When it comes to picking up a new camera, it is always essential to spend some time dialing in the settings to fit your needs as a photographer. I recently published my complete Setup Guide for the Sony a7R V that takes the time to walk you through the various different menu options and items to help you get started. However, missing from that guide was a complete breakdown of how I fully customize my Sony a7R V. Here, I will walk you through each of the different buttons, dials, and custom menu’s I have set up that fit my needs as a wildlife, landscape, and travel photographer. In addition, I will provide a link below for you to download my Settings file that you can load onto your a7R V to help speed up the process if you enjoy how I have set things up on my end. Let’s jump right in!
Customizing the Buttons on your a7R V
When it comes to customizing the buttons on any camera I own, I want to make sure that any setting or feature that I need quick access to is set to one of the many buttons and dials found on the camera. This essentially prioritizes these settings to be just a single button click away. If I come across a setting that I rarely use or even if I use it every so often, that shouldn’t warrant it being assigned to a custom button. We have other places like the Fn menu or My Menu for those situations.
It is important to note that the a7R V allows you to separately customize the buttons and dials on the camera for photo, video, and playback modes. So, in theory, one button could do three different things depending on what camera mode you are currently in. Personally, because I am mostly a still photographer, I don’t change the way my buttons are configured between photo and video mode, although I do make a few small changes in “Playback” mode when I am reviewing images, which I will explain shortly.
Photo & Video Mode
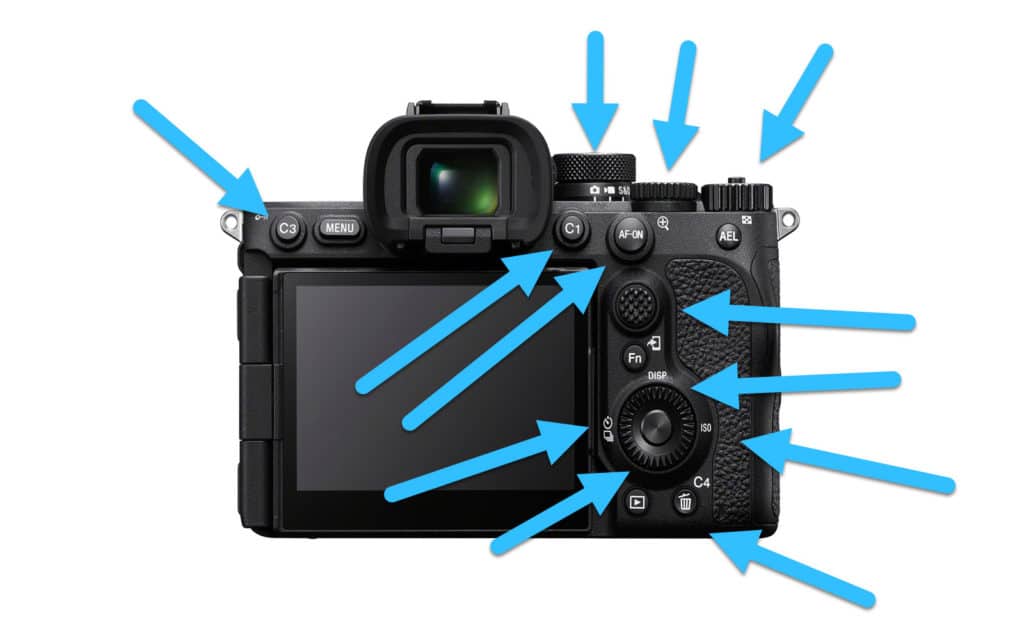
Let’s walk through each of the screenshots above…
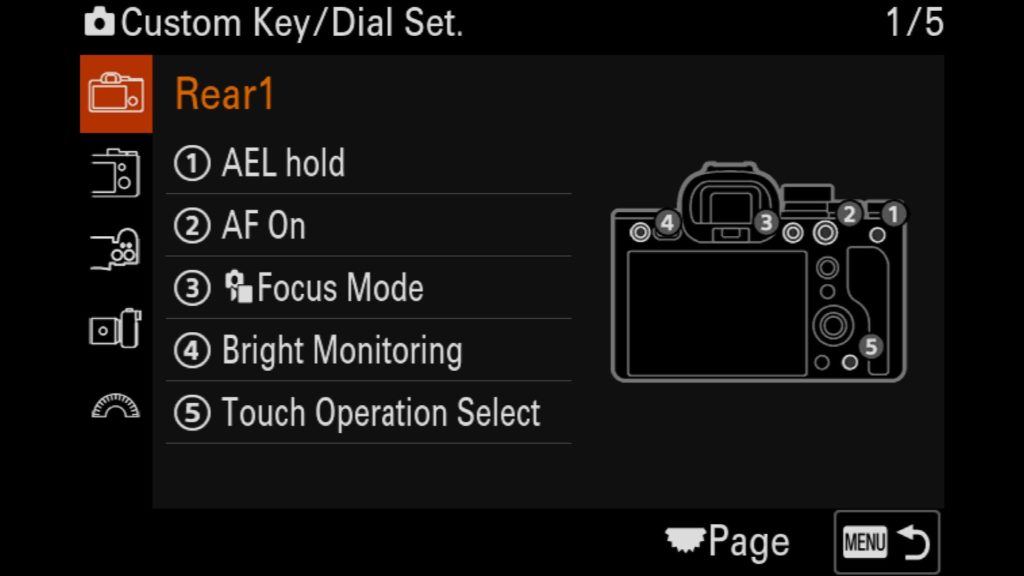
Page 1
1. AEL hold – Auto Exposure Lock, helpful when you want to lock the exposure in Aperature or Shutter Speed Priority Modes
2. AF On – Engages AF
3. Focus Mode – Allows you to switch from Manual to Single Shot to Continuous AF modes
4. Bright Monitoring – A super handy feature for astro/night photography that temporarily increases ISO so that you can compose your shot in near-pitch black situations. (Not great for manual focusing to achieve sharp results, though).
5. Touch Operation Select – Turn on and off touch screen support for the rear LCD of the a7R V.
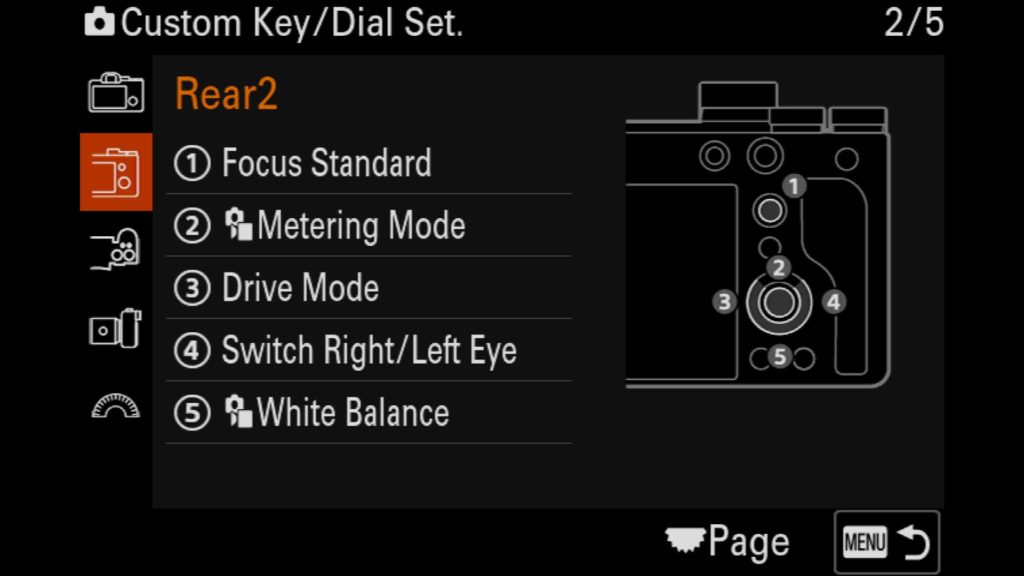
Page 2
1. Focus Standard – Adjust and reset adjustable focus point selections
2. Metering Mode – Allows you to change from Multi, Center-Weighted, Spot, Entire Screen Average, or Highlight light metering modes.
3. Drive Mode – Adjust from single shot, continuous shooting, shutter delay, exposure bracketing, and focus bracketing (stacking).
4. Switch Left/Right Eye – With Eye AF engaged, you can switch between which eye is prioritized for any subject.
5. White Balance – Adjust the white balance of your image.
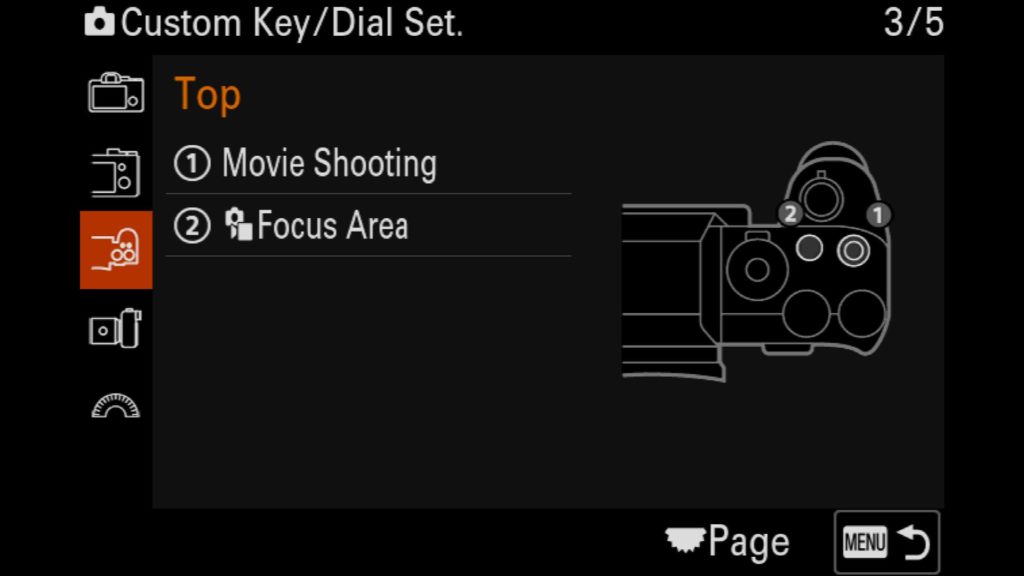
Page 3.
1. Movie Shooting – The dedicated movie button has moved from previous models to the top of the camera. Pressing this mode in cany camera mode will start recording a video.
2. Focus Area – Change from Wide, Zone, Center Fix, Spot, Expanded Spot and Tracking area AF modes.
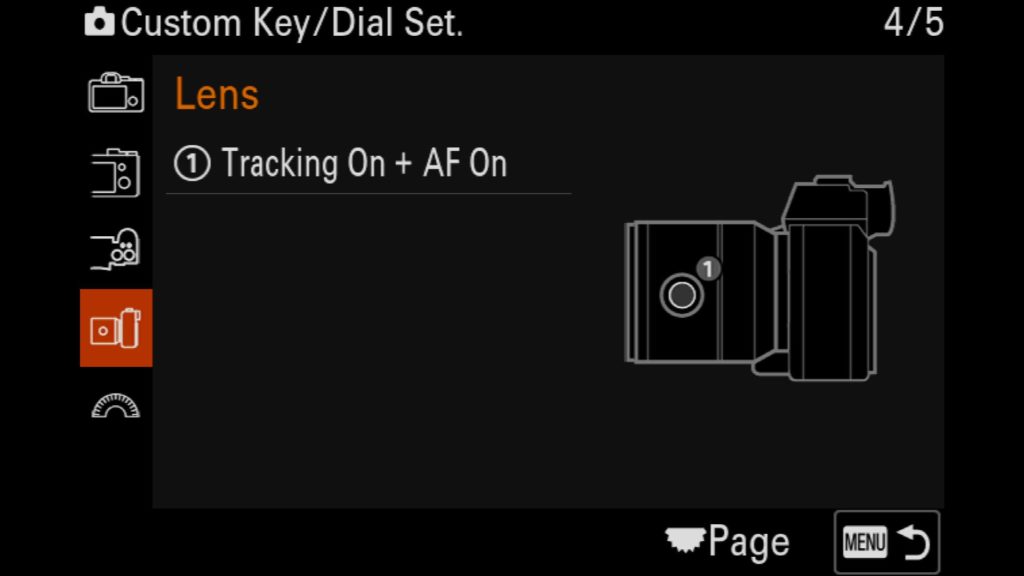
Page 4.
1. Tracking On + AF On – This allows you to quickly switch to the tracking AF mode while also achieving AF at the same time no matter what AF mode you are in. The setting is temporary so as soon as you stop pressing the button, you will revert back to the original AF mode you were in. This is very handy when photographing subjects that move suddenly, such as wildlife.
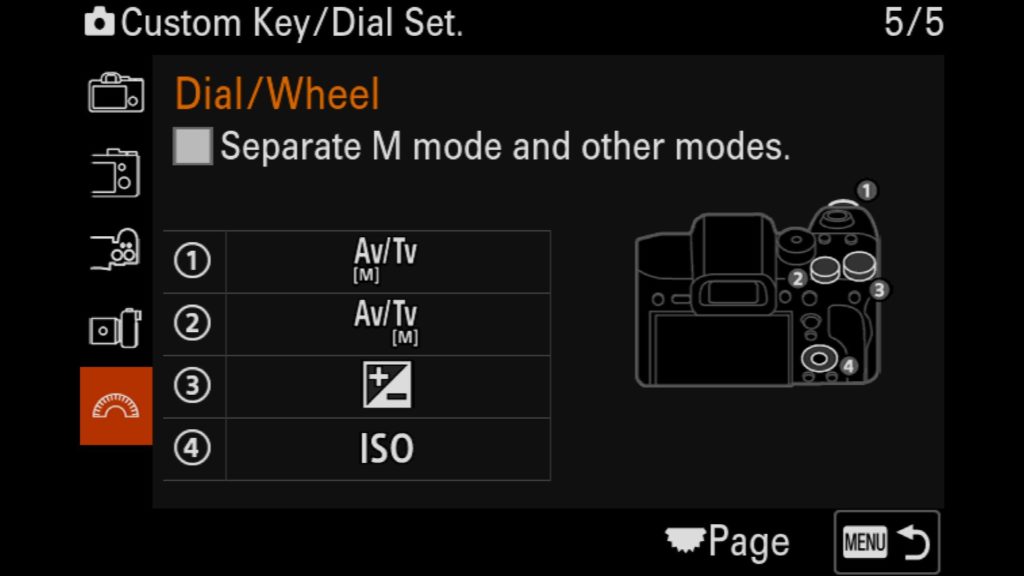
Page 5.
1. AV/TV – By default, adjusts the aperture via this dial.
2. AV/TV – By default, adjusts the shutter speed via this dial.
3. Exposure Compensation – Helps you darken or brighten an image when shooting in any mode outside of “Manual” by adjusting exposure settings the camera is in control of.
4. ISO – I prefer to have quick access to adjust my ISO quickly. By default, you have to press right on the rear wheel to adjust ISO, but that is often too slow for me. Just make sure you don’t accidentally adjust this dial, or you might find yourself shooting at much higher ISOs than you initially wanted.
Playback Mode
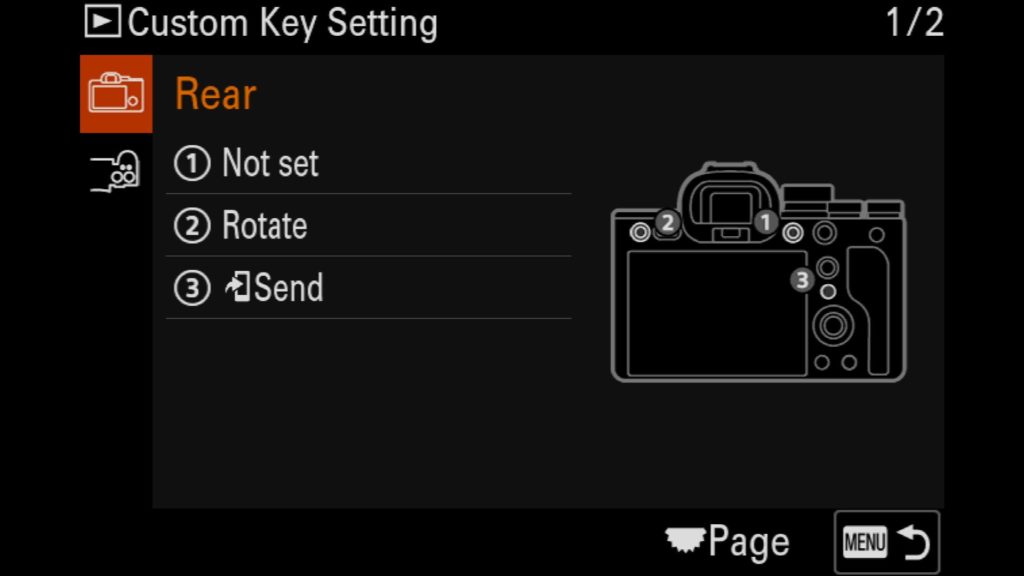
Page 1
Not Set – Doesn’t do anything
Rotate – Rotate the selected image
Send to Smartphone – Send the selected photo in question to your smartphone
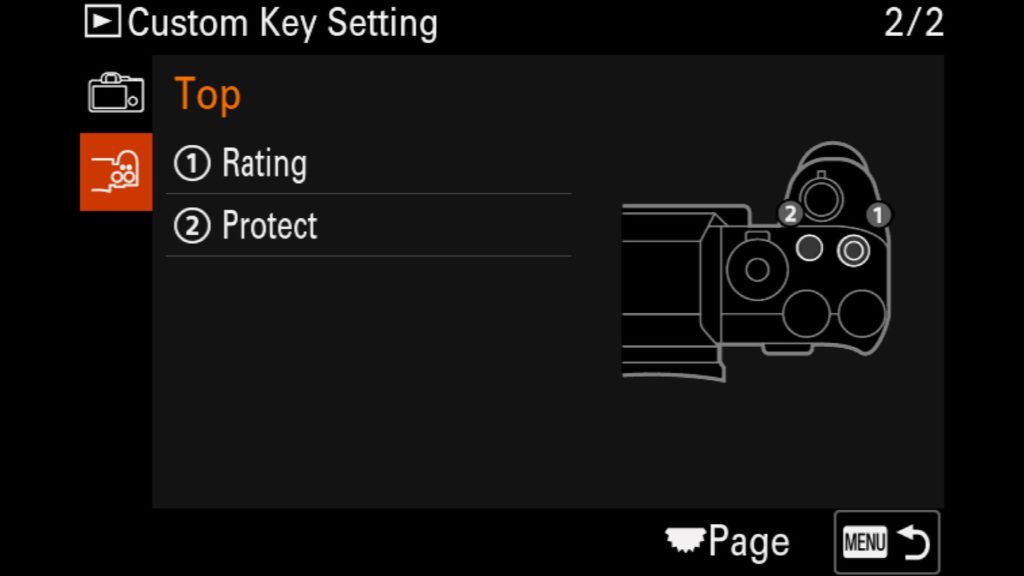
Page 2
Rating – Adds a 1-5 star rating to the selected image which shows up in Lightroom & Capture One. This can help you identify the images you are most excited to edit once you get them on your computer of choice.
Protect – Will protect the selected image from being accidentally deleted, however if you format the memory card, any protected images will still be removed. This only prevents manual deletions of images.
Customizing the Fn Menu on your a7R V
When it comes to customizing the Fn Menu, this is where I want quick access to settings that I don’t usually change too often or that I rarely have to change quickly on the fly. Each setting here is at least two button clicks away (Press the Fn Menu button and then select the setting to adjust). However, unlike with the custom buttons and dials on my a7R V, I have entirely changed the Fn menu for both Photo and Video modes. Why? Because the general settings/features needed for photo and video are often vastly different.
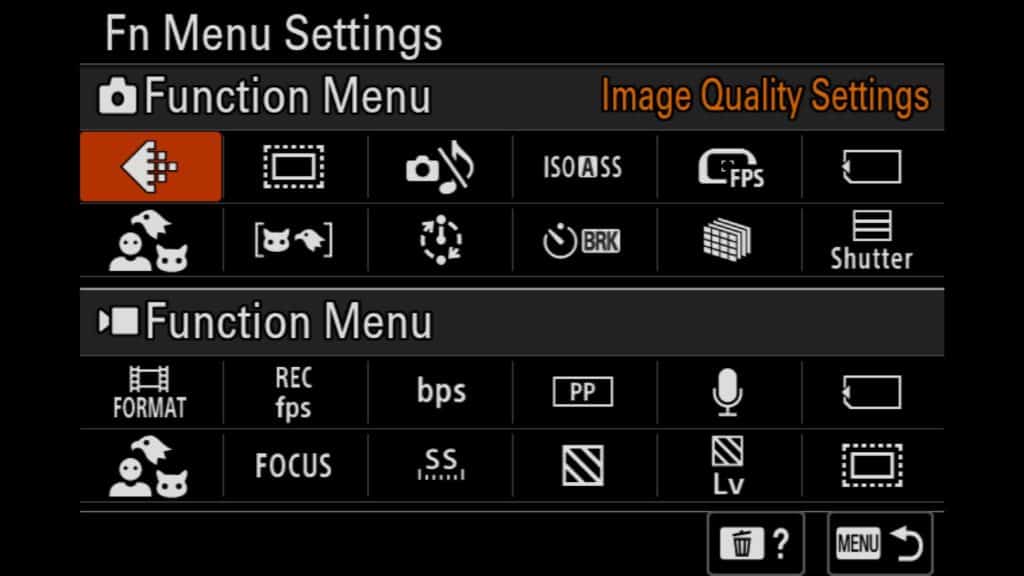
Photo Fn. Menu
Starting in the top left…
Image Quality Settings – Allows you to switch between JPEG or Raw as well as choose the different sizes of RAW files you wish to capture
APS-C S35 Shooting – Allows you to turn on APS-C crop mode, turn it off or leave it in AUTO
Silent Mode – Turn on or off “Silent Mode”. If turned on, it forces the use of an Electronic Shutter
ISO Auto Min. Shutter Speed – Allows you to set the minimum shutter speed to use with Auto ISO
Finder Frame Rate – Switch between Standard or High FPS with the viewfinder
Rec. Media Settings – Choose which memory cards you want the camera to write photo and videos to
Now the bottom row…
Recognition Target – For Eye AF, choose between Human, Animal/Bird, Animal, Bird, Insect, Car/Train or Airplane
Recognition Part – Choose to prioritize the Eye/Head/body or the Eye/Head or just the Eye of your subject.
Interval Shooting – Adjust the settings that allow you to shoot a timelapse with your a7R V
Self-timer during Bracket – Change the self-timer delay for use with any bracketing mode from 2, 5 or 10 seconds
Pixel Shift Multi Shoot – Adjust any settings to use with the Pixelshift mode
Shutter Type – Switch between Mechanical and Electronic Shutter on the a7R V
Video Fn Menu
Starting in the top left…
File Format – Lets you adjust the video file format such as moving from 8k to 4k.
Rec Frame Rate – Easily adjust the frame rate of the video you are shooting from 60p to 24p depending on the video mode you are in.
Record Setting – Adjust the bit rate and color depth of the video you are filming.
Picture Profile – Select the appropriate Picture Profile for your video to make color grading easier in post processing.
Audio Rec Level – Adjust the levels that you are recording audio along with your video.
Rec. Media Settings – Choose which memory card slot videos are being recorded to.
Now the bottom row…
Recognition Target – Select Human, Bird/Animal, Animal, Bird, Insect, Car/Train or Airplane to prioritize for Eye AF and subject recognition.
Focus Mode – Switch between manual focus and auto focus
Var. Shutter – If you are shooting video with LED lights, you can adjust the shutter speed to odd numbers to match the frequency of the lights so you don’t see black or white bars across your frame.
Zebra Display – A handy tool to determine when you have blown the highlights in a scene when it comes to video.
Zebra Level – Allows you to set custom zebra levels for the above feature.
APS-C S35 Shooting – Allows you to know when you jump into S35 crop sensor mode when shooting video with the a7R V.
Customizing the My Menu on your a7R V
Next up on this tour of my custom set Sony a7R V is the My Menu section of the cameras menu system. Here you can add any setting found in the menu system to an easily accessible custom section. This is the best place to put hard to find settings so that you don’t have to dig around in the camera’s menu to find them when you are out in the field. Here is how I have mine setup.
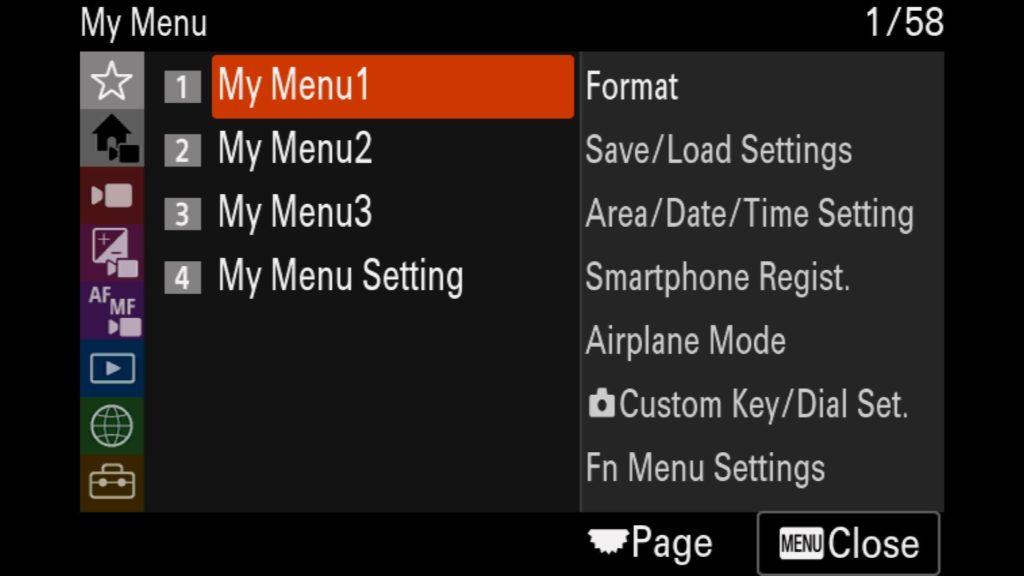
My Menu 1
Format – Quickly format your Memory Cards
Save/Load Settings – Quickly save or load new camera settings for your a7R V
Area/Date/Time Setting – Easily adjust the time zone you are in when traveling to make sure your multiple cameras match timestamps for your images.
Smartphone Regist. – Register a new smartphone with the Sony a7R V
Airplane Mode – Quickly jump in airplane mode to save battery life
Custom Key/Dial Set – Customize the camera’s buttons and dials
Fn Menu Settings – Change the settings/features found in the Fn. Menu on your a7R V
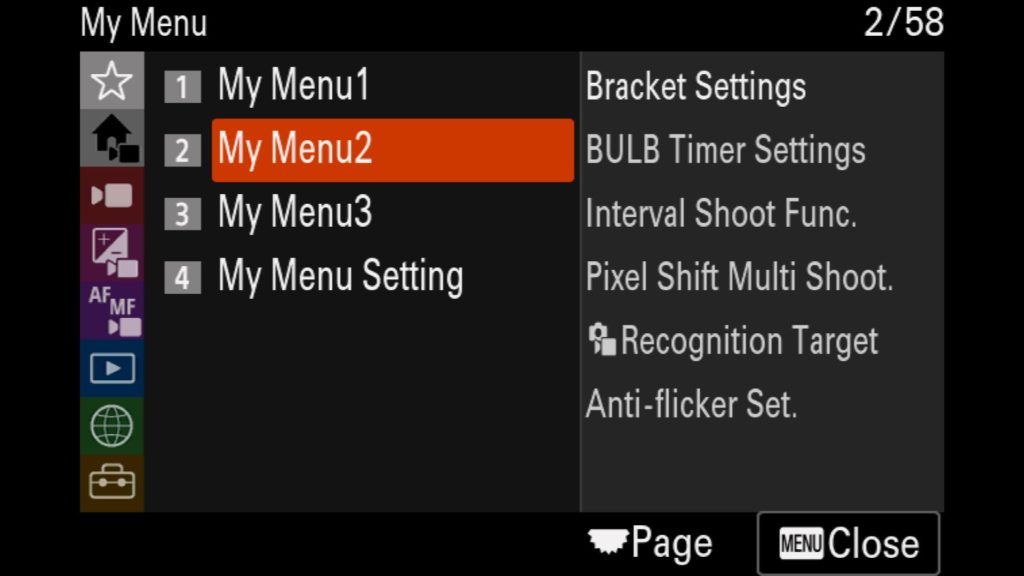
My Menu 2
Bracket Settings – Change the bracketing settings (including Focus bracketing/stacking)
BULB Timer Settings – Change the BULB timer settings (Unfortunately you can’t assign this to the Fn. Menu currently, which is where I would prefer to have it)
Interval Shoot Func. – Adjust the settings for shooting timelapses with the a7R V
Pixel Shift Multi Shoot. – Adjust the pixel shift settings
Recognition Target – Change a variety of settings tied to the a7R V recognizing the subject and how you want the AF system to work with each individual subject type
Anti-flicker Set. – Adjust the settings to counter for banding light bars that can appear when shooting with LED lights in your scene
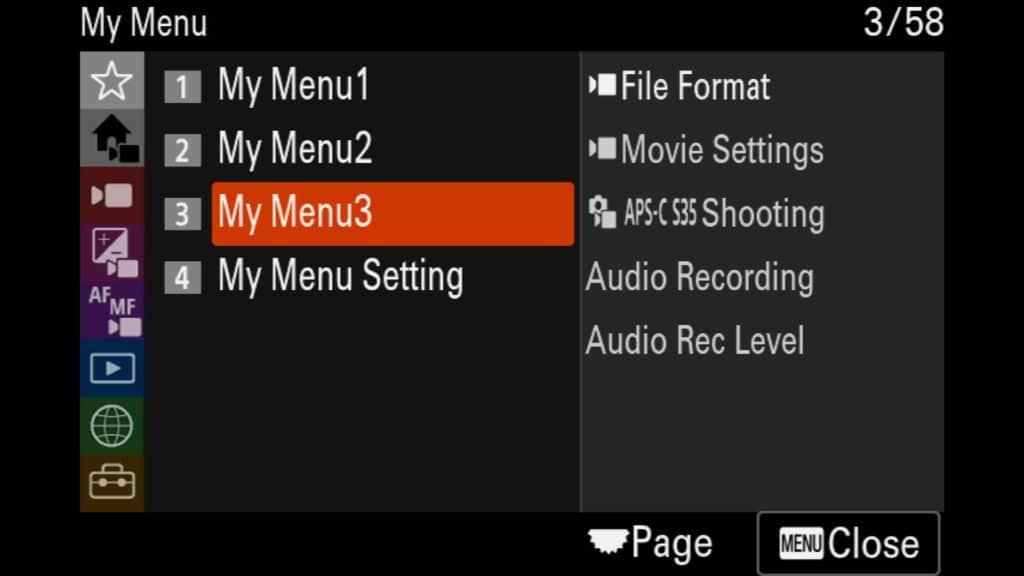
My Menu 3
Video File Format – Lets you adjust the video file format such as moving from 8k to 4k
Movie Settings – Adjust the Rec Frame Rate as well as the Record Settings (Bit Rate/Color Depth) for any videos you shoot
APS-C S35 Shooting. – Allows you to change into S35 crop sensor mode when shooting video or stills with the a7R V
Audio Recording – Turn audio recording on/off
Audio Rec Level – Adjust the levels that you are recording audio along with your video.
Downloading My Setting File For Your a7R V
One of the best additions to the Sony mirrorless camera lineup over the last few generations is the ability to not only save all of your settings into a single file on your memory card for backup but also load those same settings onto a 2nd camera as well. This feature becomes incredibly handy if you have two camera bodies as you can fully set up one a7R V, save the settings file to your SD or CF Express card, and then simply load those settings into your 2nd a7r V and instantly have a fully setup camera.
Additionally, this feature makes it easy for me to share all of my settings and customizations with you easily. Everything I have mentioned in this blog post can be loaded onto your a7R V in just a few seconds. Of course, you can just use this guide and manually set up your camera, but if you wish to do it quickly, simply sign up for my newsletter below, and they are yours for FREE!!
What Questions Do You Have?
If you have questions about any of the following, please let me know in the comments below!