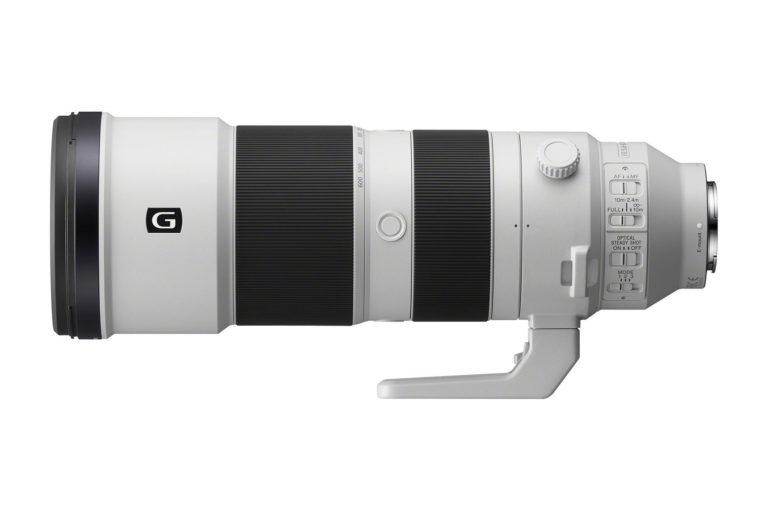
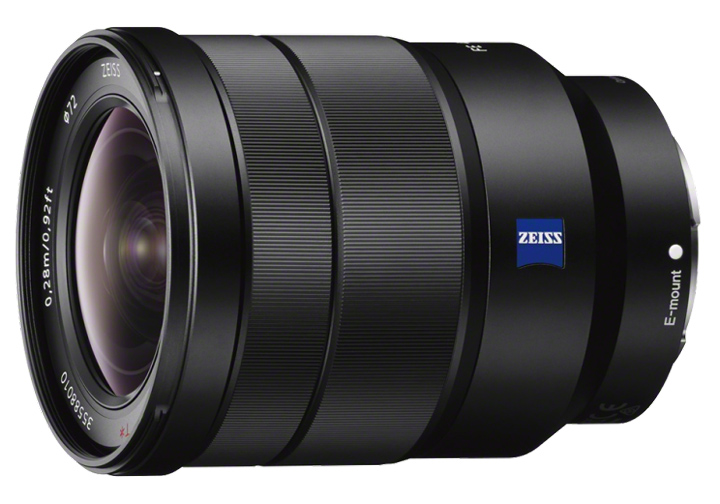
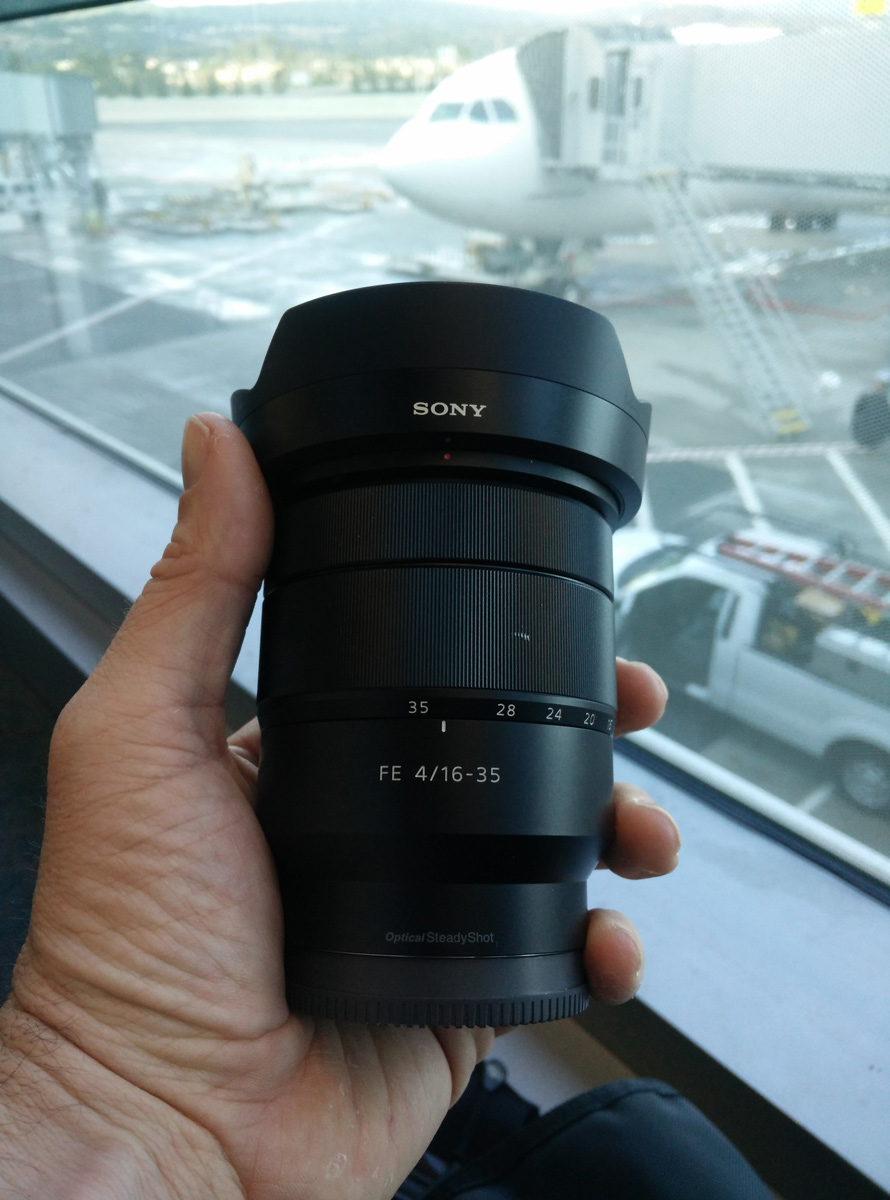
While Sony has continued to take the photo industry by storm with their a7 series of full frame mirror-less cameras, many of us have been eagerly awaiting the FE lens mount lineup to grow. At the top of that list was one of the only holes in Sony’s mostly incredibly impressive lens options for their a7 cameras…namely a native wide angle lens option. Like many Sony converts, I wanted a wide angle lens that was not only light weight and portable, but that didn’t sacrifice in build quality, functionality or image quality. Luckily, we didn’t have to wait long. On September 15, 2014, the Sony FE 16-35 f/4 OSS (SEL1635Z) wide angle lens was announced. Needless to say I was excited. Having made the switch to Sony from Canon earlier this year, I had been using the Sony 16-35 f/2.8 ZA lens that while impressive, was pretty bulky and heavy.
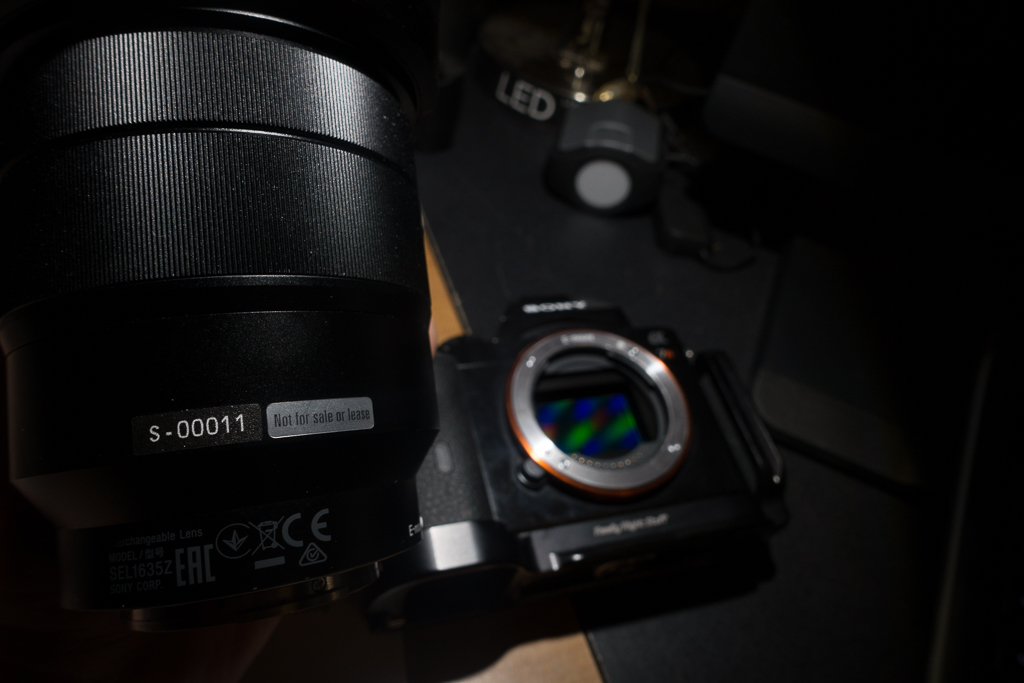
As it turns out, being sponsored by Sony has its perks as I was given a pre-production model to use throughout my time on The Big Island of Hawaii over the last few weeks as well as here in Colorado before the lens is official released at the middle of November of 2014. On the lens itself resides the number 00011, effectively noting that I got to use the 11th version ever made. While Sony never asked for me to write this review, my goal was to put the lens to the test in a variety of environments and share my experiences. To make things more interesting, I wrote a First Look blog post that gave many of my followers the chance to ask questions that I would try to get to in this in-depth review. I tried to answer every ones questions here in this review, but if I missed something, please let me know in the comments.
Now that all that is out of the way, how did the Sony FE 16-35 f/4 do? Lets find out!
Specs
-
Optics/Lens
- Lens Mount Type : Sony E-mount (35mm full frame)
- Lens Stabilization : Optical SteadyShot
- Minimum Focus Distance : 11″ 0.28m
- Lens Groups-Elements : 10 groups, 12 elements
- Filter Diameter : 72mm
- Lens Type : Full-frame E-mount Wide-angle Lens
- Lens Weight : 18.3 oz (518g)
- Aperture (Max.) : f/4.0
- Aperture (Min.) : f/22
- Maximum Magnification : 0.19x
- Focal Length (35mm equivalent) : 16-35mm (35mm) 24- 52.5mm (APS-C)
- Aspheric Elements : 5 aspherical, 1 advanced aspherical
- Aperture Blade : 7 blades (Circular aperture)
- Angle of View : 83°-44° (APS-C) 107°-63° (35mm)
-
Weights and Measurements
- Dimensions (Approx.) : 3-1/8″ x 4″ (78 x 98.5mm)
- Weight (Approx.) : 18.2 oz (518g)
Build Quality
As I mentioned in my First Look post on the 16-35 f/4, this lens is built to the high Zeiss standards most of us have come to know. That is to say that it feels solid, not cheap and plastic. The metal body, focus ring and zoom ring all feel good in my hands. Focusing is buttery smooth and the zoom ring has enough tension to allow you to get accurate movement. While it is certainly heavier than the Sony 55mm 1.8 fe lens (which weighs 10 oz or 281g) it is not much bigger or heavier than the Sony 24-70 f/4 fe lens which comes in at 15.1 oz or 426g.
The lens has Sony’s dust and moisture resistant design which according to Sony’s website “makes this lens appropriate for heavy-duty outdoor use, especially when combined with a camera that employs weather resistant measures such as the Sony’s a7 series of cameras”. While there has been some speculation over just how much weather sealing the a7 series of cameras and fe lenses have, I can tell you that I have been consistently impressed with both.
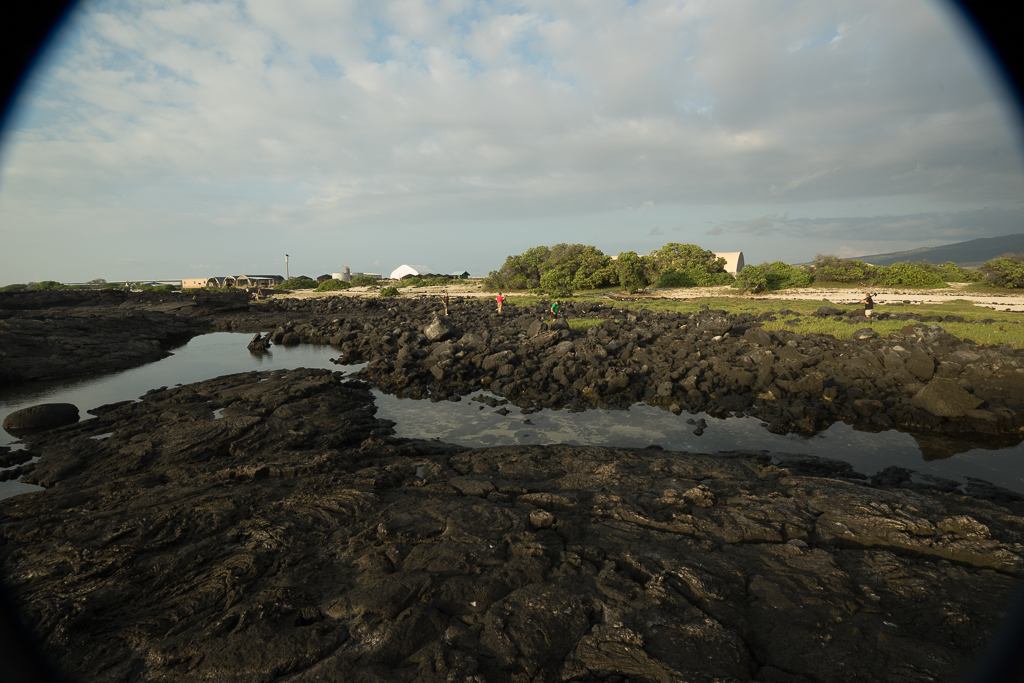
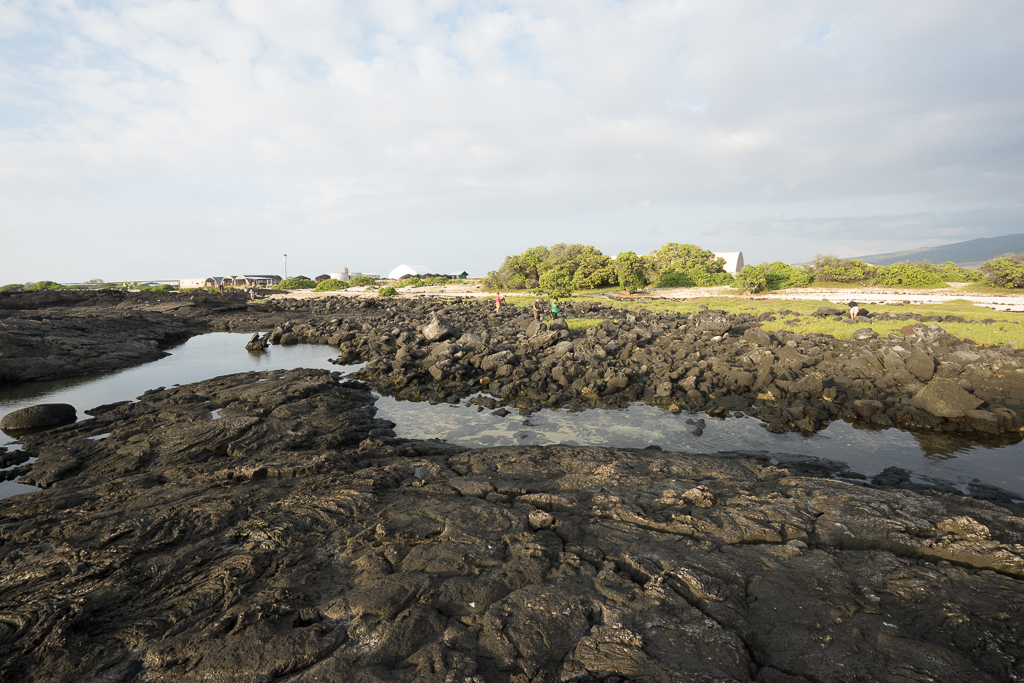
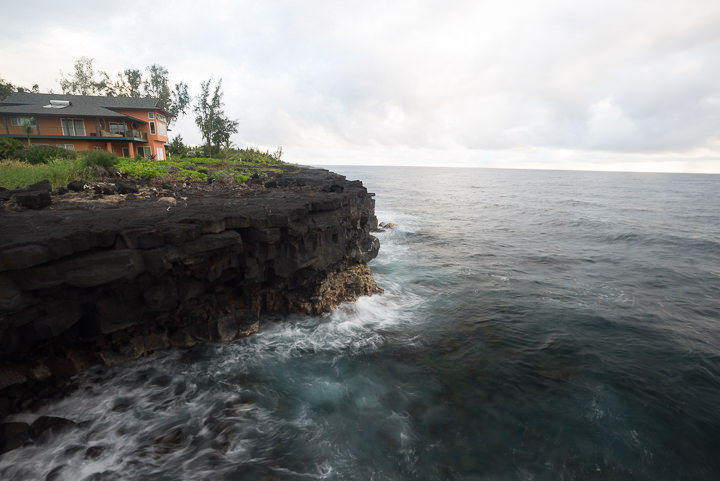
While I was only able to test this lens in the humid and wet environments of The Big Island of Hawaii (where it performed incredibly well), I have pushed the rest of my Sony cameras and lenses in wide variety of extreme environments around the globe (from -50 degree weather in the Canadian Rockies to the heat of Australia to the dust laden country of Myanmar in South East Asia). All in all, I haven’t had one camera malfunction because of weather (aside from my a7r deciding that an hour in -50 degrees was enough…and even than it was the rear LCD that froze and not the camera body itself.
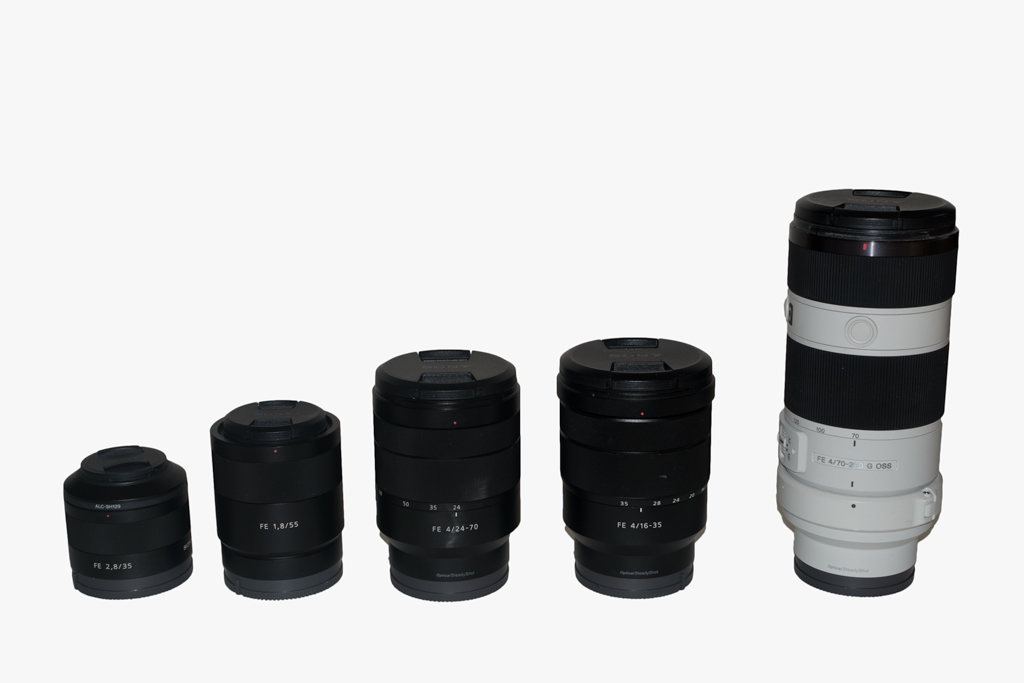
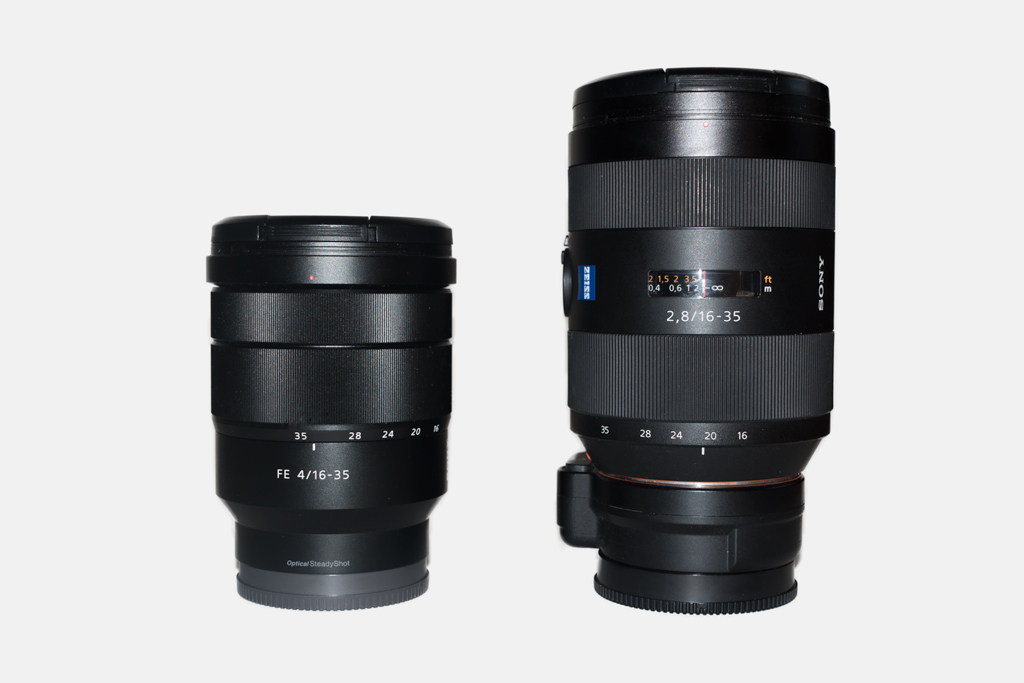
Size Comparisons
When it comes to the a7 series of cameras and lenses, size matters. Most people moving to this setup are doing so because they are looking for lighter and smaller alternative to their former DSLR counter parts. So how does the Sony 16-35 f/4 fe lens compare to the rest of the FE lens line up?
*Don’t mind the poor studio images here…there is a reason I prefer to stay away from this kind of stuff 😉
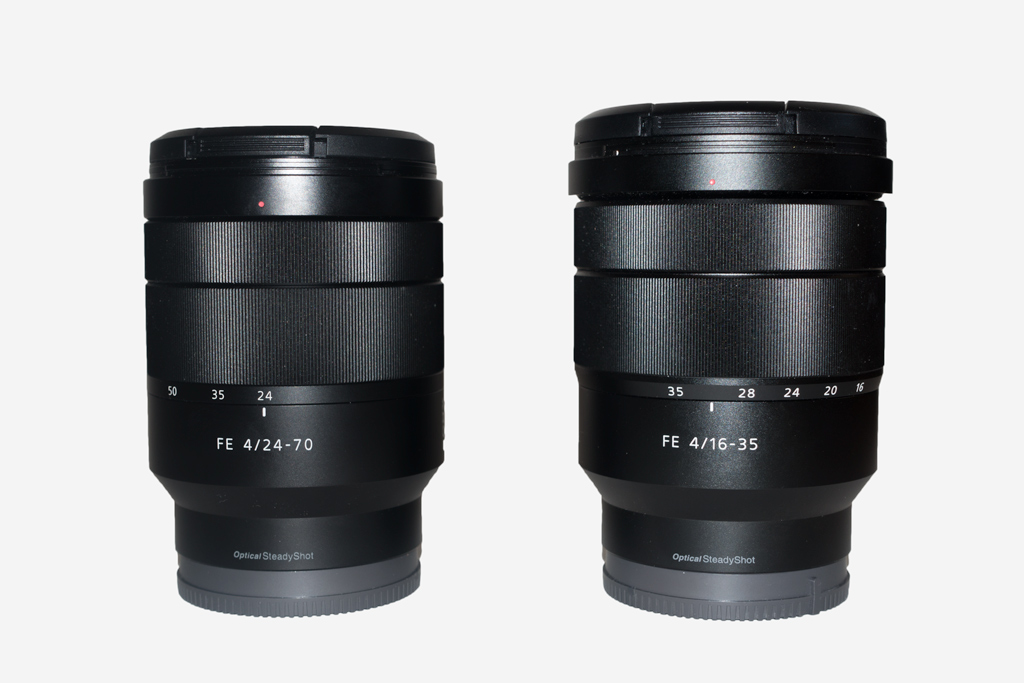
If you are looking for the closest comparison in size to the 16-35 f/4, it would be the 24-70 f/4. Here is a closer look at the two next to each other.
Lastly, since many Sony users are currently enjoying the Sony 16-35 f/2.8 ZA lens as their wide angle option with the a7 series cameras, lets take a look at how those two stack up together. The weight difference between the two is pretty staggering right off the bat, with the 16-35 f/4 fe coming in at nearly half the weight (518g vs 1020g) of the f/2.8 ZA lens + adapter needed to make the alpha lens work on the a7 series camera.
Corner Sharpness
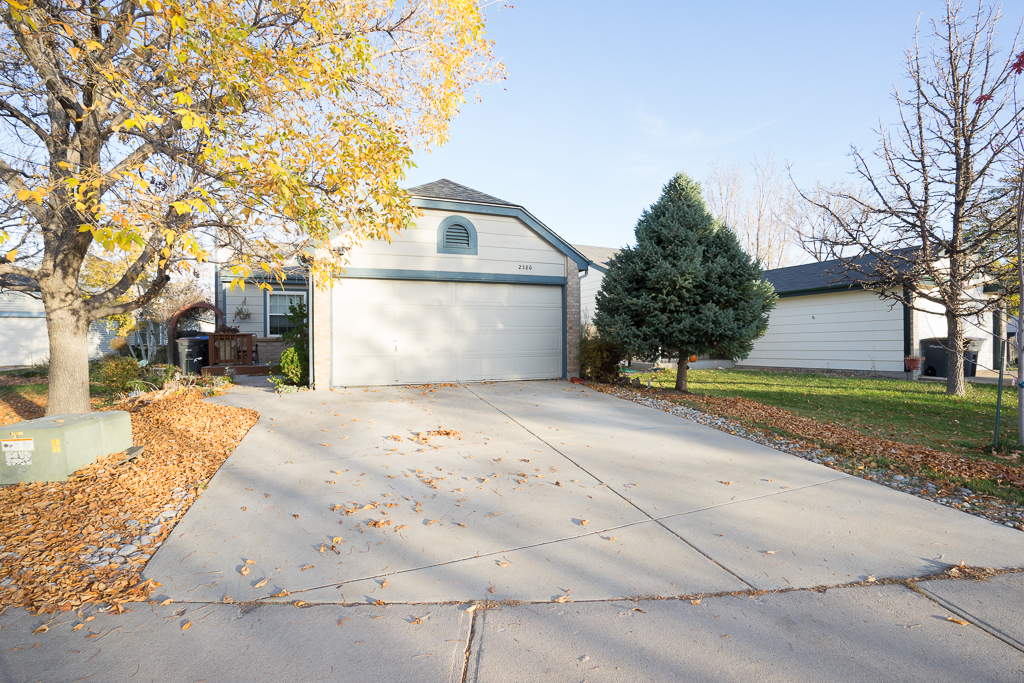
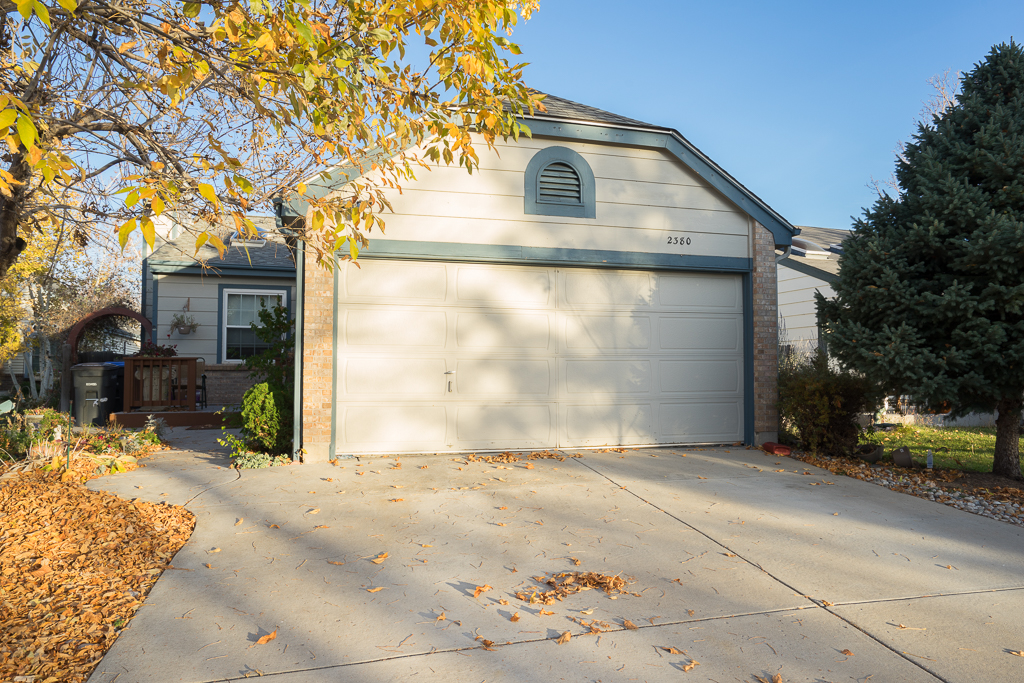
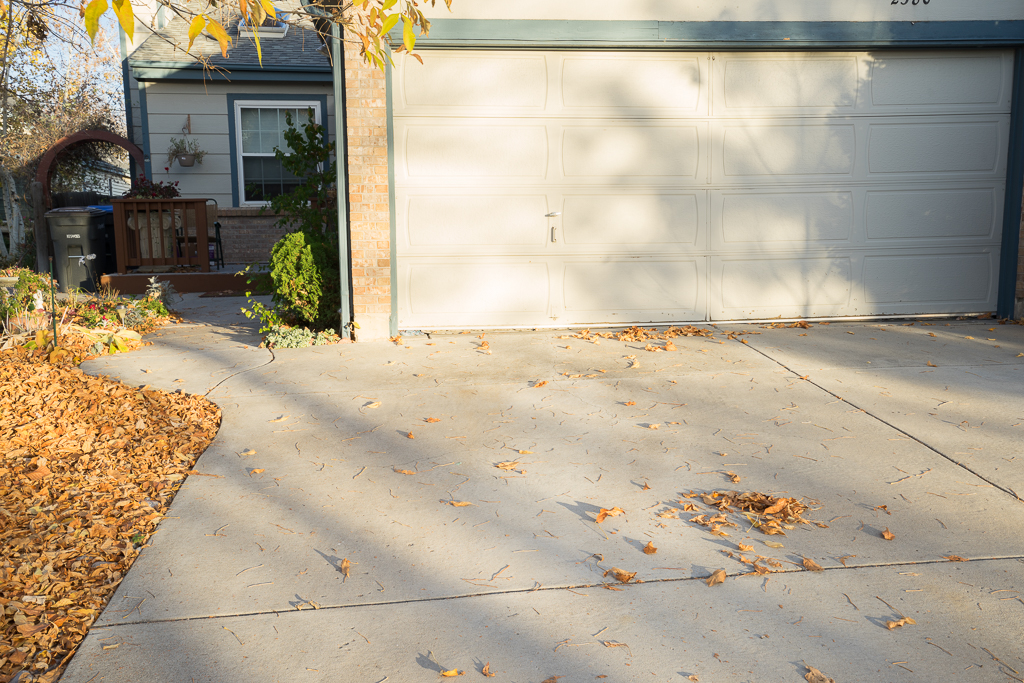
Easily the most requested test for this lens was to see just how good it did with corner sharpness. However because I was shooting professionally in Hawaii, most of the images I came away with were when there was little light, such as dawn and dusk, which generally don’t make for great sharpness tests. So instead, I walked around my neighborhood here in Denver and found a good test subject in my neighbors house. I tested the lens at f/8, f/11 and f/16 at 16mm, 24mm and 35mm. Below are the results.
16mm
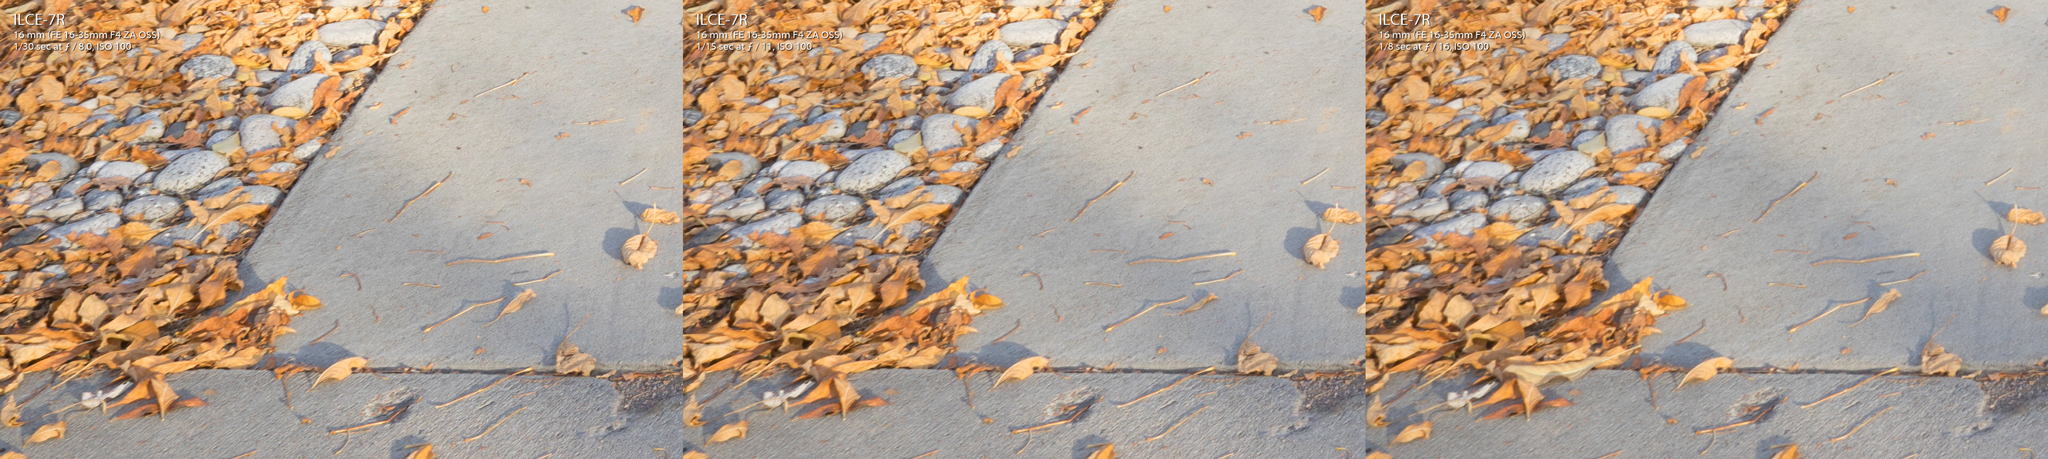
To be honest, I found very little difference in corner sharpness between f/8, f/11 and f/16. While I don’t doubt that there is a tiny difference, I couldn’t find much evidence in my pixel peeping of the details.
24mm

Again it doesn’t feel like there is much of a difference between the three options, but if I had to give an edge it would be to f/11, which does seem to be the sweet spot for this lens.
35mm
At 35mm, you get some of the best corners, although if history is any indication, I would suspect that 33mm would be better as the extreme ends of any zoom lens tends to not offer the best corner to corner sharpness.
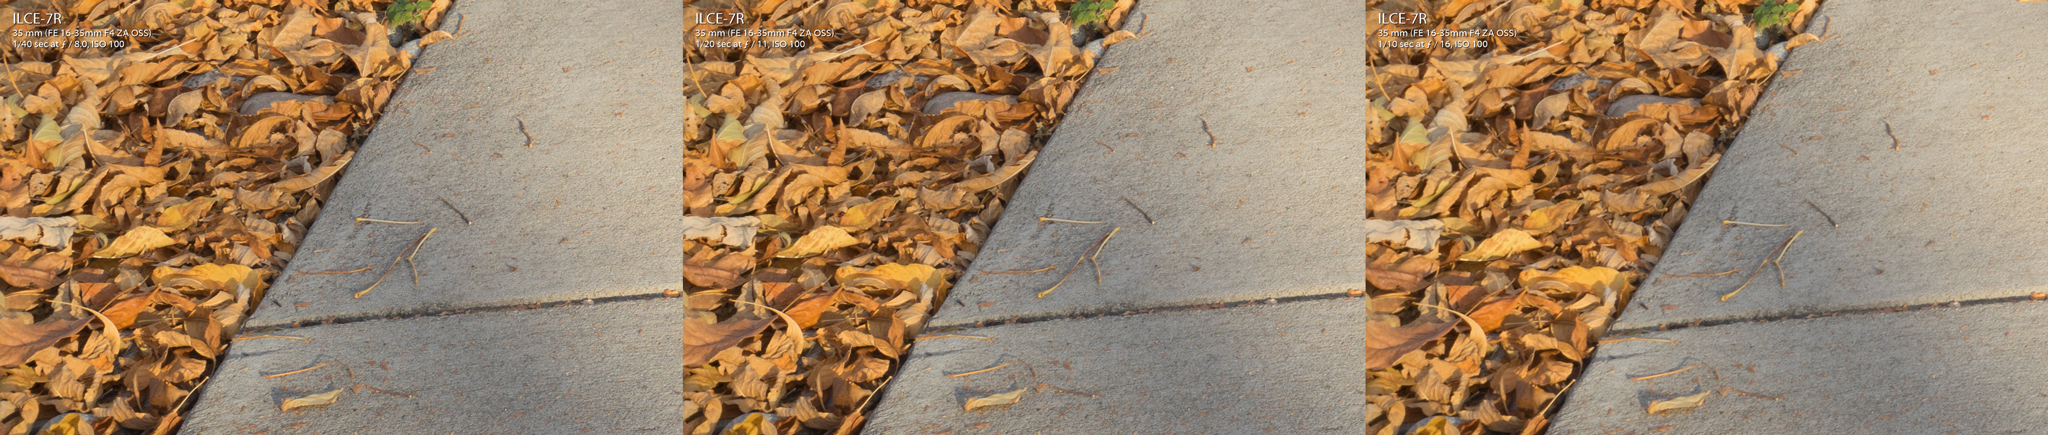
F/4 Corner Sharpness *NEW SECTION*
After publishing this review, many photographers requested to see corner sharpness at f/4, an oversight on my part. This section will focus on corner sharpness at f/4 at 16mm, 24mm and 35mm ranges. Below you can see the results.
16mm
Pulling in the upper right hand corner you can get a good feel for corner sharpness. Considering this is being pulled from an unedited raw file, the results look good to my eyes. There is sharpness dropoff, but very little considering the use of f/4. This is good news for astro/night photographers. The bottom right corner doesn’t look as good as the upper right, which I equate out to focal plane distance separation as my focus point was half way up the drive way.

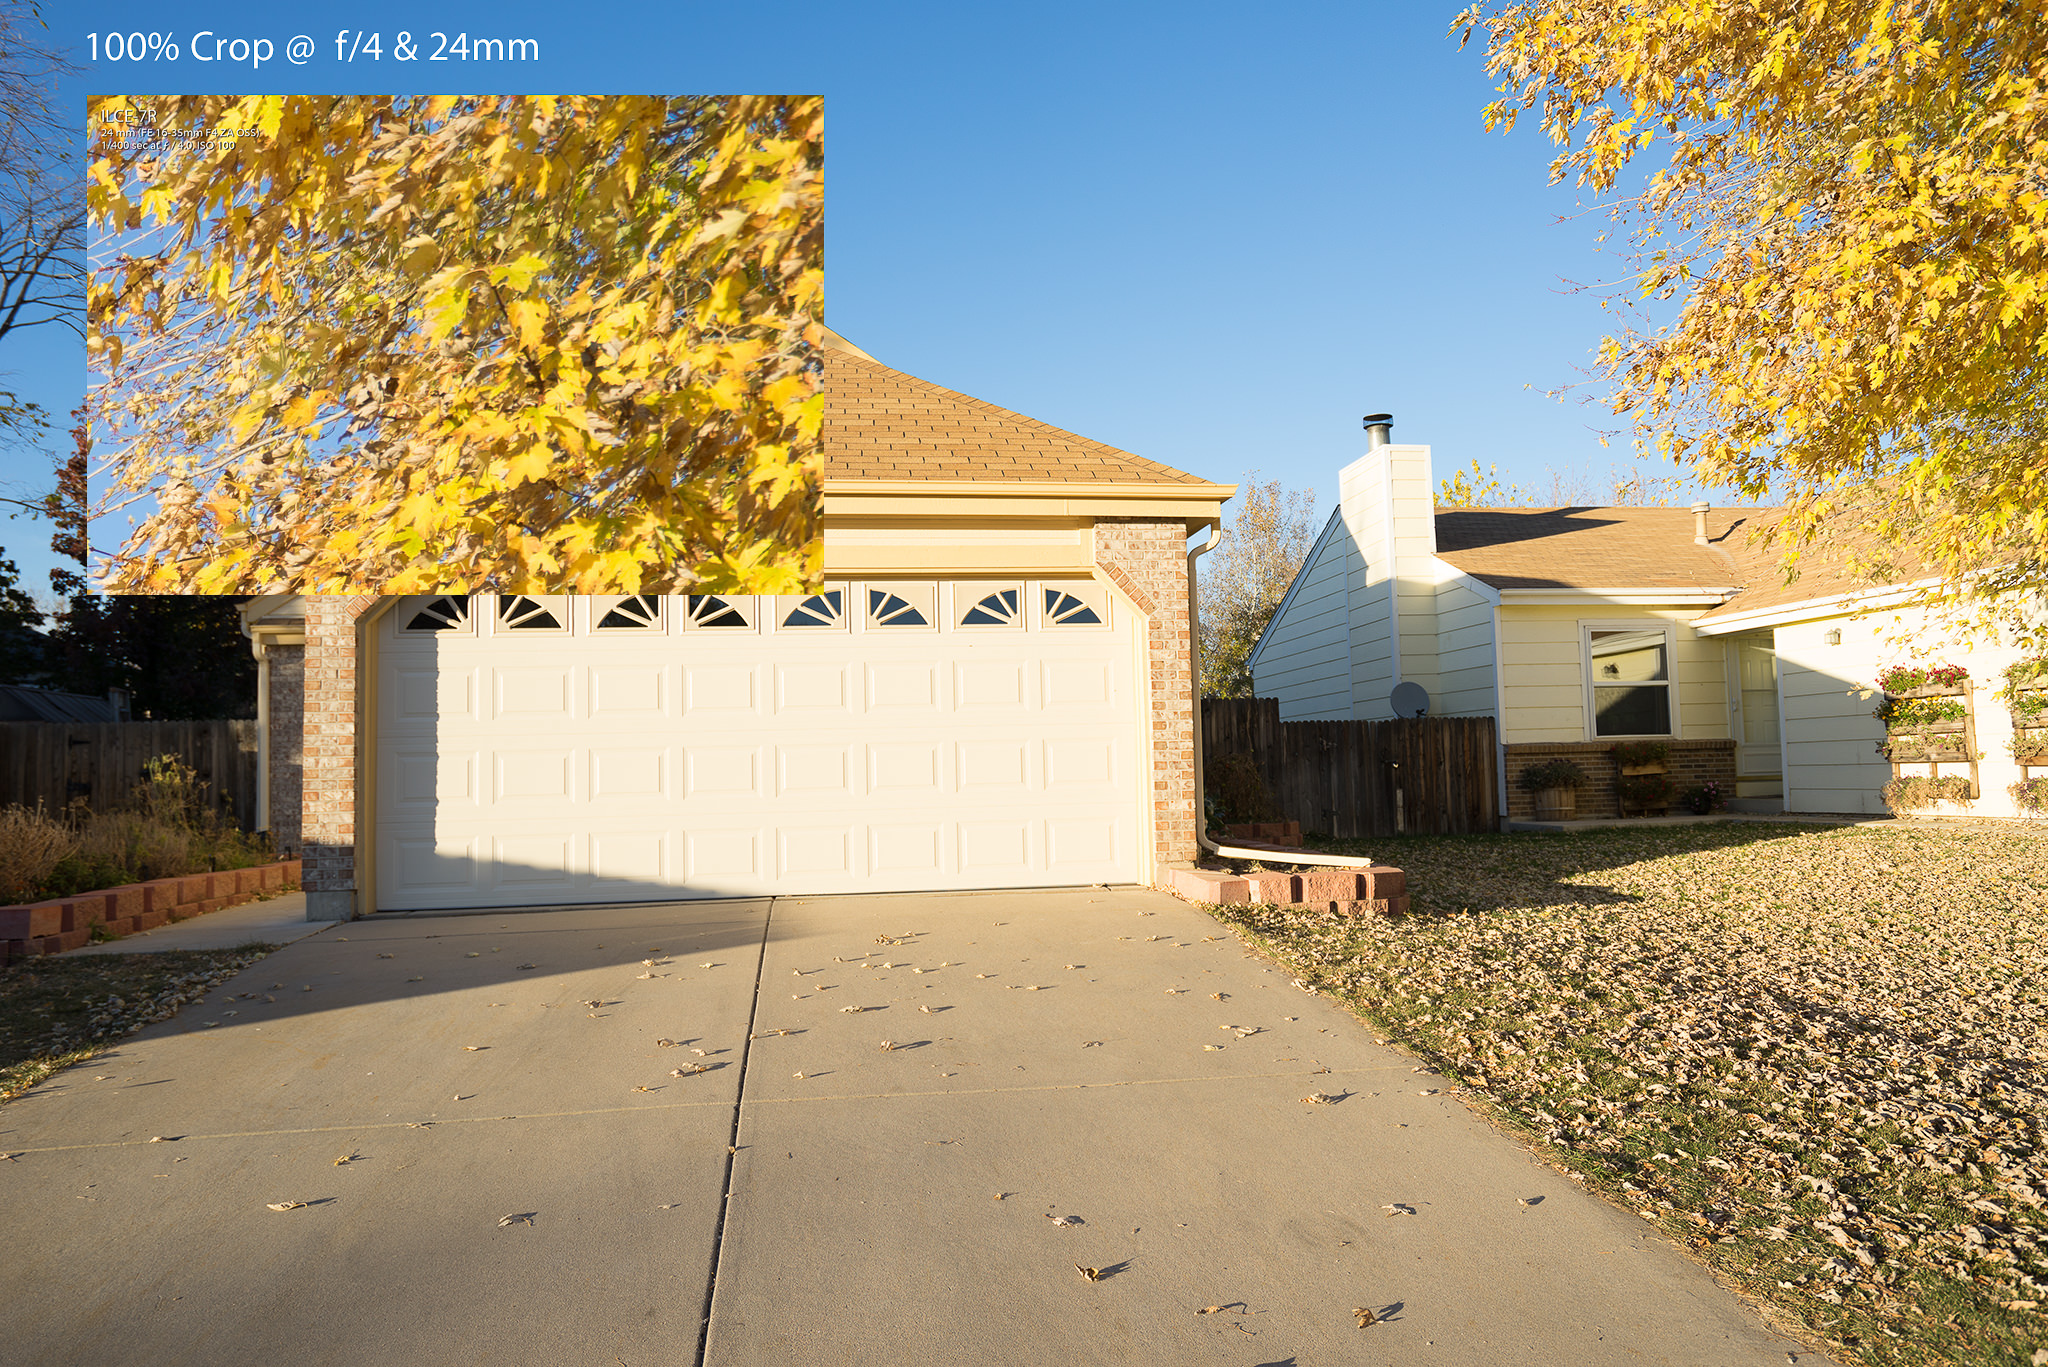
24mm
At 24mm, corner sharpness looks very similar to 16mm, although maybe a touch sharper. Either way, there doesn’t appear to be much of difference between the two.
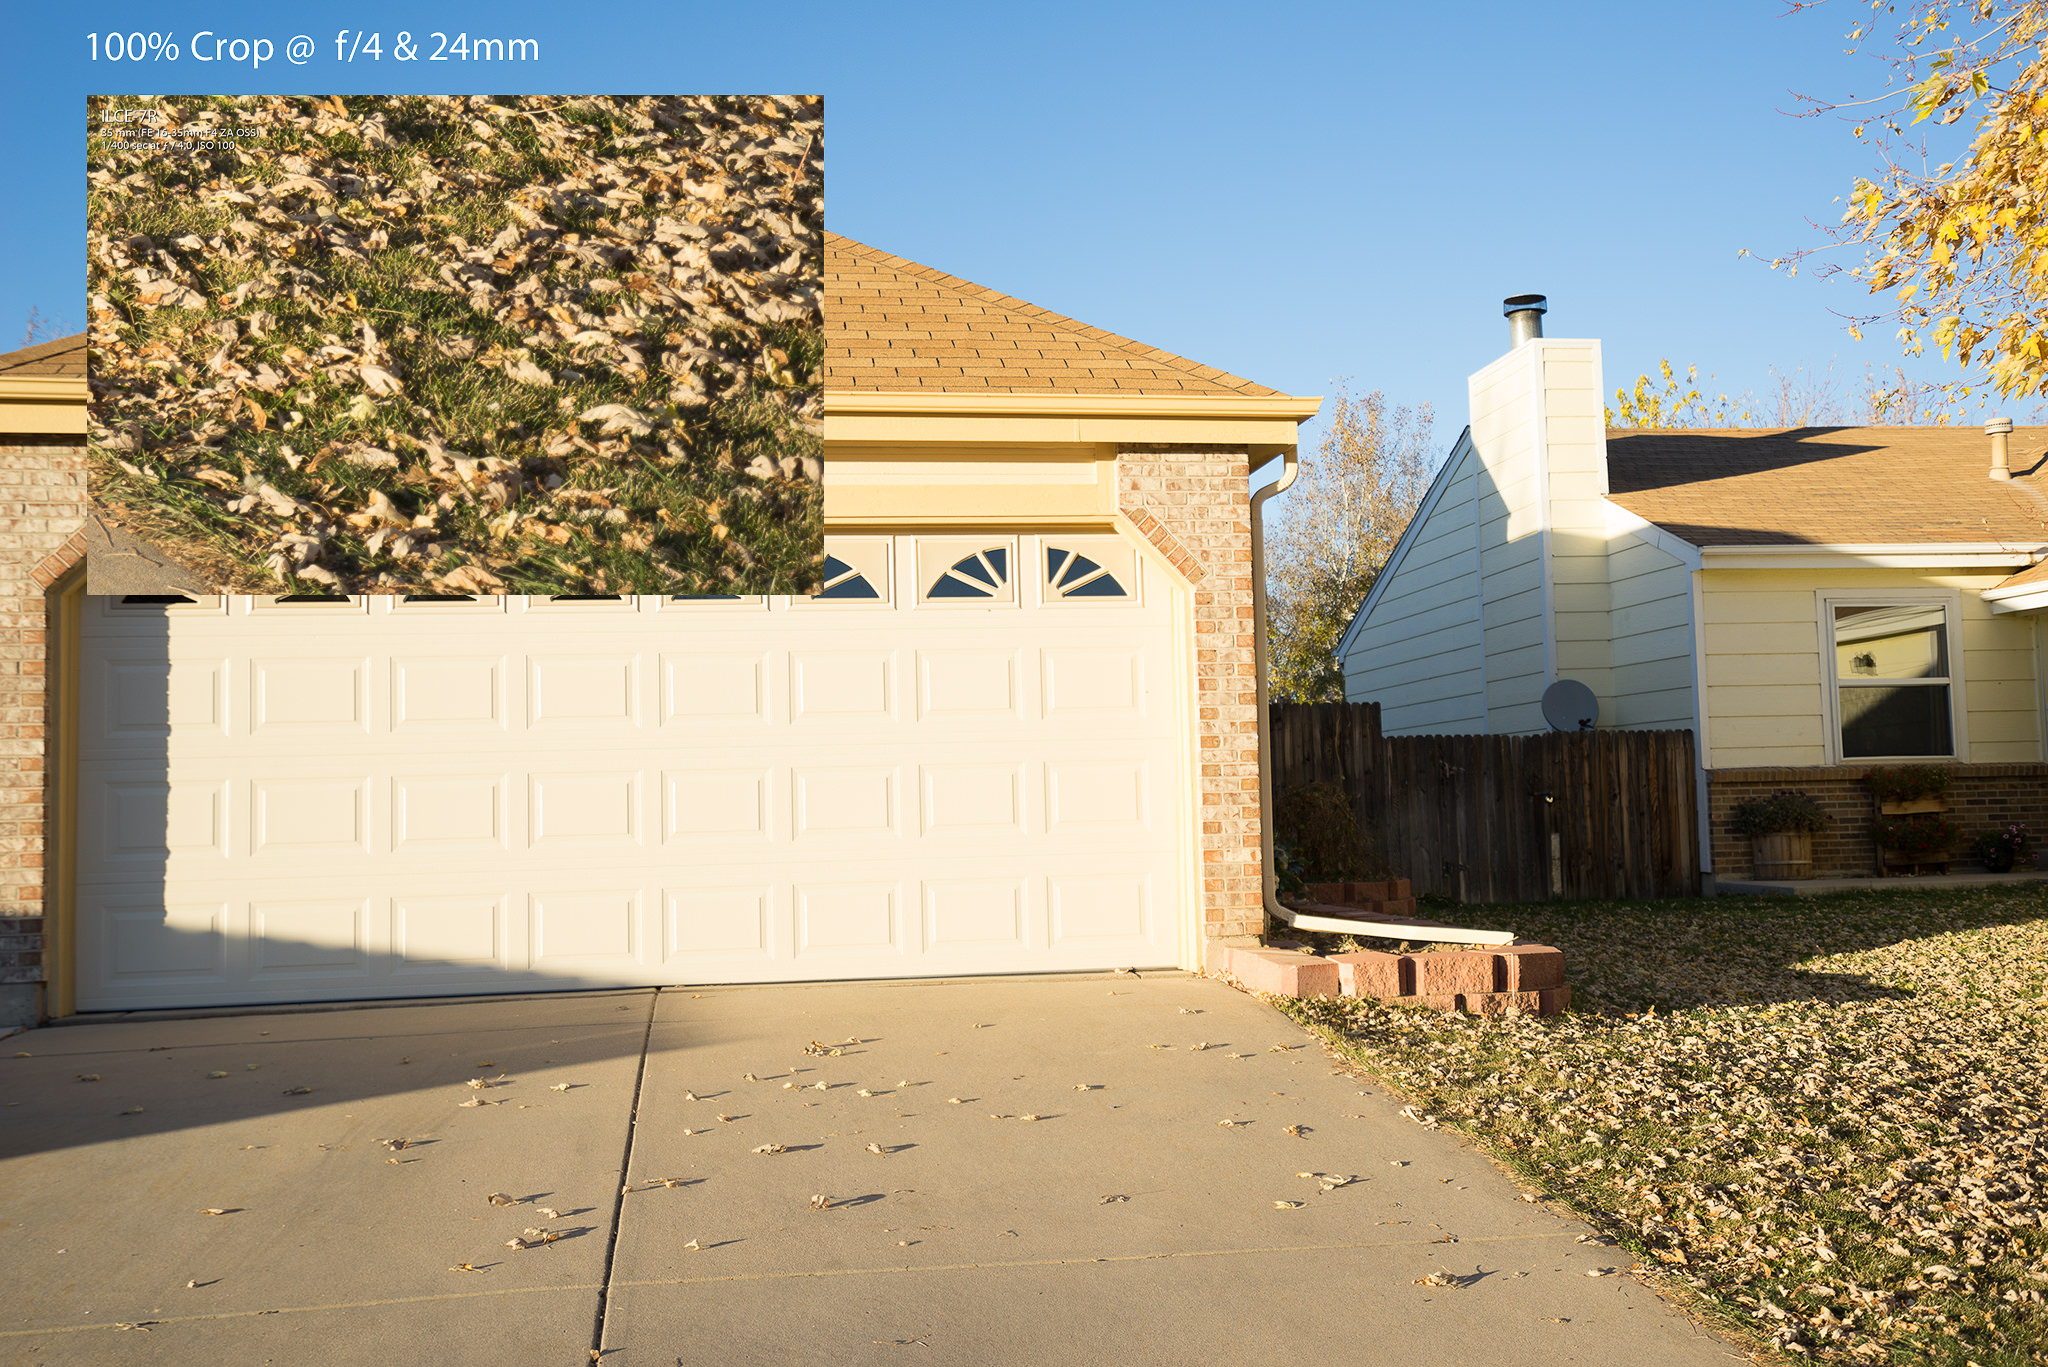
35mm
At 35mm, we lose most of the tree, so I decided to focus on the lower right hand corner instead for this test in terms of the 100% crop. The results here look good as well and a touch better than the others, but I am not seeing anything too significant in the comparison between all three. All of them look like they will provide solid options for night/astro photographers wanting to use this lens at its widest aperture.
In conclusion this lens preforms incredibly well in terms of corner to corner sharpness. As you move from wide angle to its furthest zoom, it gets better and better. At its widest point, it might not take the new crown for corner sharpness but it is pretty dang close. Once Adobe Lightroom gets a lens profile for this baby, you will get even better results!
Distortion Test *NEW SECTION*
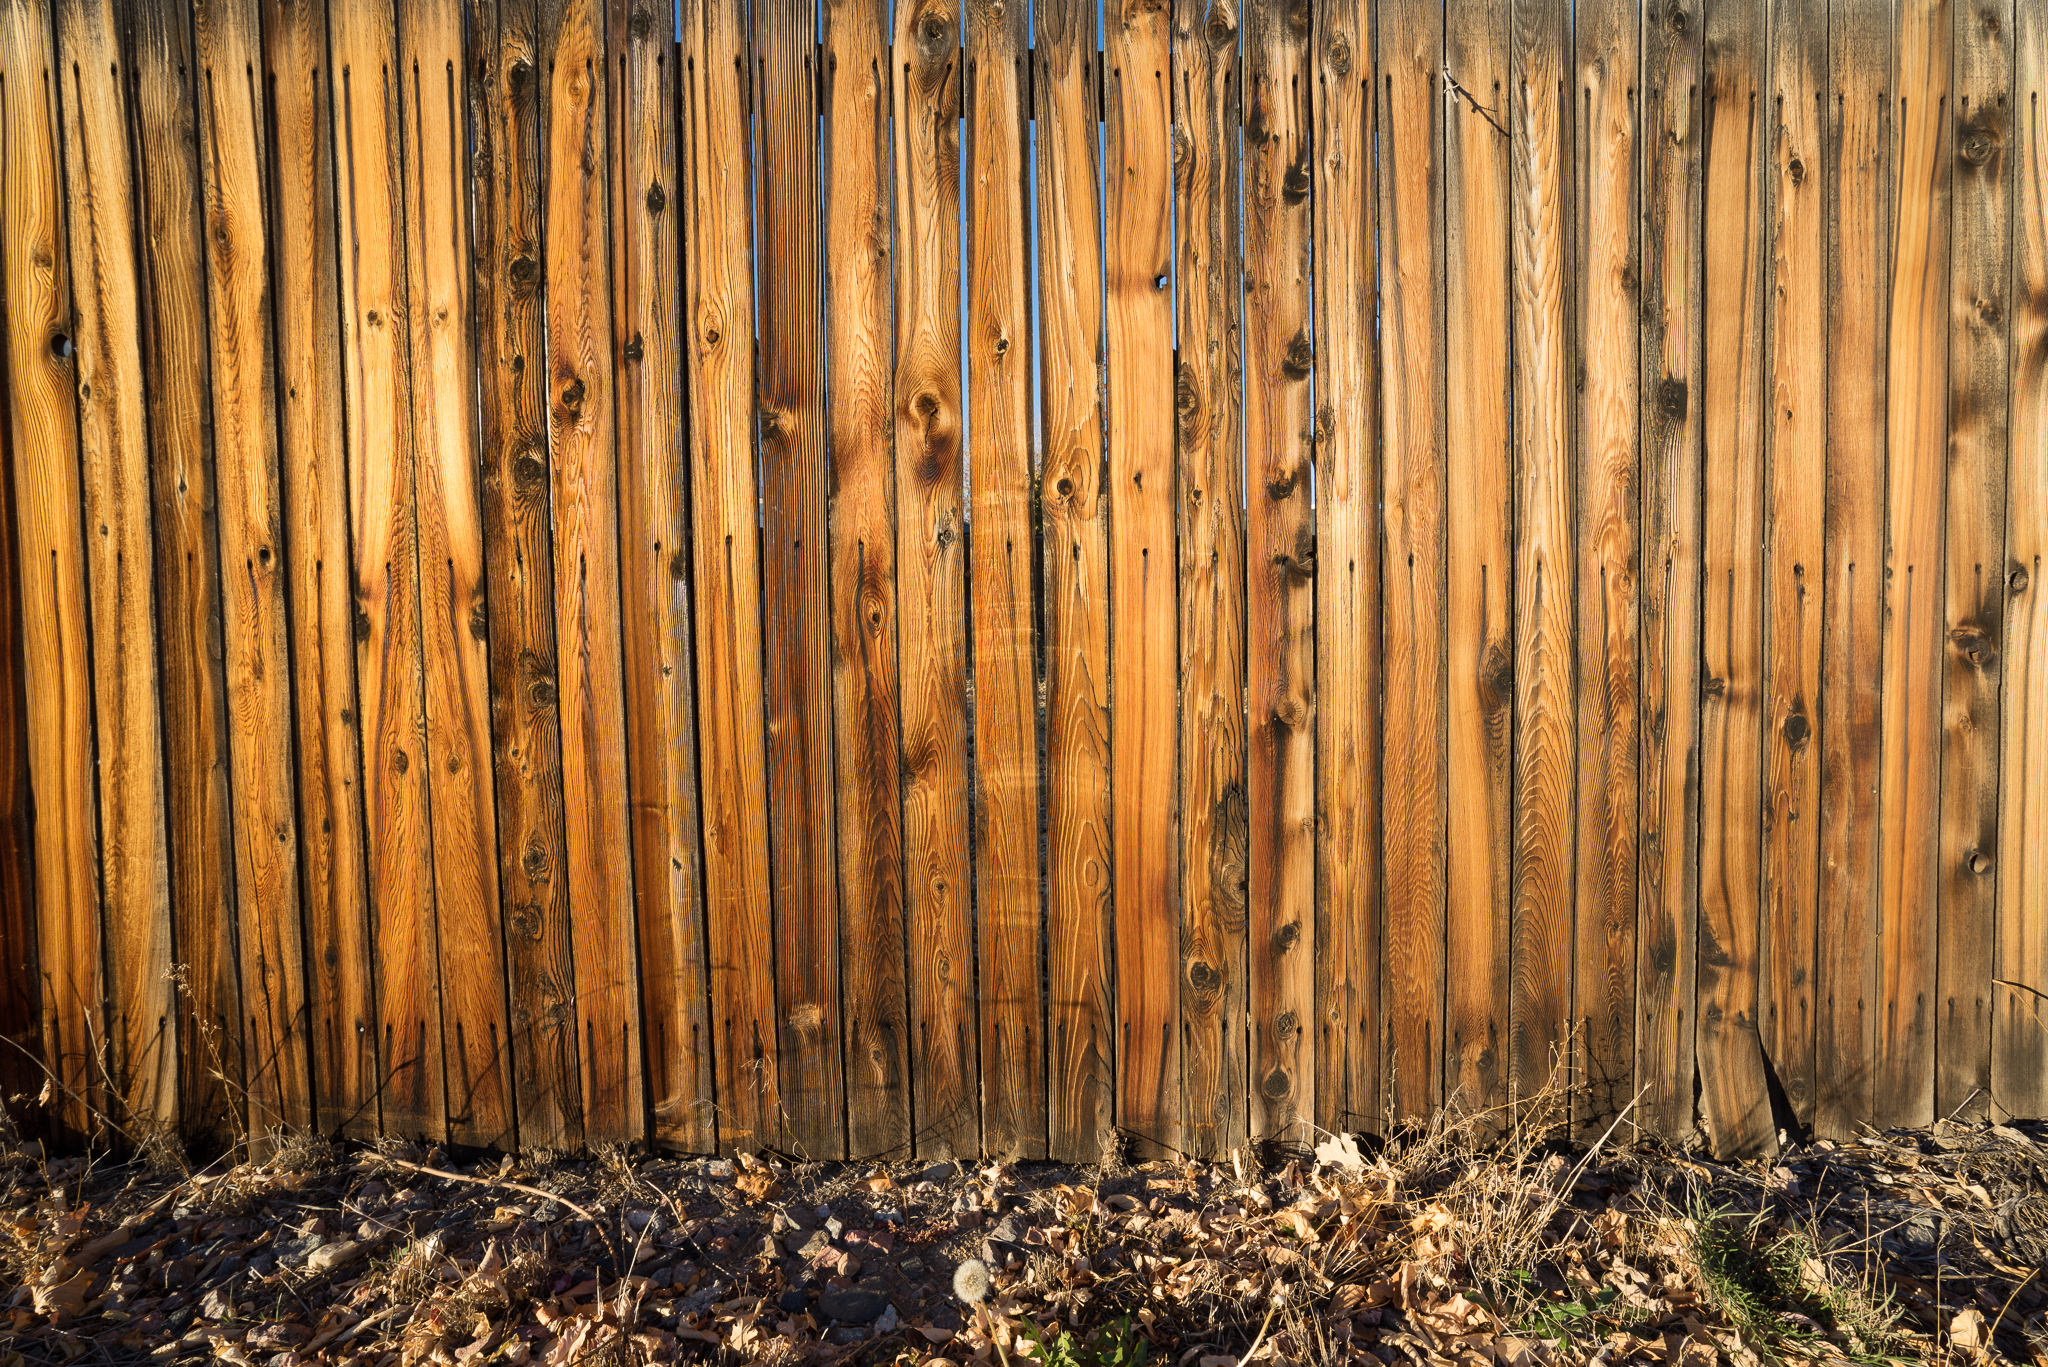
As requested after this review was released, I have decided to include a distortion test of the Sony FE 16-35 f/4. I used a fence in my neighborhood, lining up my tripod, camera and lens to be perfectly level. The variable in this case is that the fence is not guaranteed to be perfectly straight. Either way, looking at the upper right and lower right corners, you can see that this lens handles distortion pretty well. (click on the image to enlarge).
Sun Stars Test
One question that I received frequently from other photographers with regards to this lens was its ability to create sun stars. Essentially what they are asking is that if you stop down your aperture to f/22, do you get perfect little sun stars when photographing a light source, such as the sun or a street lamp at night. The quality of the sun star comes down to a few different factors, namely the quality of optics used in the lens as well as the number of aperture blades. While it is purely subjective, it is said that you want an odd number of aperture blades to give the best overall look to your star. Luckily the 16-35 f/4 lens has 7.
For the sun star test I took advantage of the fall colors here in Denver, CO and went to my local park. I found some beautiful yellow leaves and simply held them up in front of the camera while shooting hand held. As you can see from the results, the sun star looks pretty great.
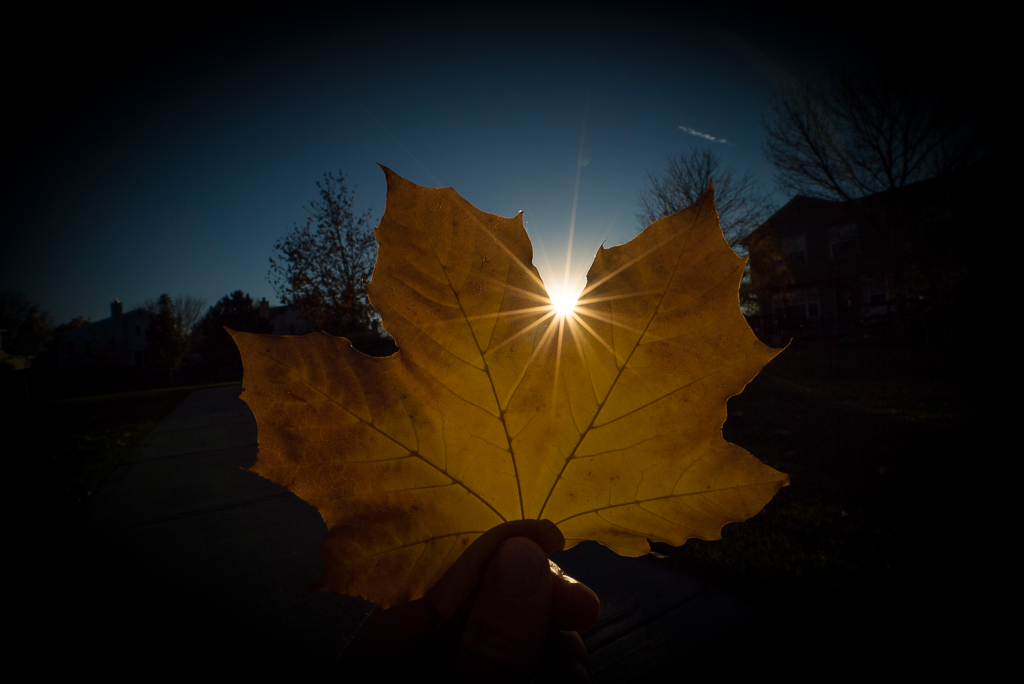
In terms of how it handled flare, it isn’t immune to it, but does a great job of minimizing it, especially for an ultra wide angle lens. In this image above I was literally looking straight at the sun and don’t find any noticeable lens flare in the shot. The same goes for nearly all the images in this series that didn’t end up getting selected to be showcased here. It did show up in a few of the shots, but it seemed to be minimal and pretty well controlled.
Lens Filter Test
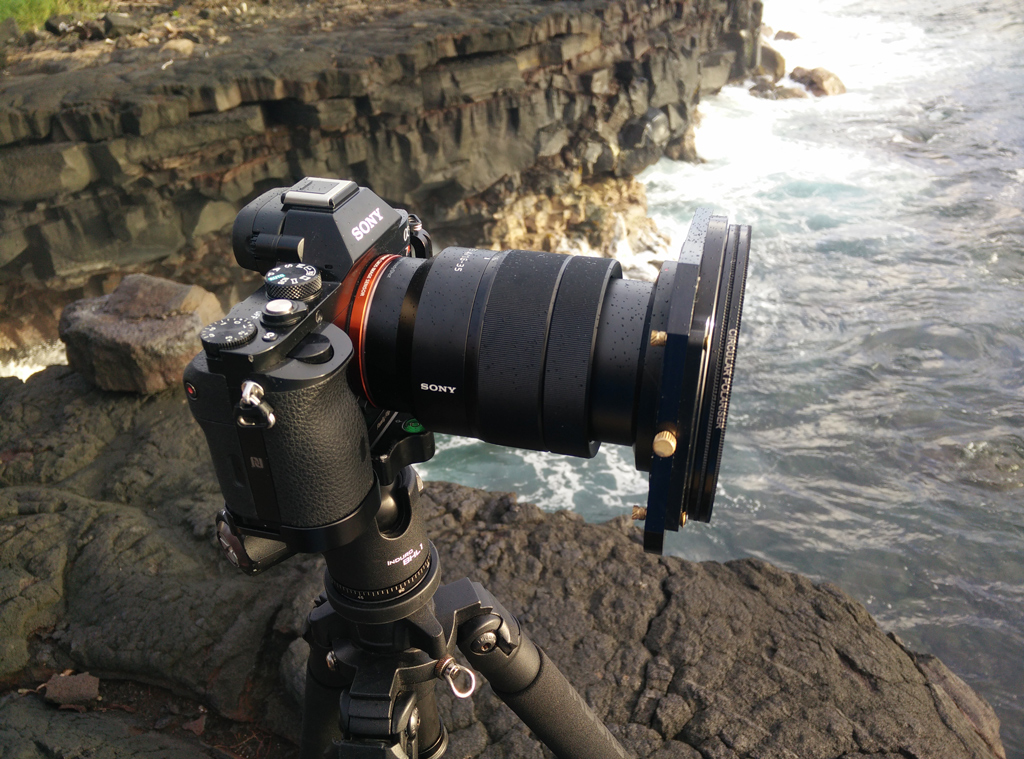
While ultra wide angle lenses tend to be popular with landscape photographers, they still have their trade offs, especially when it comes to using photography filters. For example, the coveted Nikon 14-24 f/2.8 ultra wide lens has amazing corner to corner sharpness, but because of its bubble front lens element, it is difficult to use any filters with it, especially at 14mm. This is a similar problem with most ultra wide angle lenses. While most have easy to use filter threads, you can’t use filters with them at their widest point because of vignetting (the filters effecting appear in the corners of your shot). When Sony announced the 16-35 f/4 FE lens I was hopeful. Not only because of my experience with other Sony FE lenses, but because the filter diameter is 72mm. While Canon’s wide angle lenses tend to be 77mm or 82mm in diameter, the size of the 16-35 f/4 FE lens offered the potential to use filters even at the widest mm offering, 16mm.
For these tests, I used filters from the Signature Edition Colby Brown Landscape Photography Filter Kit that I produced with Formatt Hitech. In the kit you will find a 6 stop ND, 2 stop soft GND, 2 stop RGND and a 105mm Circular Polorizer. The kit is available for sale directly through Formatt Hitech as well as Amazon, B&H, 2filters and most major photography retail chains around the globe.
The goal of these tests were to determine just how much flexibility this lens gives landscape and long exposure photographers. As a landscape photographer, my most used filter is my circular polorizer, followed closely by my ND filters that help me slow down my shutter speed to take photos of moving water (waterfalls, seascapes). I rarely use more than two filters so for these tests I had two Formatt Hitech filter holders ready to go. One had just the 105mm CPL filter adapter (allowing me to only use my CPL) and the other had 1 filter guide + the CPL adapter (which would allow me to use 1 ND slide filter and the CPL for example).
So how did it perform? Lets take a look…
In the image below of Kona, Hawaii you can obviously seen strong vignetting where the CPL filter hold crept into the frame. This isn’t all that surprising considering that it is the most amount of filters that I use at any given time (1 ND filter + 105mm CPL) at 16mm. The good news is that if you zoom in the 17mm or 17.5mm or above, all of the vignetting goes away. With most normal lenses I would have to use my ultra wide angle lenses at 19mm or above in order to use this filter setup. The Sony 16-35 f/4 fe essentially gives you roughly two more mm to work with when using a similar setup.
Next up was a test to see what happened when I removed the 105mm circular polorizer from the same setup at 16mm. As you can see, there is no vignetting…even at 16mm. This means that you can easily use a single filter and possibly a second slide filter (if you add a second filter guide to your holder) and still shoot at 16mm. This is certainly a win for this lens!
Lastly and most importantly to me is the test of the using my filter holder with just the 105mm Circular Polorizer (you can see an image of this setup at the start of this section). Here I wanted to see if I would be able to use my CPL with this lens at 16mm (something I can’t do with the Sony 16-35 f/2.8 ZA alpha lens). When we look at the corners, there is just a touch of vignetting from the filter being visible in the frame itself (I am talking barely). This is big. Having an ultra wide angle lens that allows me to use a polorizer at 16mm will certainly make a difference with my landscape photography work. This is something that will easily be corrected for with a lens profile in LR when that becomes available. Very excited to see these results!

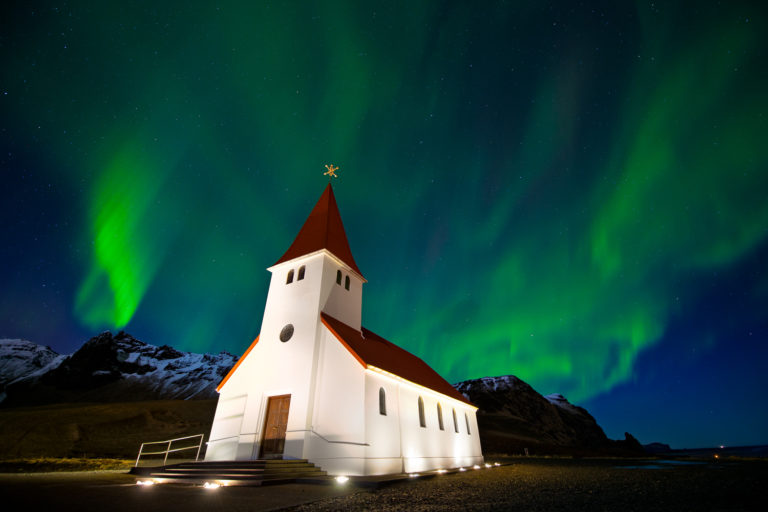
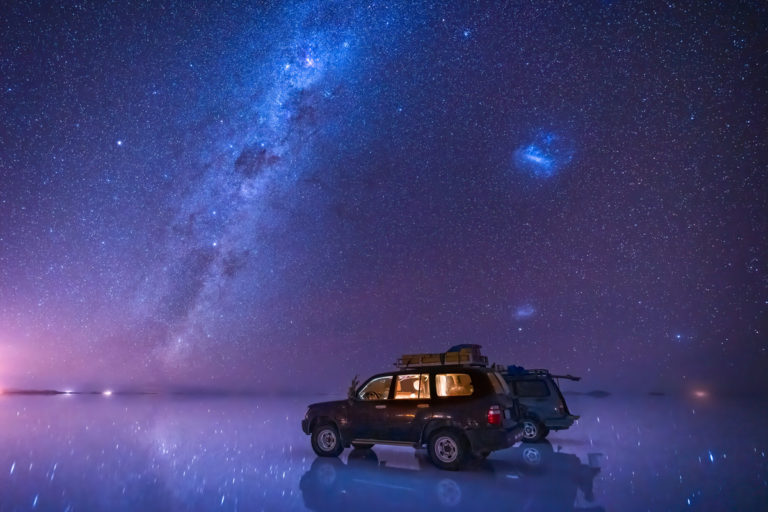
F/4 and Night Photography
When it comes to night photography, most photographers need incredibly fast lenses. Why? Because a fast aperture, such as f/2.8 allows more light into a scene than a slower aperture of say f/4. By allowing more light to reach your sensor, you can use either a faster shutter speed to capture stars with no movement (such as 20 seconds instead of 30 seconds) or you can use a lower ISO (such as ISO 1600 instead of 3200) which would offer cleaner images as a result (without noise and retaining detail). So with the Sony 16-35 f/4 FE lens being an f/4 lens and not an f/2.8 lens like its heavy and larger big brother (the Sony 16-35 f/2.8 ZA alpha wide angle lens), some photographers were worried that they wouldn’t be able to use the lens for astro photography.
To be honest, this is really only a worry if you don’t own the Sony a7s (which I have) as it has such incredible ISO performance that there is very little to no difference between ISO 1600 and ISO 10,000 (with a little editing magic to help). So needless to say, if you have that camera, don’t worry about shooting with an f/4 lens. As for everyone else, I pushed the 16-35 f/4f FE lens in Hawaii with the a7r over the active Kilauea Volcano (with the milky way in the back ground). Below we can see the results.
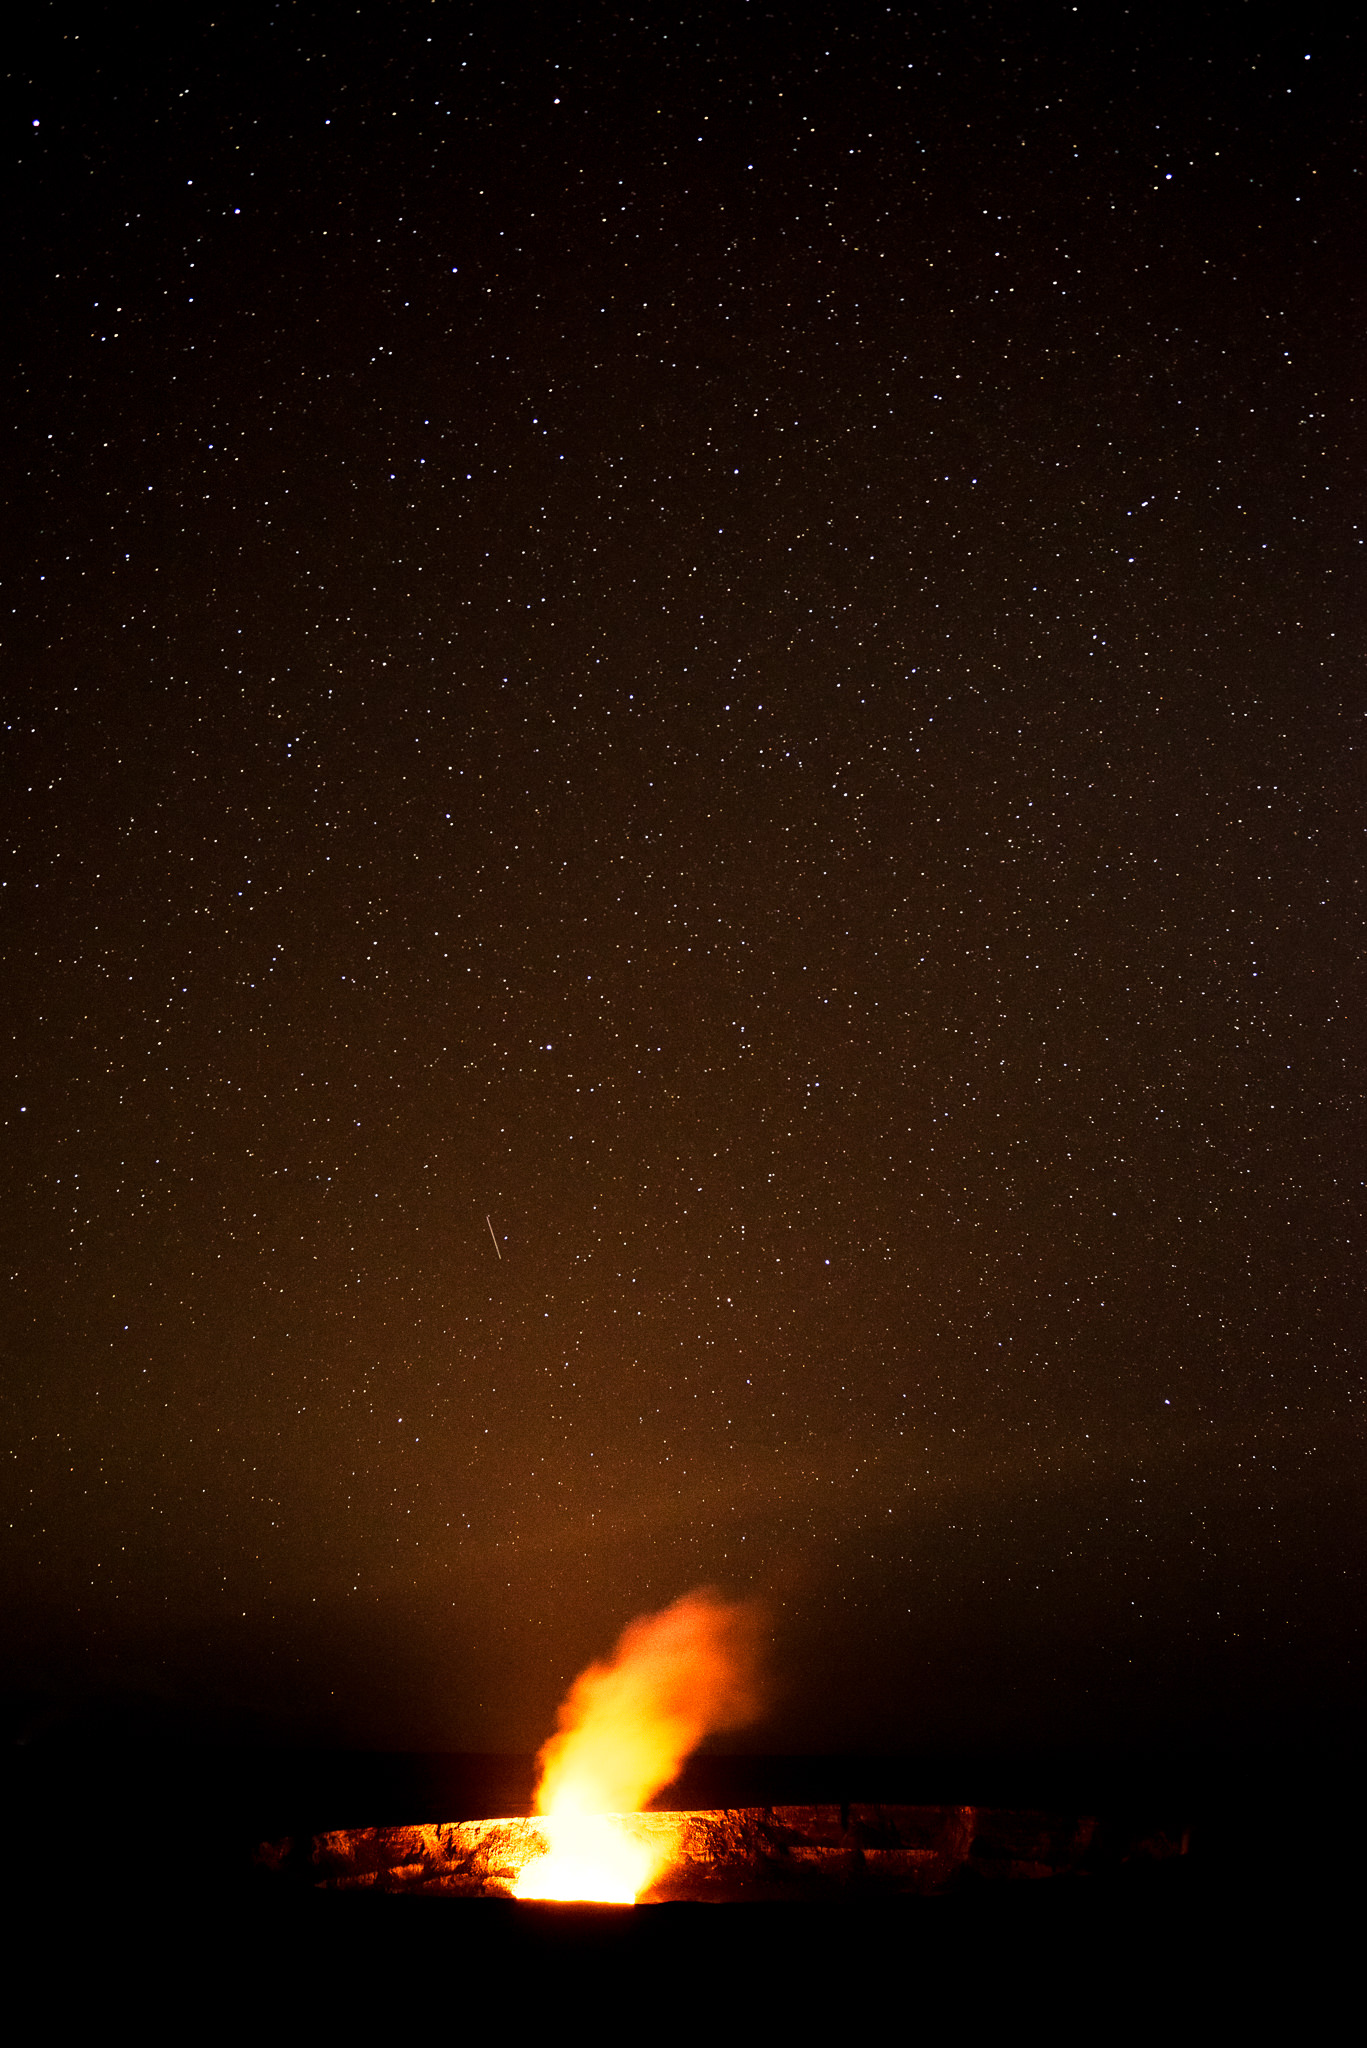
At 3200 ISO, I feel we are pushing the limits of the a7r in terms of noise management. As you can see in the image above (click to enlarge), the results still look great even at f/4. Bottom line is that if you are ok with shooting at 3200 ISO with your night photography, the Sony 16-35 f/4 fe lens shouldn’t be an issue for most of the images you will be trying to shoot.
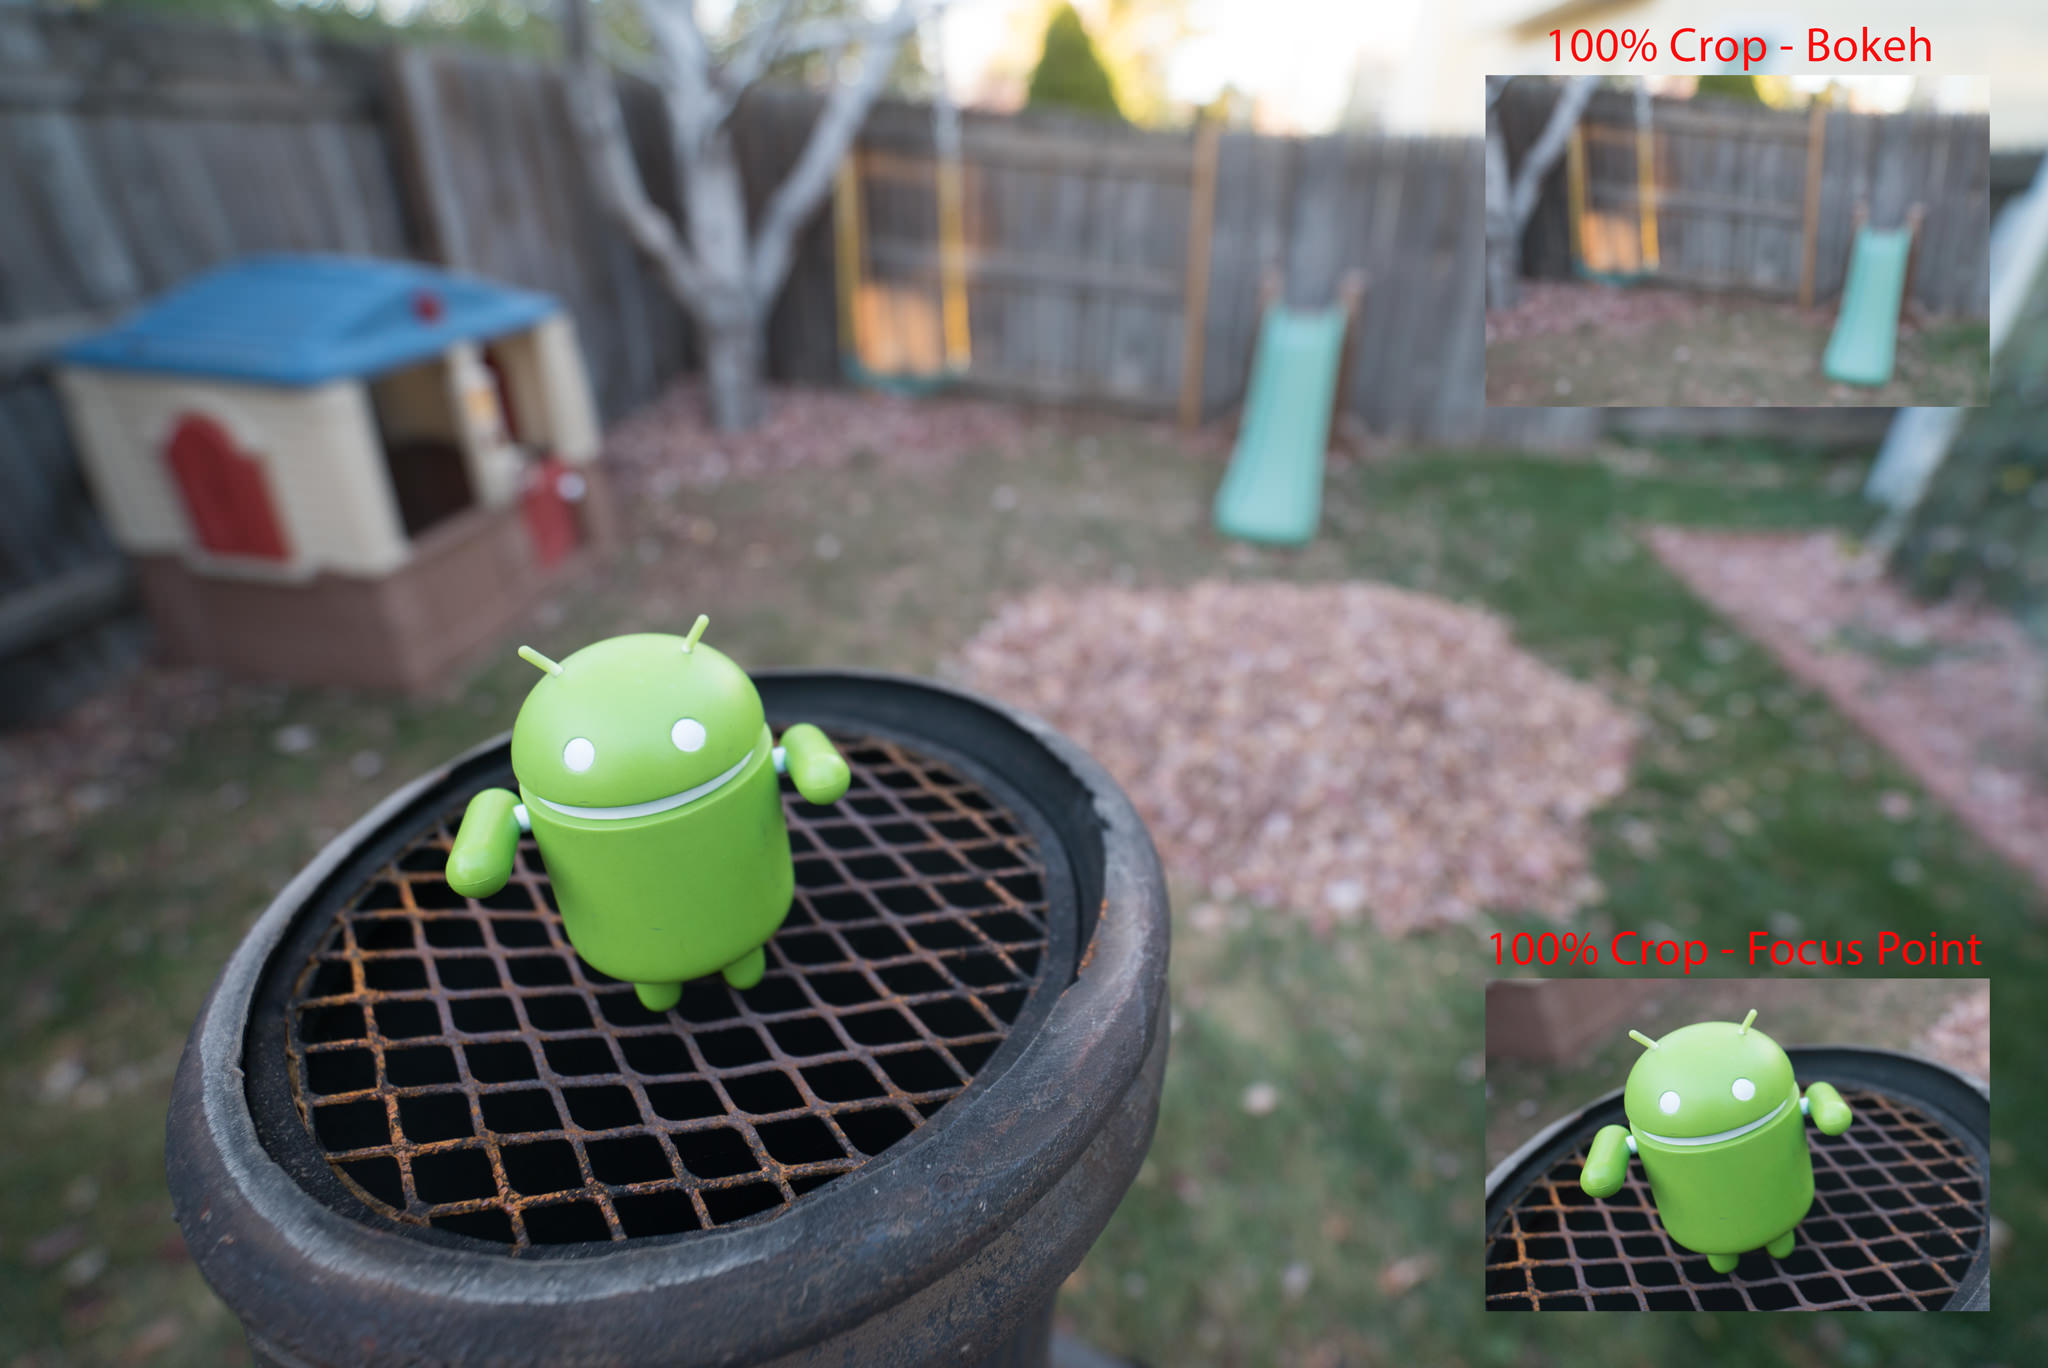
F/4 and Bokeh
Another one of the benefits of using fast lenses is their ability to create gorgeous bokeh (the blurred background behind a subject). The faster the lens, generally the more blurred the background is. This is one of the reasons that many portrait and street photographers love lenses that have an f/stop of 1.8, 1.4 or lower. While portrait lenses tend to be 50mm-100mm to help compress the precieved distance between the subject and its background, the 16-35 fe sits at f/4, so how well does it perform? Lets take a look. (click on the images to enlarge).
By request, I have decided to open up the RAW files for the images found in this Bokeh test to alleviate any confusion or error on my part over the 100% crop found in the below images. You can find them in the following links. 16mm | 35mm
*All of these images were taken with the a7s in my home in Denver. I didn’t get around to capturing any epic images in Hawaii for this test, so these will have to do 🙂
16mm f/4
At 16mm, the bokeh in the background is nice but not ground breaking. That being said, portrait images with ultra wide angle lenses are generally pretty unflattering anyway, so the fact that the bokeh doesn’t look like an f/1.8 lens isn’t a big deal at this mm range. Regardless, you still have nice separation between your focal plane and the background.

35mm f/4
At 35mm, things become a bit better as the compressed spacial distance plays a greater role in how the bokeh looks.


SOTC Image Gallery
One of the most common complaints I read from other photographers reviews is the fact that they edit their review images. While I also want to show off what this lens is ultimately capable off (and I do in the next section), I also want to give you guys a quick look at a small gallery of images that are Straight Out of The Camera…otherwise known as SOTC. These images have not been touched other than imported into LR and exported at 2048x on the long end. Most were shot with on the a7r but there are a few from the a7s as well. Nearly all of these images are shot either at sunrise or sunset and were part of an image bracket, which explains why parts of each image could be blown out. Enjoy!
*Keep in mind that this is a pre-production lens with any of the images I took in this review.


Edited Image Gallery
The images found in this gallery have been edited using Adobe Lightroom, Adobe Photoshop, onOne Software Perfect Suite 9 and Nik Software’s Nik Collection by Google. Enjoy!
*Many more images coming shortly, but just wanted to get this review out the door and live rather than wait for me to edit more images.


RAW Files
Reviews like these bring out the “pixel peepers” in all of us, so instead of simply giving you access to high resolution JPEGs that have had atleast a tiny LR magic done to them, I have decided to include a few RAW image files for you enjoy to your hearts content. Atleast until Sony asks me to pull these from the review since my lens is a pre-production model 🙂

Final Thoughts
When Sony first started releasing lenses for their a7 series of cameras, many photographers initially worried about the trade offs to using gear that was substantially smaller and lighter than what they were used to in the DSLR world. Would the lenses be as sharp? Would they still produce good enough image quality? Fortunately Sony has continued to surprise us with incredible quality lenses such as the 55 f/1.8 and 70-200 f/4. So where does the 16-35 f/4 fe stand? In my personal opinion, near the top of the FE lens line up food chain. Not only was Sony and Zeiss able to engineer a small and lightweight ultra wide angle lens, they were able to do so without sacrificing image quality. I was impressed with the corner to corner sharpness (although it doesn’t dethrone the Nikon 14-24 f/2.8), how it handles sun stars and as well as how it can be used hand held with its built in OSS (optical stabilization), especially with the a7s which tends to have better AF capabilities than the a7r (which I use more than anything else).

Pros
- Lightweight and Portable
- Good corner sharpness
- Great build quality
- Excellent star stars
- Minimal flare issues
- Works well with filters
- Dust and Moisture resistant
- Lens stabilization
Cons
- Expensive (MSRP is $1349 USD)
- Not a fast aperture lens (f/4)
So do I recommend this lens? Yes. I am very happy the the image results from this lens and I am happy to say that it is essentially on par with the famed Canon 16-35 f/4 wide angle lens that was just released that has great IQ. This lens has already become a staple of my gear setup, helping me shed another 1lb off my camera backpack by swapping out my Sony 16-35 f/2.8 ZA lens with this one. No lens is perfect, but between the build quality, portability and corner sharpness, this is a welcome addition to nearly anyone with an a7 series Sony camera.
Full Disclosure
As I mentioned at the start of this review, I am sponsored by Sony. Regardless, even if you choose to not take me at my word or have issue with my opinions, I have provided enough RAW and high resolution evidence for you to come to your own conclusions about the lens. Having said that, Sony did not ask nor pay me to write this review. As for the question of bias because of my connection with Sony, my integrity is worth far more than a few free lenses and cameras each year. I am always honest in my reviews, regardless of my affiliation with a company and they know that going into our agreement.