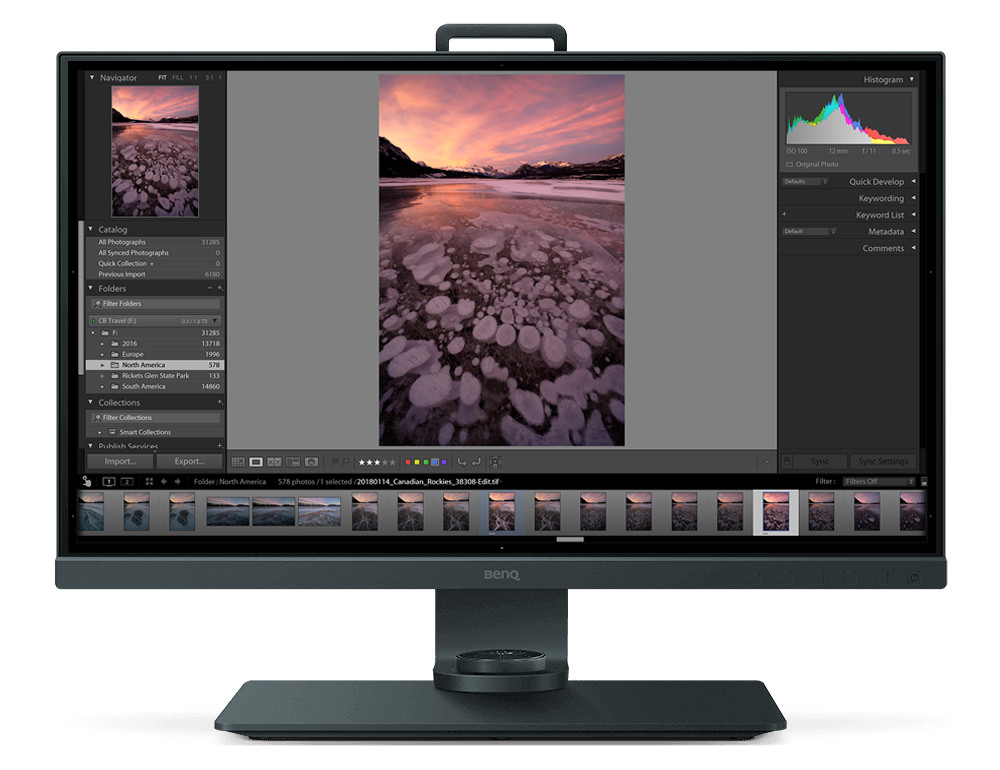
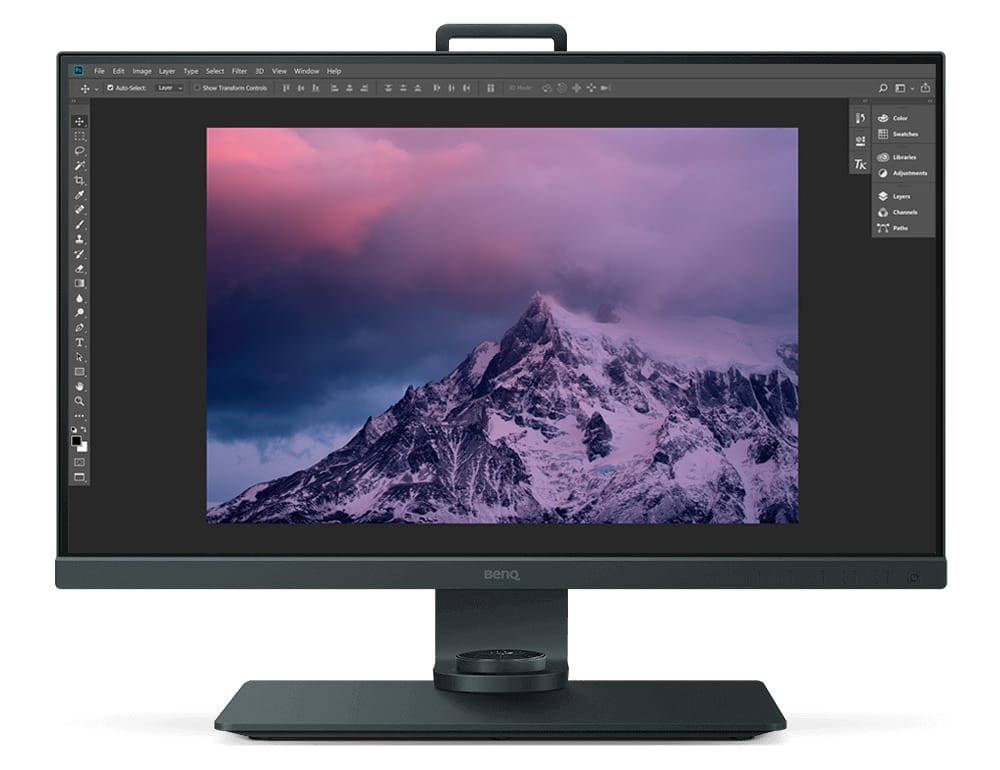
When it comes to choosing the right monitor to buy as a photographer, things can get pretty complicated pretty quickly. There are simply so many choices for you to pick from in a variety of different shapes, sizes & qualities, which leaves many photographers with more questions than answers. However, regardless of the complexity of those choices, there is no doubt that the industry as a whole seems to be moving toward 4k resolutions at breakneck speeds. As more and more photographers continue to operate mostly in the digital space, dabble in time-lapse and expand their skillsets into video production, this migration was inevitable. BenQ’s latest answer to this trend can be found in the new 27″ SW271 wide gamut 4k display.
Over the past few years, I myself experienced this transition first hand, first moving from 1080p to QHD, which included the BenQ SW2700PT which I reviewed HERE. With our phones, tablets, and laptops already hitting higher & higher resolutions, it was only a matter of time that computer monitors themselves caught up.
So when it comes to picking the best 4k display for your needs, how does the BenQ SW271 stack up? Let’s dive right in and find out!
BenQ SW271 Specs
Here is a quick look at the spec breakdowns between the two displays…
LCD Size – 27″ / 68.58 cm
Aspect Ratio – 16:9
Resolution – 3840 x 2160
Display Area – 23.97 x 13.99″ / 60.88 x 35.53 cm
Dot Pitch – 0.1554 x 0.1554 mm
Brightness – 350 cd/m²
Contrast Ratio – Native: 1000:1
Panel Type – In-Plane Switching (IPS)
Viewing Angles (H/V) – 178°/178°
Refresh Rate – 60 Hz
Color Gamut – 100% Rec. 709 / sRGB | 99% Adobe RGB | 93% DCI-P3
Color Tables – 10-bit
Backlight – LED
3D LUT – Yes (14-bit 3D LUT)
Weight – Without Stand 13.9lb / 6.3 kg
What Comes In The Box?
When you first open the box you will notice that the display is well packaged. There is amble packaging to keep the monitor’s displays harm free during shipping, which is always a nice touch!
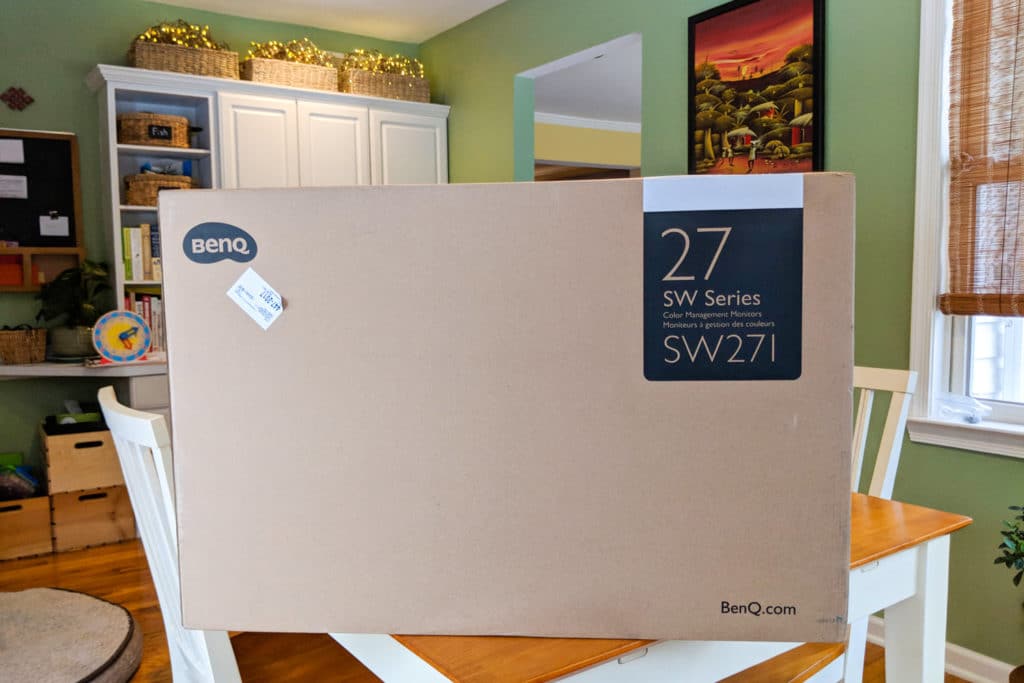
Once you open the box and finally get the display out, you should find the following items and accessories…
- Monitor Desk Stand
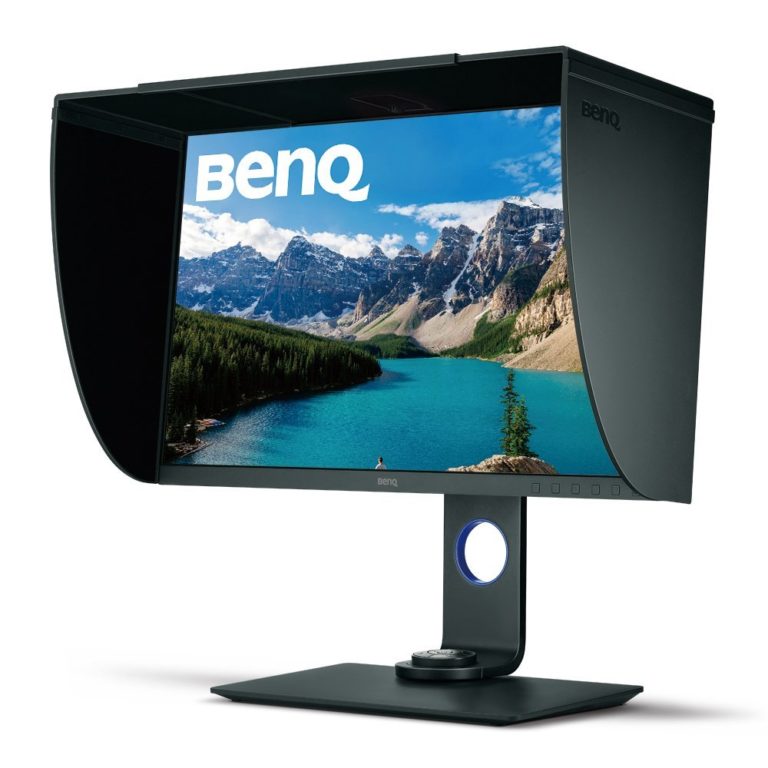
- Shading Hood
- CD with Monitor Drivers and Manuals
- Individual Calibrations Reports from BenQ for your specific display
- Hotkey Pucks
- Power Cable
- Additional Cables: USB type-C cable(1m), mDP to DP cable (1.8m), HDMI 2.0 cable (1.8m), USB 3.1 cable (Gen 1)(1.8m)
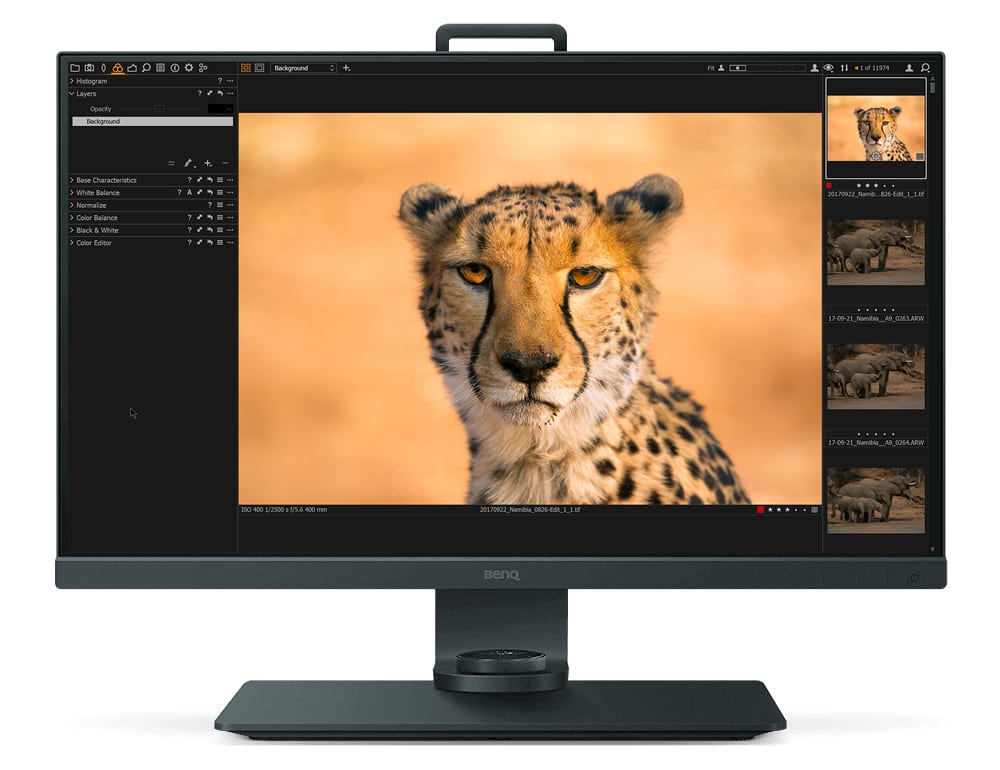
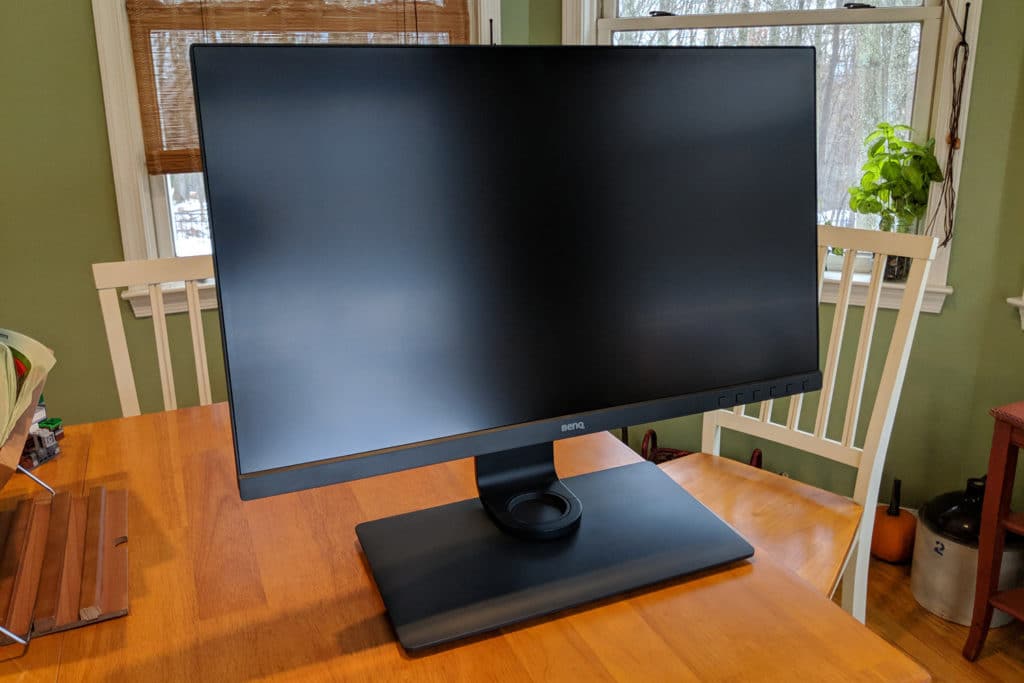
Screen Design/Ports
When you get the BenQ SW271 out of the box and set up on your desk, either by using the included Desktop Stand or by attaching the display to an Ergotron Arm (more on that later), you will notice the new screen design, at least if you have used BenQ displays in the past like I have.
The display itself is gorgeous, but more importantly in terms of design, they have managed to seriously shrink the bezels from previous BenQ display lines. The bezels on the top, left and right of the monitor look to be either 1/3 or maybe even 1/4 of the size of the bezels I have on my larger BenQ 32″ SW320 4k displays sitting on my desk. That is a pretty big deal as it means that your display gets more screen real-estate while having a smaller footprint.
In terms of button placement, those haven’t moved from the bottom right-hand corner of the monitor. Having used other monitor brands in the past, I am a pretty big fan of BenQ’s button/menu layout system, making it easy for me to adjust brightness or play around inside the menu system as needed.
On the bottom of the monitor, you will find all of the available port connections. This includes the power input, headphone jack, (2) HDMI 2.0 ports, 1 DisplayPort (v1.4) and a Macro USB (Upstream) for you to connect the BenQ Hot Keypuck. The USB port, a first for a BenQ display, is a great way to connect your display to some of the latest Laptops & Desktops that support Thunderbolt 3. With its universal fit, high data transfer rates (including video & data) there is a lot to like about it over HDMI or the Display port connections more commonly used.
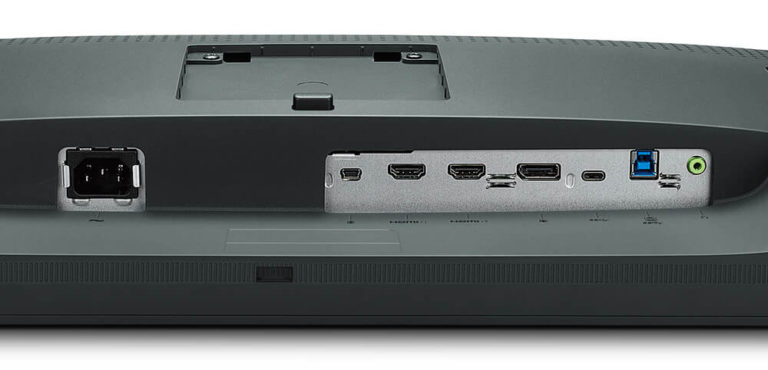
Lastly on the back of the monitor, behind the left edge of the display, you will find two full USB 3.0 ports as well as a full SD card slot. These additional ports only work if you connect your display to your computer via the USB 3.0 cable included in the box or the USB C/Thunderbolt 3 port.
Oh, The Colors!
The single most important aspect of any monitor is how accurately it shows both color & contrast. If your display isn’t showing you the true colors of your image, regardless if you are using a laptop or desktop, how can you hope to accurately edit your photos? While we will talk a bit about Color Management in the next section of this review, you still need to have the display hardware capable of achieving the level of accuracy we should all be shooting for. Fortunately, the BenQ SW271 excels in this regard!
Display Panel Type
With the SW271 we have an LCD display that puts out an impressive 4k resolution. It is an IPS panel, which stands for “In-Plane Switch”, which is a term used to describe a monitor that has great viewing angles (178 degrees to be exact). When viewing a non-IPS display, the saturation and contrast of your image can fluctuate depending on the angle you are viewing the display from. An easy way to see if your current monitor is an IPS display is to sit directly in front of it while looking at one of your images. Lean to the left or the right (or even stand up or duck down). If you notice any significant changes to how your image looks, your display doesn’t have IPS technology built in.
Additionally, this monitor is capable of display 10-bit color if you have the right GPU. With most monitors displaying content at 8-bit, a 10-bit display is capable of showcasing more than one billion different colors. This will be most notable in situations where you have strong gradients of a single color such as a sunset or blue sky. As the single color moves from one gradient to another, you can notice “banding” or hard transitions between the gradients. With a 10 bit display, the colors will almost always look smooth across your screen.
Color Gamut Coverage
With the SW271 you will get 100% sRGB coverage and 99% of Adobe1998. So why is important? When it comes to understanding color, most of us look at the color gamut that a monitor is capable of displaying. This is essentially the number of different colors and variations of those colors that can be viewed. Currently, sRGB is by far the most popular color gamut. It is what is used by the vast majority of digital devices around the world including web browsers and the majority of mobile phones/tablets. So when you upload a photo to Instagram, Facebook or even to your website, most likely that image is only being displayed in sRGB.
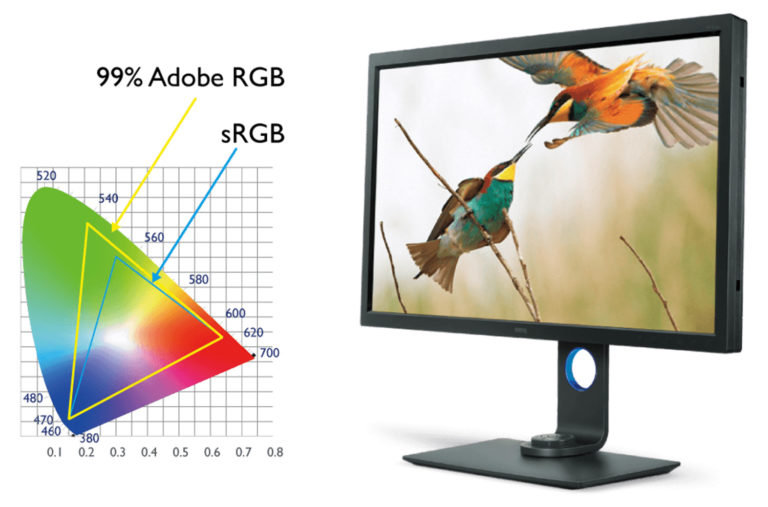
With Adobe1998’s color gamut, the focus is almost purely on printing images. This is because it is capable of display more variations of colors with it’s wider (larger) color space than sRGB. All in all, this monitor gives you near perfect coverage of both of these color gamuts, making it ideal for those that live in the digital world as well as those that prefer to see their images in physical form.
HDR10 Support
One of the hottest trends happening in the display industry right now is HDR, also known as High Dynamic Range, which has been used through the photography industry for years. The base premise is that most cameras have the ability to capture anywhere between 10-15 stops of light in a given image or video whereas our eyes can capture between 22-24 stops, leaving a pretty big gap between the two. A display with HDR support allows you to increase the dynamic range between the black and white points of your display, allowing things to appear much closer to what your eyes see in the natural world.
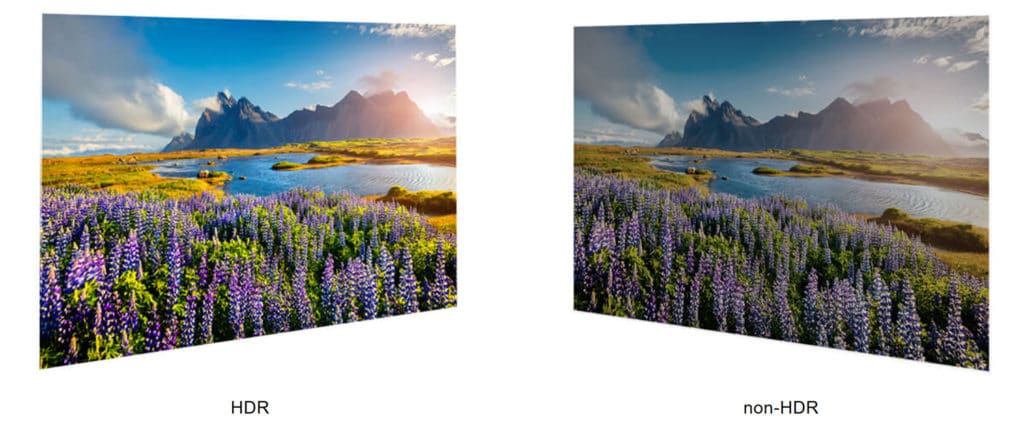
While this trend still has a way to go before it truly gets picked up via the mainstream, it does appear to be heading that way. More and more cameras are allowing creatives to utilize HDR picture profiles when shooting video, which will continue to change the way we consume this kind of content. If the technology is truly adapted on a larger scale, you will want to have an HDR compatible display so that you can edit your photos and videos in a similar environment to how that content will eventually be consumed.
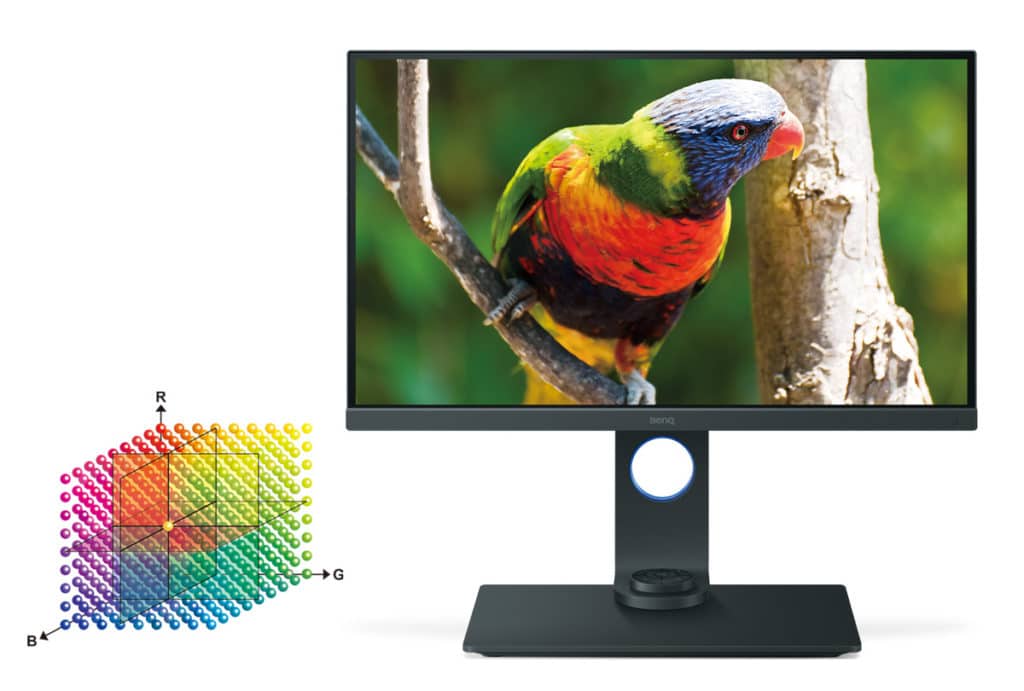
14 Bit 3D LUT and Delta E ≤ 2
For many of your reading this review, you might have thought the above was some weird typo or maybe that you feel like all of a sudden we’re all back in math class starring at a confusing equation, but you would be wrong 😉
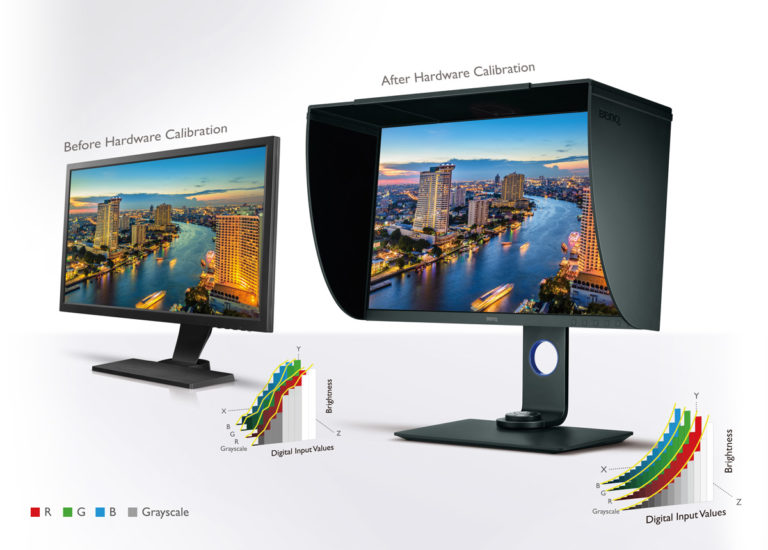
In simple terms a LUT (which stands for Look Up Tables) are color correction tools that help a display take the digital values of the color of an image and convert it into a display value that you can see. A 14-bit 3D LUT gives you an amazing amount of precision for any tonal transitions between colors found in the color palate. The more colors and color gradations that you see, the more accurately you can process your work.
Calibrating The Display
When it comes to the BenQ SW271, the display itself is very color accurate out of the box. Plug it in for the first time and you will have the ability to easily switch between sRGB, Adobe1998 and other Color Profiles that come pre-calibrated with the display. This is a nice touch for photographers that haven’t fully invested in a proper Color Management workflow, but you can’t necessarily depend on this in the long run. Why? Because all displays (calibrated or not) lose accuracy over time.
Regardless if you end up picking up this monitor or another, you will want to calibrate your display eventually. This is done using colorimeter that works with additional software on your computer (Windows and OSX) to help you maintain color accuracy on your system. The two main players in this space are DataColor and X-Rite.
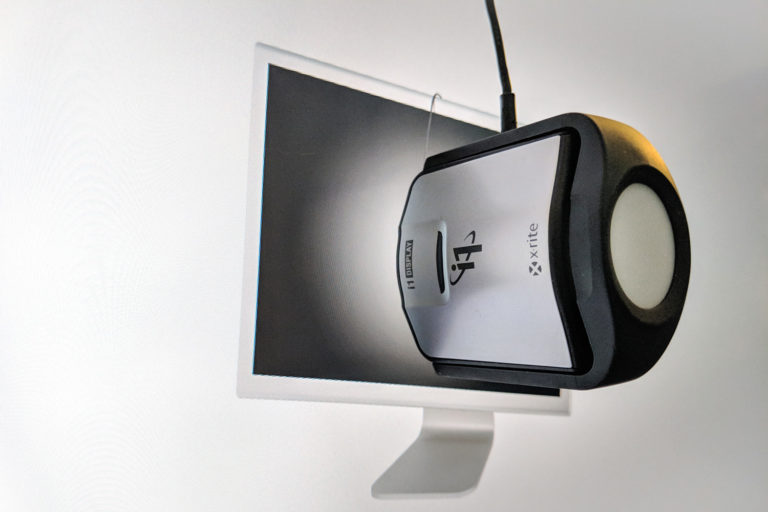
Every few weeks I spend a few minutes and calibrate my monitors to make sure they maintain accuracy as I process my images over time. Once you have a colorimeter, you have two ways you can calibrate the BenQ SW271…using BenQ’s own Palette Master software or the software that comes with your colorimeter, which in this case means i1 Profiler from Xrite. Both have their advantages and disadvantages so lets quickly dive into both options.
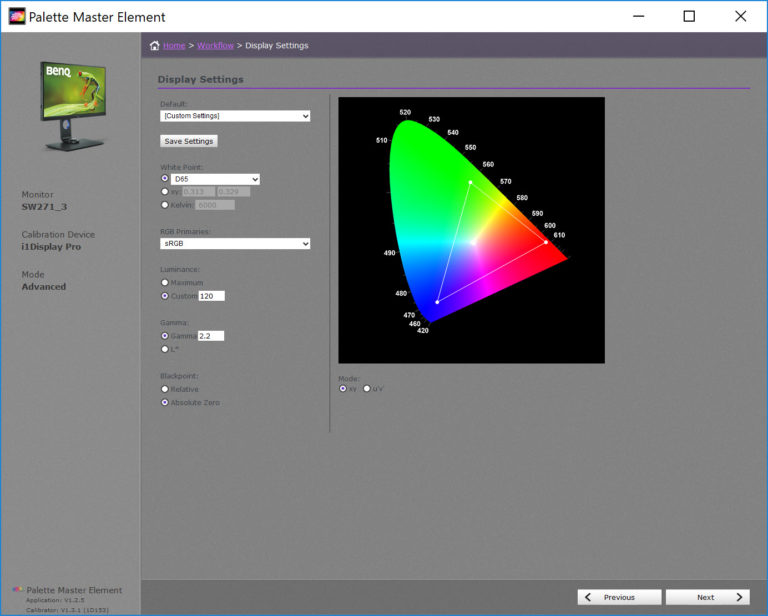
BenQ’s Palette Master
One of the best ways to calibrate your sw271 would be to use BenQ’s own Palette Master software which works with both DataColor and X-Rite devices. By doing it this way, you have the ability to calibrate your display using the image processing chip inside the monitor rather than relying on your computer’s operating system to load a new Color Profile. This is often considered a better option because it allows you to adjust color without changing your graphics card output or without your display being affected by the graphical settings of other applications. It is generally more accurate and long lasting as well.
The only downside to using Palette Master is its lack of multiple display support. You will need to physically unplug other monitors when calibrating one of your displays, which is unfortunate for people with multiple screens like me.
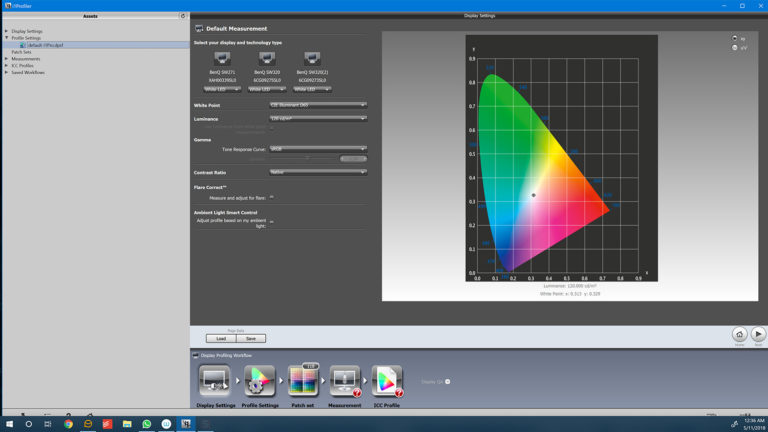
X-Rite’s i1 Profiler
For a slightly more user-friendly calibration option, X-Rite has their own software that works with their colorimeters called i1 Profiler. The software is pretty straightforward, at least in the “Basic mode”, allowing you to easily calibrate and even compare calibration results for multiple monitors. However, this software is limited to helping you create an accurate Color Profile rather than adjusting the imaging chip itself found in this display.
Being able to easily calibrate multiple monitors and compare the results between displays is a nice touch with this approach to color management.
Hotkey Puck
One of BenQ’s more unique features with its monitors lays within the physical controller it calls the “Hotkey Puck”. With it you can customize the buttons that sit at the base of your display to easily switch between the different picture modes (sRGB, Adobe1998 & Black & White for example) or they can be made to help you easily adjust some of the displays’ settings, such as brightness or contrast. While this isn’t a game-changing feature, it is a nice touch for those that don’t care to jump around the display’s menu system to access these controls.
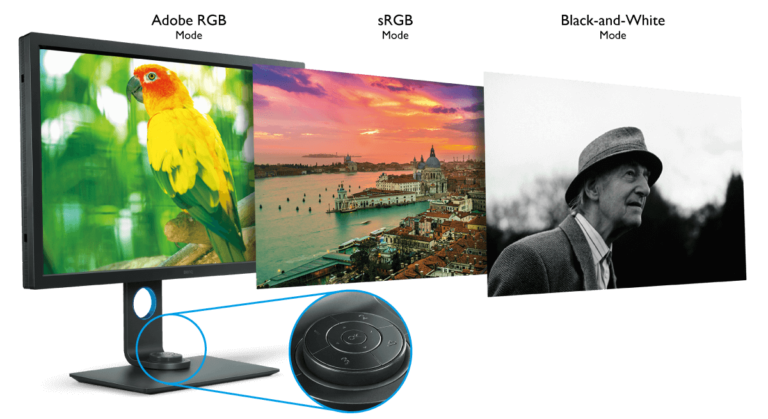
In my experience, the Hotkey Puck worked well. While I would of preferred that it had a little better build quality, it was easy to use and setup from the beginning.
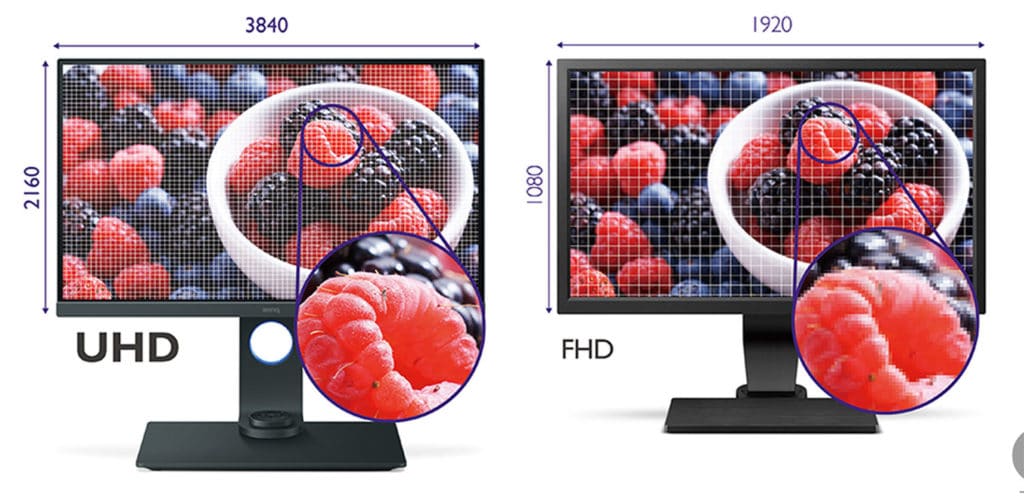
Working in a 4k World
As I have mentioned throughout this review, the trajectory and momentum of the display industry are certainly moving towards higher resolutions such as 4k, with 8k monitors and TVs not too many years away as well. So what does this mean for you as a photographer?
First and foremost, having a higher resolution screen generally means that you have much more screen real-estate or space to operate in. Photoshop looks a lot different on a 1080p screen as it does in 4k. With more pixels to work with, not only will the screen be crisper and sharper, but your tools and panels will be smaller as well, allowing your images to take up much more space on your screen.
If you work purely in the digital space, this increased resolution and sharpness of your display will be a huge benefit not only for your general photo editing workflow but also in maintaining accuracy throughout the process for how your images will look in the digital world. However, when it comes to printing images, there are a few things to be aware of. Certain 4k displays, such as the BenQ SW271, are so sharp and clear that some photographers feel that it is difficult to discern sharpness when it comes to preparing images for print, especially for those coming from much lower resolution workflows.
Personally, I feel that like anything else, it simply takes time to get used to a new display. Having used 4k monitors for a number of months now I don’t see any issue when it comes to properly sharpening my images.
Building My Own Custom Display Setup
While I feel that most photographers in the industry still use a single monitor setup, the popularity of a multi-display system is increasing. So what does my office look like? To be honest, it is a bit overkill. On top of the custom desk I had built I have three different BenQ displays: (2) SW320s and (1) SW271. Each of them is mounted to adjustable Ergotron arms that are clamped to my desk, allowing me to move and articulate my displays easily.
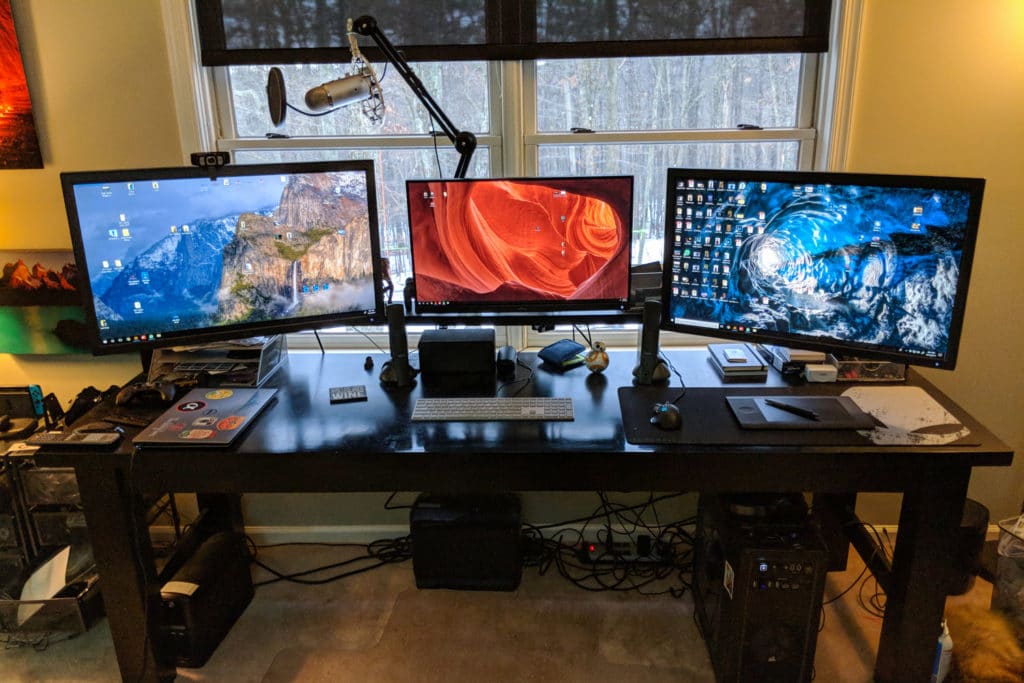
When I am in productivity mode, I can push them all to the back of the desk and easily make more room on my desk. When I get into photo editing mode, I can bring them in closer, allowing my two side displays to create a near half circle around me. As I said before, this is a bit overkill for most people, but I love it. Not only does it allow me to easily multi-task, but it is pretty awesome to use in person 😉
Overall Thoughts
With the SW271 BenQ has created one of the best 4k wide gamut displays that I have used to date. With the improved design that allows for much smaller bezels, the inclusion of USB-C and the highly accurate displays for both sRGB & Adobe1998, there is a lot to love. Throw in HDR support and the ability to color calibrate the hardware of the display and it is hard not to come away impressed.
With all that said, I do wish that BenQ’s Palette Master Software did allow for easy calibration for multiple monitor setups. Being forced to unplug my additional displays while I calibrate one is a touch cumbersome, making the process of managing the color accuracy of my various displays a bit more involved than I would prefer. Additionally, if you find yourself heavily focused on printing, you will want to pay close attention to the dot pitch and pixel density of the display you end up purchasing. A 4k display at 27″ might make determining sharpness for printing a touch more challenging then you are used to, depending on how close your monitor is to your chair. In these situations, you can simply temporarily lower the resolution of your display to QHD as needed.
Regardless, after moving all my displays into the 4k space, I don’t ever see myself going back. Not only do I find myself already working mostly in a digital space the days, but I feel that dynamic content such as timelapse and video production is only going to increase in value moving forward. With a brilliant, vivid and accurate 4k panel such as the BenQ 271, it is a pleasure to use across all of the creative medians I find myself in. From Photoshop to Lightroom, Adobe Premiere to Resolve, the cleaner looking text, larger screen space and vivid colors make the SW271 a welcome addition to my growing and evolving photo and video editing setup in my office.
Full Disclosure
While BenQ did not pay me or ask me to write this review, they did provide the SW271 that I used to create this review. Your trust is important to me and one of my most valuable assets when it comes to this website and my brand. This review and the thoughts/opinions behind it are mine and mine alone. In this day and age, it is very easy for anyone reading this review to do their own Google search to verify my claims. Any reviewer that would be willing to jeopardize that trust and their brand by falsifying a review shouldn’t be reviewing products in the first place 🙂