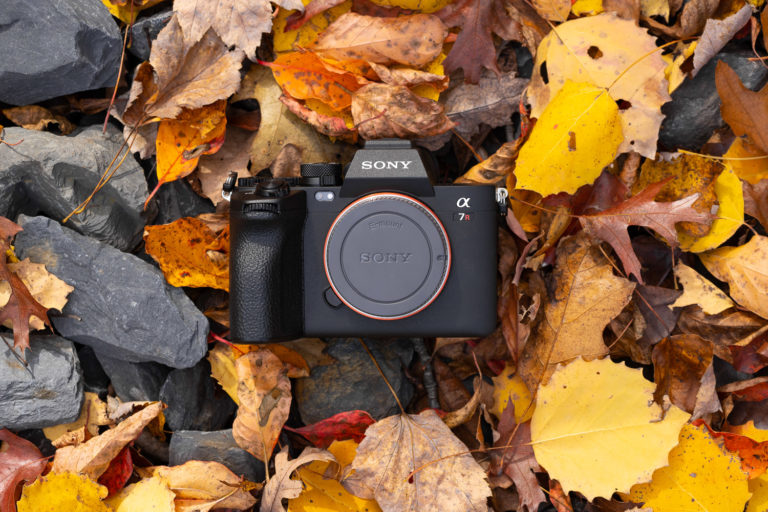
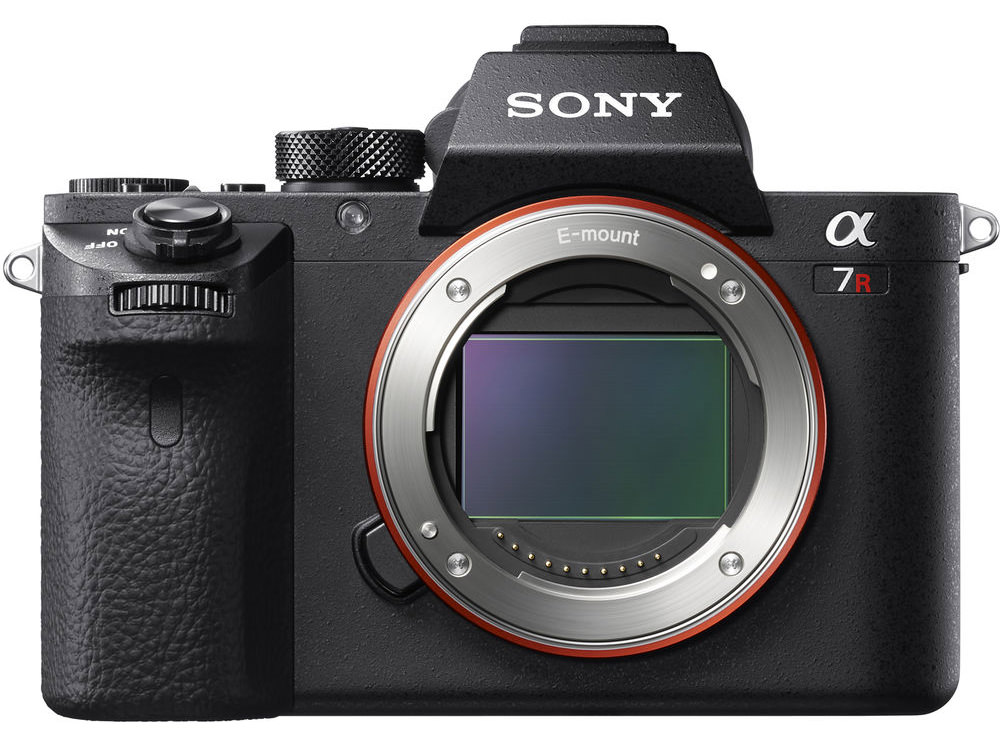
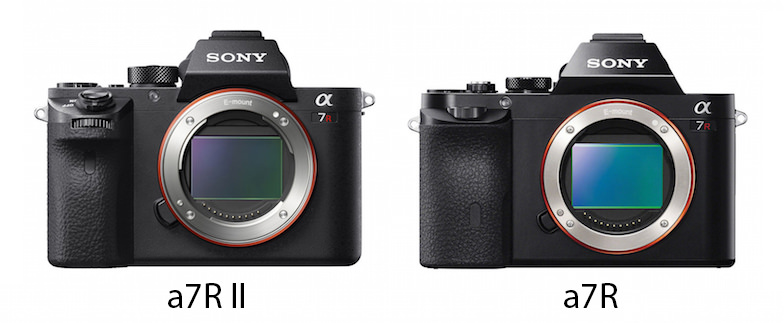
In October of 2013, Sony announced the a7r, the world’s first 36mp full frame mirrorless camera. While it wasn’t perfect (REVIEW), it was good enough to pull me, and many other photographers, into the world of mirrorless photography for the first time. Here we are nearly two years later and Sony has finally released its successor, the a7rII. So what’s new? This time around Sony went with a brand new 42mp backlit CMOS sensor, a much improved AF system and new body style to name just a few additions to this already pretty popular line of mirrorless cameras.
Sony has certainly been pushing the boundaries of both camera and sensor technology for the last few years so it is no surprise that the photo industry has full of talk, hype and excitement surrounding this camera, but can Sony and the a7rII live up to these lofty expectations? Are the new features and upgrades enough to overcome the quirks and short comings of the first generation a7r? Luckily I have able to test a number of Sony a7rII’s over the last few weeks here in my home state of Colorado. Let’s see if this camera can live up to its hype!
Camera Features/ Highlights
Here is a short list of spec highlights for the Sony a7rII. Click HERE to see the full specs.
- 42 MP Full-Frame Exmor R BSI CMOS Sensor
- BIONZ X Image Processor
- Internal UHD 4K Video & S-Log2 Gamma
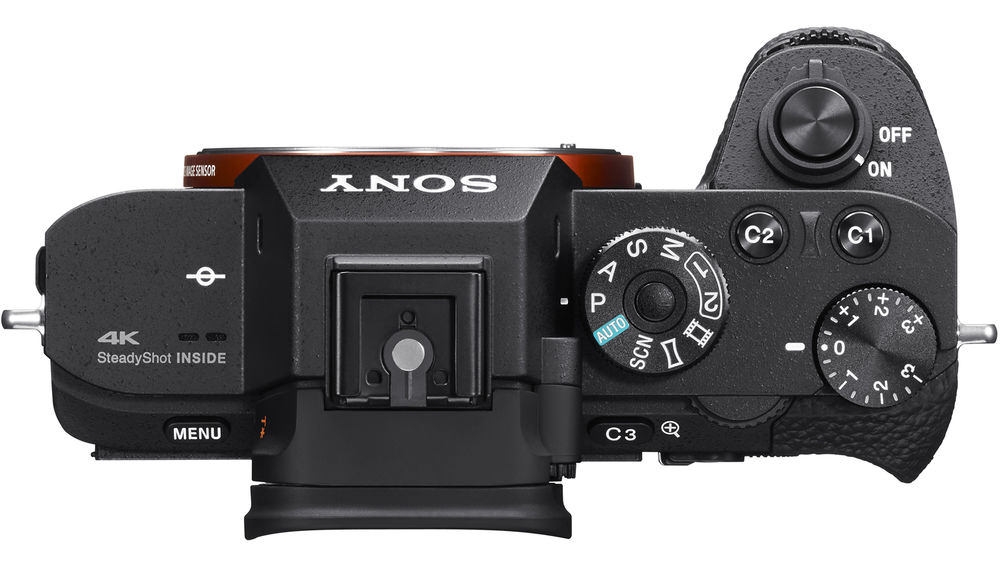
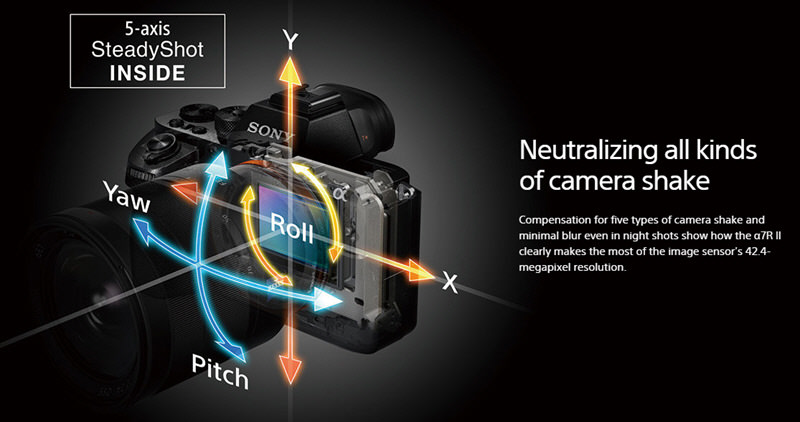
- 5-Axis SteadyShot INSIDE Stabilization
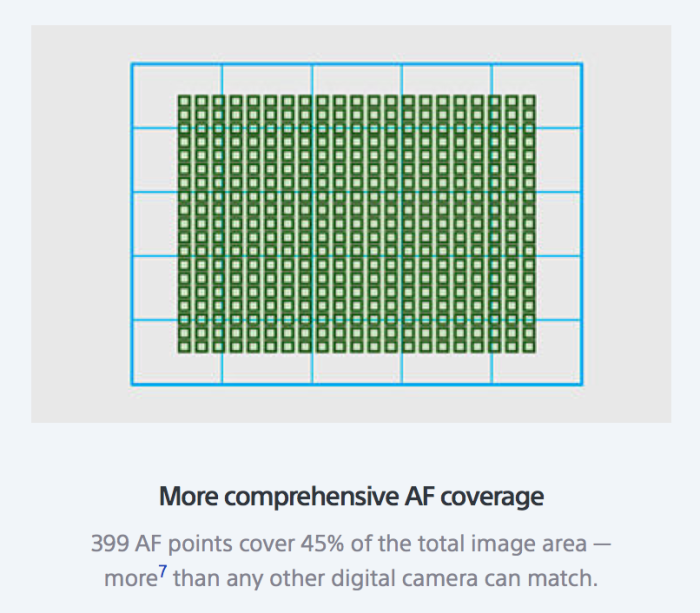
- 399 Phase-Detect AF Points & 5 fps Burst
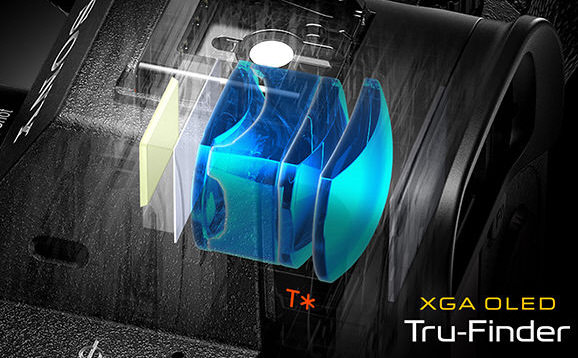
- 0.5″ 2.36M-Dot XGA OLED Tru-Finder EVF
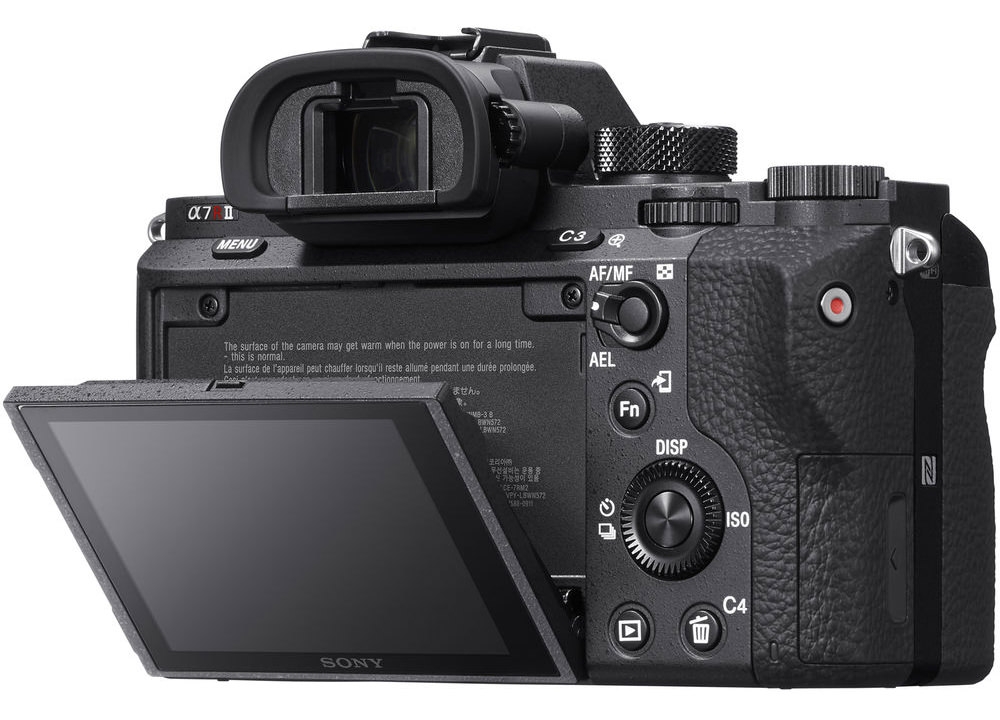
- 3.0″ 1,228.8k-Dot Tilting LCD Monitor
- ISO 102,400 and Silent Shutter Mode
- Durable Reduced-Vibration Shutter Design
- Built-In Wi-Fi Connectivity with NFC
- MSRP $3,198
Build/Portability
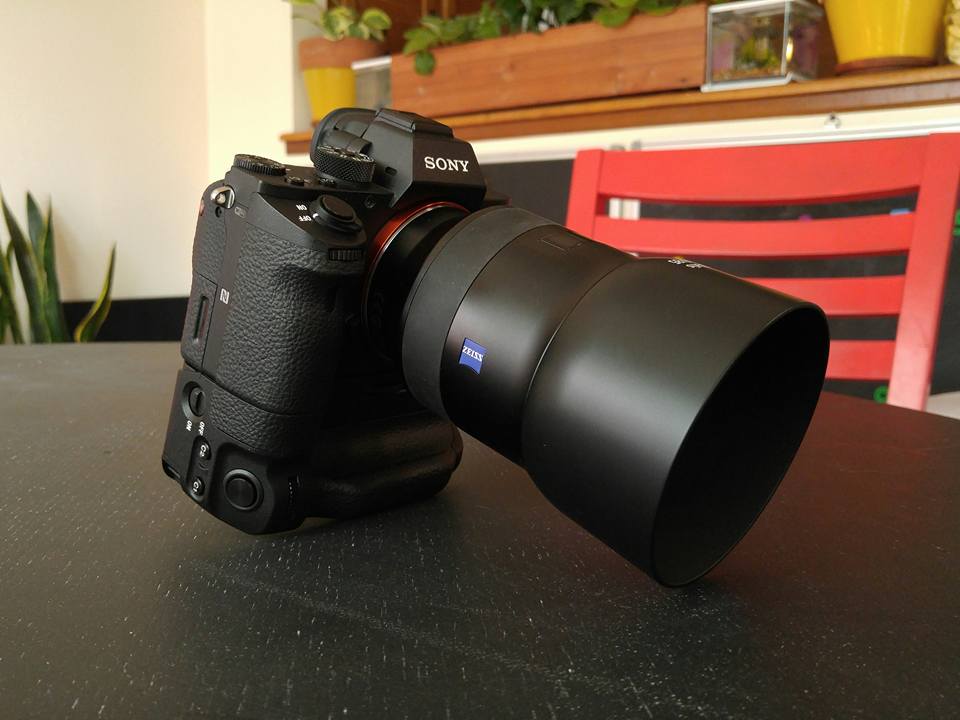
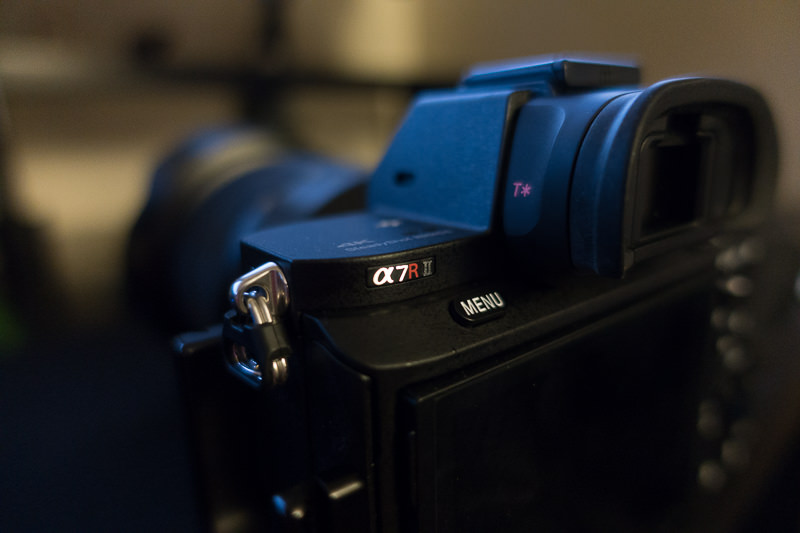
One of the biggest initial selling points of any mirrorless camera is both its size and weight when it comes to a direct comparison with their DSLR cousins. While the Sony a7rII is still fairly compact, it has “bulked” up a big since the first generation. Why? To both improve ergonomics and to fit all the new fancy technology inside (such as the 5 axis image stabilization). While the a7r came in weighing 407g (14.36 oz), the a7rII is now 582g (1lb 4.5 oz).
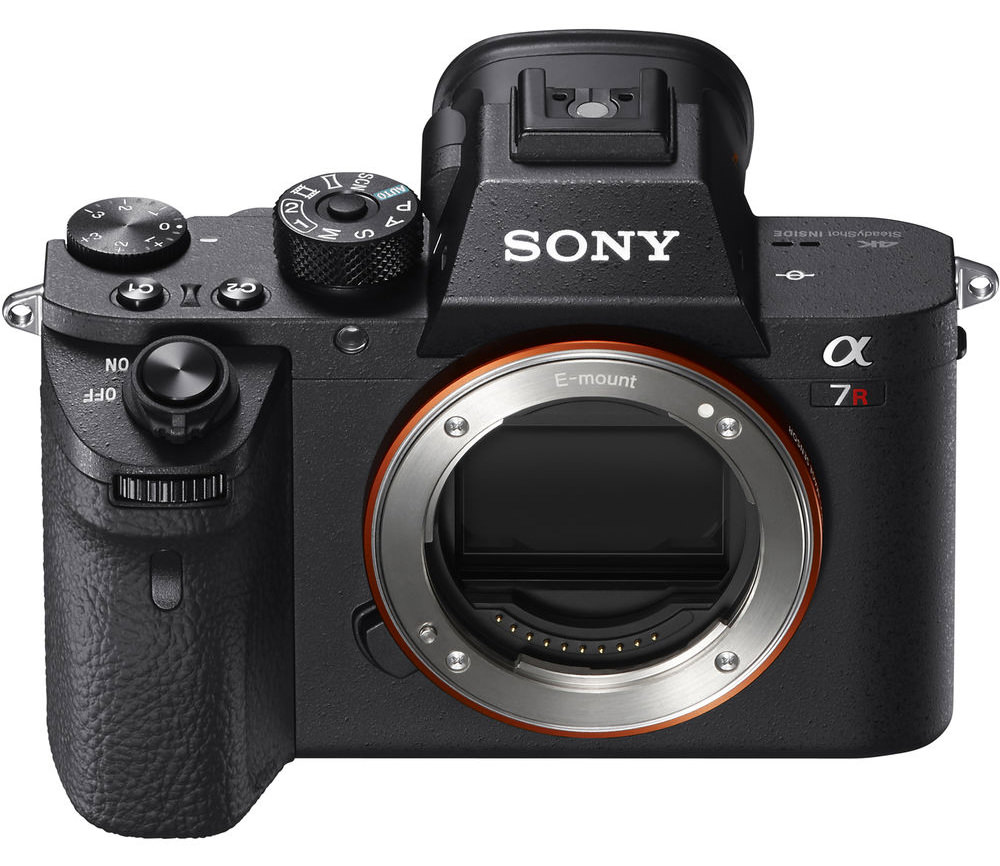
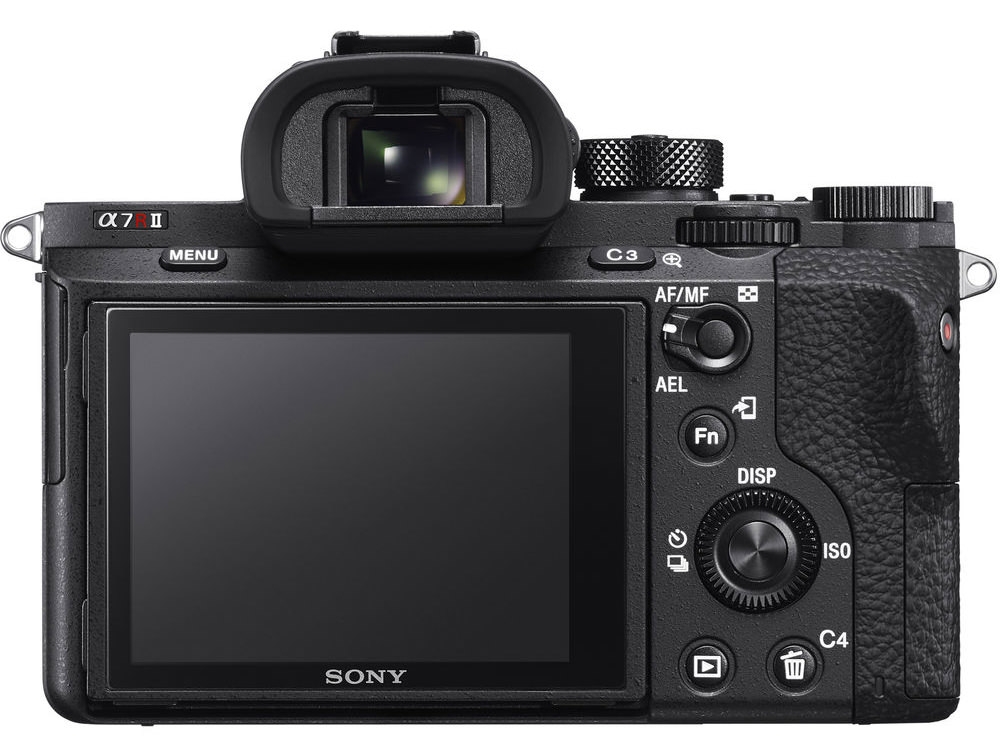
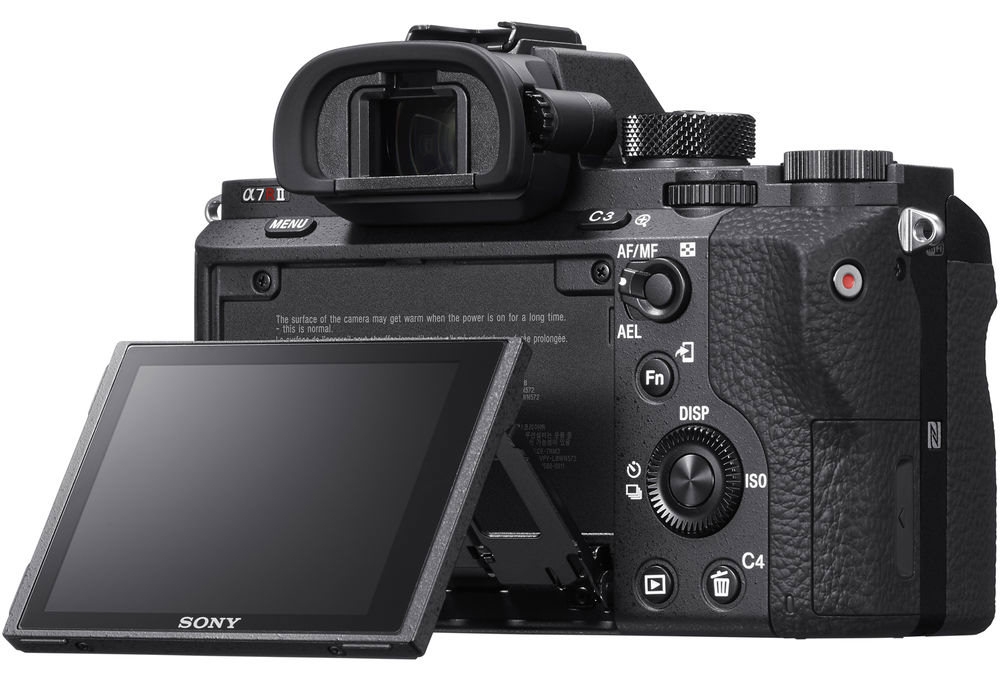
The new body style not only mimics the second generation a7II, it is virtually identical (.6mm difference). In fact it is so similar, that you can easily switch L bracket plates between the two (If you don’t know what an L Bracket is don’t worry, I will cover it later in this review). But while all this sounds fine on paper…the real question is how does it actually feel in your hands? How does it handle? Personally I LOVE the new ergonomics found in the second generation line of mirrorless bodies from Sony. The grip itself is much more pronounced now, making it easier to to hold on to. The weight increase, while not a significant amount, does make the camera feel a bit more solid. It also doesn’t hurt that Sony updated the magnesium alloy body that not only looks great with its textured matte black finish but feels like it can take more of a beating. The first generation body was prone to scratches and it looks like that is no longer the case. Like the last generation, the a7rII comes with a tilting rear LCD screen. It still doesn’t have touch support, but does come in handy when you find yourself using the camera at an extremely odd angle.
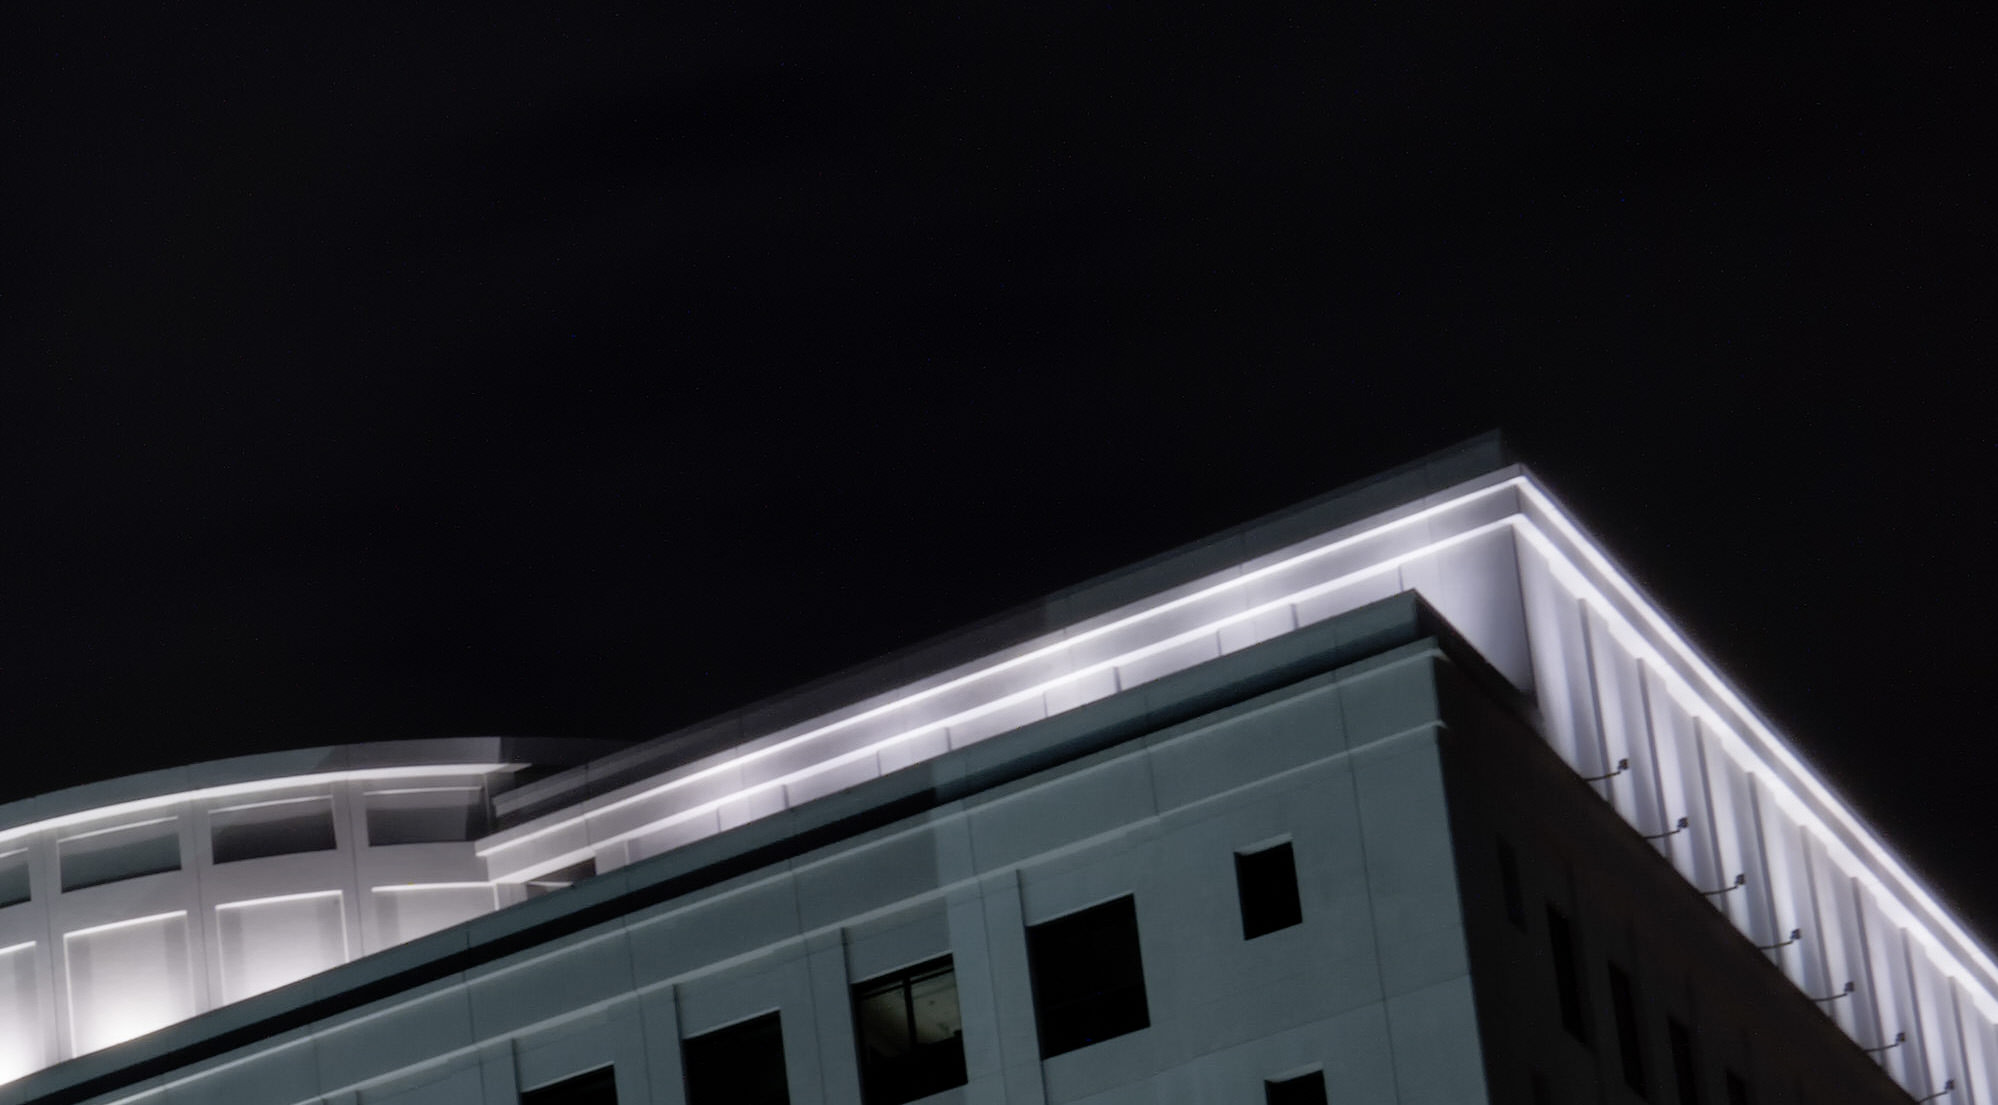
Lastly, we need to talk about weather sealing. While the a7rII is not weather/water-proof, it did get an upgrade in the weather sealing department. While there are certainly stories of Sony a7 bodies getting damaged by water on the internet, I personally haven’t had a single issue. This is surprising because I am often working in far more extreme environments than 99% of photographers out there. Regardless, I feel confident that the a7rII can handle some nasty weather although I personally wouldn’t let it get hit by an ocean wave if I had a choice 🙂
Handy Accessories for the a7rII
Like with most cameras, there is a handful of accessories that you can optionally purchase that may or may not make your life exceptionally easier when it comes to picking up the Sony a7rII. Here is a short list of a few of my favorites.
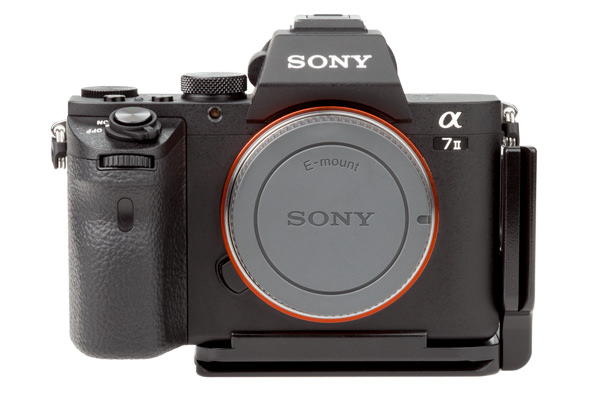
L Bracket
One of my favorite accessories for any camera, let alone the a7rII, is an L bracket. This handy little add-on allows you to easily move your camera from vertical or horizontal with ease while working with a tripod that accepts the “arca swiss” standard. No more having your tripod lean over to the side when you want to shoot vertical images anymore! The good news…if you own the Sony a7II, the a7rII has roughly the same exact body style, allowing you to swap your L bracket between the two. While there are few options in this space, I prefer the RRS brackets. While costly, they have incredible CS and are made of the best material (manufactured here in the US as well).
In addition to the a7II L bracket from RRS, on my other a7R II I am using one of the Neewer L brackets which cost less than $25. While I prefer the look and feel of the RRS bracket, it is hard to ignore the price savings found with the Neewer version on Amazon.
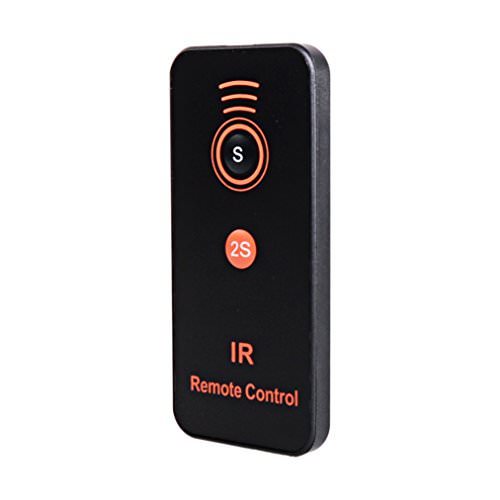
Wireless Remote
While the shutter delay system on the a7rII is drastically better than the original, there might be times when you want to use a remote control to take a photo. This is especially handy with long exposures and required for “bulb” use when you need to take images longer than 30 seconds. However instead of picking up Sony’s own remote (which is pretty expensive), I prefer the Foto & Tech wireless remote, found on Amazon for $9.99. While made in China, I found the remote to be well built and very reliable. I picked up a few and keep them in my bag just in case.
Dual Battery Charger
Probably the most important accessory you can buy is a dual battery charger. Not only does the Sony a7rII come with two batteries (a nice touch Sony), but the camera does run through batteries a bit quicker than a DSLR (especially since the batteries are half the size). To overcome the challenge of having to constantly charge your batteries, I highly recommend picking up a dual battery charger.
While there are a few options available in this product space, my favorite by far is the Opteka Dual Battery Charger that uses interchangeable battery plates. Why? It is both smaller and lighter than its competition and it comes with an additional DC plug, allowing you to charge your batteries in the car as well as from a wall socket. The catch? It is hard to find a Dual Charger that fits the Sony NP-FW50 right out of the box. So what you need to do is buy THIS dual battery charger and then pick up two of THESE and simply swap the battery plates.
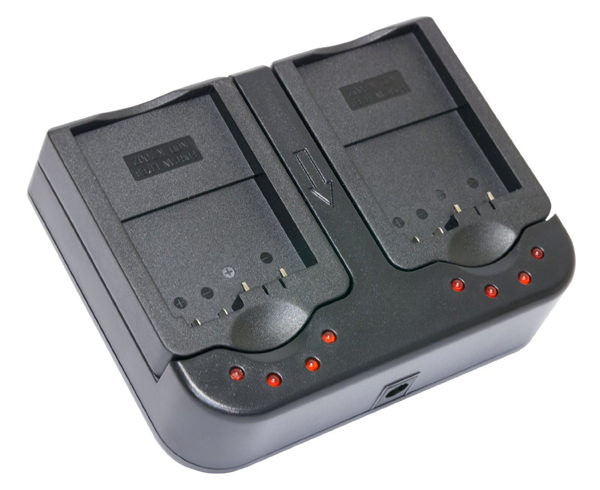
This setup is so effective, I often bring two dual chargers with me at once, allowing me to charge 4 batteries with ease at any given moment. For less that $30, it is a hard bargain to pass up on.
Is the a7R II a significant Upgrade?
Evolutionary or revolutionary? That is one of the most common questions that I have received since picking up the a7R II, and to be honest…it is an important one. It doesn’t matter if you are currently an a7R owner or if you held off on the a7r because you felt that its features didn’t work for you.
To get a sense for just how far the a7R II has come, let’s take a look at the following list of new features and specs. Some of these are fairly obvious while others are probably considered hidden gems. After reading through the list, I will let you come to your own conclusion.
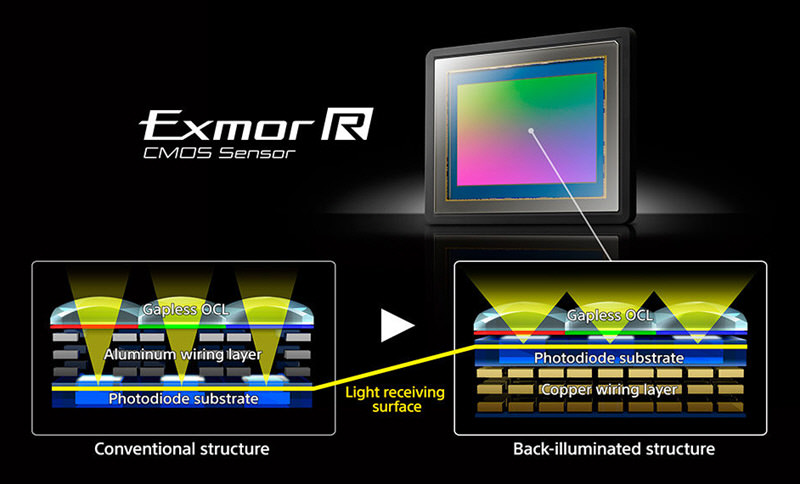
New 42MP Exmor R CMOS Backlit Sensor
Probably the most exciting update with the a7R II is its brand new 42mp backlit sensor (a first of its kind). So what’s so special about it? Aside from adding 6mp from the a7r’s 36mp sensor, it has tons of new technology inside that not only allows it to capture light more efficiently, but also speeds up data outputs by 3.5x (which helps with image buffering and AF). Additionally, it improves how the sensor handles noise, which is a big plus for such a high-resolution sensor. While I will be talking more about low light shooting later in this review, you can expect around one to two stops of improved ISO performance to the a7r.
Improved Ergonomics
Like the a7II, the a7rII has taken a more robust and well thought out body style. The shutter button is in a much more natural position, you have more custom buttons to work with and the grip of the camera is much more pronounced, making it easier to use for people with big hands, like me. In addition, it is better weather resistant to both water and dust, so you don’t have to worry about taking it out in extreme environments.
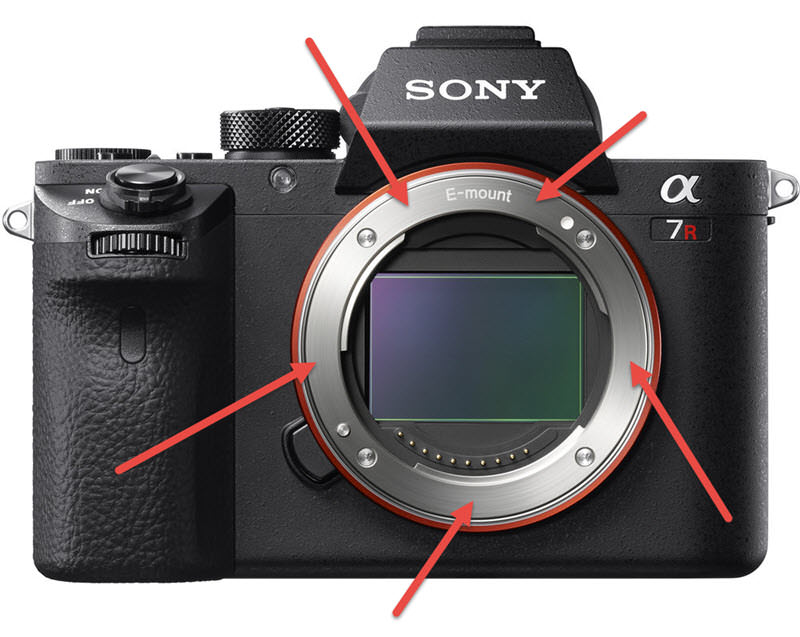
Stronger Lens Mount
One of the complaints of the Sony a7 & a7r was that the lens mount allowed for a loose connection, especially with heavier lenses. This was most evident with longer and or heavier lenses. Luckily Sony was quick to fix this with the a7s & a7II and now the stronger metal lens mount has come to the a7rII.
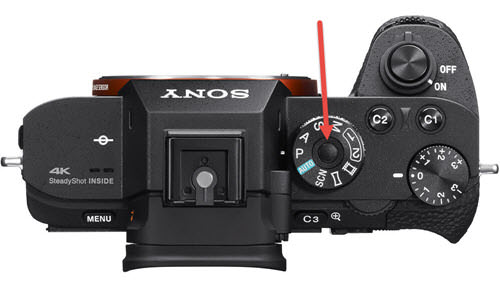
Locking Camera Mode Dial
For the first time with a Sony mirrorless camera, they have included a small locking mechanism with the camera mode dial at the top of the body itself. This will help you avoid accidentally changing modes, something I found myself doing often when pulling my camera out of my bag.
399 Point AF System
There is no beating around the bush, the AF found on the a7r wasn’t great. The camera itself was fantastic, but mostly if you relied on manually focusing your images like I do 99% of the time for my landscape work. This being said, the new AF system on the a7rII is mind boggling good. Not only do you get 399 AF points that cover a wide spectrum of your viewfinder, but the system itself is snappy, fast and accurate…a challenging feat with a 42mp sensor no doubt. I will cover this in more entirety later in the review.
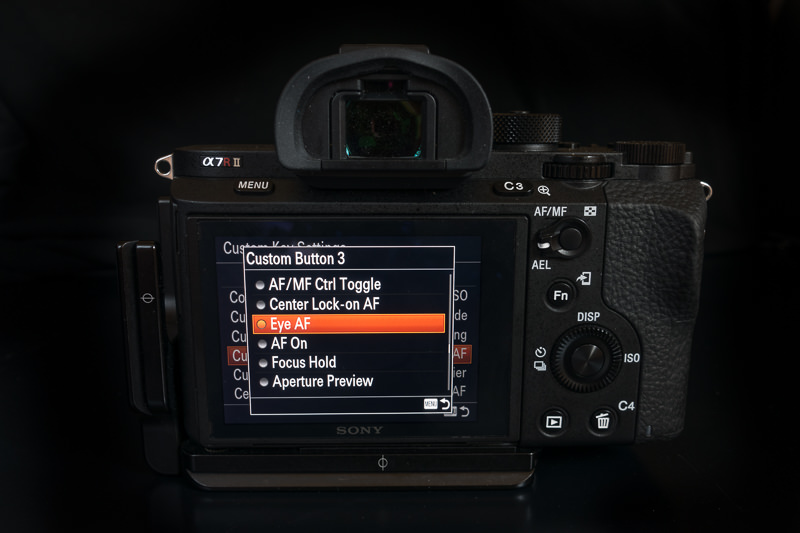
Eye AF
One of the most impressive features that isn’t being talked about nearly enough is the new Eye AF system that will blow portrait photographers minds! Essentially how it works is that when engaged, the AF system on the a7R II will constantly be searching for eyes throughout your image. When it finds one (or two) it will automatically start to continually focus on them, even as you move your camera around or your subjects move throughout your frame. I simply can’t stress just how incredible this feature is!
AF Works w/ 3rd Party Lenses
Not only does the a7rII work with 3rd party lenses…it works REALLY well. The new AF system allows you to use its robust AF technology even when connecting most 3rd party lenses. Have that Canon 70-200 and want to use it to shoot wildlife with your new a7rII…no problem. Focus tracking and continual focus both work!
5-Axis SteadyShot Stabilization
Carrying over from the a7II, the a7rII also gets 5-Axis in-body stabilization. What does this do? Essentially it allows you to shoot at lower shutter speeds without having camera shake causing your images to be “blurry”. Do note that this doesn’t keep your subjects from moving…but rather counters for some potential movement of the camera while shooting 😉
New XGA OLED EVF
When you look through a viewfinder on a mirrorless camera, you are looking at a digital version of what your camera is seeing, which is different from an optical viewfinder found on DSLRs. Because of this, the quality of the EVF (Electronic Viewfinder) is important. With the a7rII, Sony has included a new XGA OLED Tru-Finder with Zeiss coating. The resulting 2,359,296 dot screen with .78x magnification for extra wide viewing is gorgeous and much better than before.
* Be sure to change the “Display Quality” setting from “Standard” to “High” in the Menu System (Toolbox – Section 2) as this will give you max resolution in the EVF
Minimum Shutter Speed w/ Auto ISO
One of the features I missed the most after moving to Sony from my Canon bodies was the ability to select a minimum shutter speed when using the AUTO ISO feature. Why is this important? Let’s say that you are shooting portraits and find yourself in aperture priority mode. You want your f/stop to remain constant at f/2.8, but you know that your images will be fuzzy if you shoot below 1/50th of a second. By setting your minimum shutter speed at 1/50, the camera knows to increase the ISO of your shoot so that you never drop below that mark. That way your images can keep as low of ISO as possible while still working with the aperture and shutter speeds you prefer.
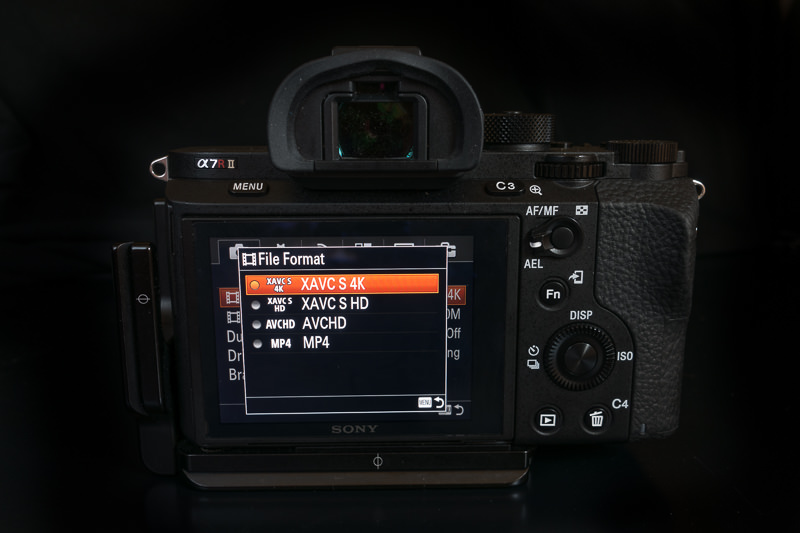
4k Video
While most photographers don’t care all that much for video, the truth is that video production with small cameras is big business. For the first time with a Sony mirrorless full frame camera, you can record 4k video internally onto your SD card (with the a7s you had to have an external drive). It also doesn’t hurt that the quality is top notch. More on this later!
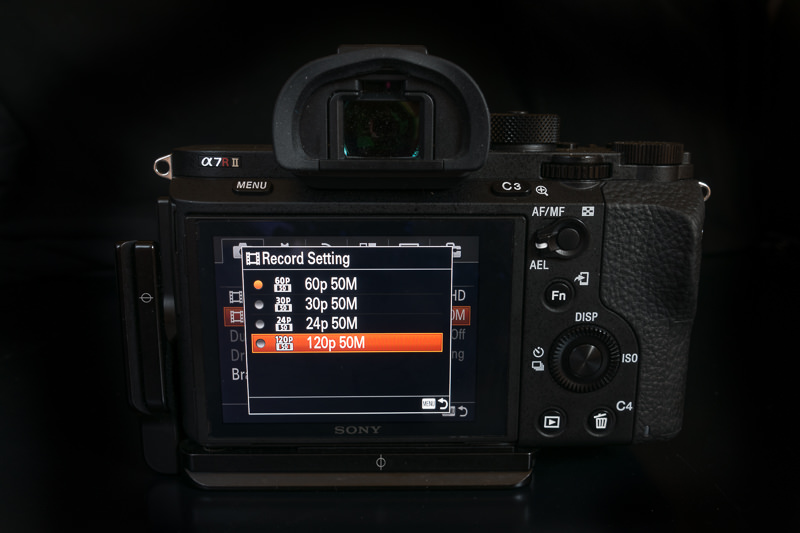
Slow Motion Video
While it is a little bit of a gimmick, it is pretty nice to be able to shoot 120fps video with the a7rII. The catch, your resolution drops down to 720p. Make in the next version we will get 1080p 😉
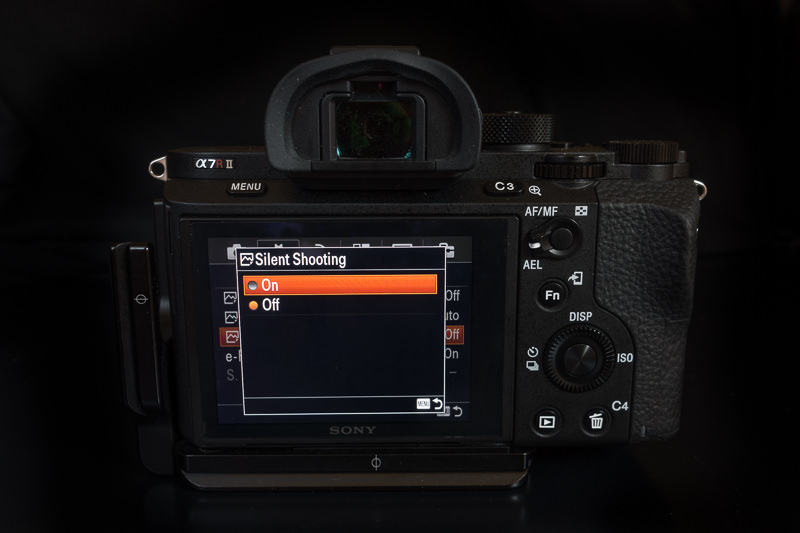
Silent/Electronic Curtain Shutter Modes
One of the drawbacks of the a7R was not only how loud the shutter was, but how much force it brought with it every time it closed. This would cause issues with longer lenses, causing the shutter to shake the camera, sometimes causing an image to be out of focus, even when using a tripod and remote control. The a7rII now has both a silent mode as well as an electronic first curtain shutter mode, which cuts the vibrations of the shutter down by 50% from the 1st generation. Long story short…no more shutter shake!
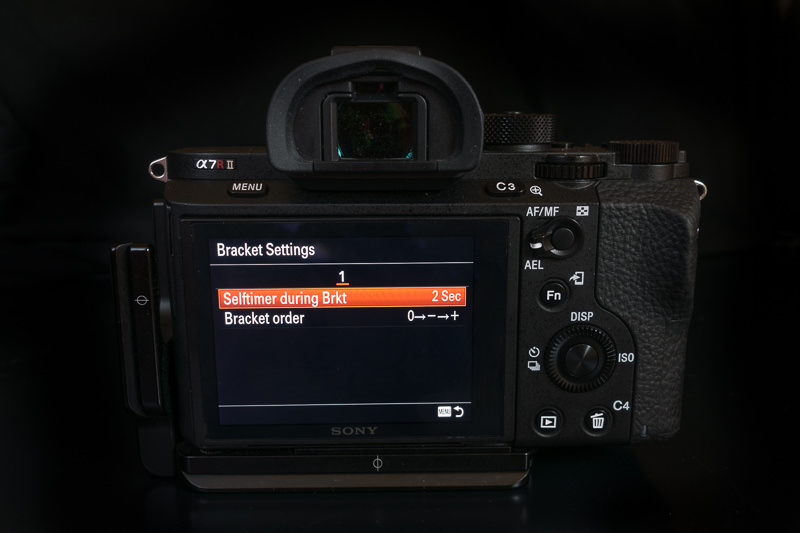
Shutter Delay While Bracketing
One of the weaknesses of the menu system found in the a7 series of cameras was the inability to separate shutter delay with bracketing. Both options existed in the same menu section, allowing you to only choose one or the other, but not both. No more. Now you can easily bracket your images with a shutter delay, allowing you to avoid any unnecessary camera shake.
Better Battery Life + Two Batteries
When it comes to mirrorless cameras, battery life is generally not the reason most photographers make the switch from a DSLR. Because the bodies are smaller, so are the batteries. Mix that with the fact that mirrorless cameras are all digital and you get a battery that doesn’t last as long as the DSLR you might be migrating from. But at least with the a7R II, you not only get two batteries in the box (instead of one) but you get a little more battery life as well. How much? Roughly 30 more images worth when compared to the a7r. Of course, if you are shooting a lot of 4k video, the processing power required to do so will eat your batteries much quicker. Just a heads up!
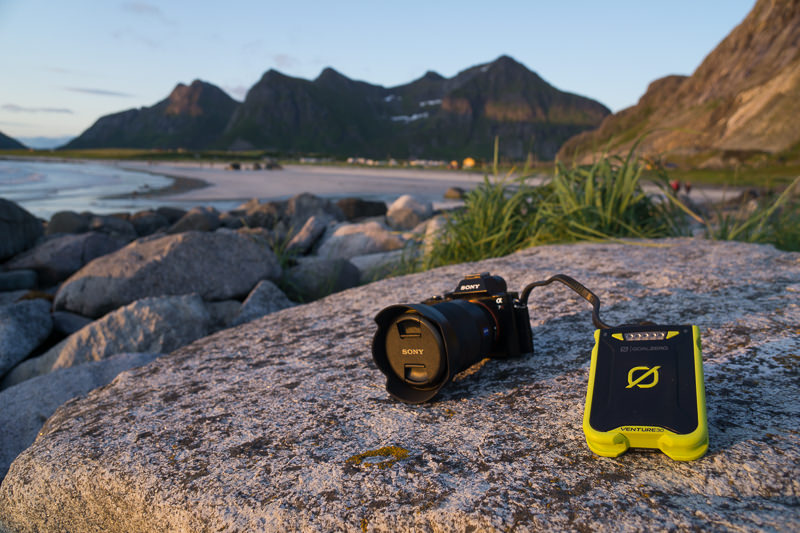
Charge Camera via USB While Shooting
One of the side effects of having smaller batteries that don’t last very long is the fact that you can only continuously shoot for as long as your battery lasts. This proved to be a short fall for many time-lapse photographers who often need hours of shooting. With all previous a7 Sony cameras, the moment you plugged in a micro USB cord to charge your camera, the camera would go into USB mode and shut down all functionality. Not so much with the a7rII. Now you can bring external power supplies, such as a Goal Zero Venture 30, set up your time-lapse, plug in your camera to the power brick and shoot to your hearts content.
Embedded Copyright Info
Lastly, photographers finally have the ability to embed their name and copyright info into each image. This can help if your camera is ever stolen or to help show that you are in fact the copyright owner of a given image taken with the a7rII.
Let’s Talk About RAW
It seems that no review of a Sony camera is complete without addressing the 10lb gorilla in the room. Yes…notice I said 10lb and not the 1000lb gorilla. When it comes to RAW files, Sony images are slightly different than those coming out of the likes of Canon or Nikon. This doesn’t have to do with sharpness, bokeh, color or image quality…but simply image data. Both Canon and Nikon output 14bit lossless RAW files, meaning that 100% of all image data is preserved with those RAW files. With Sony ARW files (including the a7R II) you are actually working with 11+7 lossy RAW files, meaning that some image data has been compressed in each of your images.
So what does this actually mean? For one, Sony RAW files are a bit smaller than its competition. For example, a 42.4mp ARW file out of the a7R II comes in between 40-50mb per image in comparison to a 50.6mp Canon 5DSR image that can get as large as 68mb per image. However in terms of negative effects of a compressed RAW file, you also have a chance to capture artifacts in your images in certain situations. How likely is this to happen? Pretty slim. In fact most cases you have to push/torture your RAW image file to see anything. RAW Digger, who wrote a story on this issue, even says, “In the vast majority of cases, the compression artifacts are imperceptible unless the heavy-handed contrast boost is introduced.” So what kind of artifacts are we talking about?
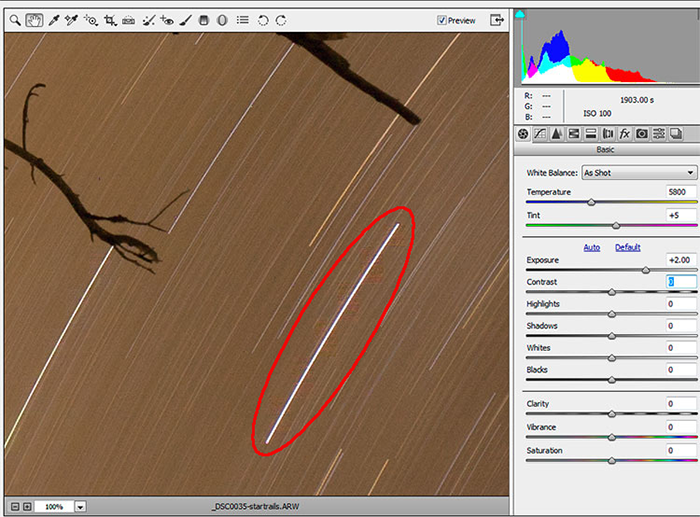
See that faint red color coming out of just one of the star trails on this image after exposure has been boosted by 2 stops on a high ISO/long exposure image. That is what this is all about. Now have I seen this phenomenon happen with any of my Sony Cameras (which includes over 45k images over the last 2.5 years)? Sadly not. That doesn’t mean that it can’t happen…just that I haven’t seen it.
So why am I bringing this up? For two reasons. 1.) There is a vocal minority of shooters that have been clamoring for Sony to allow for a true 14bit lossless RAW file (just like Canon & Nikon) 2.) As a photographer, I am always all for retaining as much image data as possible.
So while I happily welcome Sony eventually allowing all of us to shoot in 14bit lossless RAW, I would be remiss if I didn’t say that most people blow this “issue” way out of proportion. If I haven’t seen any artifacts in over 45k images with 5 different Sony mirrorless cameras, let alone the fact that I have not once had a client complain about the lossy RAW files I have continued to create my images from, it is hard for me to believe the hype surrounding this “issue”.
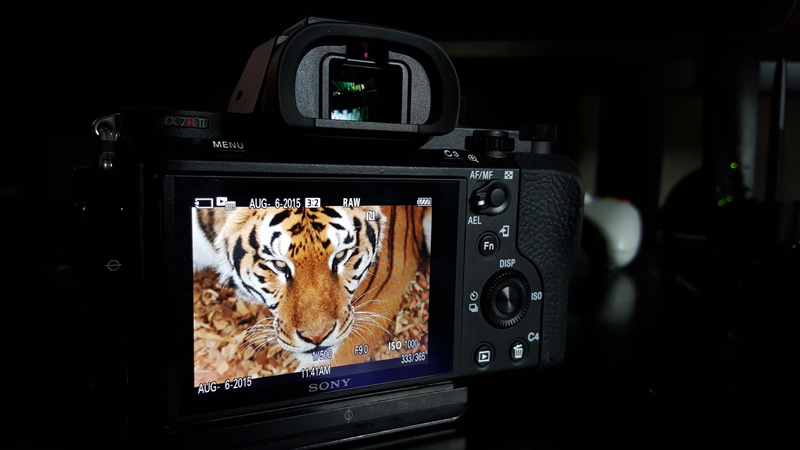
Using the EVF (Electronic Viewfinder)
One of the biggest challenges that face photographers moving from a DSLR to a mirrorless body is the simple act of getting used to using an EVF otherwise known as an Electronic Viewfinder. You see, with a DSLR you have an optical viewfinder. As light enters your camera, it reflects off a number of mirrors, bouncing around inside your camera until ultimately arriving at your viewfinder for your viewing pleasure. In contrast, mirrorless cameras (which, by the way, don’t have a mirror to reflect light) use an Electronic Viewfinder. When you point your camera at a scene, the computer inside your camera interprets what you are looking at, takes into account your exposure settings and displays a digital version of your scene (think of looking at a TV).
So how in the EVF found in the Sony a7R II? All in all, pretty awesome. The viewfinder itself is .5″ in size 2.36million-Dot XGA OLED Tru-Finder display. It has the world’s highest magnification at .78x which gives you an extra-wide field of view. It is also said to offer better visibility and sharpness from the center to edges of your images. As for the rear LCD, it is 3″ wide with a 1,228.8k-Dot monitor that tilts both up (107 degrees) and down (41 degrees) to help compose images in challenging situations.
In terms of downsides, there are two challenges you may have to overcome.
- EVF Delay – All digital viewfinders have a small delay (fractions of a fraction of a second) between interpreting the scene and displaying the digital version on your EVF and or rear LCD. This can become a problem when shooting fast moving subjects, such as with sports and wildlife photography, especially if you are coming from an optical viewfinder. You will have to learn to anticipate your subjects movements just a little faster than you may be used to. Luckily the new AF system (which we cover next) is pretty awesome.
- Low Light Viewing – Because of the new ultra wide angle viewing of the EVF, you might find the details of your image a touch mushy when zooming in 5x or more to check manual focus in low light. In these situations, I opt to move back to AF and let the camera do the hard work. With the new AF system, this is now a viable and dependable option.
Turning Off the EVF/LCD
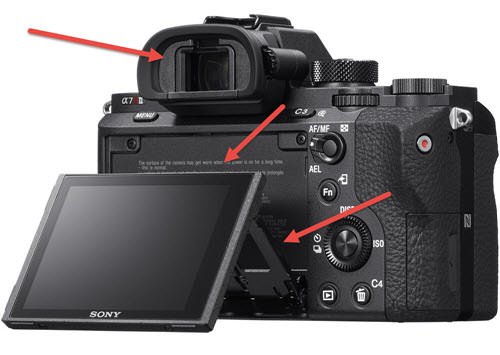
A much requested new feature found in the a7R II is the ability to completely turn off either the EVF or the rear LCD screen. With previous Sony cameras you could darken the screen you weren’t using but not completely turn off. This is an issue for those wanting to either save battery life or emit zero light when shooting starry skies at night. Here is how you do it:
- In the menu system, manually choose either “Monitor” or “Viewfinder” under “Finder/Monitor” (Gear – Section 4). Choose one.
- Assign a custom button to “Finder/Monitor Select”. Now when you press that button it will completely turn off screen you are not using. It will not be on at all…no black pixels…nothing. Just darkness.
The NEW AF System
One of the most important features of the Sony a7R II is its brand new AF system. For the first time in a FF body, you have over 399 phase detection AF points + 25 contrast detection AF points that altogether cover roughly 45% of the frame. This is a significant step up from the 1st generation a7R, which by all accounts didn’t have a robust and accurate AF system.
Luckily for all of us, the good news doesn’t stop there. The feature that is causing the biggest stir in the photo industry is the fact that the AF system on the a7R II actually allows you to utilize those 399 phase detection based AF points with many 3rd party lens with quick and responsive results, something that was not possible until now. While Canon, Leica M, and Sony A-mount users (among others) already have working lens adapters that allow you to connect your lens to the FE lens mount to take advantage of this feature, Nikon users will have to wait a bit longer as there is a new lens adapter coming out of China in the near future that is said to allow AF to work on its lenses with the a7R II.
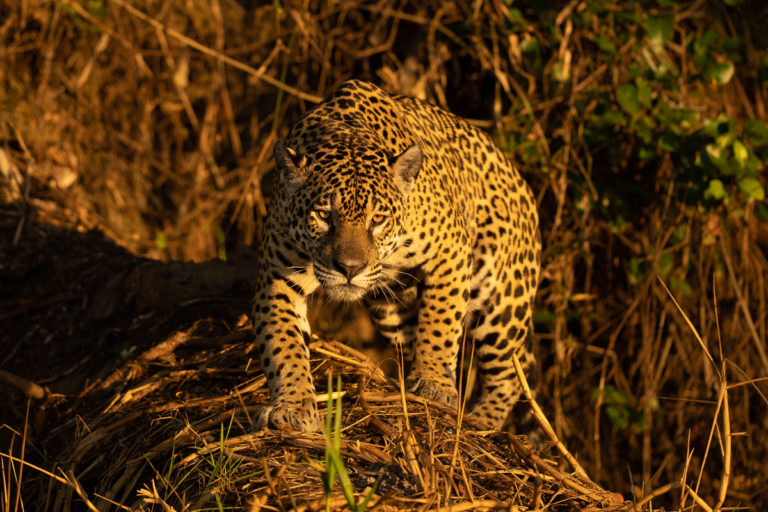
But regardless of all the specs and hype surrounding this potential game changing feature, how accurate is Sony’s new AF system and how well does it perform out in the field? While it won’t replace a Canon 1Dx or Nikon D4, the AF system is both quick and accurate, yielding some very impressive results, even in low light. While Sony never set out or marketed the a7R II to be a wildlife or sports camera, you can take great images shooting those subjects with it, especially once you fully customize your camera (menu/custom buttons).
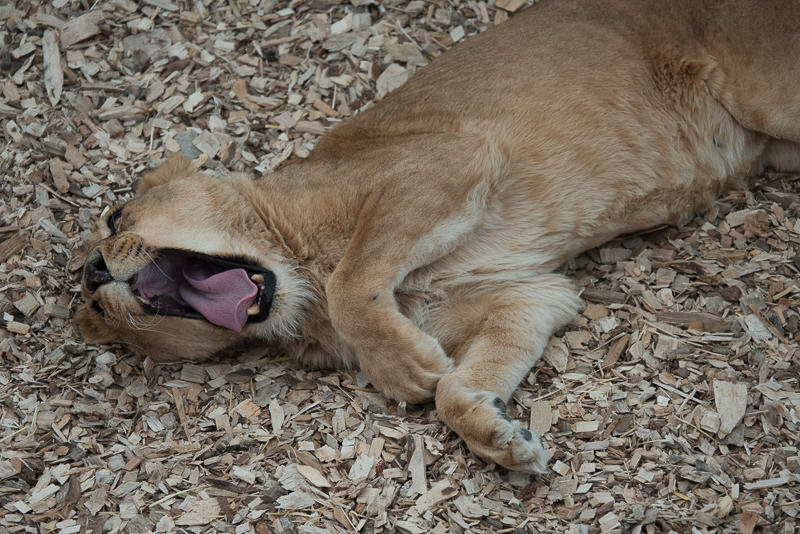
Single Shot (FE Lenses)
Where the AF system in general inside the 1st generation a7R was spotty to say the least, the Singe Shot AF system found on the a7R II is great. It is quick, accurate and works across the board with all native FE lenses. I have read of a few users having issues with back focusing with the Sony 24-70 f/4 FE lens, but I haven’t had any issues, so I have to take that info with a grain of salt.
Let’s look at a few examples of the Single Shot AF system working its magic…


Continual Focus (FE Lenses)
While it is nice to see that Single Shot AF works great, what about Continual Focus? What happens when you want to capture a moving subject. All in all, the system works well, although there are a few caveats. It is great to see the 399 AF points moving around the frame along with your subject. They dance and light up quickly and do a good job of following along, even with a fast moving subject. With lateral (side to side movement) and back movement (where the subject is moving away from you) I consistently got great results (often 4 images out of 5 with 5fps shooting).
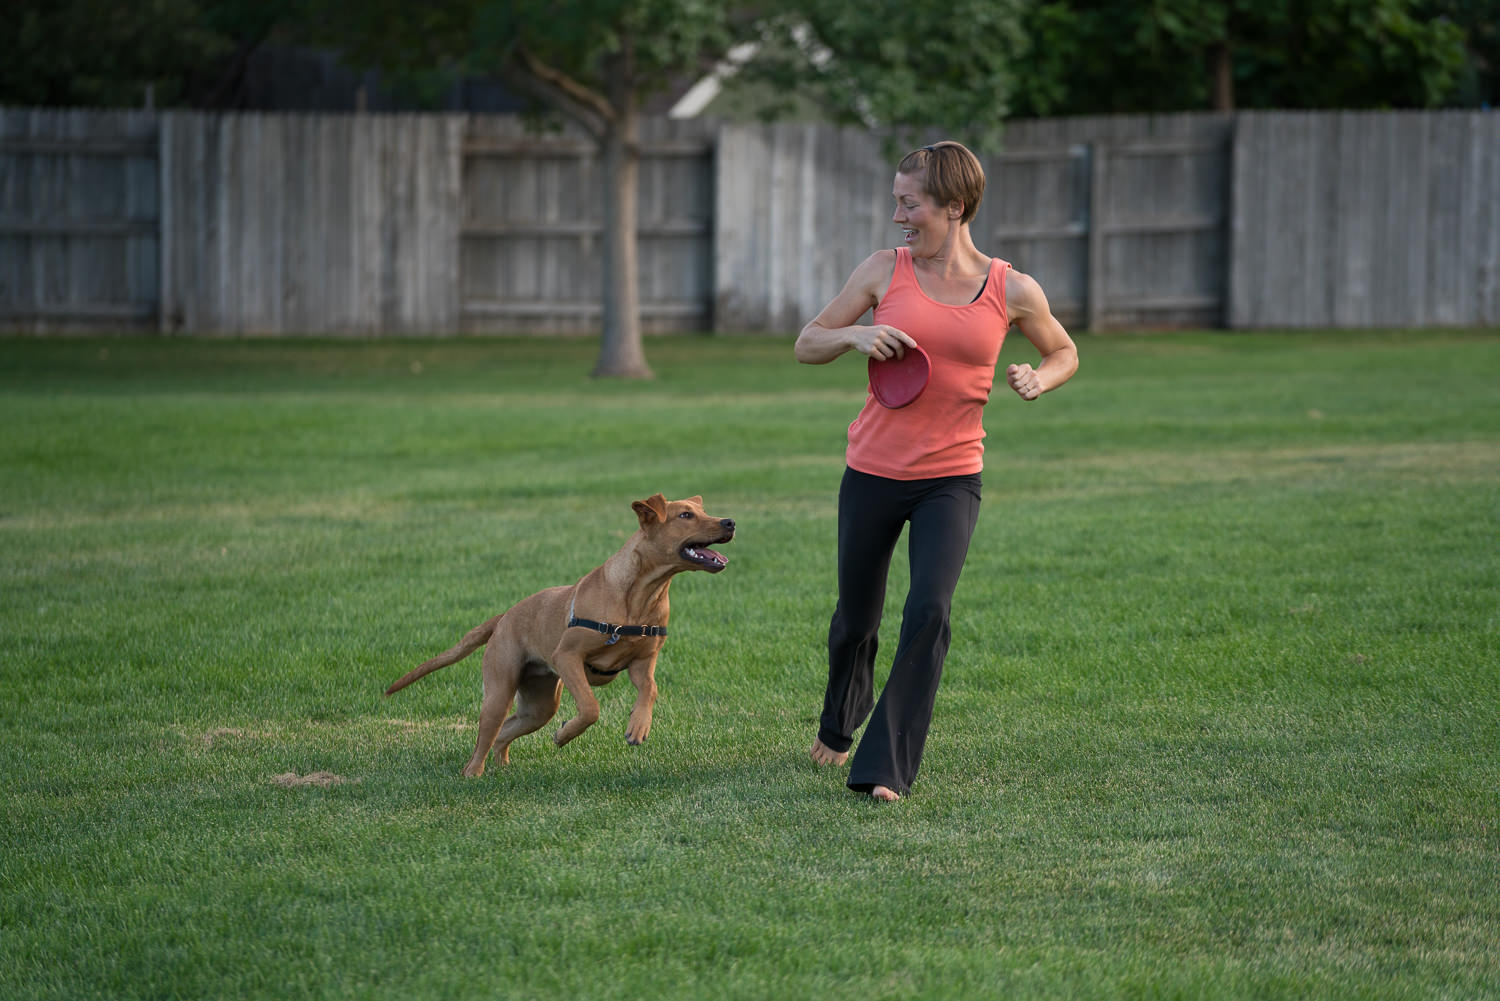
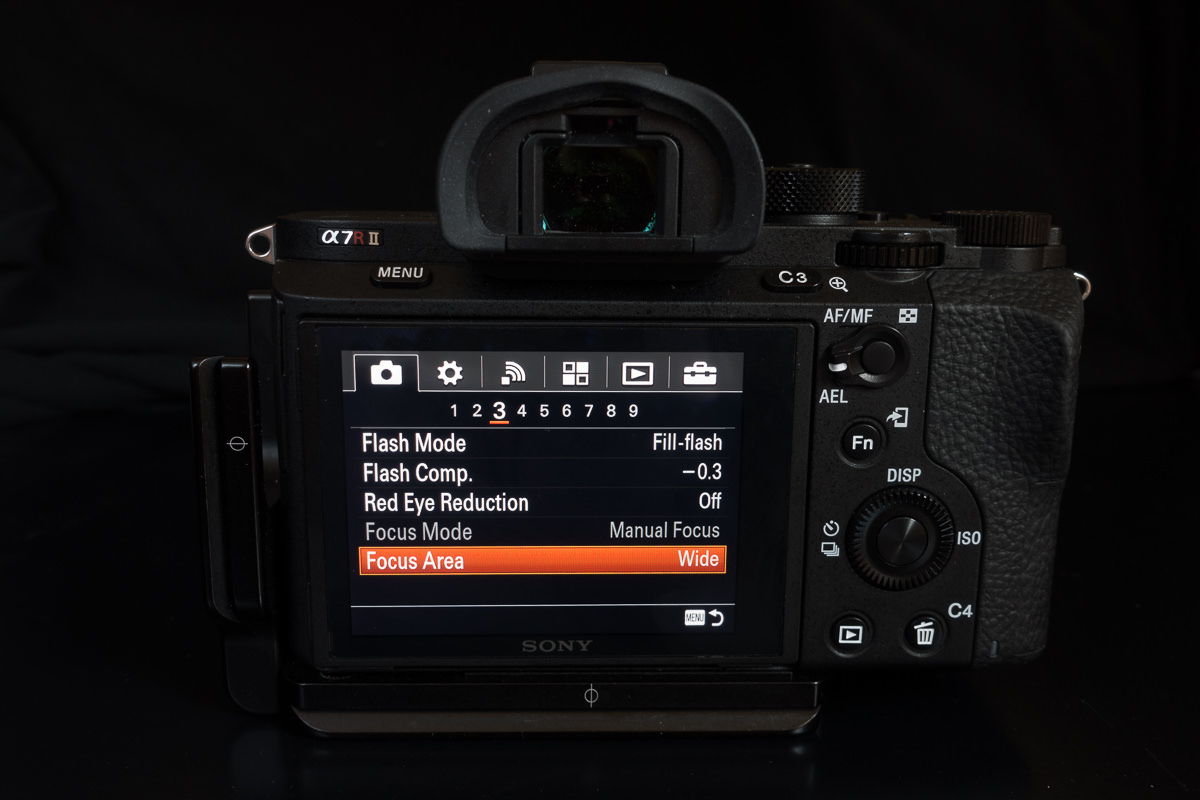
However with forward movement (where your subject is quickly approaching you), I did find that the closer the subject got to my camera, the more it struggled, especially with the AF area set to “Wide”. The problem wasn’t that it couldn’t focus, but rather that it couldn’t keep up with a fast-moving subject such as my 8-month-old puppy. While I would often come away with great images like this…
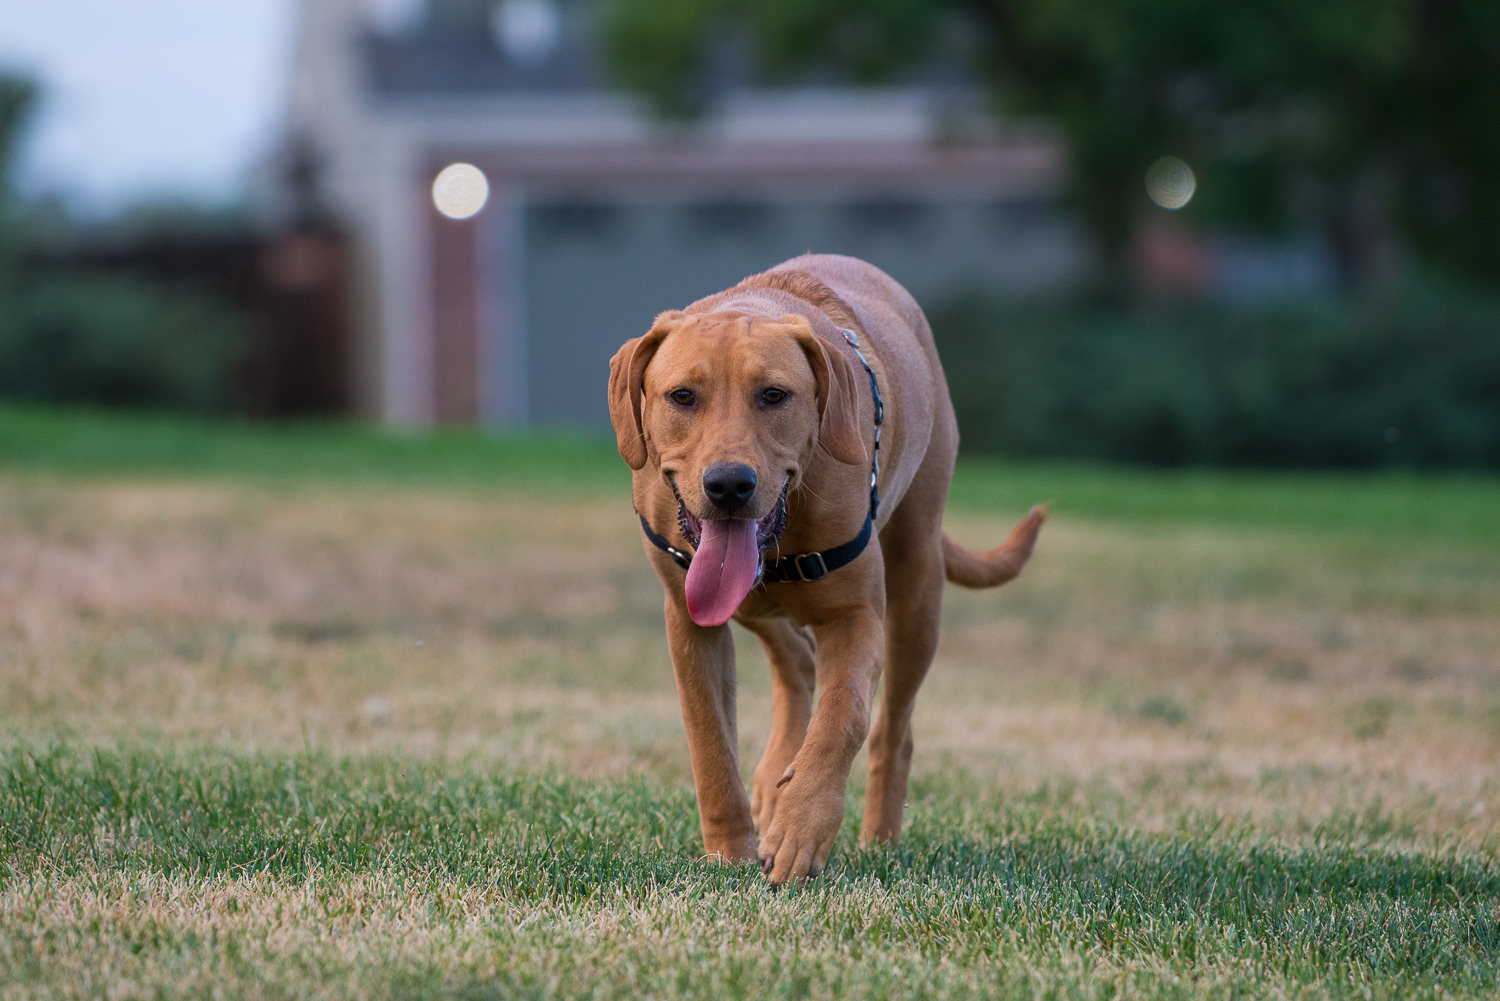
I also had some cases where the focus point was just a step behind the forward movement of Ela, capturing her body in focus rather than her head.
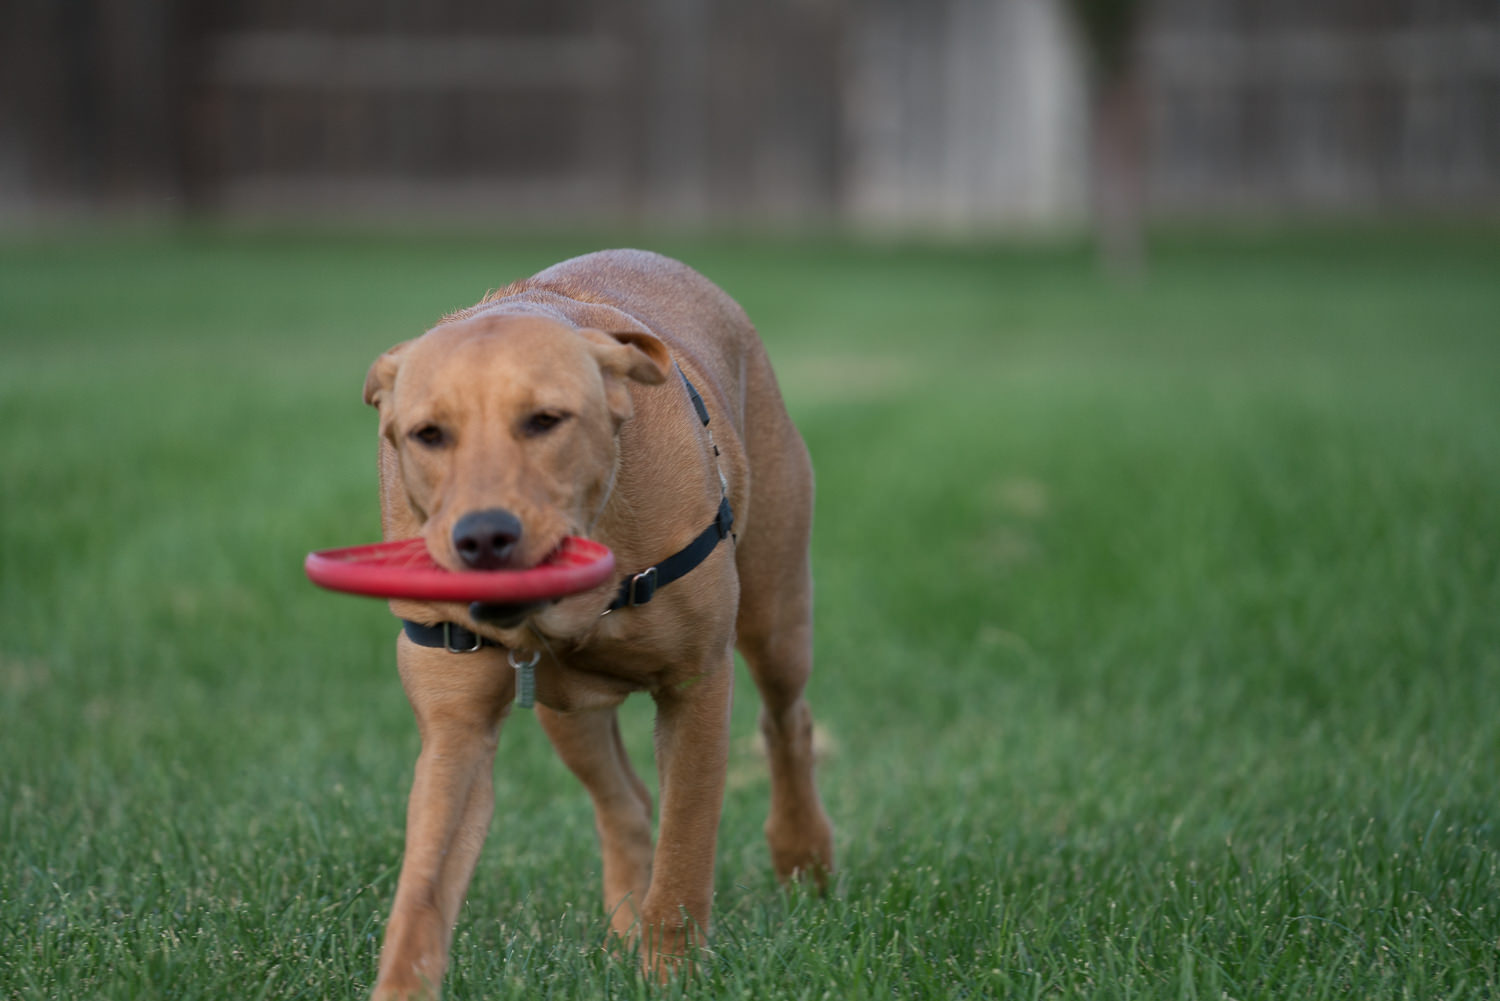
To solve this, you can adjust the Focal Area to “Center”, “Flexible Spot”, “Zone” or any of the “Lock On” options and then simply anticipate your subjects movement. Additionally you can find the “AF Drive Speed” and “AF Track Sensitivity” options in the camera menu (Camera Settings – Section 4) where you can experiment with the different combinations to find one that works for you.
Also be sure to check out my blog post “15 Tips For Getting The Most Out Of Your a7R II” where I talk about customizing your cameras buttons and getting the back button AF set up, both of which can help immensely with getting good results with continuous AF.
3rd Party Lenses
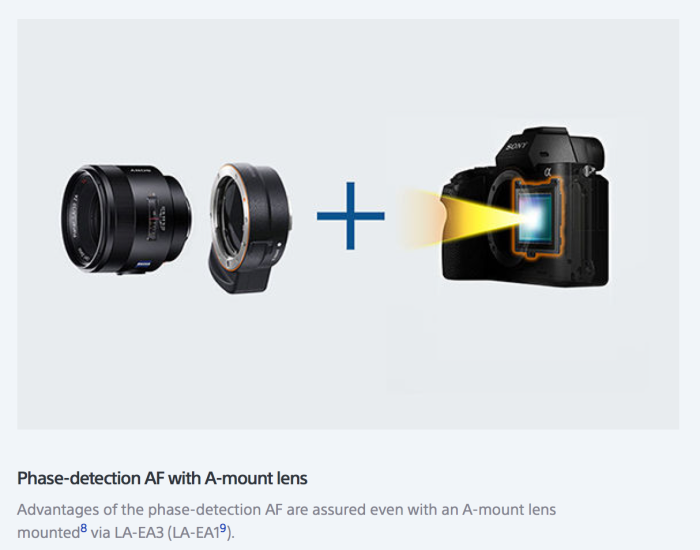
The #1 question on everyone’s mind is “How reliable is the AF system with 3rd party lens?”, Which is closely followed up by “What are the trade-offs?”. So let’s tackle these two questions right off the bat. All in all, the 399 point AF system on the a7RII works great with most 3rd party lenses, but not all. Any Canon lenses made before 2006 seem to struggle a bit as do some older Sony A-mount lenses. In the cases where the lens is compatible, both Single Shot and Continual Focus are exceptional, putting them pretty close to native FE lenses in terms of how accurate the AF system is, but not exactly the same.
So what then are the trade-offs for using a 3rd party lens? First, you lose the ability to take advantage of both the 399 phase detection AF points and the 25 contrast detection AF points at the same time. You have to pick one or the other. With native FE lenses, you get both working together, which might be one of the reasons FE lenses are a bit snappier in terms of AF. Additionally, you lose the ability to utilize all of the “AF Area” options in the menu system. With a 3rd party lens, you are regulated to “Wide”, “Center” and “Flexible Spot” options. You lose “Zone”, “Expandable Flexible Spot” and all of the “Lock On” options. Additionally you lose “Eye AF” which is a pretty awesome new feature with the camera that I will cover in more depth in just a few minutes.
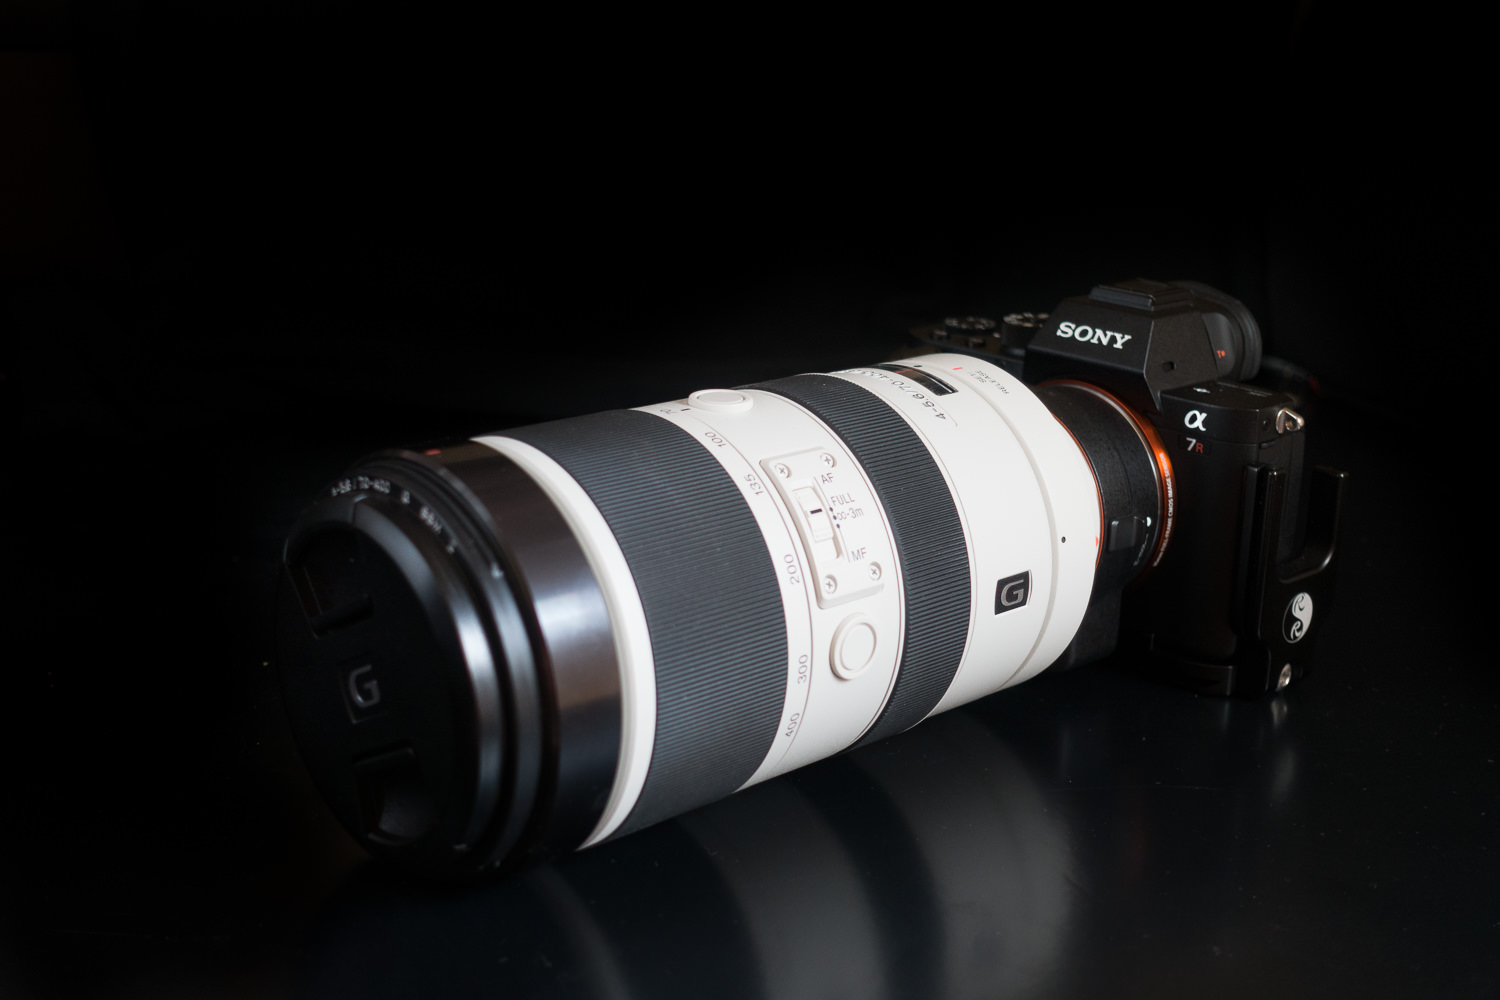
So with all this being said, let’s take a look at some of the results of using 3rd party lenses. For my tests, I used a Canon Metabones IV adapter (w/ the latest firmware) with the Canon 24-70 f/2.8 II and Canon 100-400L IS II along with the Sony 70-400 f/4-5.6 SSM II with the Sony LA-E3 adapter. (Click to Enlarge)
So how did I find each of the above setups? The Canon 24-70 f/2.8L II worked great. AF was fast and accurate and images using this setup were nice and sharp. The Canon 100-400L IS II, however, was a mixed bag. I got pretty good results from 100mm – 340mm but the system began hunting more for AF near the end of the 400mm spectrum. I still got a few nice images out of it, but it wasn’t nearly as nice to use as the Sony 70-400 f/4-5.6 SSM II. That setup with the LE-A3 adapter was great. Images were sharp, and AF worked very well…probably the closest to a native FE lens. One thing to mention though is that when the focal plane between two subjects was significant, the AF system took a second to figure out where to focus, but if the subjects were even remotely close to each other, it would snap on instantly and track all the way through the scene.
Ultimately I recommend that you do some homework and make sure any lenses you have are compatible first before you dive in expecting them to work. As a Canon shooter, check out this thread over on Fred Miranda that has a growing list of compatible lenses. For Sony shooters, Brian Smith (a fellow Sony Artisan) put together this excellent resource.
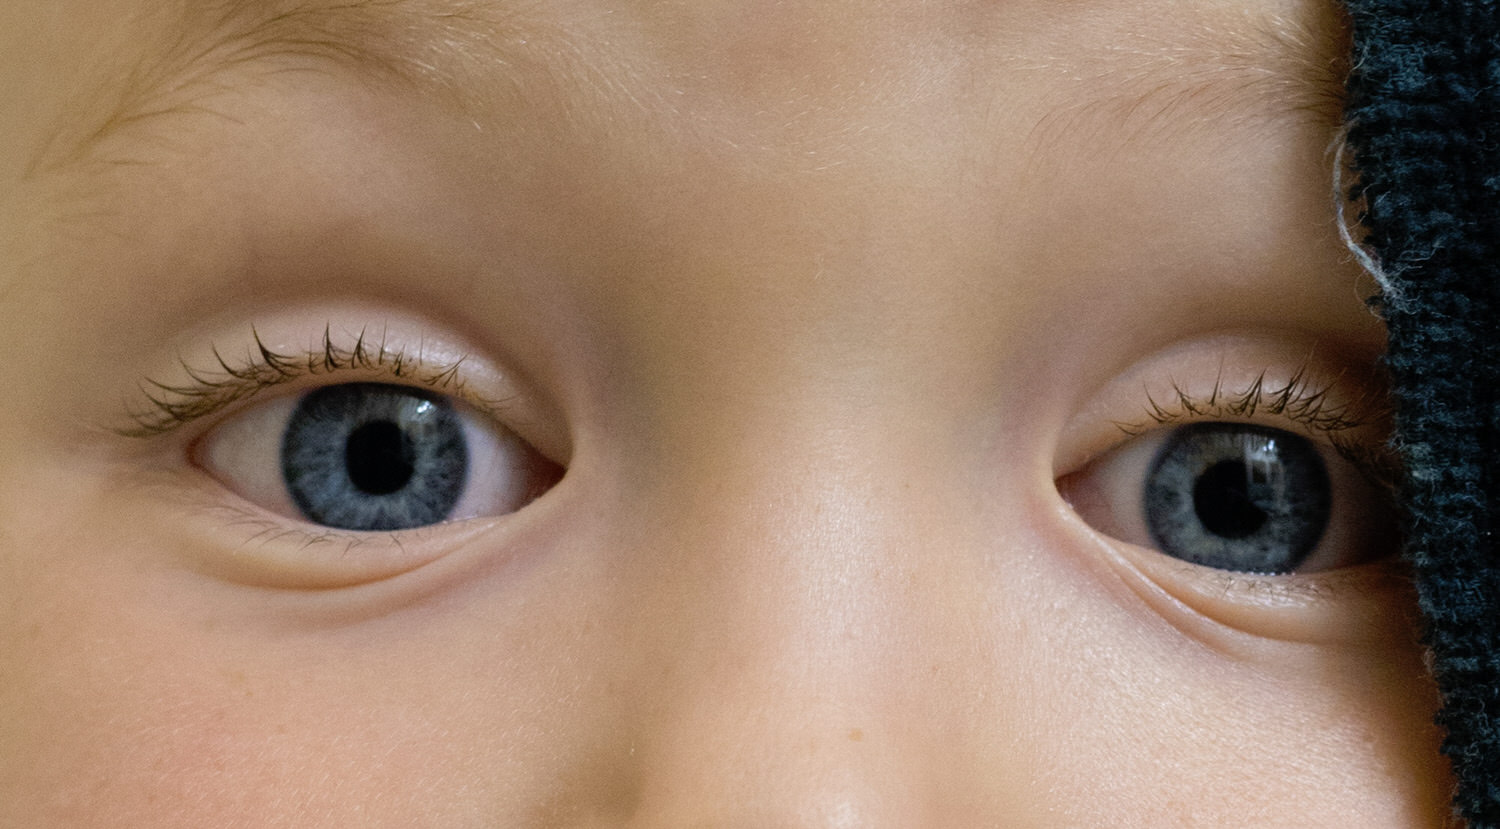
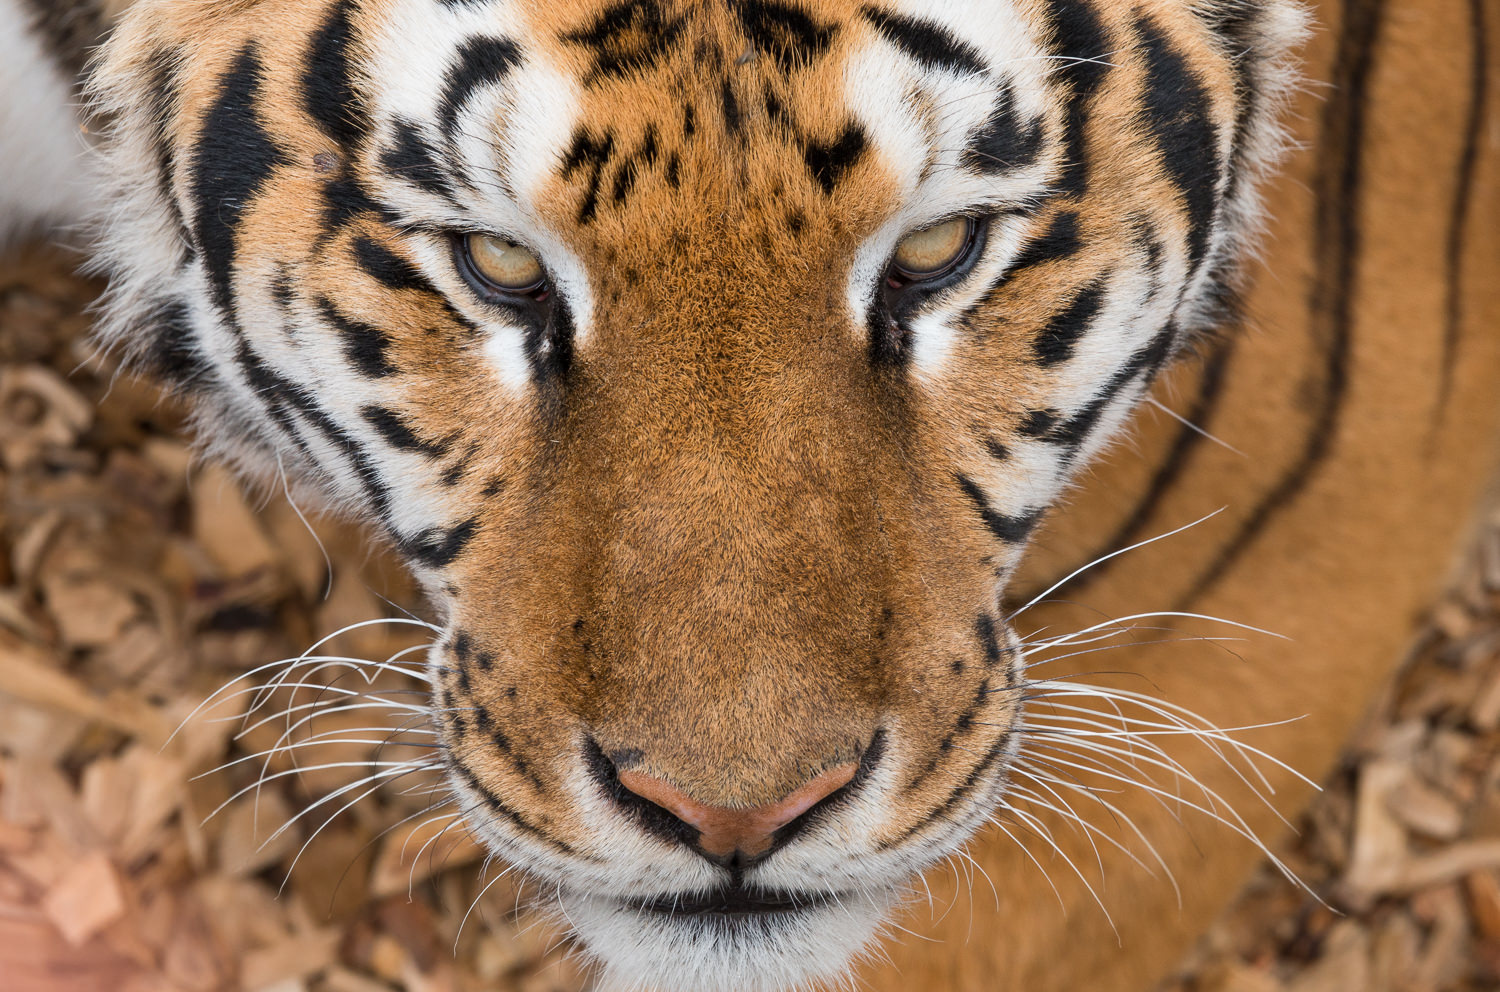
Eye AF
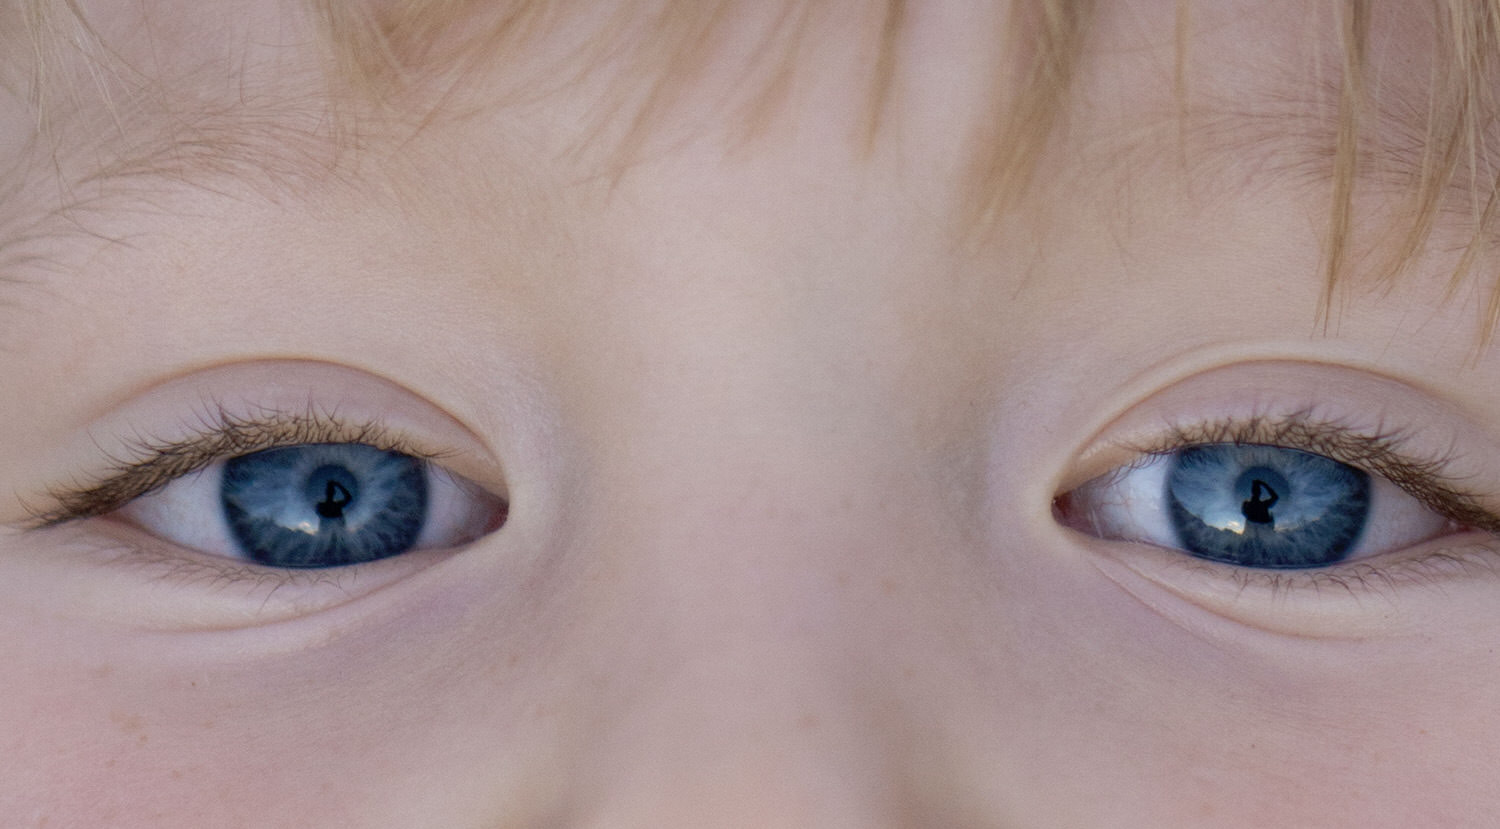
Easily one of the most overlooked AF features of the a7R II is called Eye AF. While it isn’t new (was found in the a7II), it is now vastly improved. When enabled, the AF system on the a7R II will constantly look for eyes. When it finds one (or two), the system will begin tracking the eyes with continuous AF, making sure that any portrait you take, always has focus locked in on the eyes. The coolest part of this is that the AF system will utilize all 399 phase detection based AF points to track the eyes as they move throughout your frame, allowing your subject to be in motion or for you to easily recompose your shot.
With the following example, I was running around with my 4 yr old son and quickly asked him to look at me. I pressed the Eye AF button (Custom Button 3 for me) and quickly snapped this shot. Needless to say the results speak for themselves!

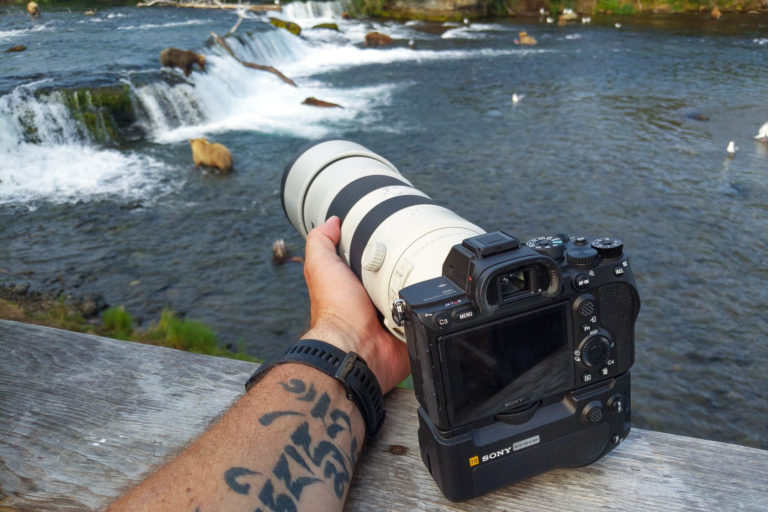
Using a Battery Grip
While I am a fan of the smaller and lighter form factor found in mirrorless bodies, I do make an exception when it comes to wildlife/sports photography (or anytime you are using bigger lenses). At 6″3 and 225lbs, I am a pretty big guy and with that I have pretty big hands. When you pair the a7R II and a large telephoto lens, such as the Sony 70-400 f/4-5.6 SSM II (w/ the Sony LA-E3 adapter) things get a little complicated. Why? With my right hand holding the a7R II and my left hand in charge of the zoom ring, I find that I put a lot of pressure on the center of my right palm as that is where the corner of the a7R II normally sits. This is made worse by the fact that I often twist my right and left arms towards each other, allowing the movement of the camera to assist for faster zooming. After an hour of shooting wildlife, I will easily have a bruise in the center of my palm.
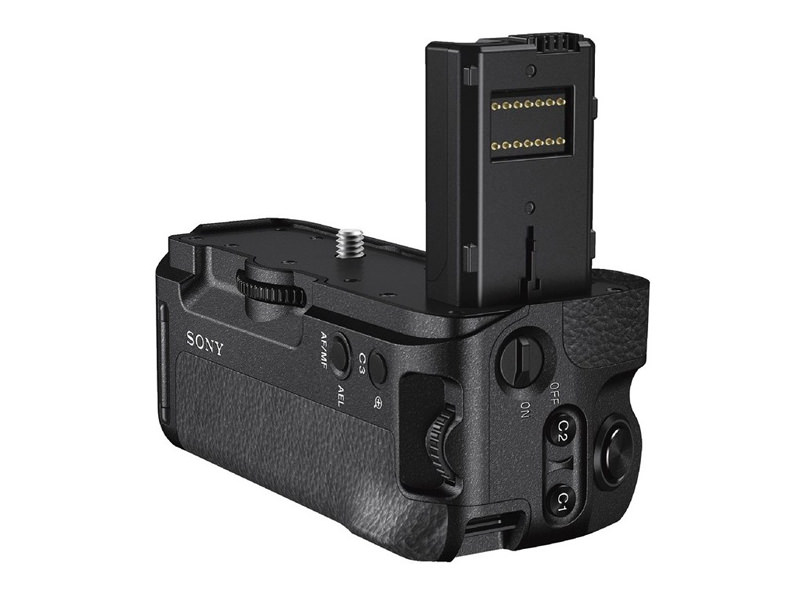
The solution? Pick up one of the battery grips for the a7R II and attach it only when needed. Not only to you get double the battery life and bit better weight balance when using a heavy lens, but your right hand will have more than enough space to fully grip the camera and battery grip, making the experience that much more comfortable.
When it comes to picking a grip, you do have a few options. While the official Sony grip looks and feels the best, it does come with the highest price tag. The other two 3rd party options have had some decent reviews on Amazon, but they also have a few quirks. Each of those two also come with a wireless remote as well.
- Sony VG-C2EM Battery Grip – $350
- Neewer MK-A7II Grip Replacement – $89
- Meike MK-A7II Grip Replacement – $65
* None of the grips allow you to charge both the batteries inside the grip by plugging a micro usb cord into the camera.
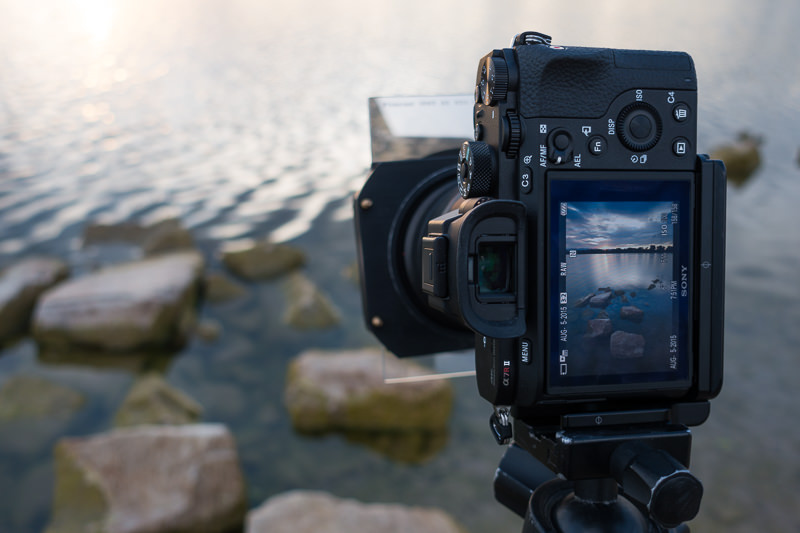
Low Light/Long Exposure Shooting
When it came to creating the a7R II, Sony had many challenges to face. The first was the choice of what sensor/sensor technology to use.Typically the more MP you cram into a sensor, the worse it performs in low light as ISO performance is usually sacrificed. In addition, Sony had to find a way to fit all of the new technology found in the a7R II (such as the 5-axis image stabilization) inside a relatively small camera body. With so much technology inside producing heat, this could lead to shutdown issues or additional unwanted noise during long exposures. The smaller the camera body, the more likely that heat can potentially play a role.
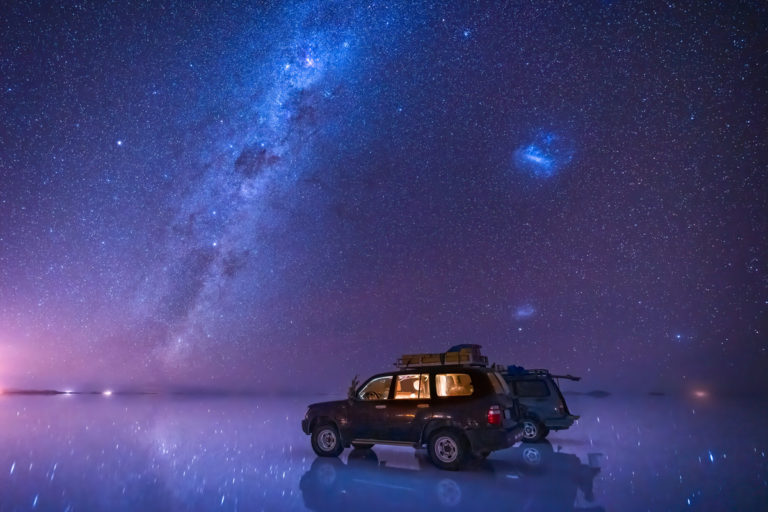
So how does the a7R II handle each of these challenges? Surprisingly well! With Sony’s new backlit CMOS sensor, they have managed to find the right sweet spot between increasing the megapixels of the camera to 42.4, while still offering impressive ISO performance. While I will hands down say that the Sony a7s is still the champion of low light shooting of any camera on the market, the a7R II can certainly hold its own in this regard. While the a7R maxed out at 1600 ISO for my tastes, I can see myself using ISO 6400 for long exposure night work with the a7R II (and higher for other situations). At those levels, I will still need to do a bit of noise reduction in post, but the results look great.
When it comes to the sensor handling heat, all of my long exposure tests yielded very positive results, especially at lower ISOs. But don’t worry, I plan on addressing the “hot pixels” and “confetti noise” issues that have been floating around the internet for the past week in a few minutes.
Let’s first take a look at a few examples…
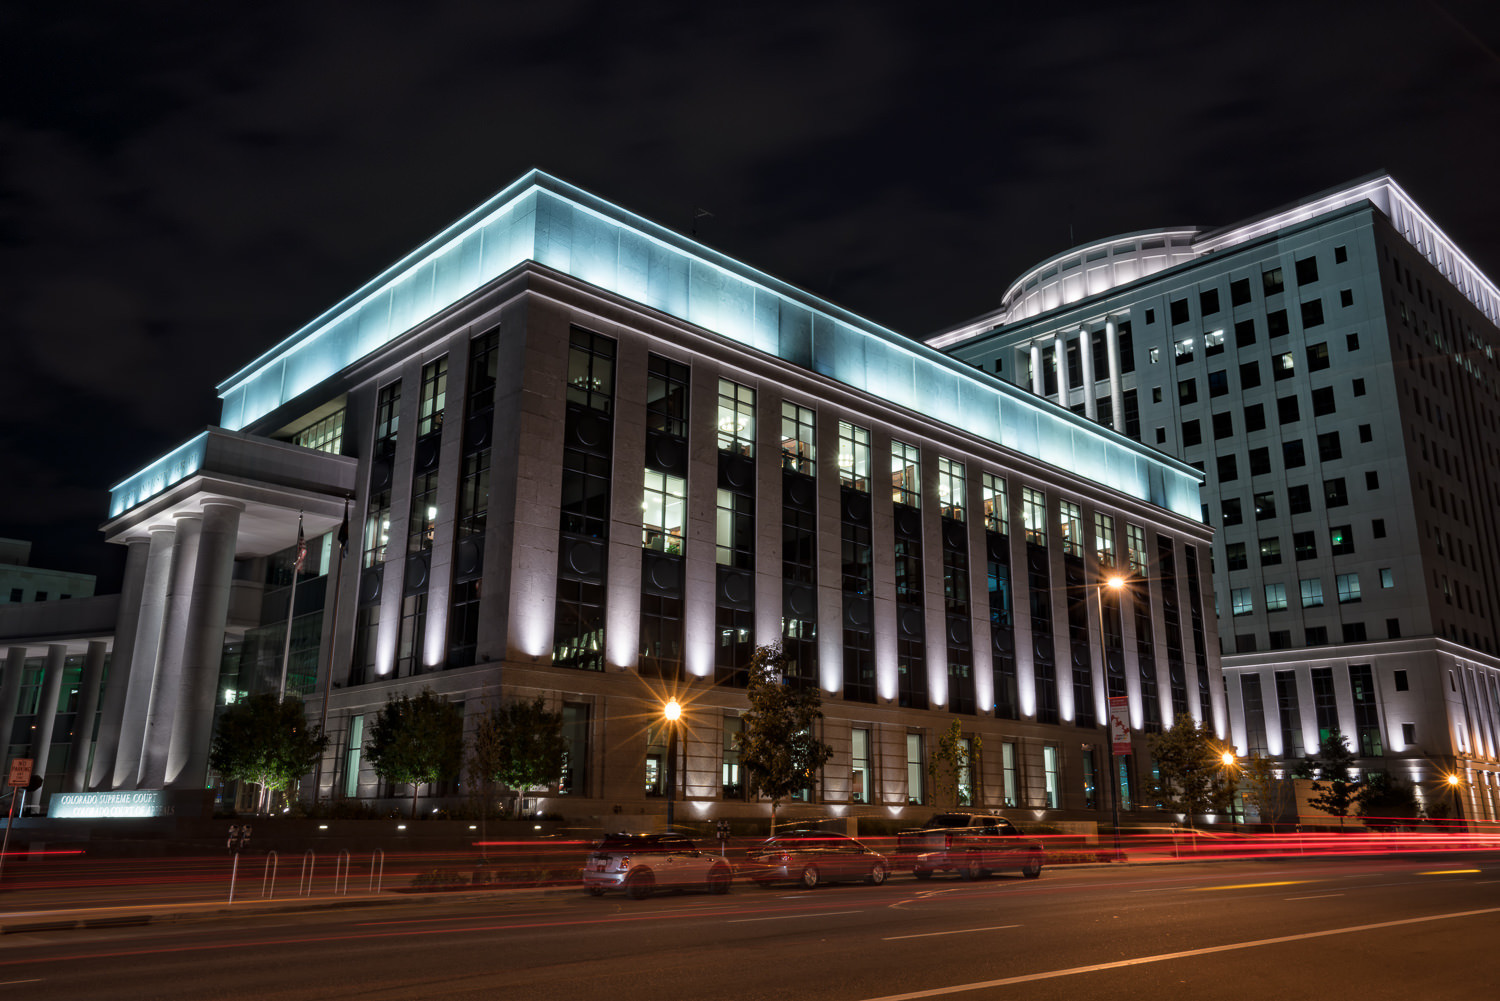
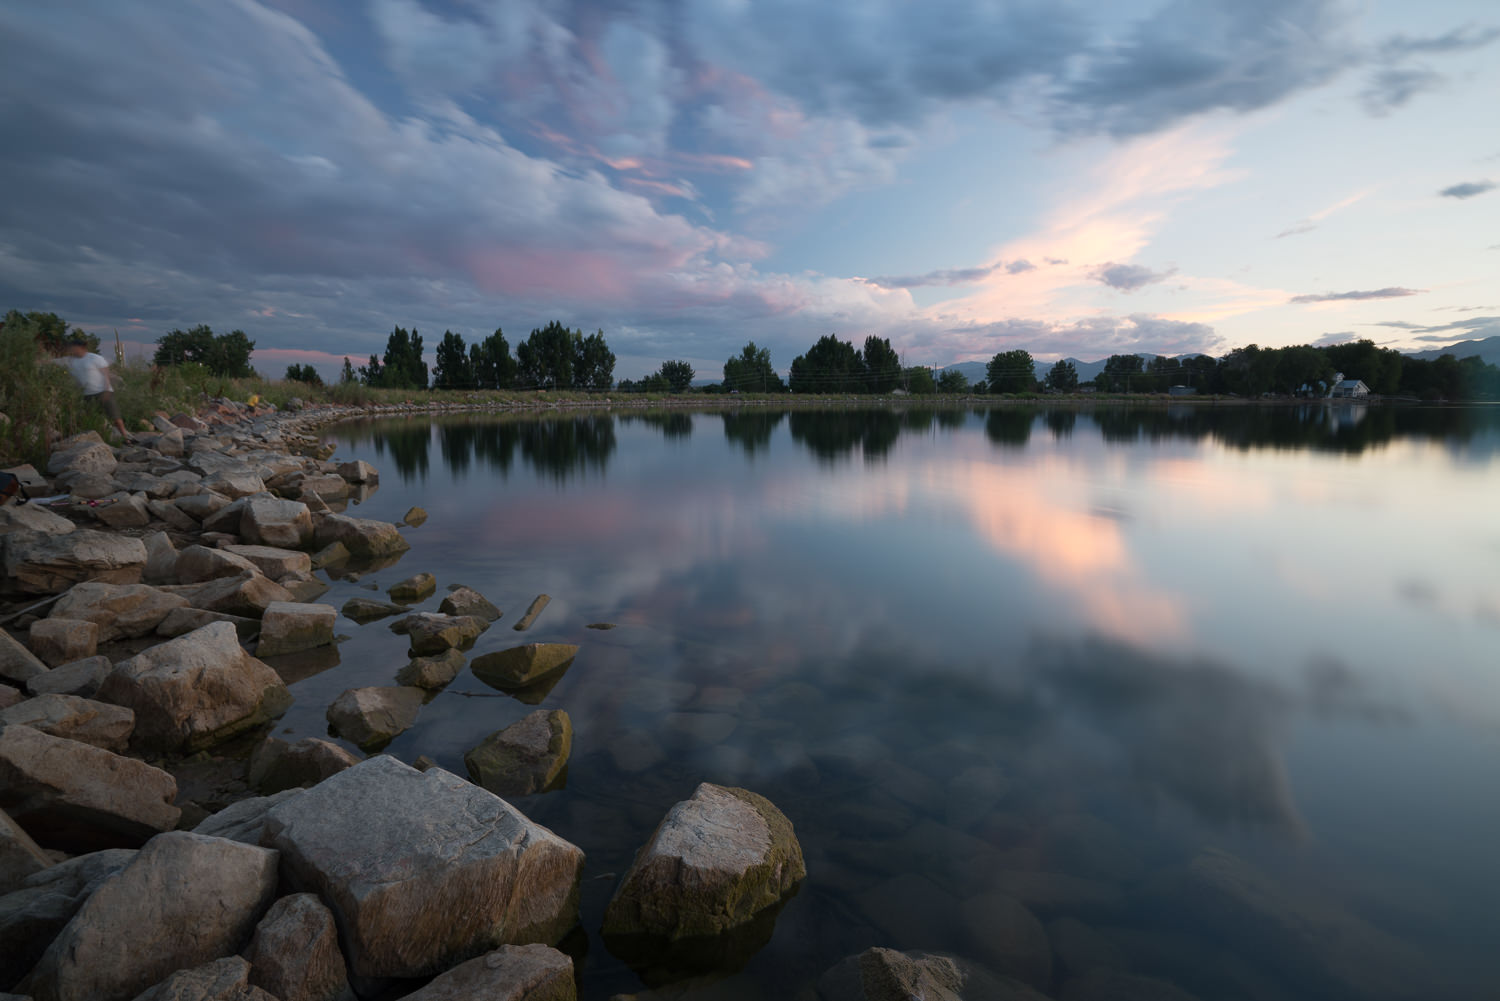
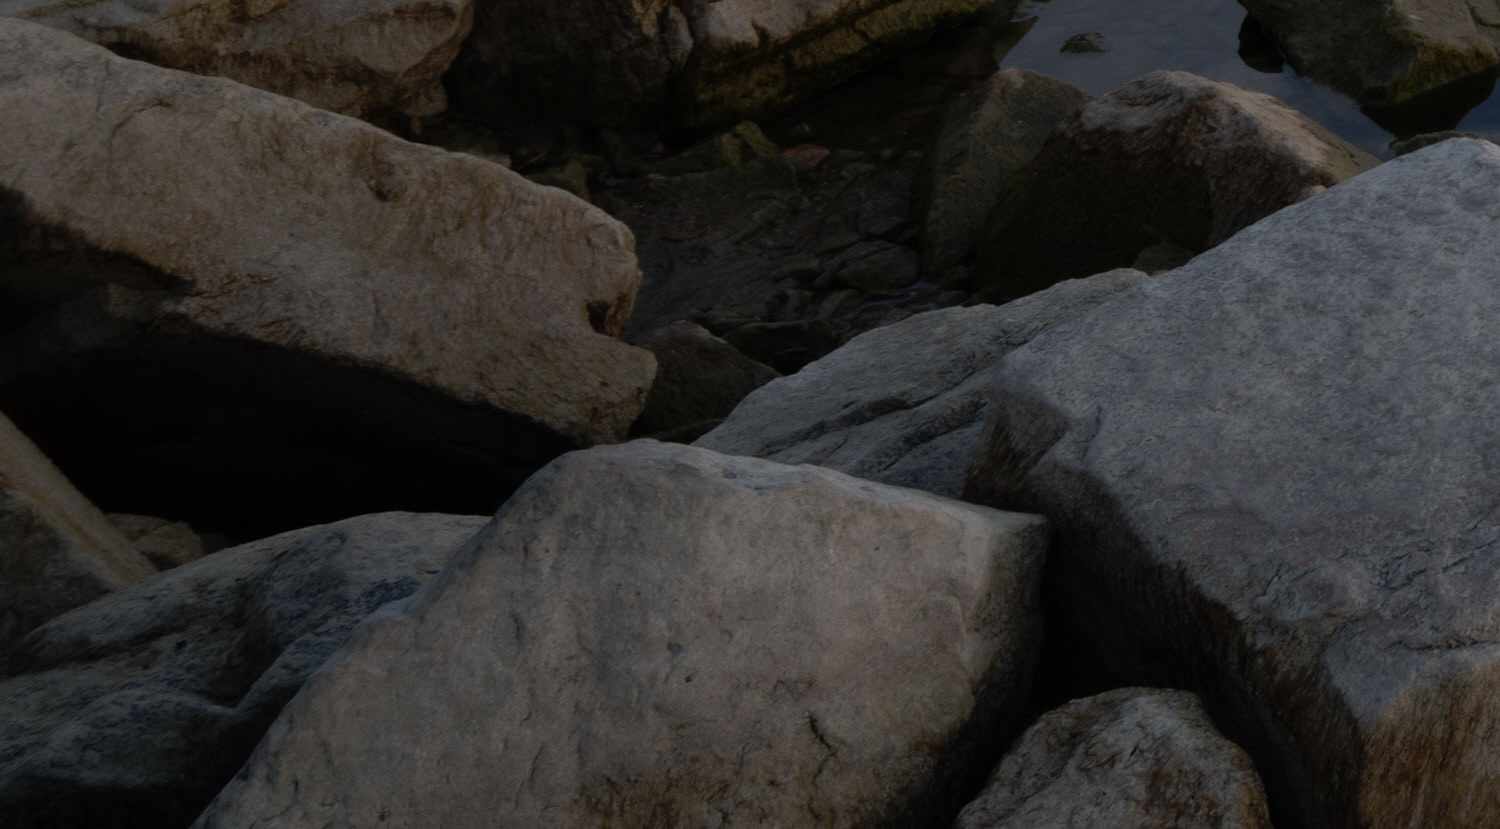
As you can see, not only do low ISO/ long exposure shots look good, there is very little noise as well. To push the boundaries even further, let’s take a look at that same 100% crop but with full shadow recovery in terms of shadows in LR (the max it can go).
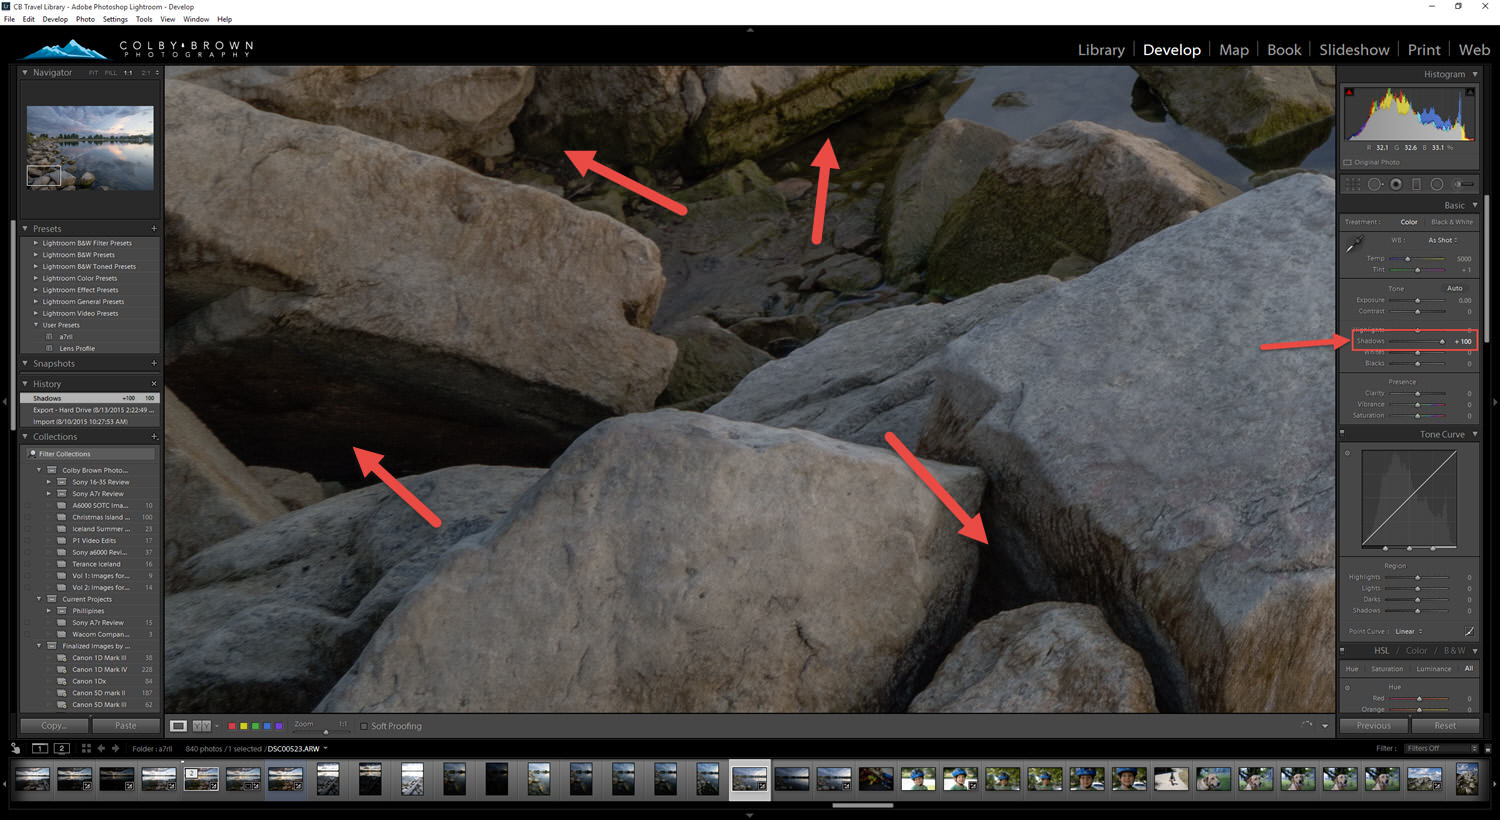
As you can see, even when shadow details are pushed to the max in Adobe Lightroom, the results are fantastic (easily a few stops ahead of anything Canon is doing these days).
Now as I mentioned before, I want to address the “hot pixels” (bright red, green and blue pixels) and “confetti noise” (grey specs/pixels) issues I have been seeing on the Internet over the last week. These issues have been reported during some relatively extreme circumstances (pulling up shadows by +100 with high ISOs while shooting long exposures at night). But many of these reports are missing one essential element of the equation…that the Adobe RAW converter for a7R II RAW files is currently flawed, especially when it comes to handling noise.
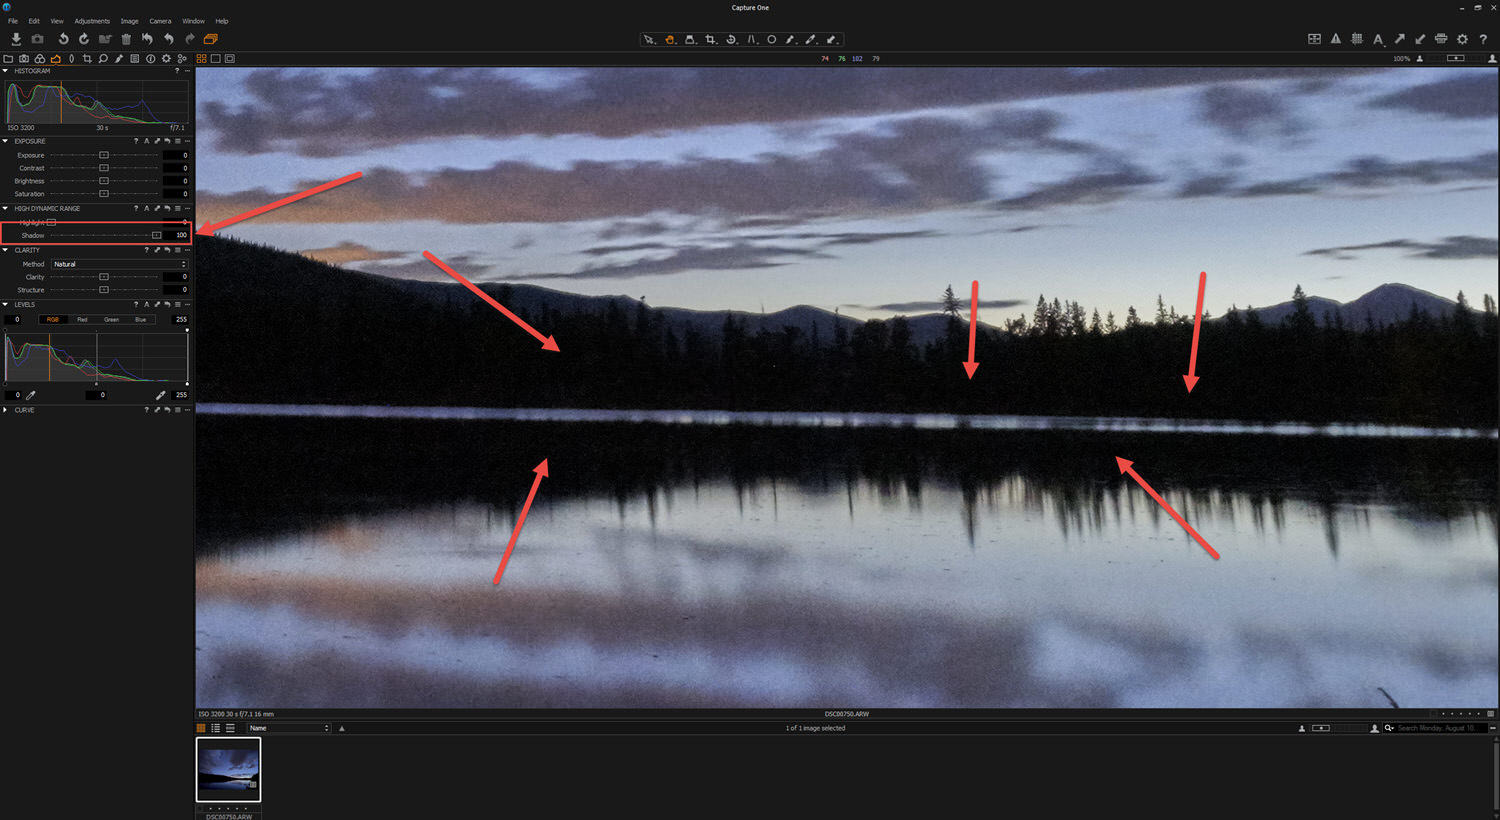
While I could spend the next few paragraphs explaining how I came to this conclusion, let’s look at some image examples instead. In the first image, you see an image with an exposure of 30 seconds while using a 3200 ISO.
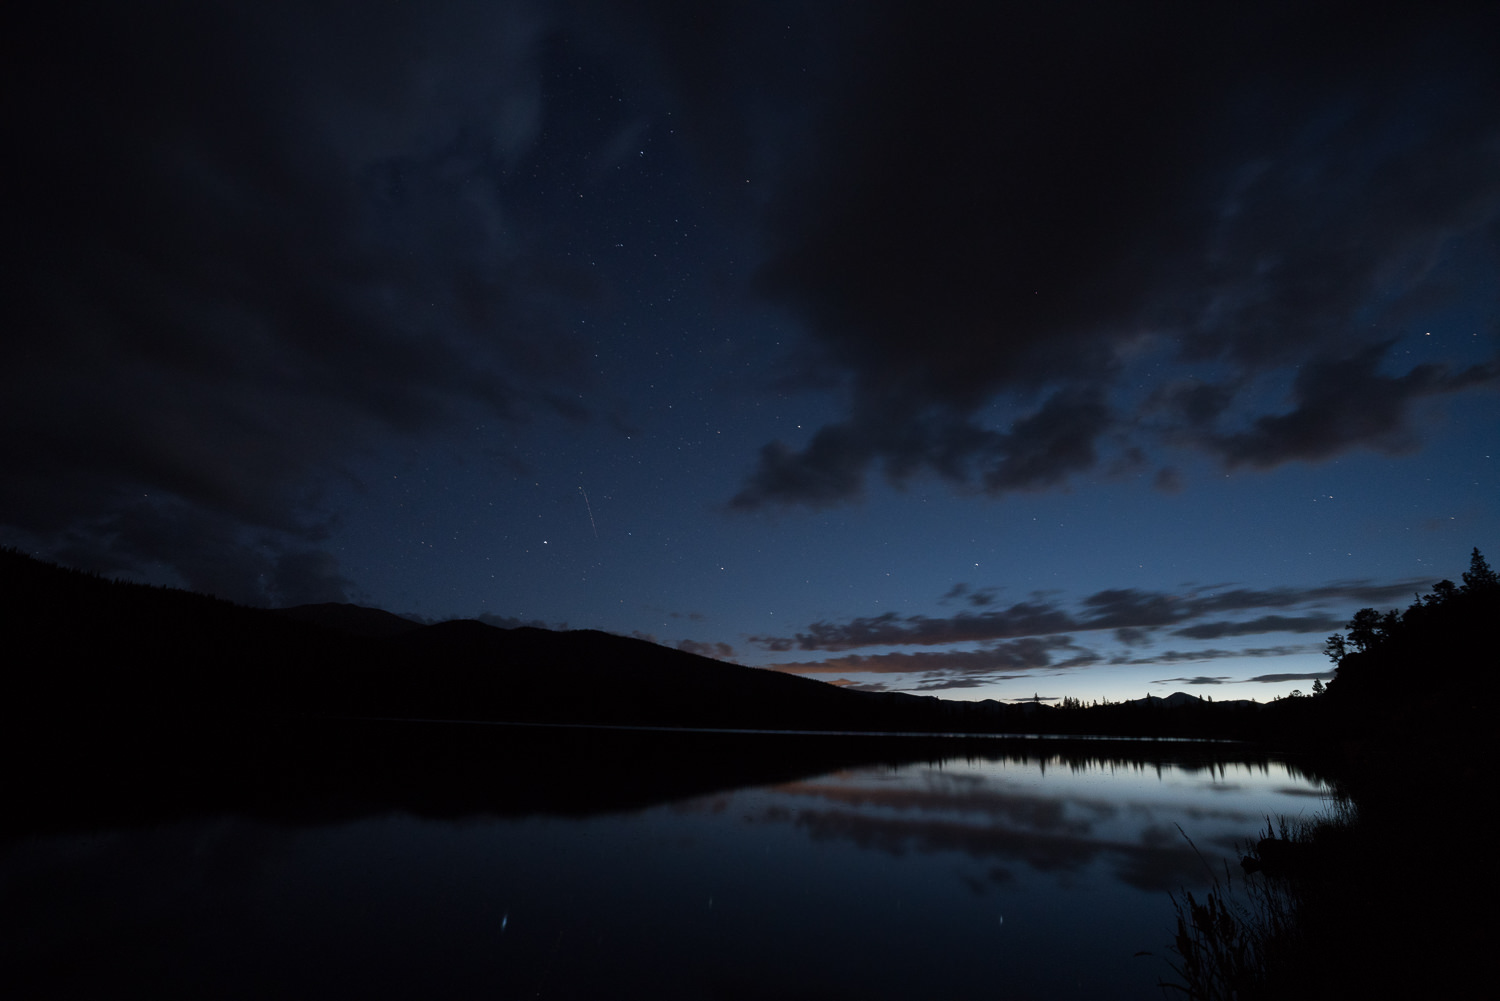
While this image looks fine as is, let’s zoom in 100% and pull up the shadows +100 in LR (which is essentially a torture test for any camera).
If you click on the above image to enlarge it on your screen, you will notice a few hot pixels and a bunch of what can best be described as “confetti noise” (lots of greys specs randomly sprinkled throughout your image). Even though this is an extreme case, at first glance you might sit there and say…” wait a minute…what is wrong with my Sony a7r II?”. But before you do…let’s look at one more example…this time the same image, opened up in Capture One 8 (instead of Adobe Lightroom).
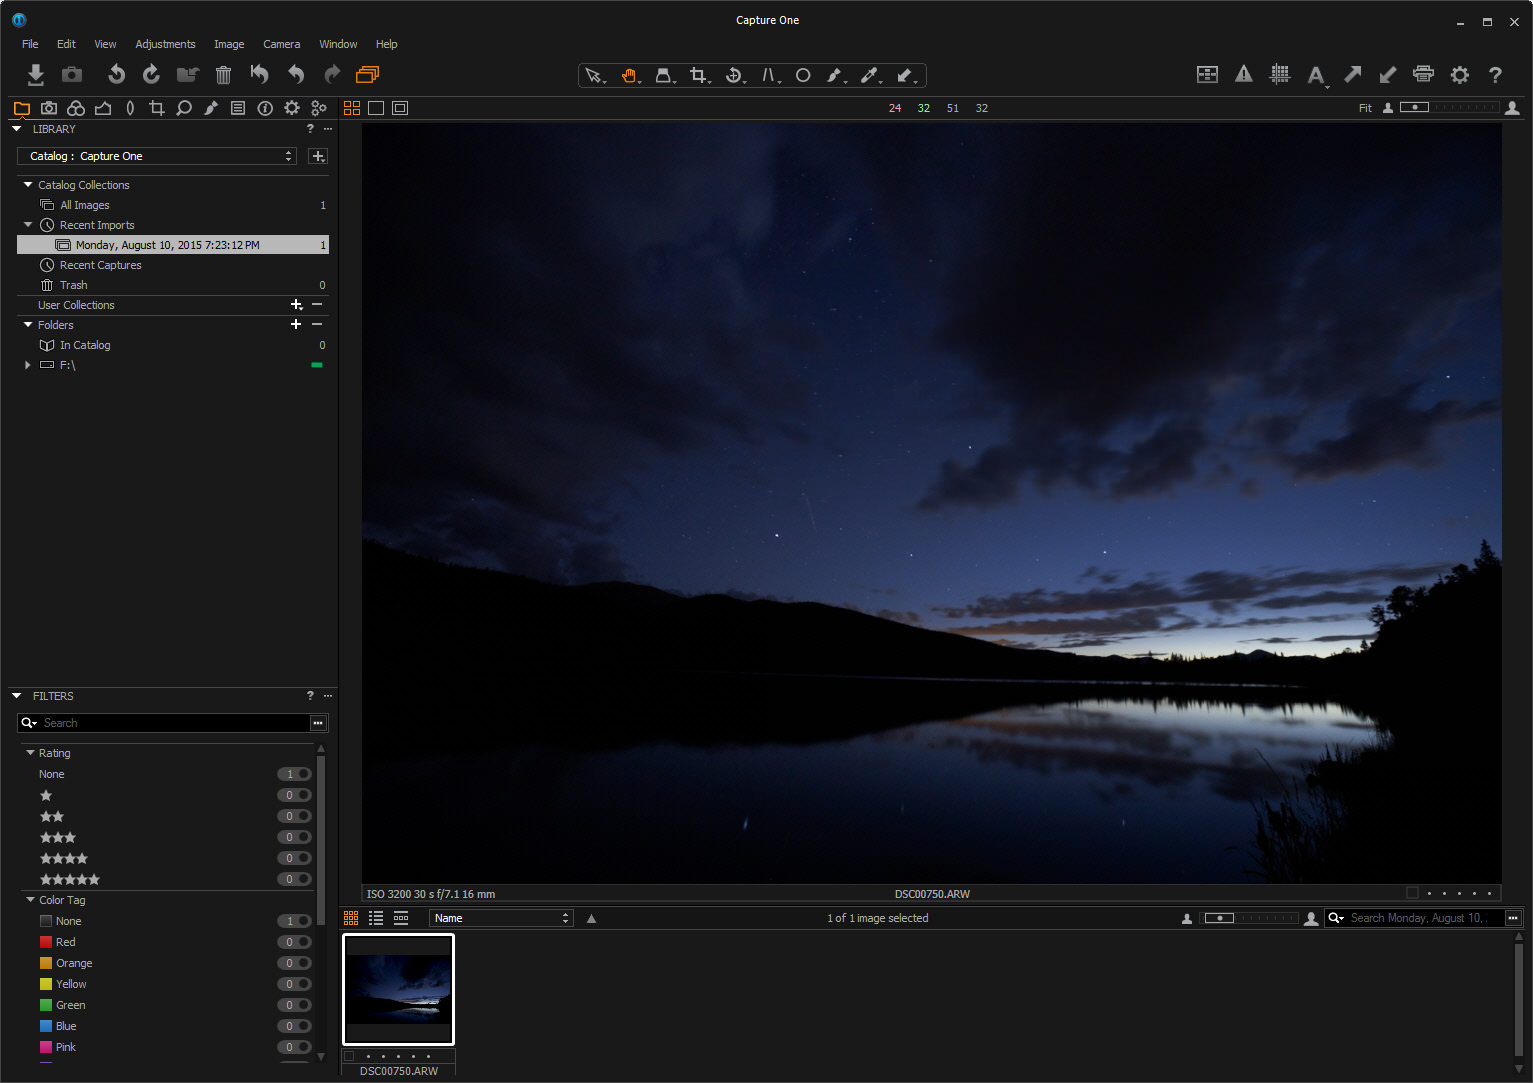
As you can see, the Image in Capture One 8, even with full shadow recovery, does not show any of the same issues that LR seems to display. To me, this is evidence that the problem is with Adobe’s RAW converter of the a7R II RAW file and not Sony’s sensor or the fact that it produces lossy RAW files. Do I think this will be fixed? Absolutely. When? I am not sure. Until then I will happily continue to use Capture One 8 (LINK to a free version for Sony Cameras) to edit any extremely challenging images taken with my Sony a7R II.
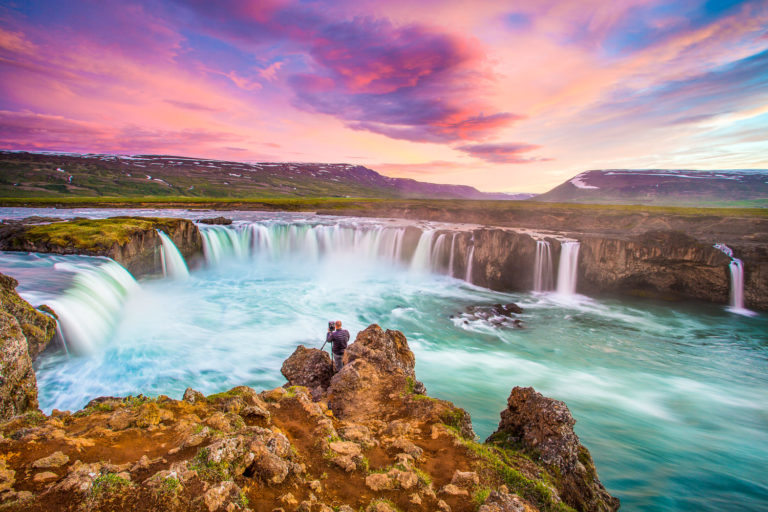
Dynamic Range
With the R in a7R II standing for “resolution” it is fairly safe to say that at least historically, the a7r line of cameras has been incredibly popular with Landscape/Nature photographers. While most landscape photographers could care less about the spotty AF system found in the 1st generation a7R, they did gravitate toward the camera because of its incredible dynamic range, which is to say the preserved pixel detail found not only in the mid-tones of an image but the shadows and highlights as well. Sony has a long history of producing camera sensors with incredible DR, especially when compared to the competition (Sony typically has 2-3 stops of dynamic range over most Canon cameras for example).

So with the a7R being a camp in this department, how does the a7R II hold up, especially considering the increase in megapixels? The good news is that the a7R II scores pretty close with the a7R, just below 14 stops of dynamic range. It is, however, important to note that dynamic range has a direct correlation with ISO. The higher the ISO you use, the less dynamic range the sensor can capture in a given image. As you can see from the chart below (created by Jim Kasson), at ISO 100, you have close to 14 stops of DR to work with, but at ISO 3200, it drops down to 10.3.
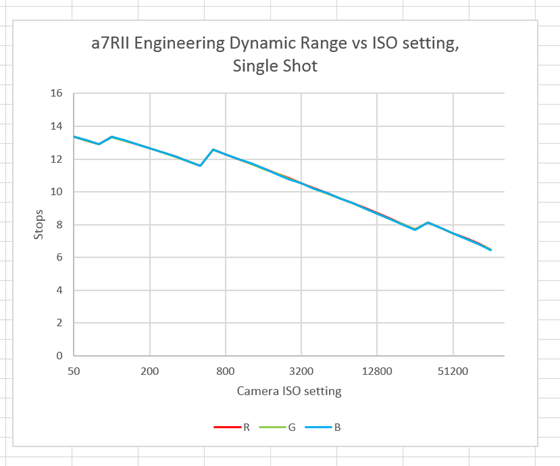

So the lesson of the day…keep those ISO’s low if you want to maximize the dynamic range coming out of the a7R II![/x_text][/x_column][/x_row][/x_section][x_section style=”margin: 0px 0px 0px 0px; padding: 0px 0px 10px 0px; “][x_row inner_container=”false” marginless_columns=”false” bg_color=”” style=”margin: 0px auto 0px auto; padding: 0px 0px 0px 0px; “][x_column bg_color=”” type=”1/1″ style=”padding: 0px 0px 0px 0px; “][x_text]
Internal 4k Video
While my focus as a photographer is on still images, it is important to talk about the 4k video features found on the a7R II. For the first time with a full frame camera, you now have the ability to shoot internal 4k video. While the Sony a7s was capable of 4k, you could not shoot internally and instead had to use an external recorder, such as the Atomos Shogun to record at that resolution. It is however important to note that you will need a Class 10 U3 rated SD card to use with your a7R II for this to work.
Let’s take a quick look at some 4k footage shot by my good friend Brian Matiash…
As you can see, the resulting footage is pretty incredible.
So what video options do you have with the a7R II?
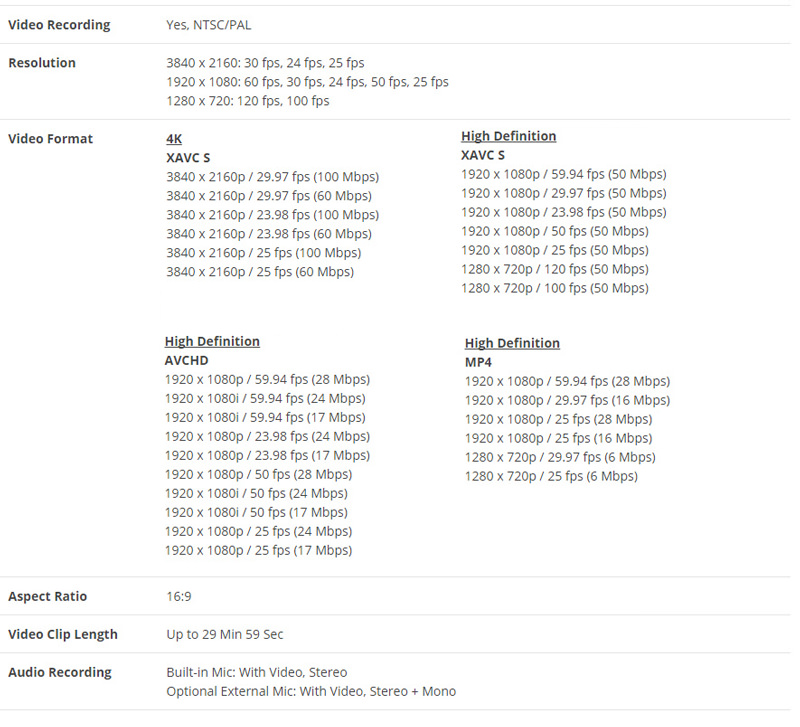
Additionally, you now have an improved S-Log 2 Picture Profile. While you were limited to a minimum ISO of 3200 with the a7s, you now have native ISO of 800 with the a7R II, which should make shooting 4k video in bright sunlight a little easier.
Overheating is also something you have to be careful of with the a7R II when it comes to shooting 4k video. As we discussed earlier, shooting in 4k requires a lot of computer processing power which causes heat. There have been a few reports online of other users getting overheating issues after 17 minutes of continues shooting in 4k. In order to avoid this, I would recommend filming in 5-minute clips or less at a time, giving the camera ample time to cool down between takes.
If your focus is on video work, check out Cinema5D’s review of the Sony a7R II.
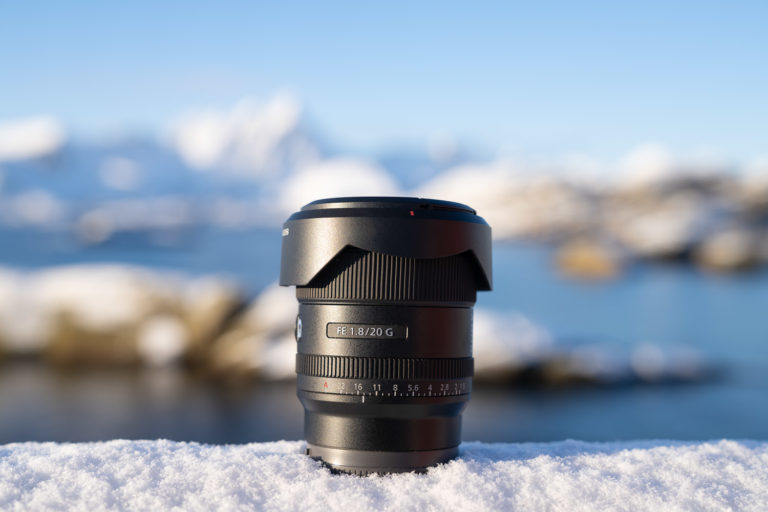
Recommended Lenses
When it comes to the Sony lens lineup, sadly there is often a bit of miss information out there. While the running mantra of many DSLR shooters is that they are waiting for Sony’s full-frame FE lens lineup to mature, the truth is that most of Sony’s lenses currently available are not only as sharp as their Nikon & Canon counter parts, but rated higher as well. This is important because after all, the quality of glass you put in front of your sensor, especially one that resolves 42.4 megapixels, is a vital part of the equation responsible for image quality.
While it is great that 3rd party lenses now offer impressive and promising results with the Sony a7R II, I will always recommend that users ultimately migrate to using native FE lenses, when possible.
Let’s take a quick look at a few of my favorite lenses to use with the a7R II (Click on each lens for more info).


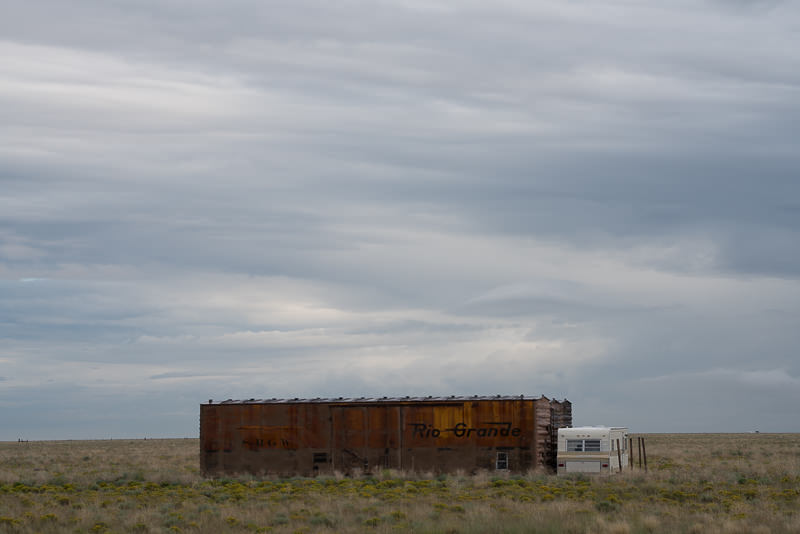
SOTC Gallery
When it comes to camera reviews, many photographers are interested in what images look like straight out of the camera. This gallery shows you exactly that. These images were imported into LR, resized for web format and exported.


Finalized Images Gallery
If you want to get a feel for what you can do with the images coming out of the Sony a7rII, look no further. This gallery is full of images that I have edited using Adobe Lightroom, Photoshop, On1 Software’s Perfect Photo Suite and the Nik Collection by Google. Additionally, be sure to check out other images included in other parts of this review (clicking on images will enlarge them).


RAW Files
For all my pixel peeping friends out there, here are a few links to a number of Sony a7rII RAW files. You can download these files and load them in your own programs. I have picked four images for you to play with that represent a variety of different scenes and settings. Enjoy!


Final Thoughts
The a7R II is essentially the culmination of all the previous a7 cameras that Sony has released to date. It expands upon the resolution and dynamic range found in the a7R, improves upon the AF and in-body image stabilization found in the a7II and pulls in aspects of the low light performance and 4k video capabilities found in the a7s. In addition, it has fixed nearly all of the quirks found in the 1st generation a7r such as shutter shock, low light performance, AF accuracy and the menu system limitations.
But as we all know, no camera is perfect. As we talked about, Sony is still using a compressed RAW file format and while I truly feel that this doesn’t make a difference for 98% of photographers out there, I do know many that are calling Sony out on this. Luckily Sony has acknowledged the cry for 14bit lossless RAW, and I wouldn’t be surprised if this iswas addressed soon. Additionally the new EVF (Electronic Viewfinder) while offering a wider angle of view, does allow details to turn a little mushy when zoomed in 5x in low light. While this happens with all EVFs, the a7R II’s EVF is wider and larger, making the lack of details in low light a little more pronounced. Speaking of the Electronic Viewfinder, all mirrorless cameras still suffer from the tiny delay between what is happening real time and the digital version that has to be computed and displayed. While this delay is fractions of a fraction of a second, it can cause you to potentially miss “the moment” with wildlife or sports photography if you aren’t paying close enough attention and anticipating the action.
But to be honest, one of the biggest challenges facing the Sony a7R II is the hype that has surrounded it from the very beginning. Ever since it was first announced photographers have been throwing around names like “Canon Killer” or “Nikon Killer” or “Game Changer”. I am pretty sure if I did a Google search for Sony a7R II and the word “Revolutionary”, I wouldn’t be surprised at how many hits showed up on my screen. I feel it is important for all photographers to sift through the hype and distinguish reality from fantasy. While I have been incredibly impressed with the camera, I can tell you that picking up the Sony a7R II will not magically make you a better photographer. Even though I plan on continuing to use it for sports and wildlife photography, it is not meant to directly compete with a Canon 1Dx or Nikon D4, both of which will surely out perform the already impressive AF system found on this body. The ability to use 3rd party lenses on the a7R II certainly does open up a number of doors for photographers to slowly migrate over to the Sony mirrorless full-frame system, but I will always recommend using native FE lenses to take full advantage of the a7R II.
Bottom line, The a7R II is easily the best camera Sony has released to date and if I had to choose one Sony body to take with me on any given project…this would be it. Is it “better” than the Nikon D810 or the Canon 5DSR? Maybe. Maybe not. That depends on what your needs are as a photographer. The dynamic range, ISO, AF capabilities and size of the a7R II make it a better fit for me than Canon’s current flagships. The inclusion of internal 4k video, silent shooting and impressive features such as Eye AF and the ability to use 3rd party lenses on occasion make the a7R II a better fit for me than the D810. While your mileage may vary, I hope that I have included enough information, images and RAW files for you to ultimately come to your own conclusion on whether or not this is the right camera for you.
If you have any questions or think I missed something, please let me know in the comments below!
Full Disclosure
It is important to note that I am legally responsible to let you know that I am a Sony Artisan of Imagery, which is a similar program to Canon’s Explorers of Light or the Nikon Ambassador program. That being said, Sony did not ask nor pay me to write this review. These thoughts are my own and I would like to think that I have provided enough examples, details and assets for you to download and comb through before deciding if I am biased or not. The internet is an unforgiving place and I would be remiss if let my professional connections to Sony (or any other company) color my thoughts or opinions on this camera in any way.