While most of the attention Sony gets these days is directed towards their innovative cameras and sensors, they have consistently been pushing out great glass at a slow but steady pace over the last few years. On May 17th, 2017 Sony announced the 12-24 f/4 G ultra-wide angle lens, filling a highly requested hole in their lens lineup. As a Sony Artisan, I happened to be at the launch event in Santa Barbara, California and was given some time to play around with it for an afternoon. But to be honest, it left me with more questions than answers. As a landscape photographer, how close could I truly get to my foreground subjects? What about corner sharpness? COMA? Distortion?
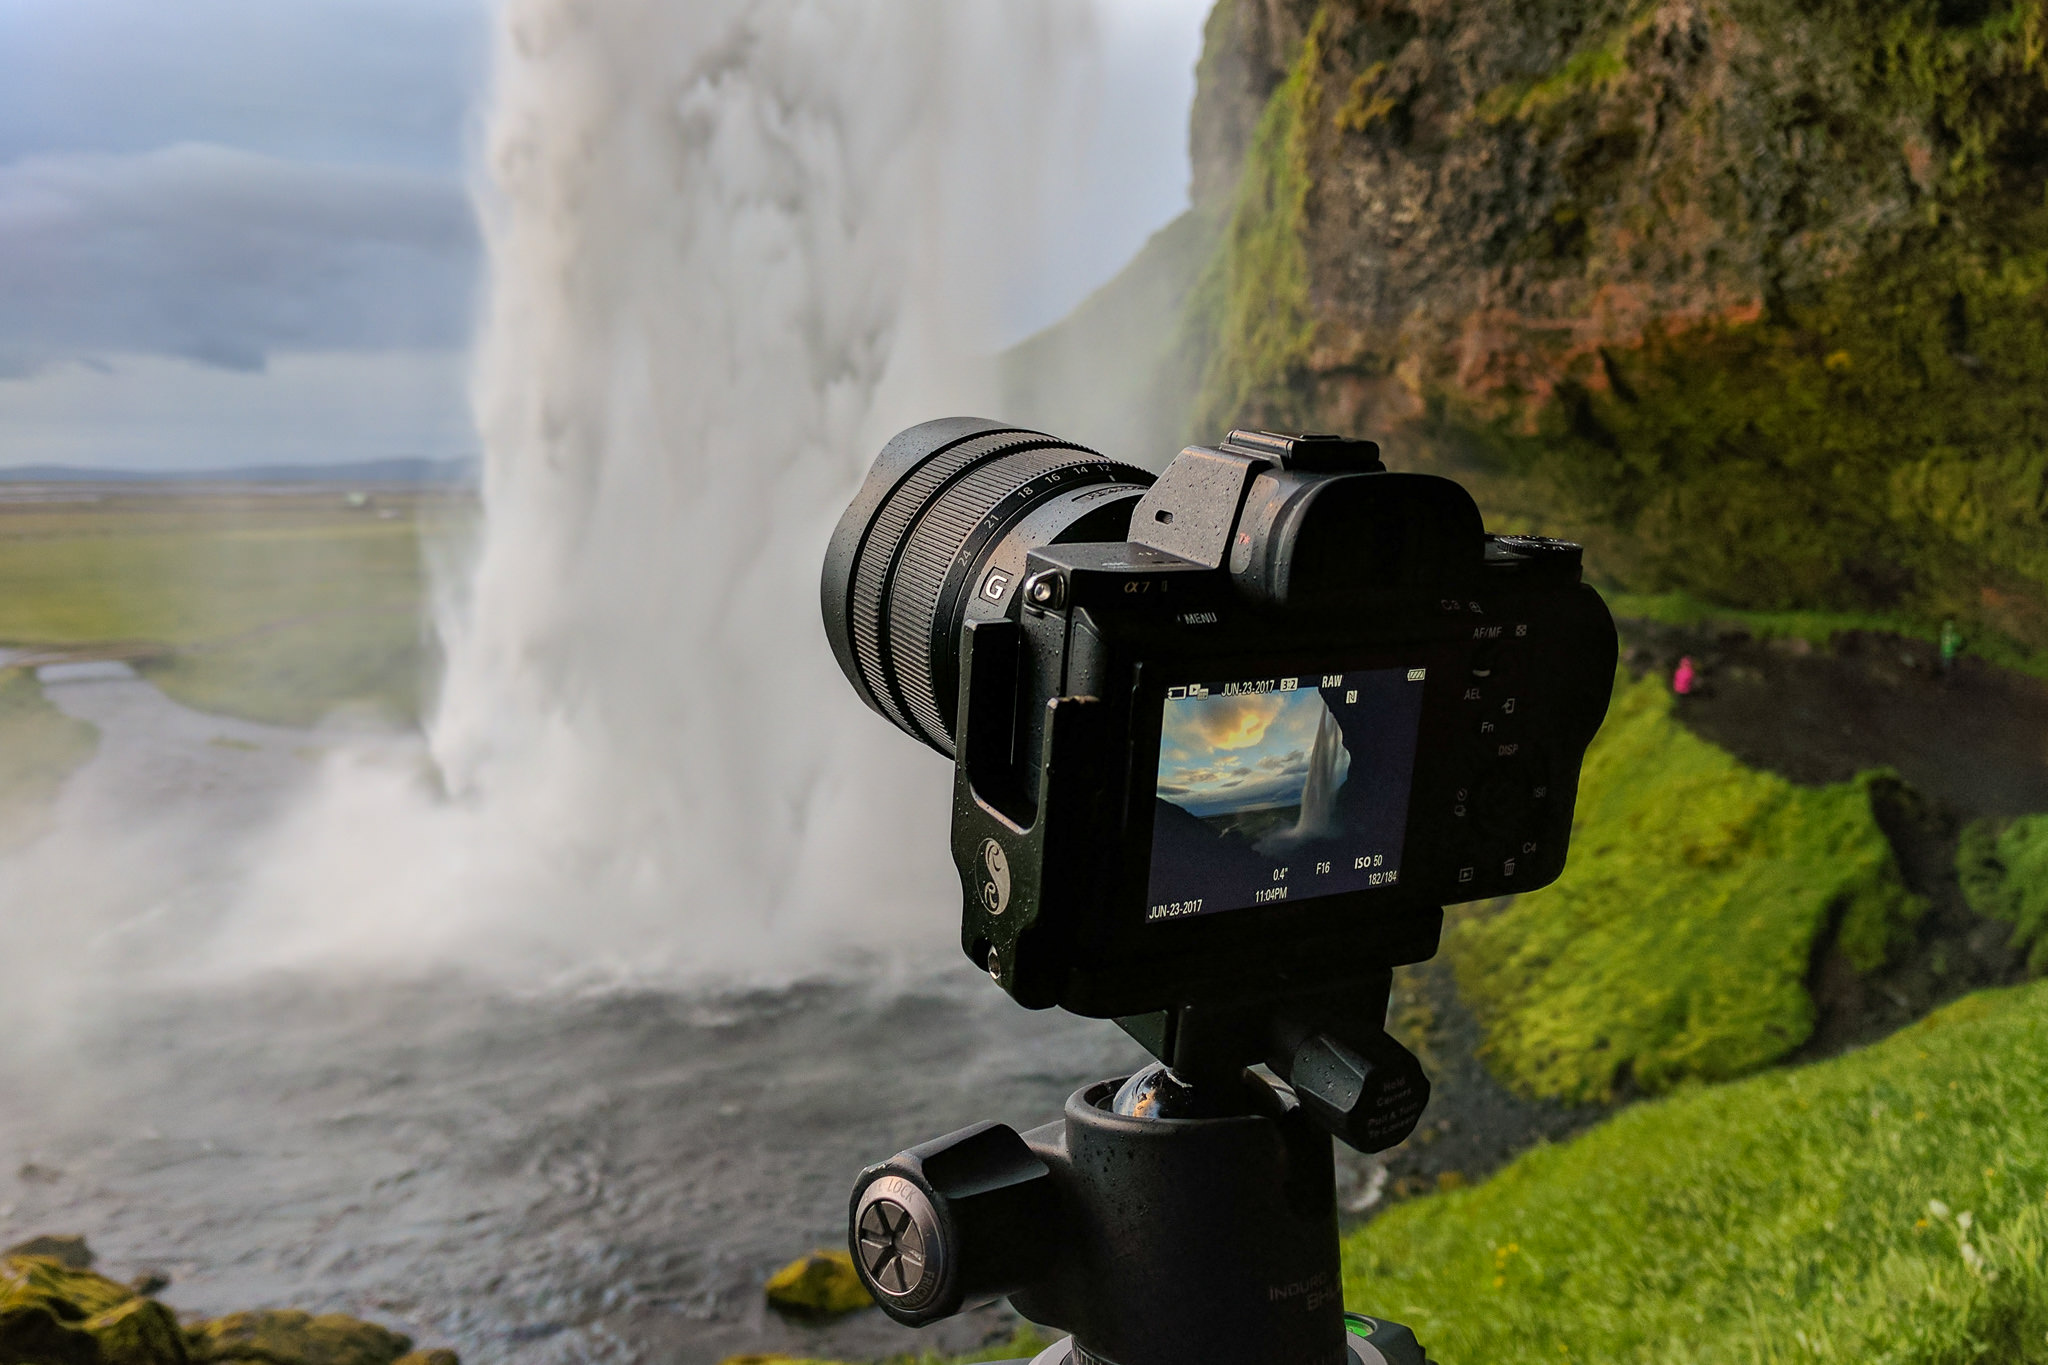
Fast forward a month later and Sony was kind enough to loan me a 12-24 f/4 G to take to Iceland where I was working for a month on a number of projects while also leading a few photo workshops. While there will be plenty of photographers that will drag this lens through MTF charts and dim lit studios with tiny rulers hanging on the wall, the only test I really care about happens out in the real world…in places & situations that I would typically find myself working regardless of what new lens was being released
Throughout this review, you will find plenty of physical evidence backing up my thoughts and opinions. Nearly every image provided has been uploaded in high resolution and I have even provided a number of RAW files at the end of the review for you to download and explore on your own. With all that being said, let’s get started…
Specs
- E-Mount Lens/Full-Frame Format
- Bulbous Front Lens Glass Element
- Aperture Range: f/4 to f/22
- Angle of View: 122 – 84
- Minimum Focus Distance (28cm)
- Four Aspherical Elements
- One Super ED and Three ED Elements
- Nano AR Coating
- Dust and Moisture-Resistant Construction
- Seven-Bladed Rounded Diaphragm
- Dimensions (DxL): 3.43″ x 4.62″ (87 x 117.4 mm)
- Weight: 1.24 lb (565 g)
- Price: $1,698 USD
Build Quality/Portability
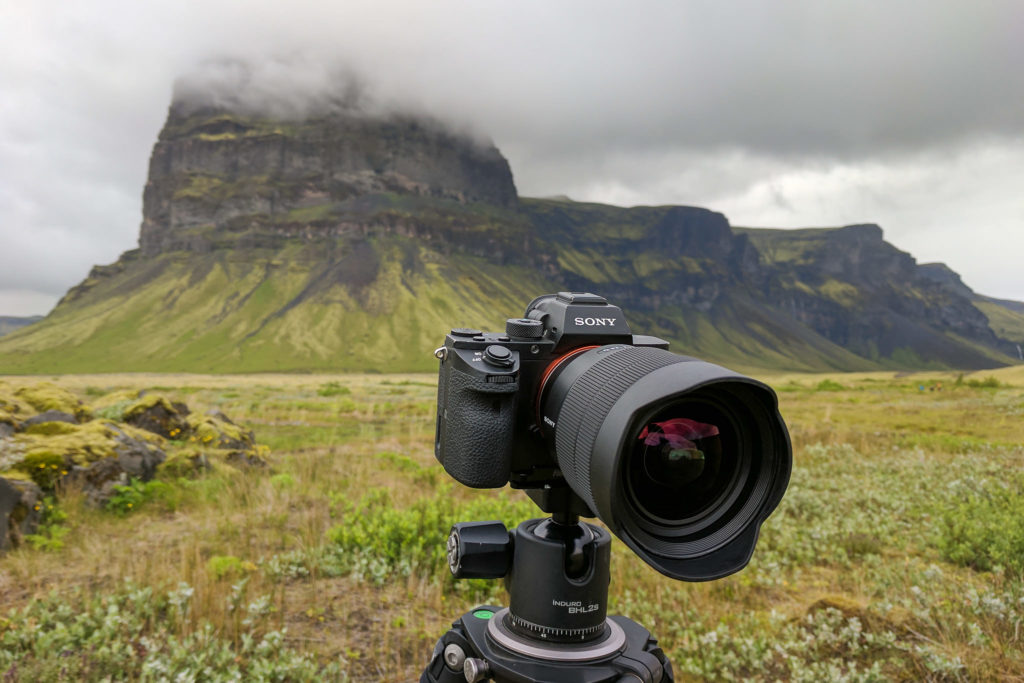
One of the first things I noticed about the 12-24 f/4 G lens is how solid it feels in my hand. It weighs just 565g, which is 47g more than the popular Sony 16-35 f/4 FE. Holding it in my hand I don’t feel as if it is top or bottom heavy, but rather much of the weight seems balanced in the center of the lens itself. For an ultra-wide, this lens is also pretty small, standing at nearly 4.62″ tall.
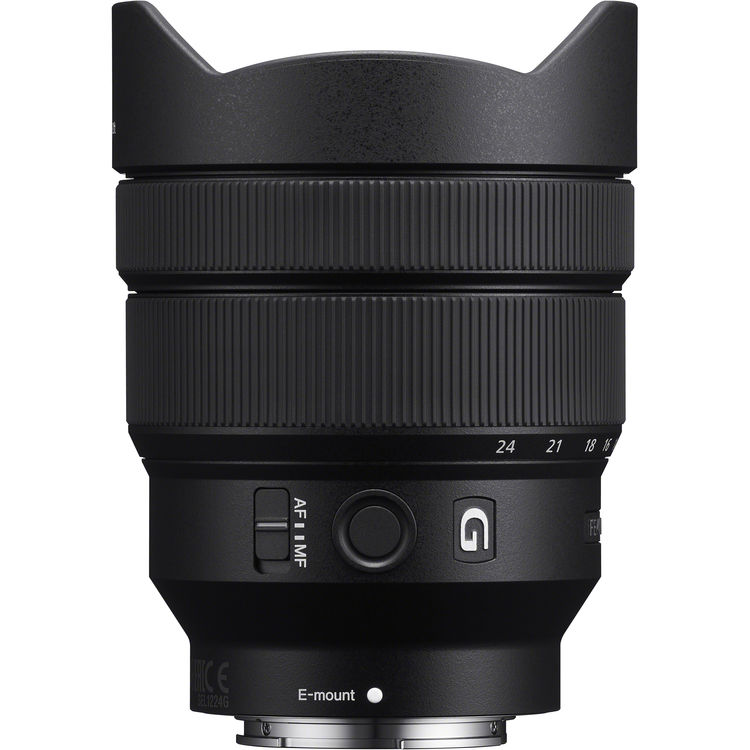
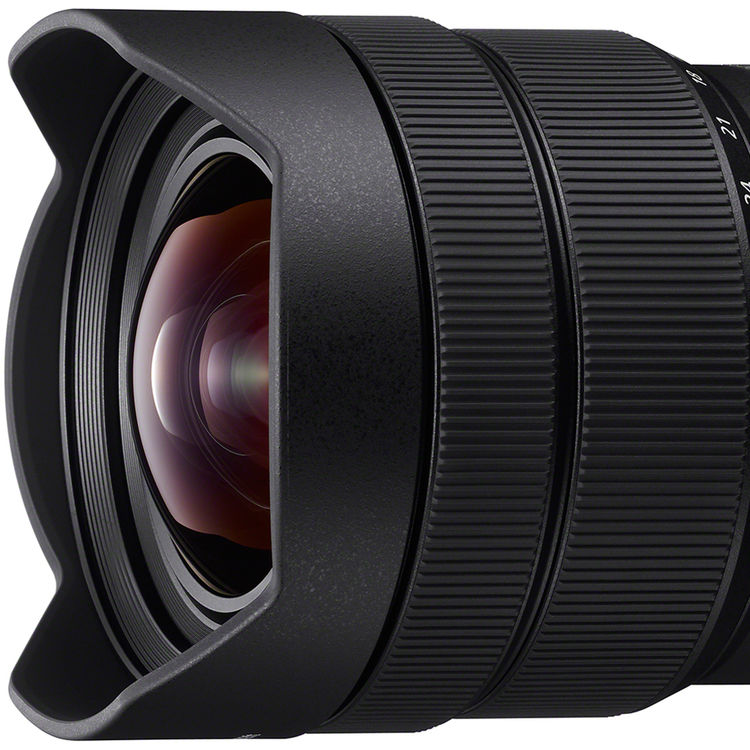
Easily the most noticeable aspect of the lens is the front of the lens. Like many ultra-wide lenses, the Sony 12-24 has a bulbous glass element, meaning that it protrudes from the front of the lens. This makes it difficult (although not impossible) to use filters with this lens. While this might be a little disappointing to some landscape photographers, Sony has at least made good use of Nano AR coating on the lens itself, helping to reduce surface reflections, flare, and ghosting in most situations.
For those of us that work out in the elements, this lens has a few nice features that you might appreciate. First, it has a dust and moisture-sealed design. I tested this lens in Iceland and in multiple situations, often times finding it literally dripping with water. No water or condensation got into the lens or my Sony a7R II. Additionally, the focus and zoom rings on the lens are rubberized, rather then metal which can make a big difference when working in very cold environments.
How Wide is 12mm?
When it comes to wide-angle lenses, the most popular or common option out there is typically a 16-35, no matter if you shoot Canon, Nikon or Sony. But if that is the case, why would you need an ultra-wide angle lens? The truth is that you can fit a lot in the 4mm difference between 12mm and 16mm, which I think is also its biggest challenge. It took me a few days to step outside of the mindset I often had as a 16-35 lens shooter. I had to think creatively and force myself to use a lens this wide, often not realizing it was perfect for a given scene until after I had already taken the image.
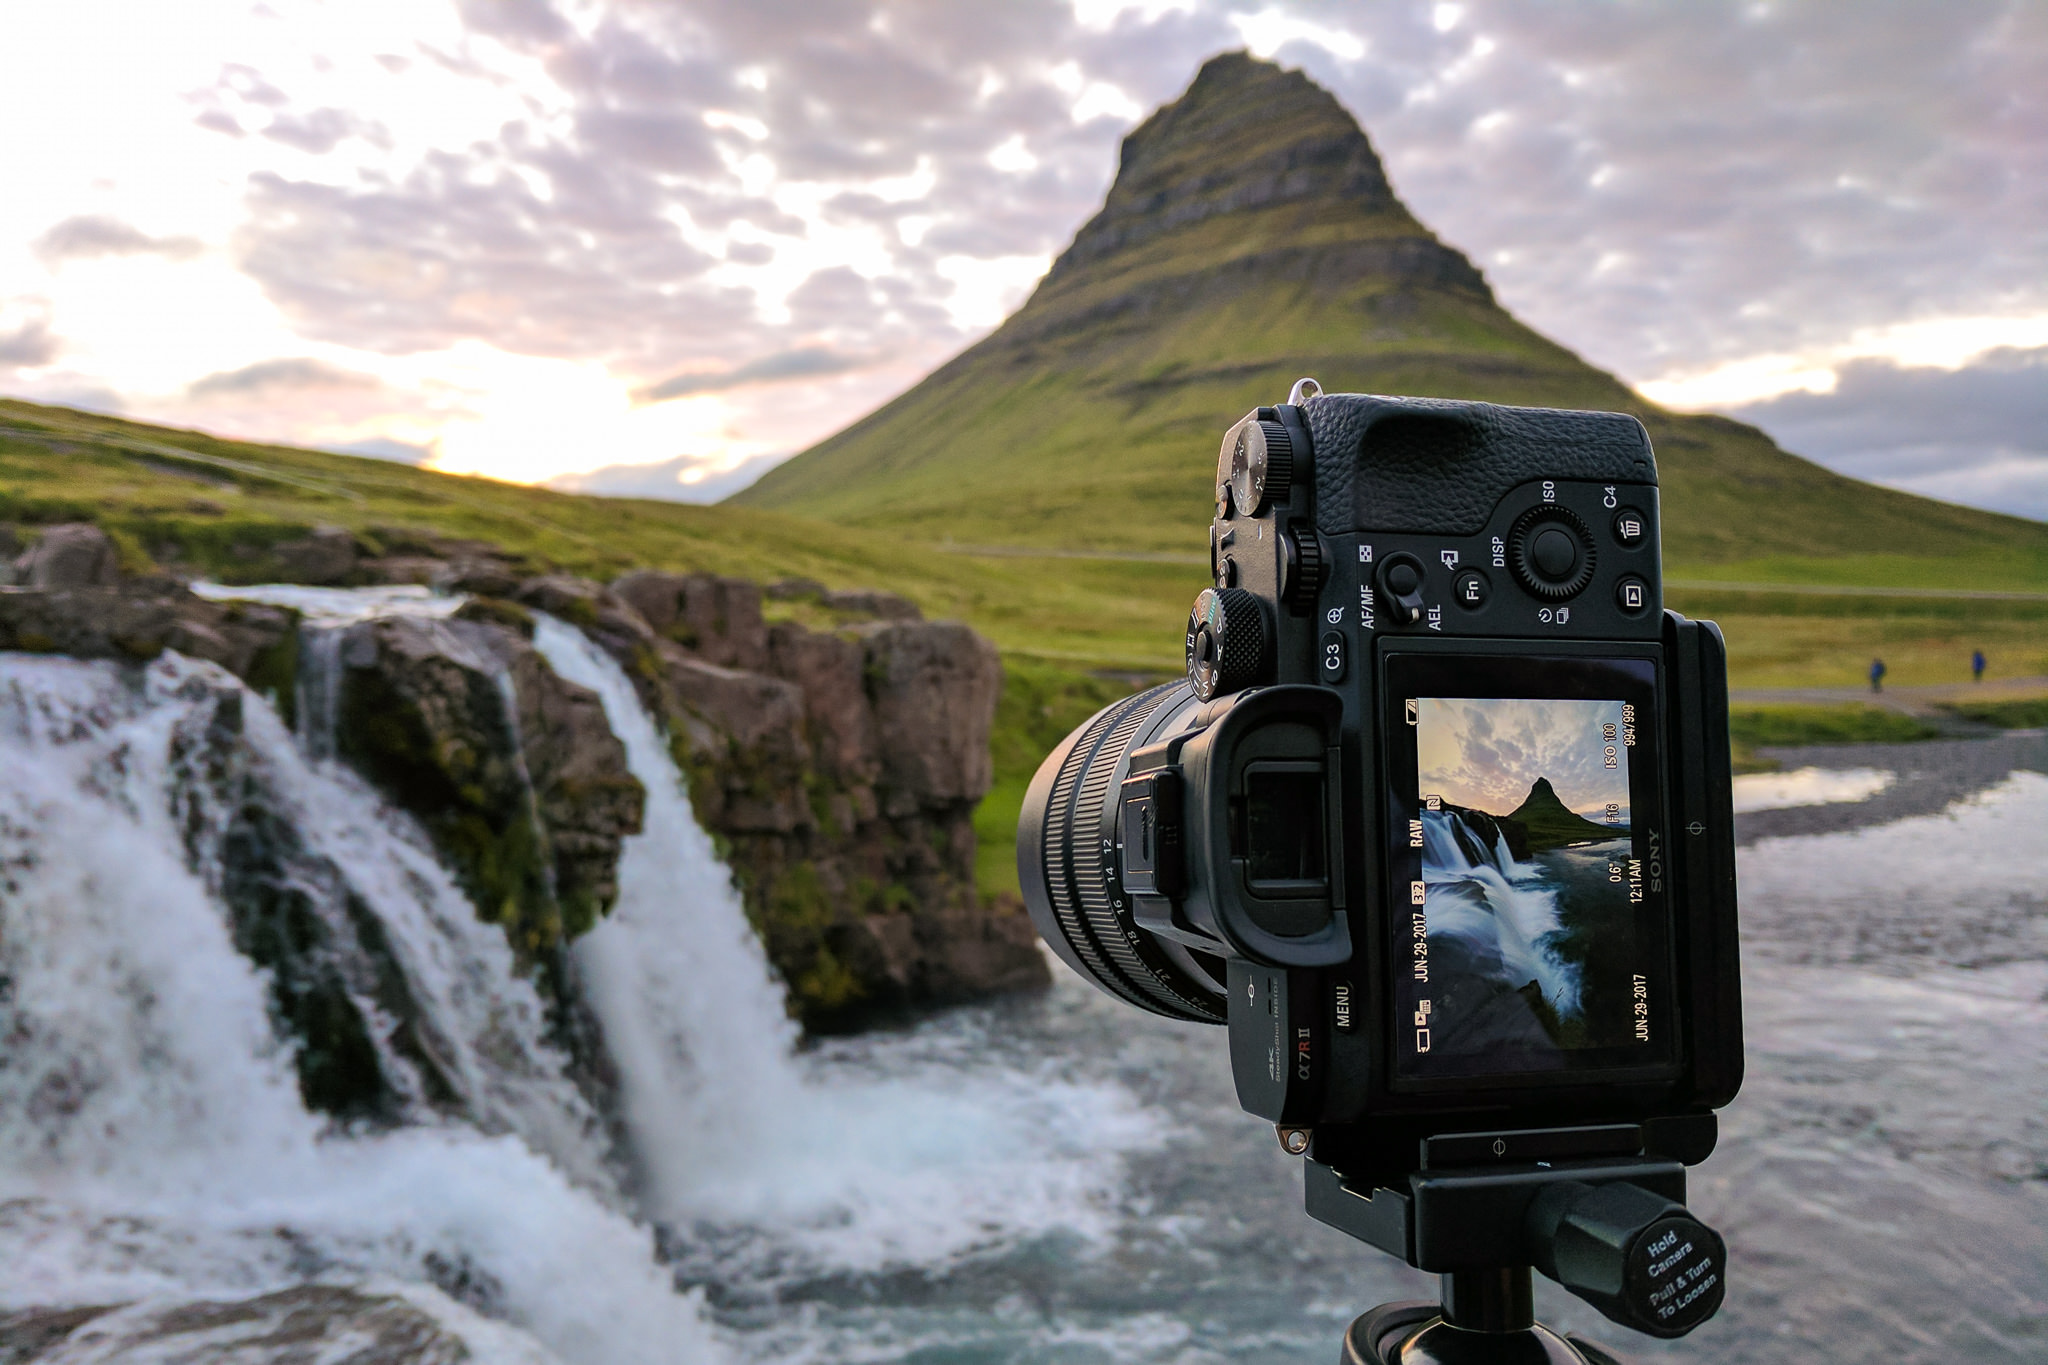
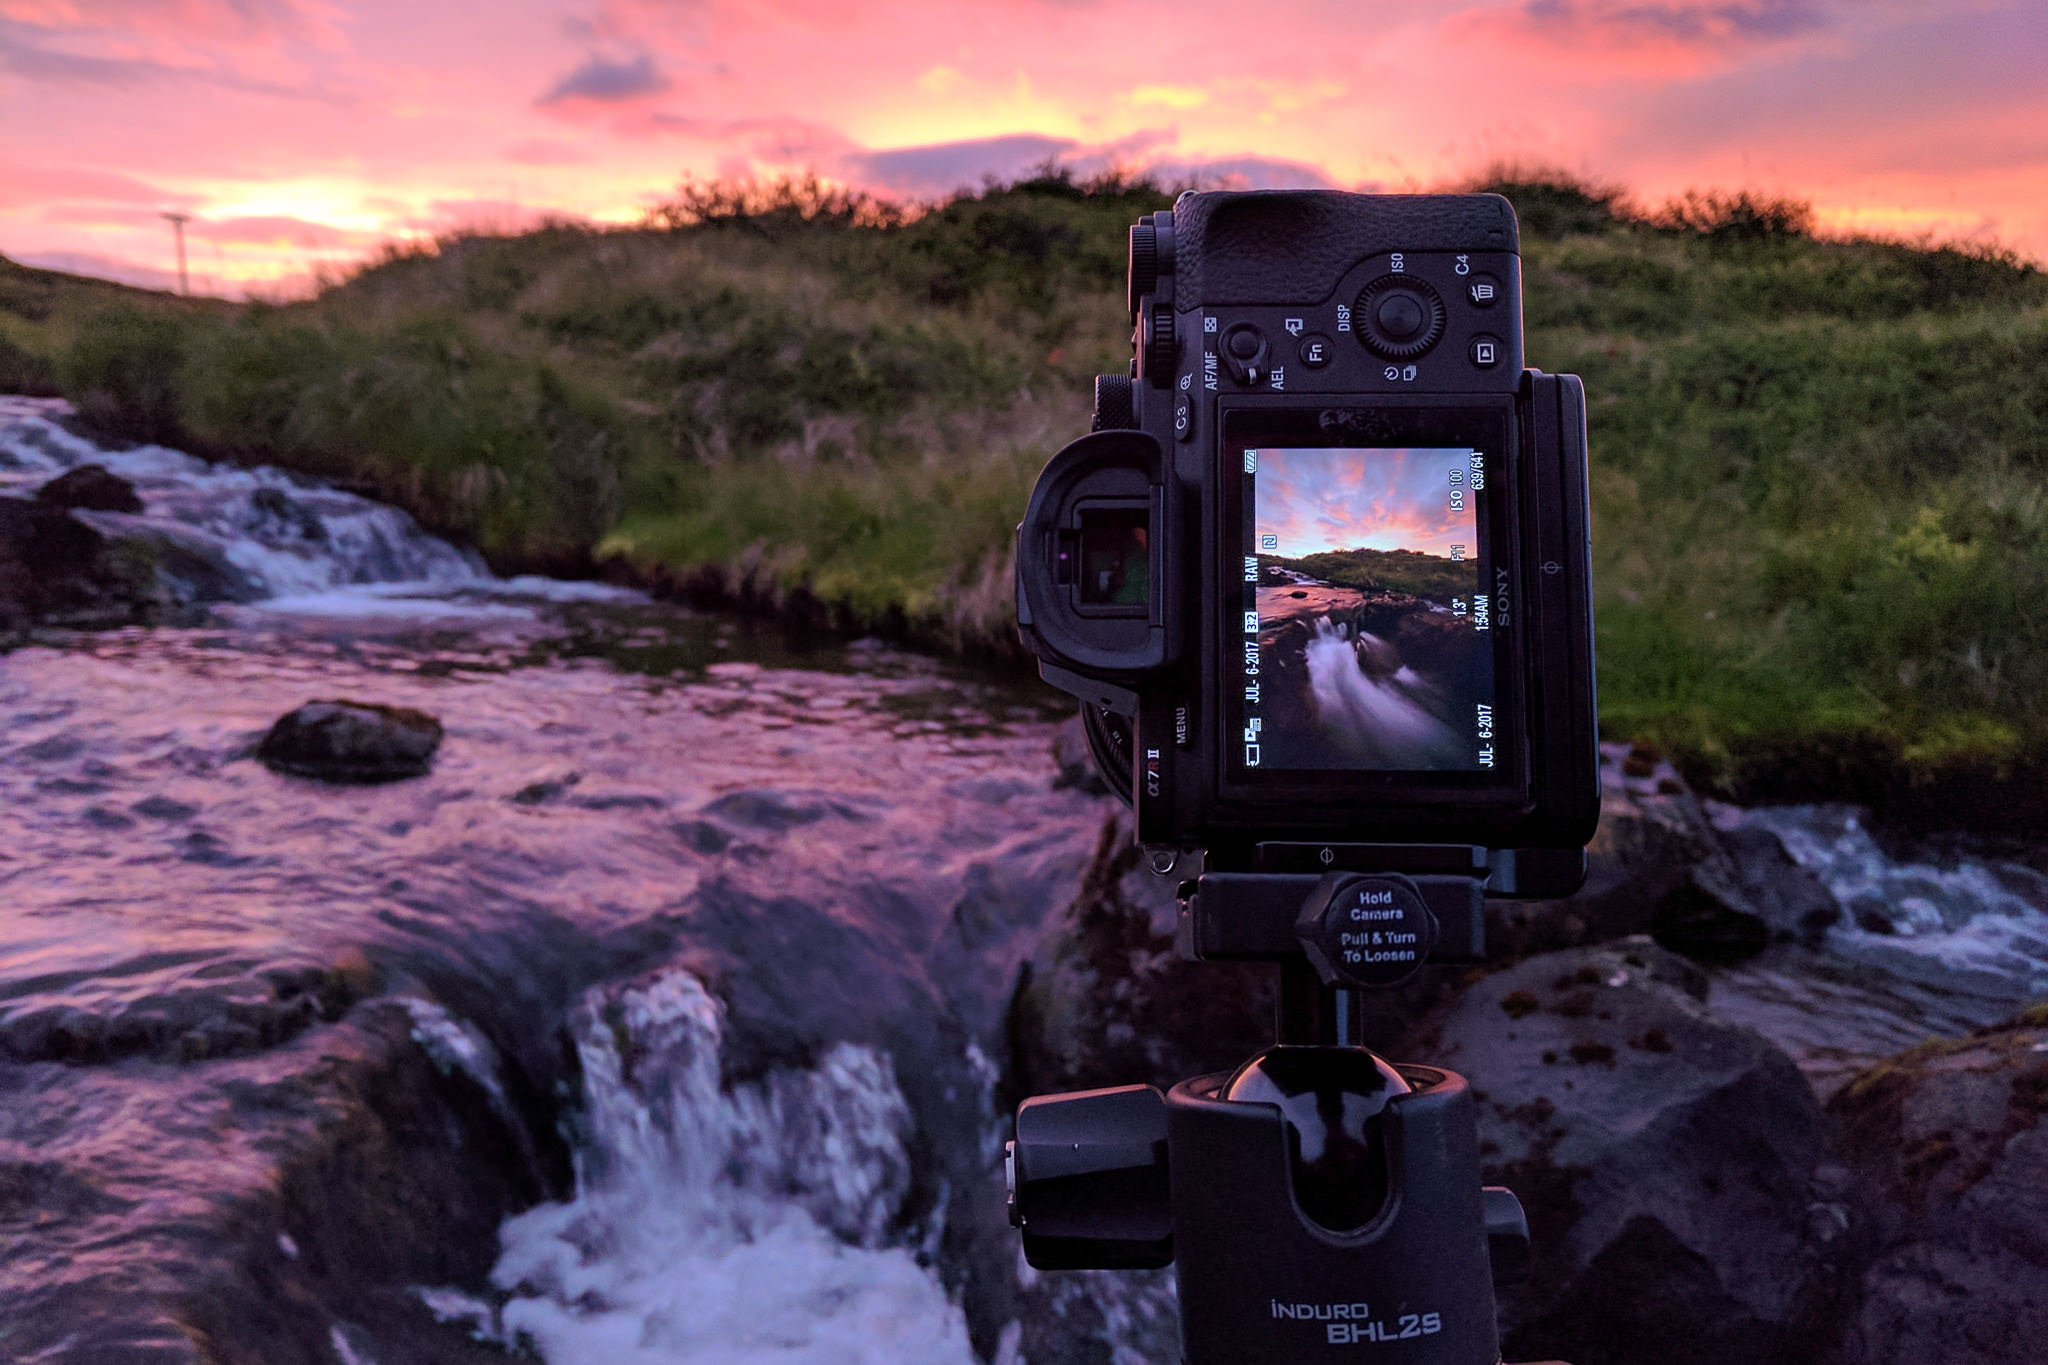
Below you will see a series of images paired together. First will be an image taken with a Sony 16-35 f/2.8 GM lens followed by an image taken with the Sony 12-24 f/4 G lens, all taken with the Sony a7R II.


As you can see, there is a pretty big difference between shooting at 12mm and 16-18mm. In a lot of situations, that extra angle of view can make a pretty big difference when it comes to the perspective of a photo. But with that being said, if you look at the image exposure data in the captions above, you should also notice something. I was limited in what shutter speeds I could choose from when I shot with the 12-24. This is because I couldn’t use filters with this lens, so I had to drop my ISO down from my native ISO of 100 down to 50 and in most cases pump my f/stop up to 16 as well. This was the only way I could slow down my shutter speed long enough to get some flow in the above waterfall images. While I am happy with these images, there will be times when I prefer the silky smooth look that I captured with the 16-35 f/2.8 GM lens along with my Formatt Hitech Filters.
Image Quality
While I have dedicated portions of this review to corner sharpness, COMA and lens flares, I want to take a quick moment to talk about the general IQ (Image Quality) that you can expect from this lens. I want to look at image sharpness, light dropoff around the edges and see how it handles lens profiles in Adobe Lightroom. All of the images below were taken with a Sony a7R II. *At the end of this review, you will also find a number of RAW files for you to dive into.
General Sharpness
When it comes to Image Quality, most photographers focus the majority of their energy looking at how sharp an image is. While some of this falls on the camera’s sensor, a lot of it comes down to the lens itself and the quality of its design. With the 12-24 f/4 G, I was actually very surprised at how sharp the lens is, especially when paired with a Sony a7R II. Details were always clean and crisp, not only on my focus point but in general found throughout my images. This combination also didn’t seem to have any trouble autofocusing in low/dim light situations. In the end, both the sharpness and quality of contrast of this lens left me wanting to reach for it more and more as I traveled around Iceland.
Light Dropoff/Edge Distortion
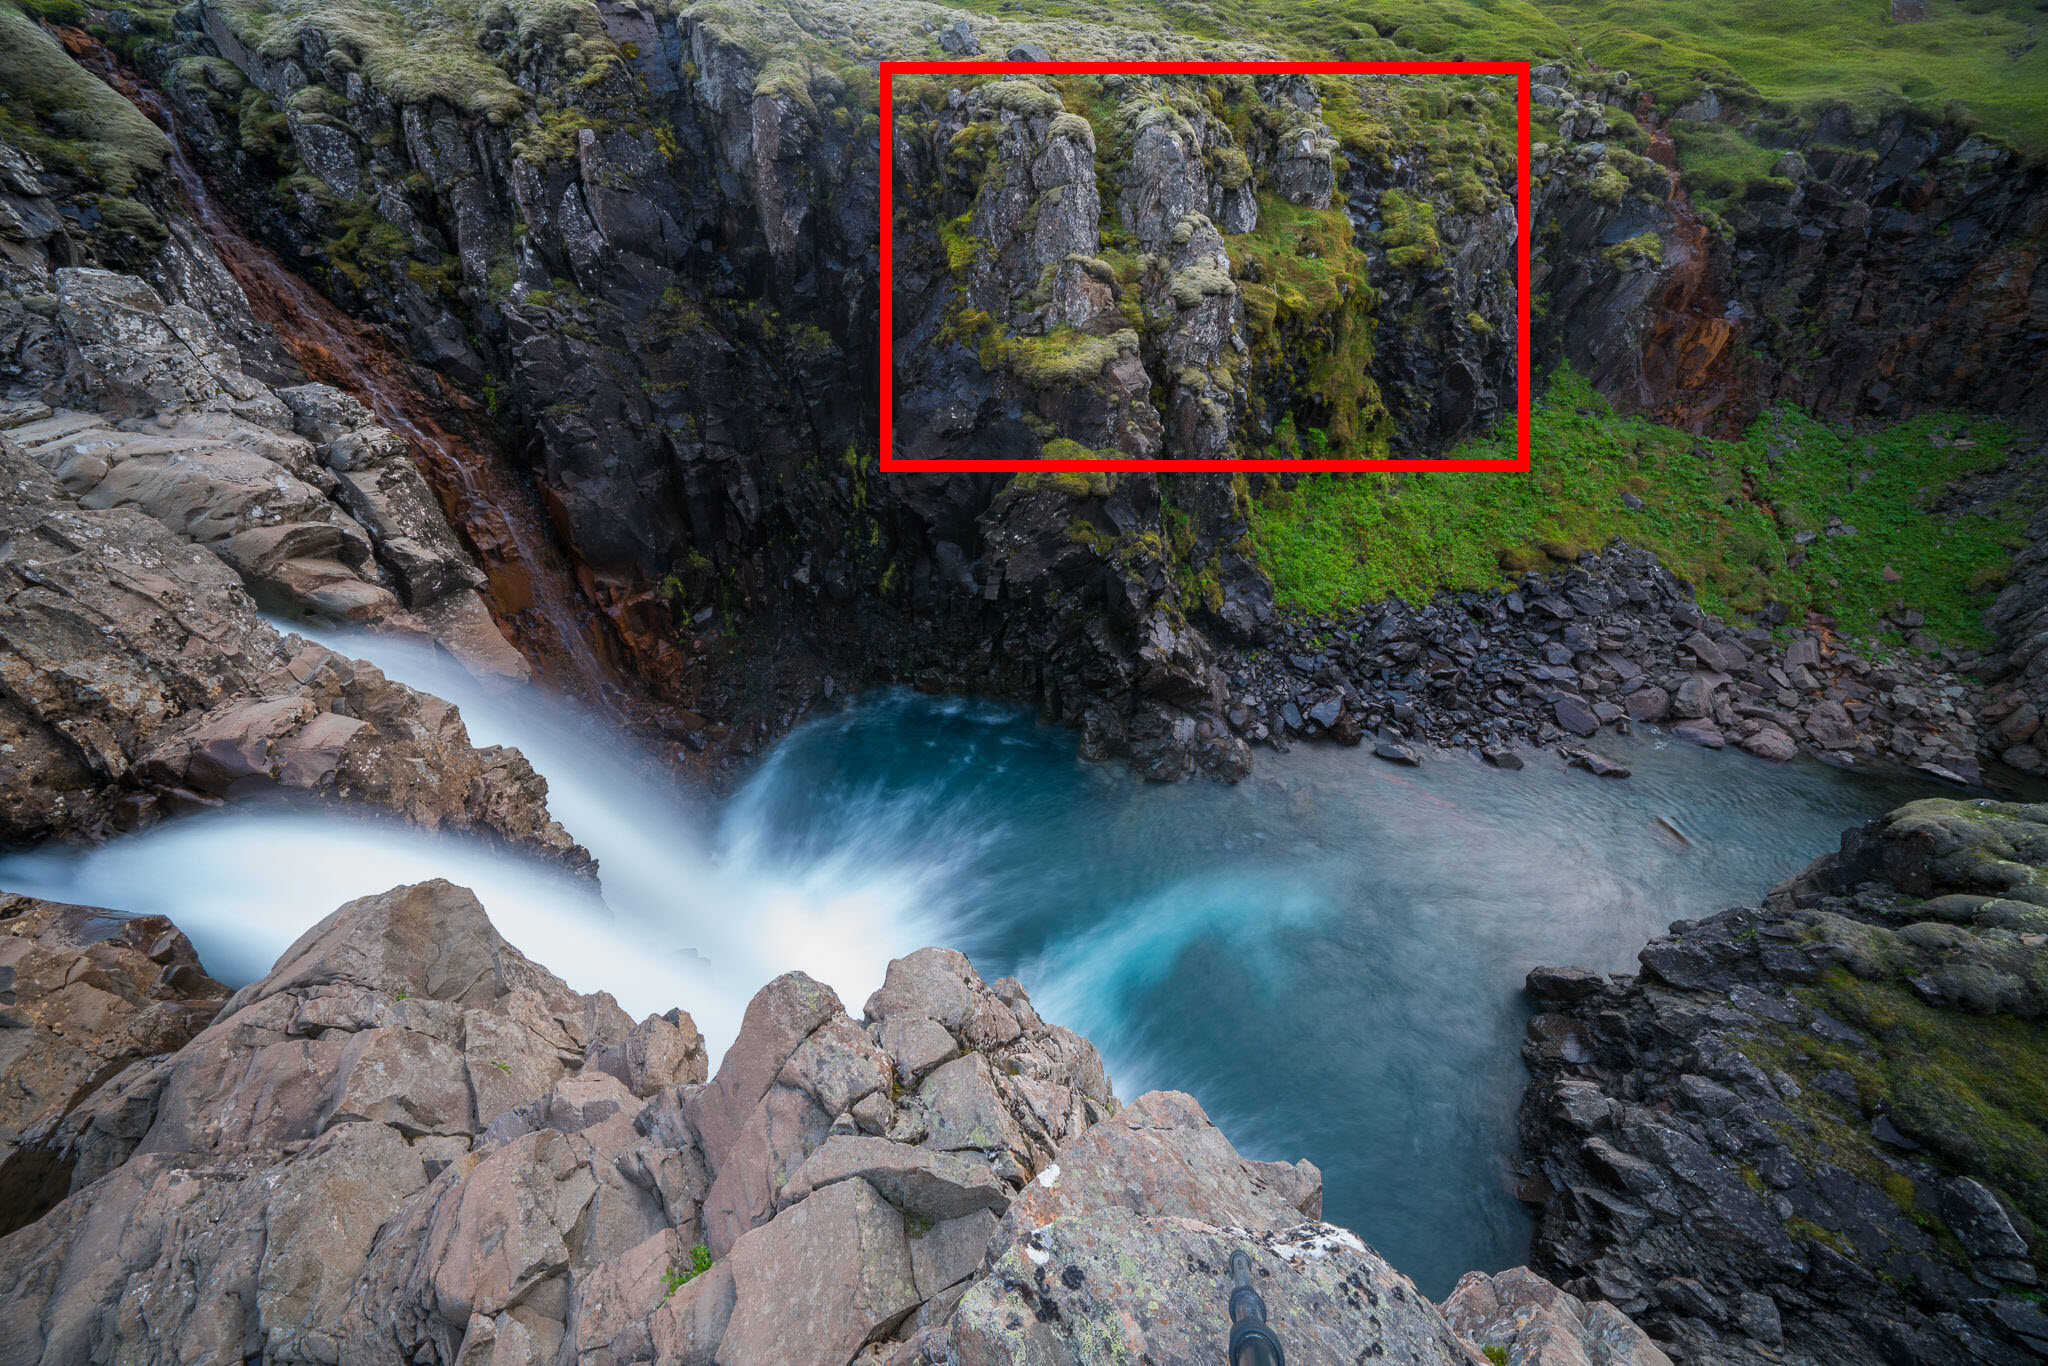
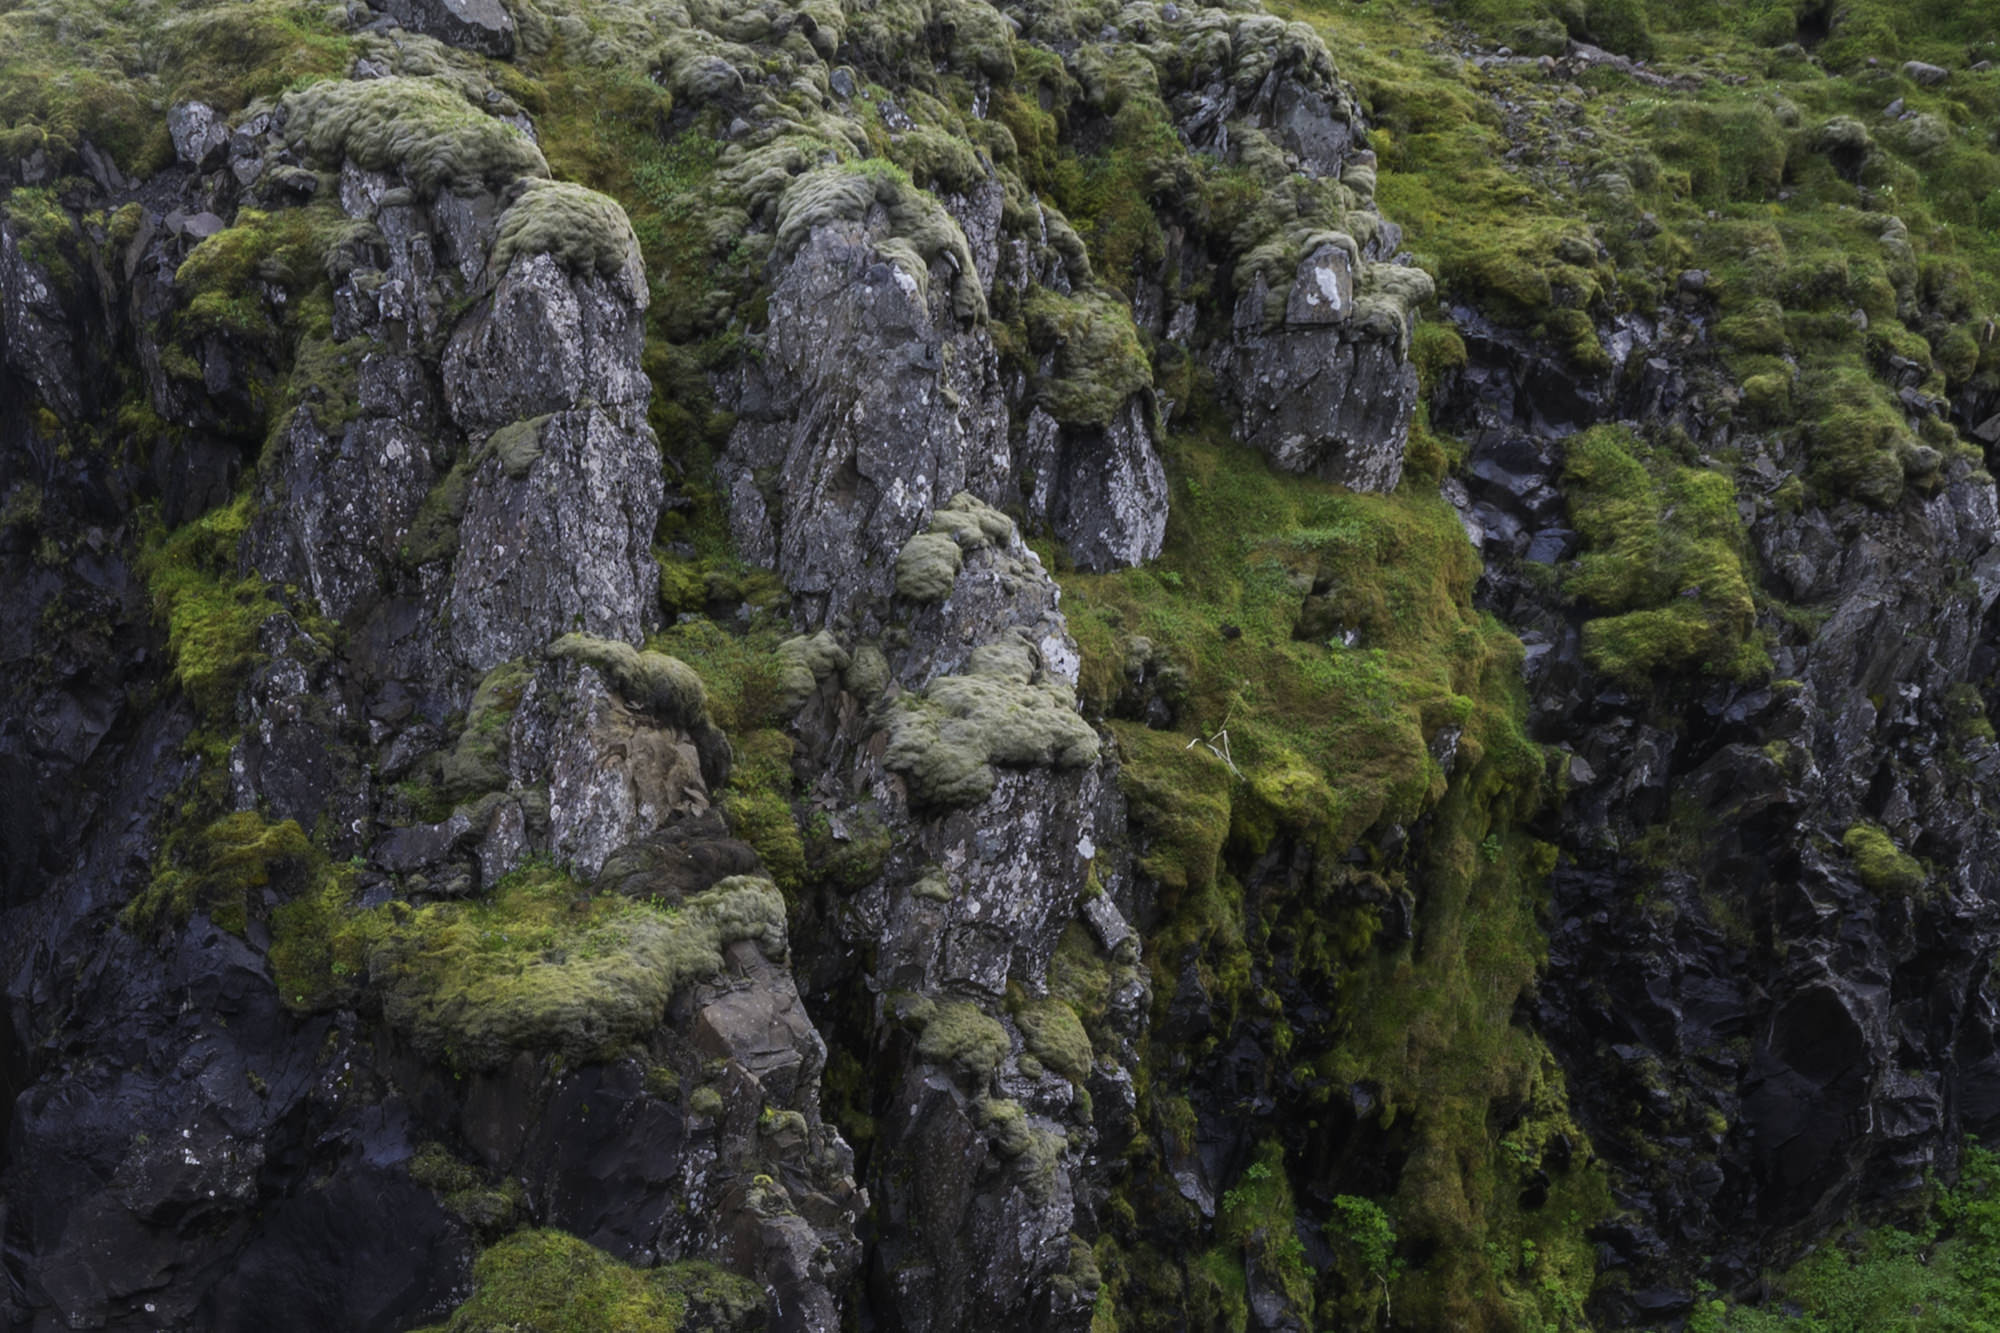
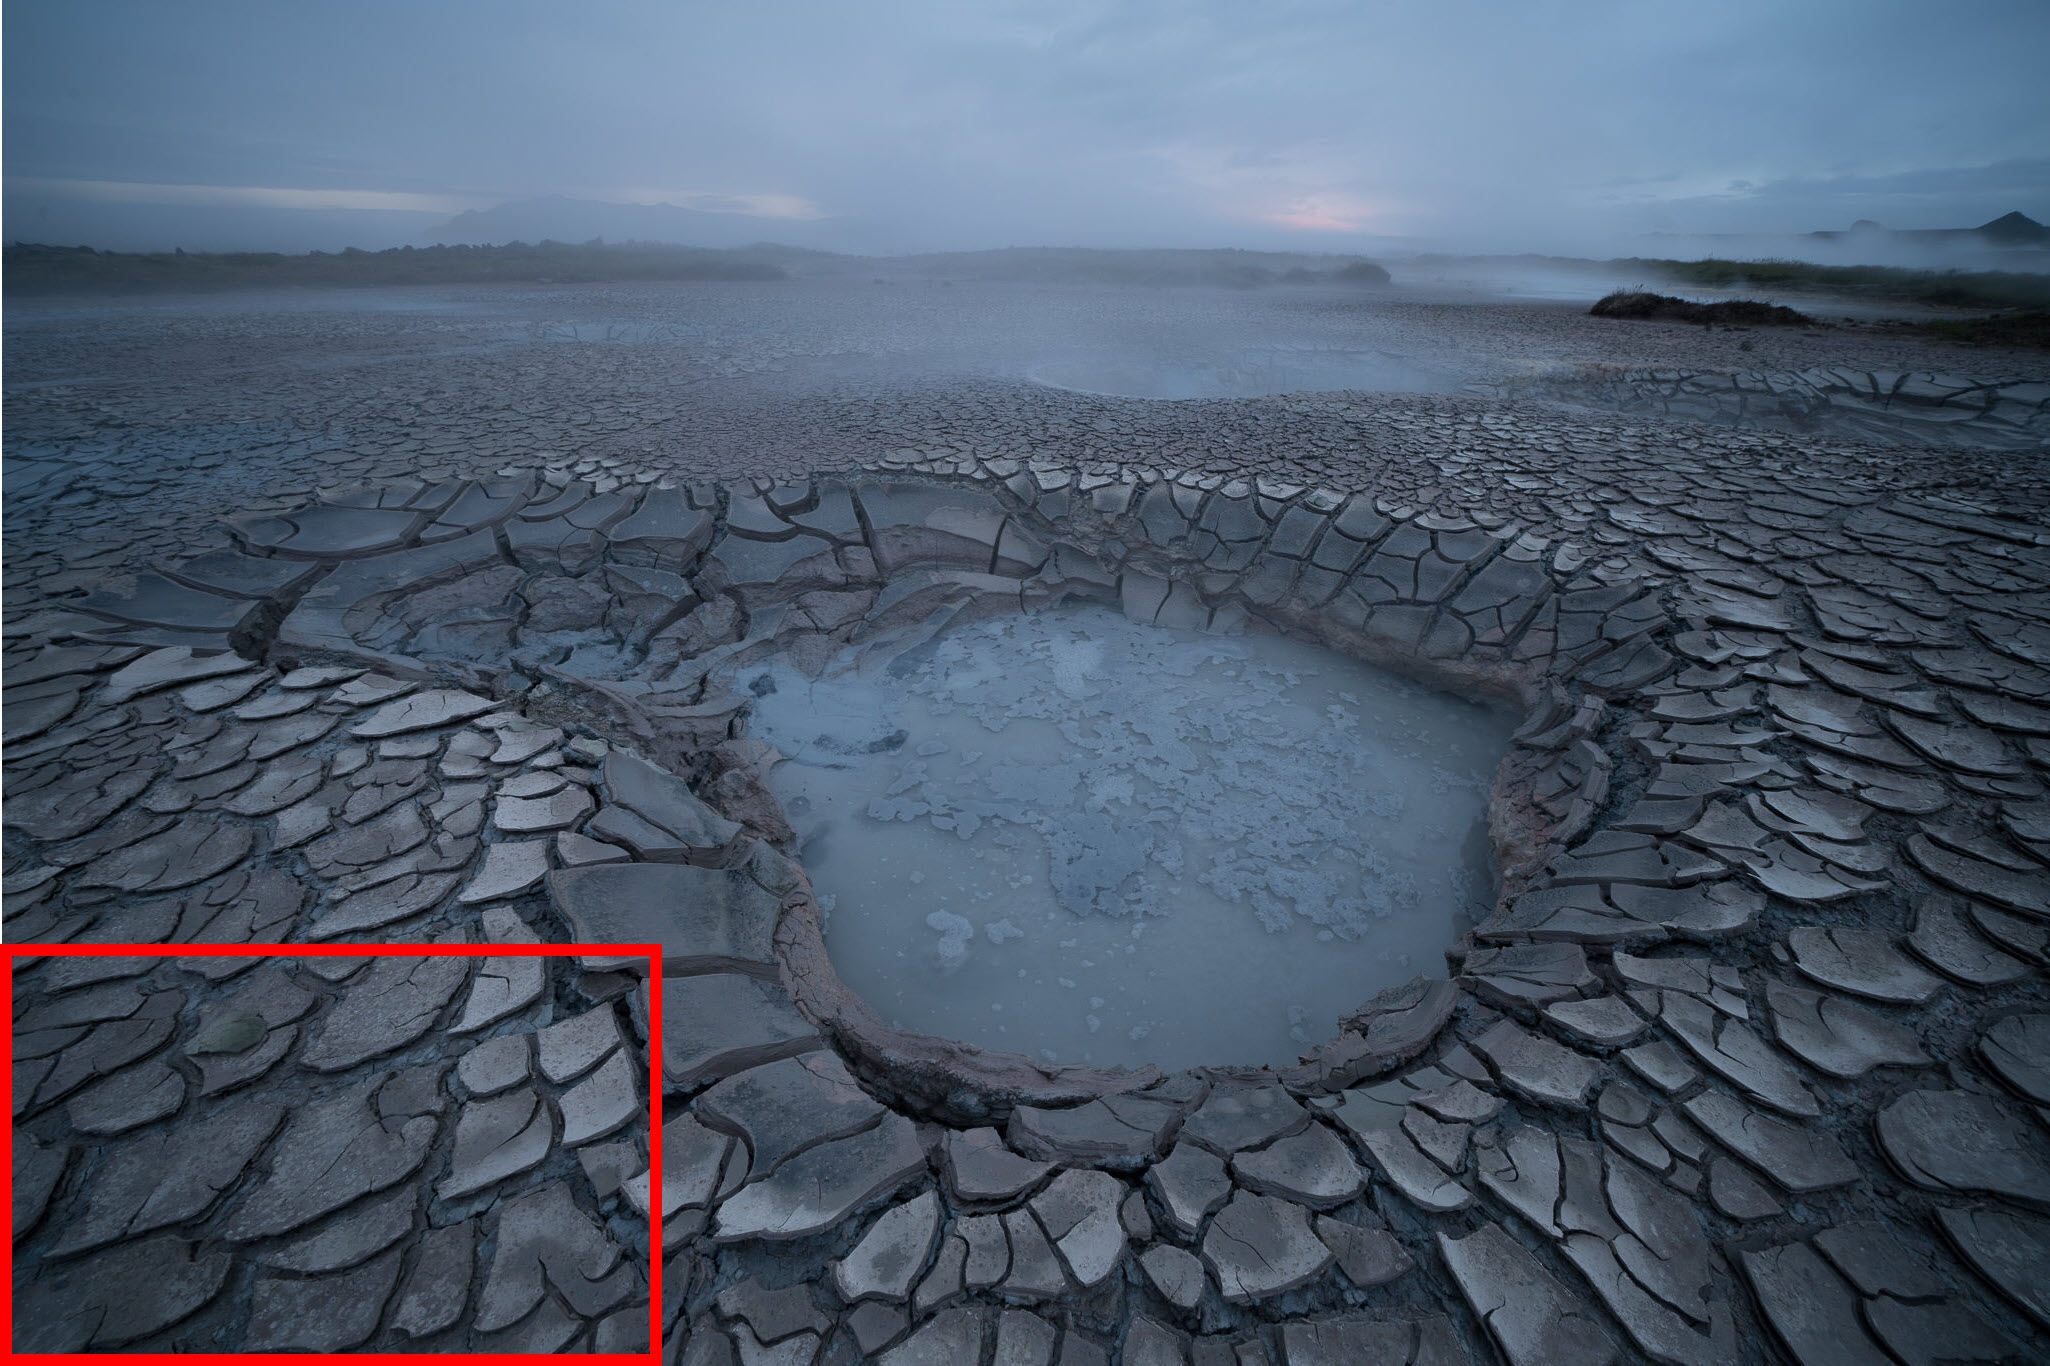
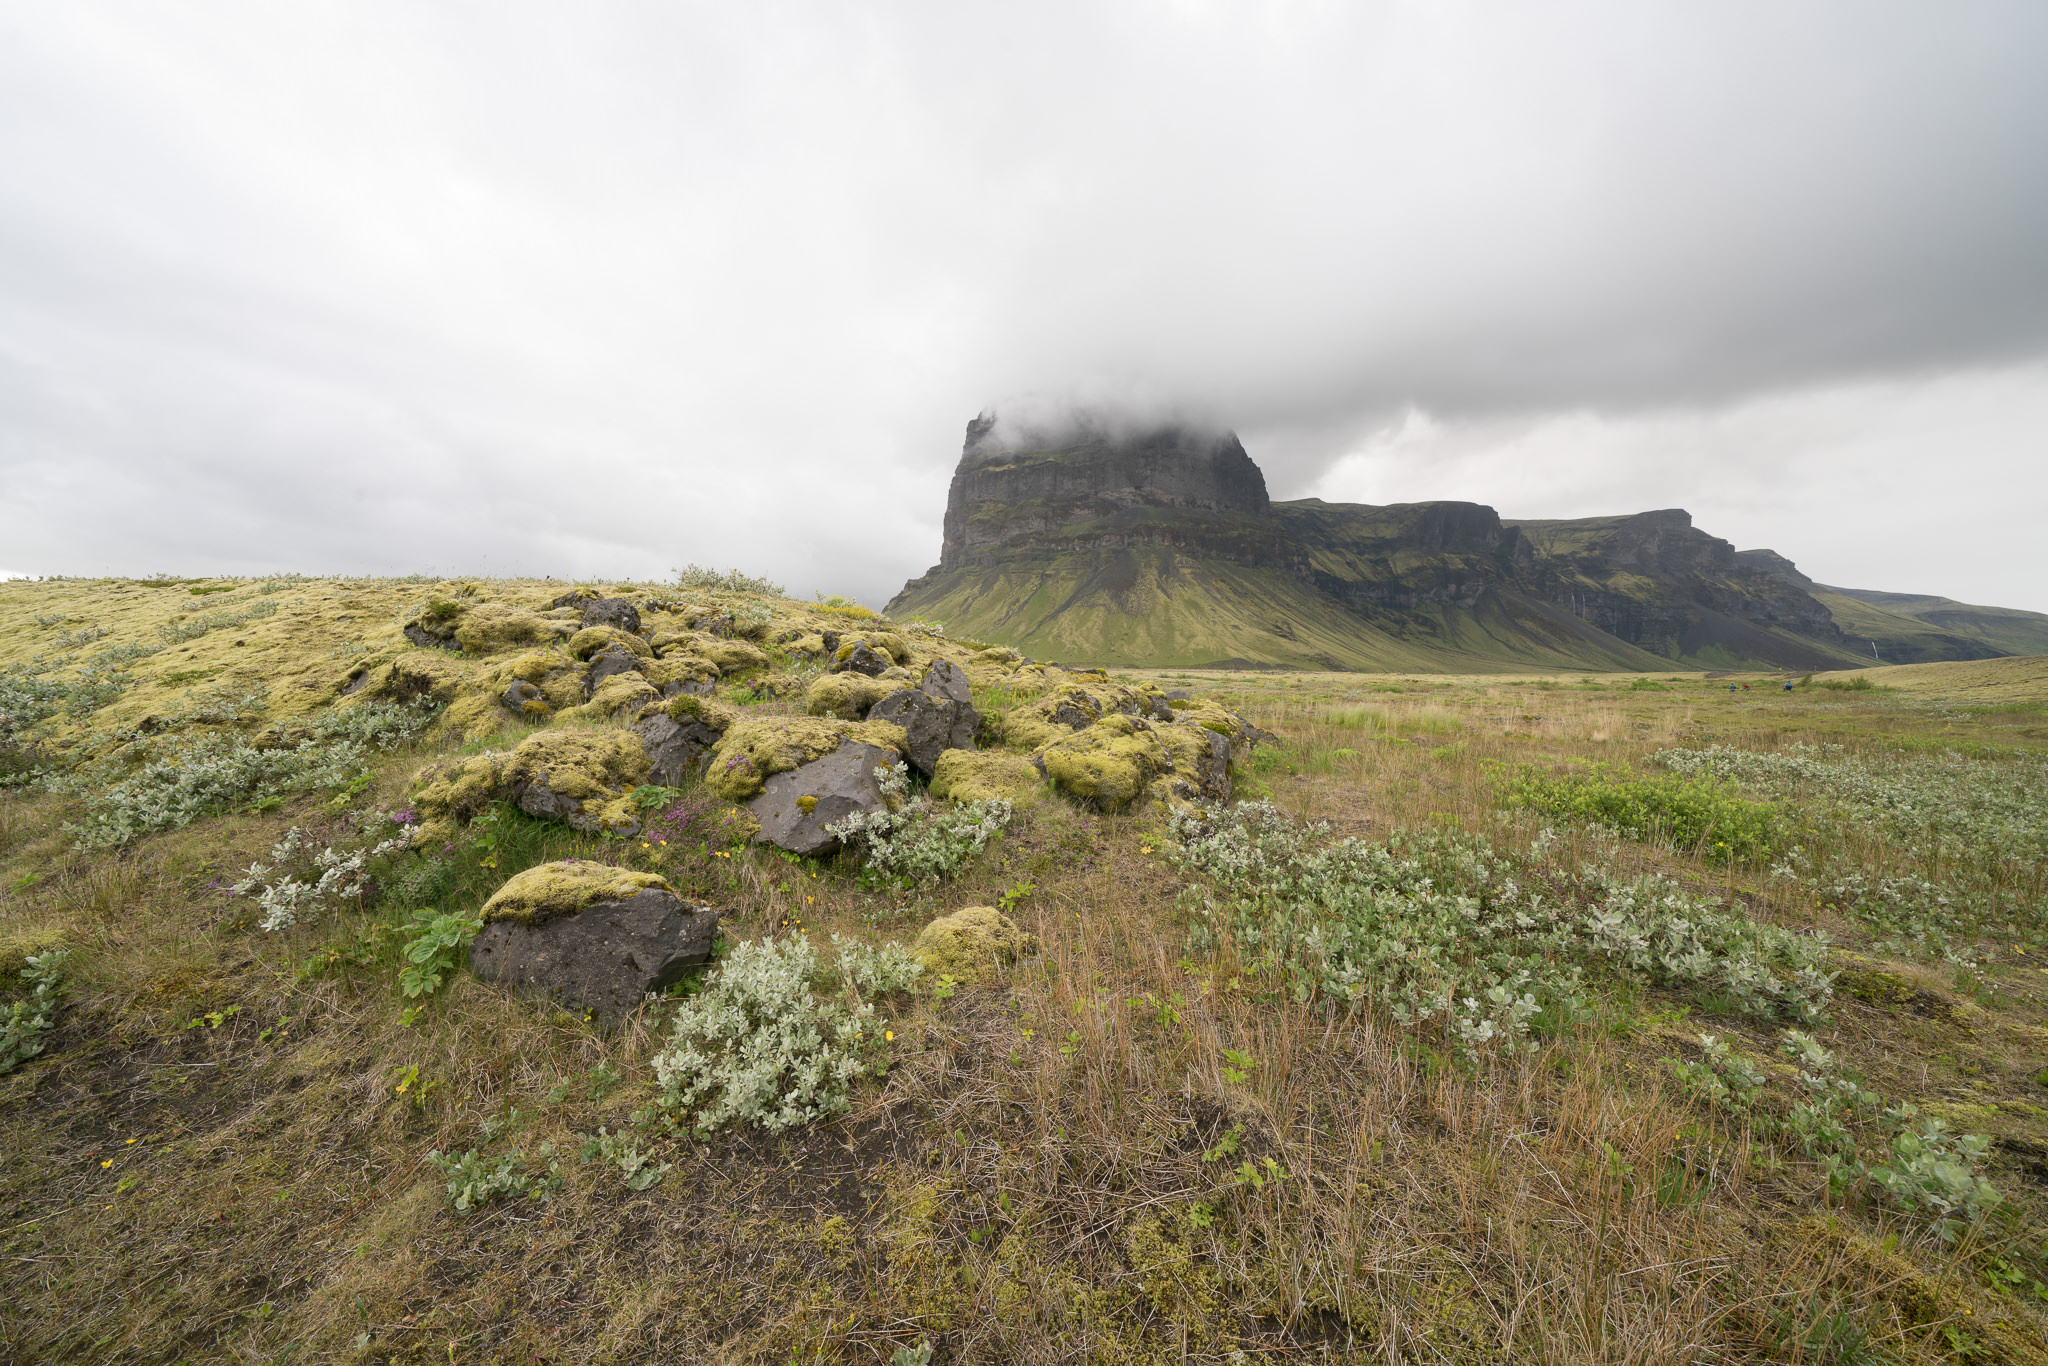
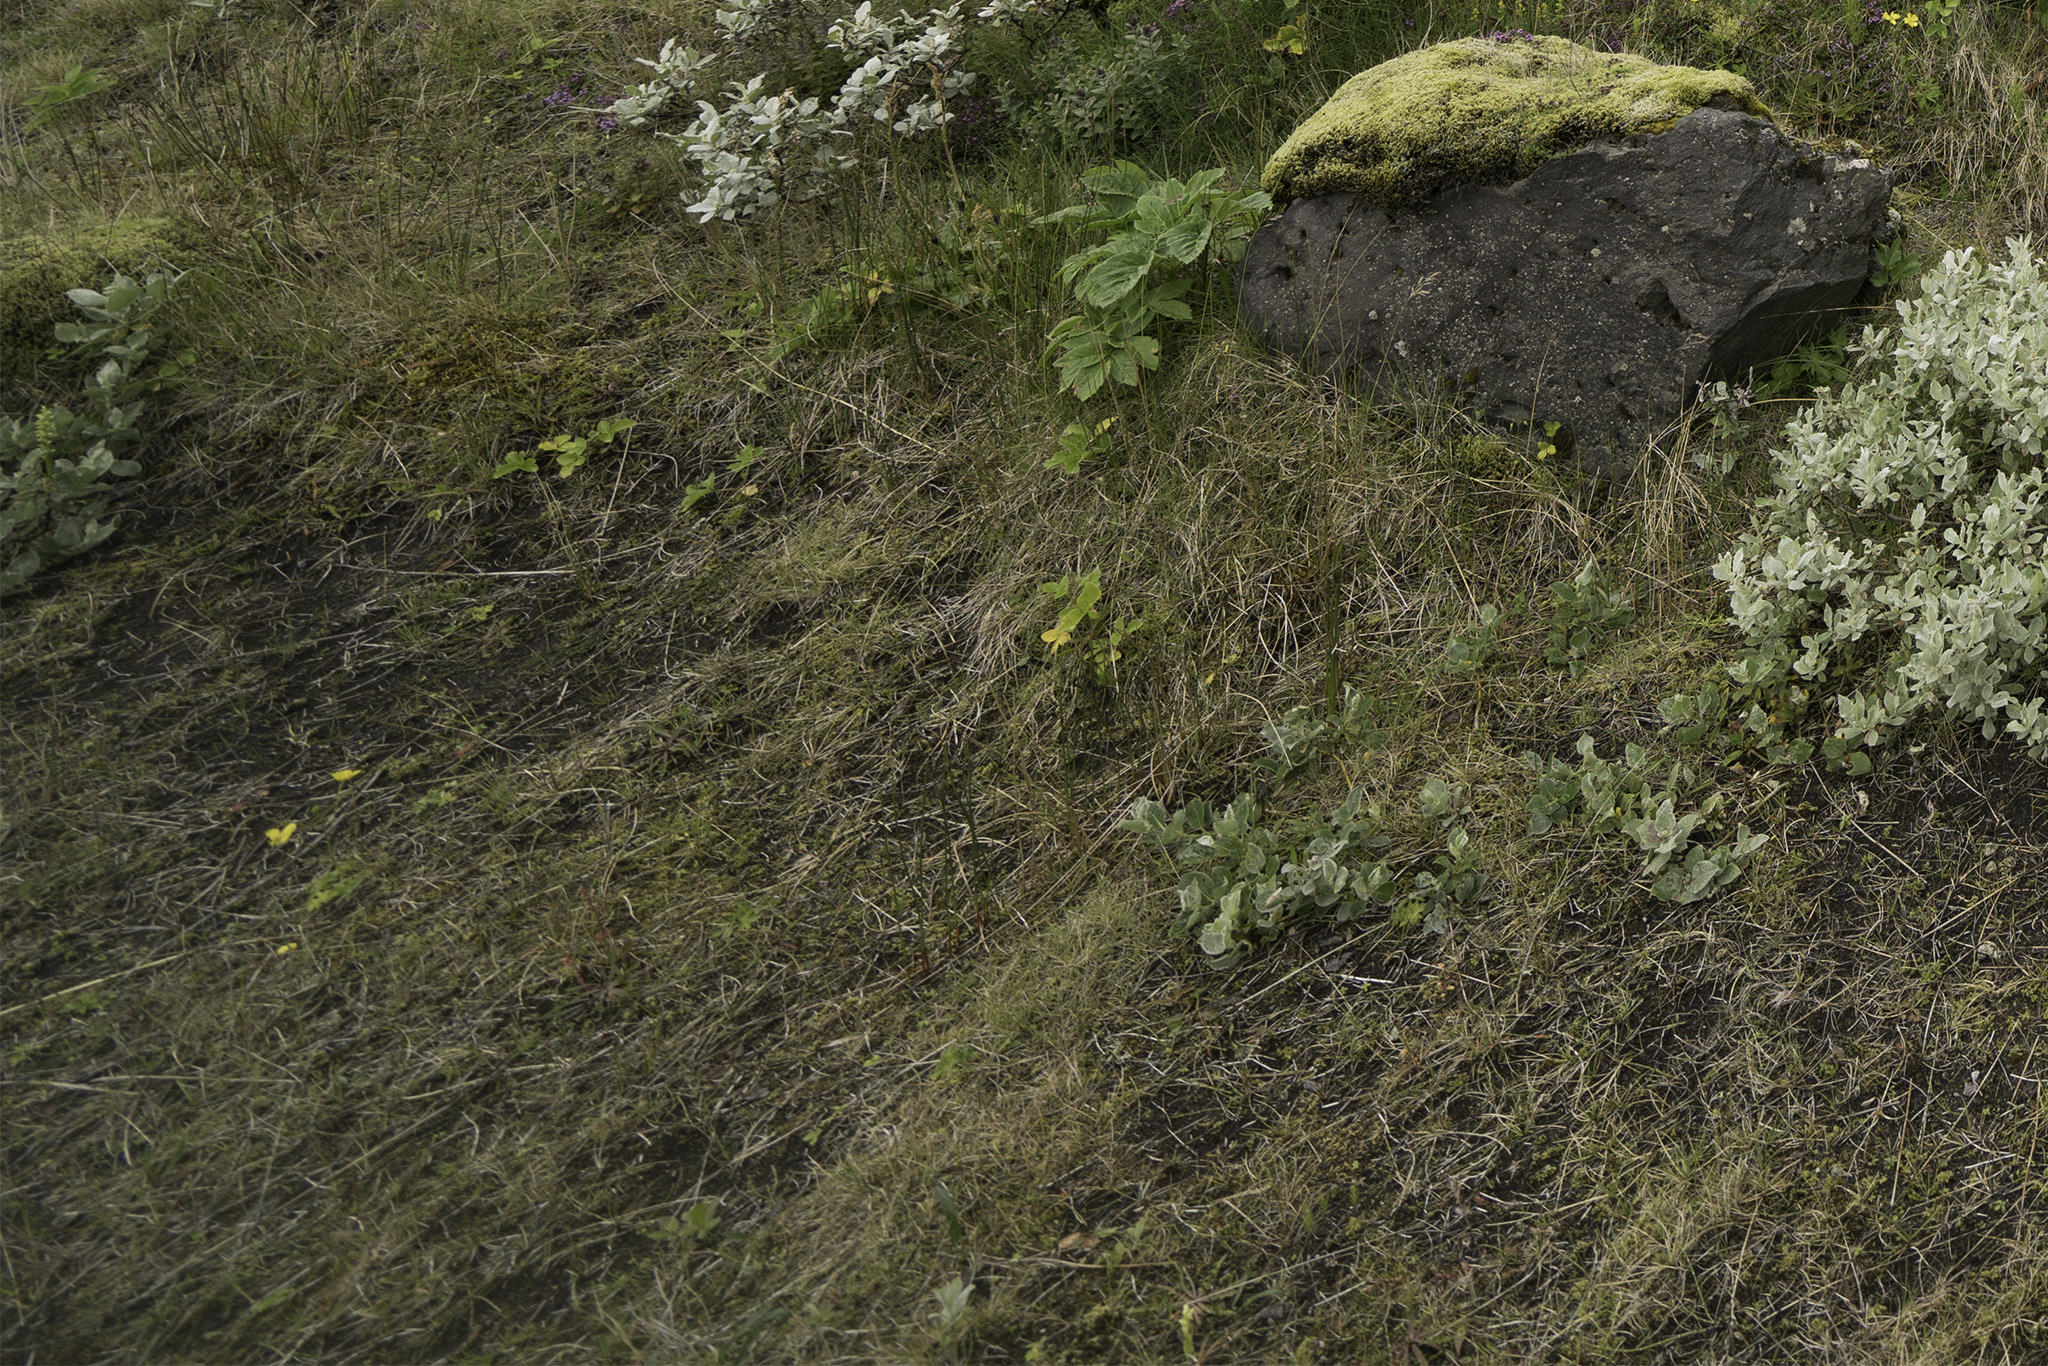
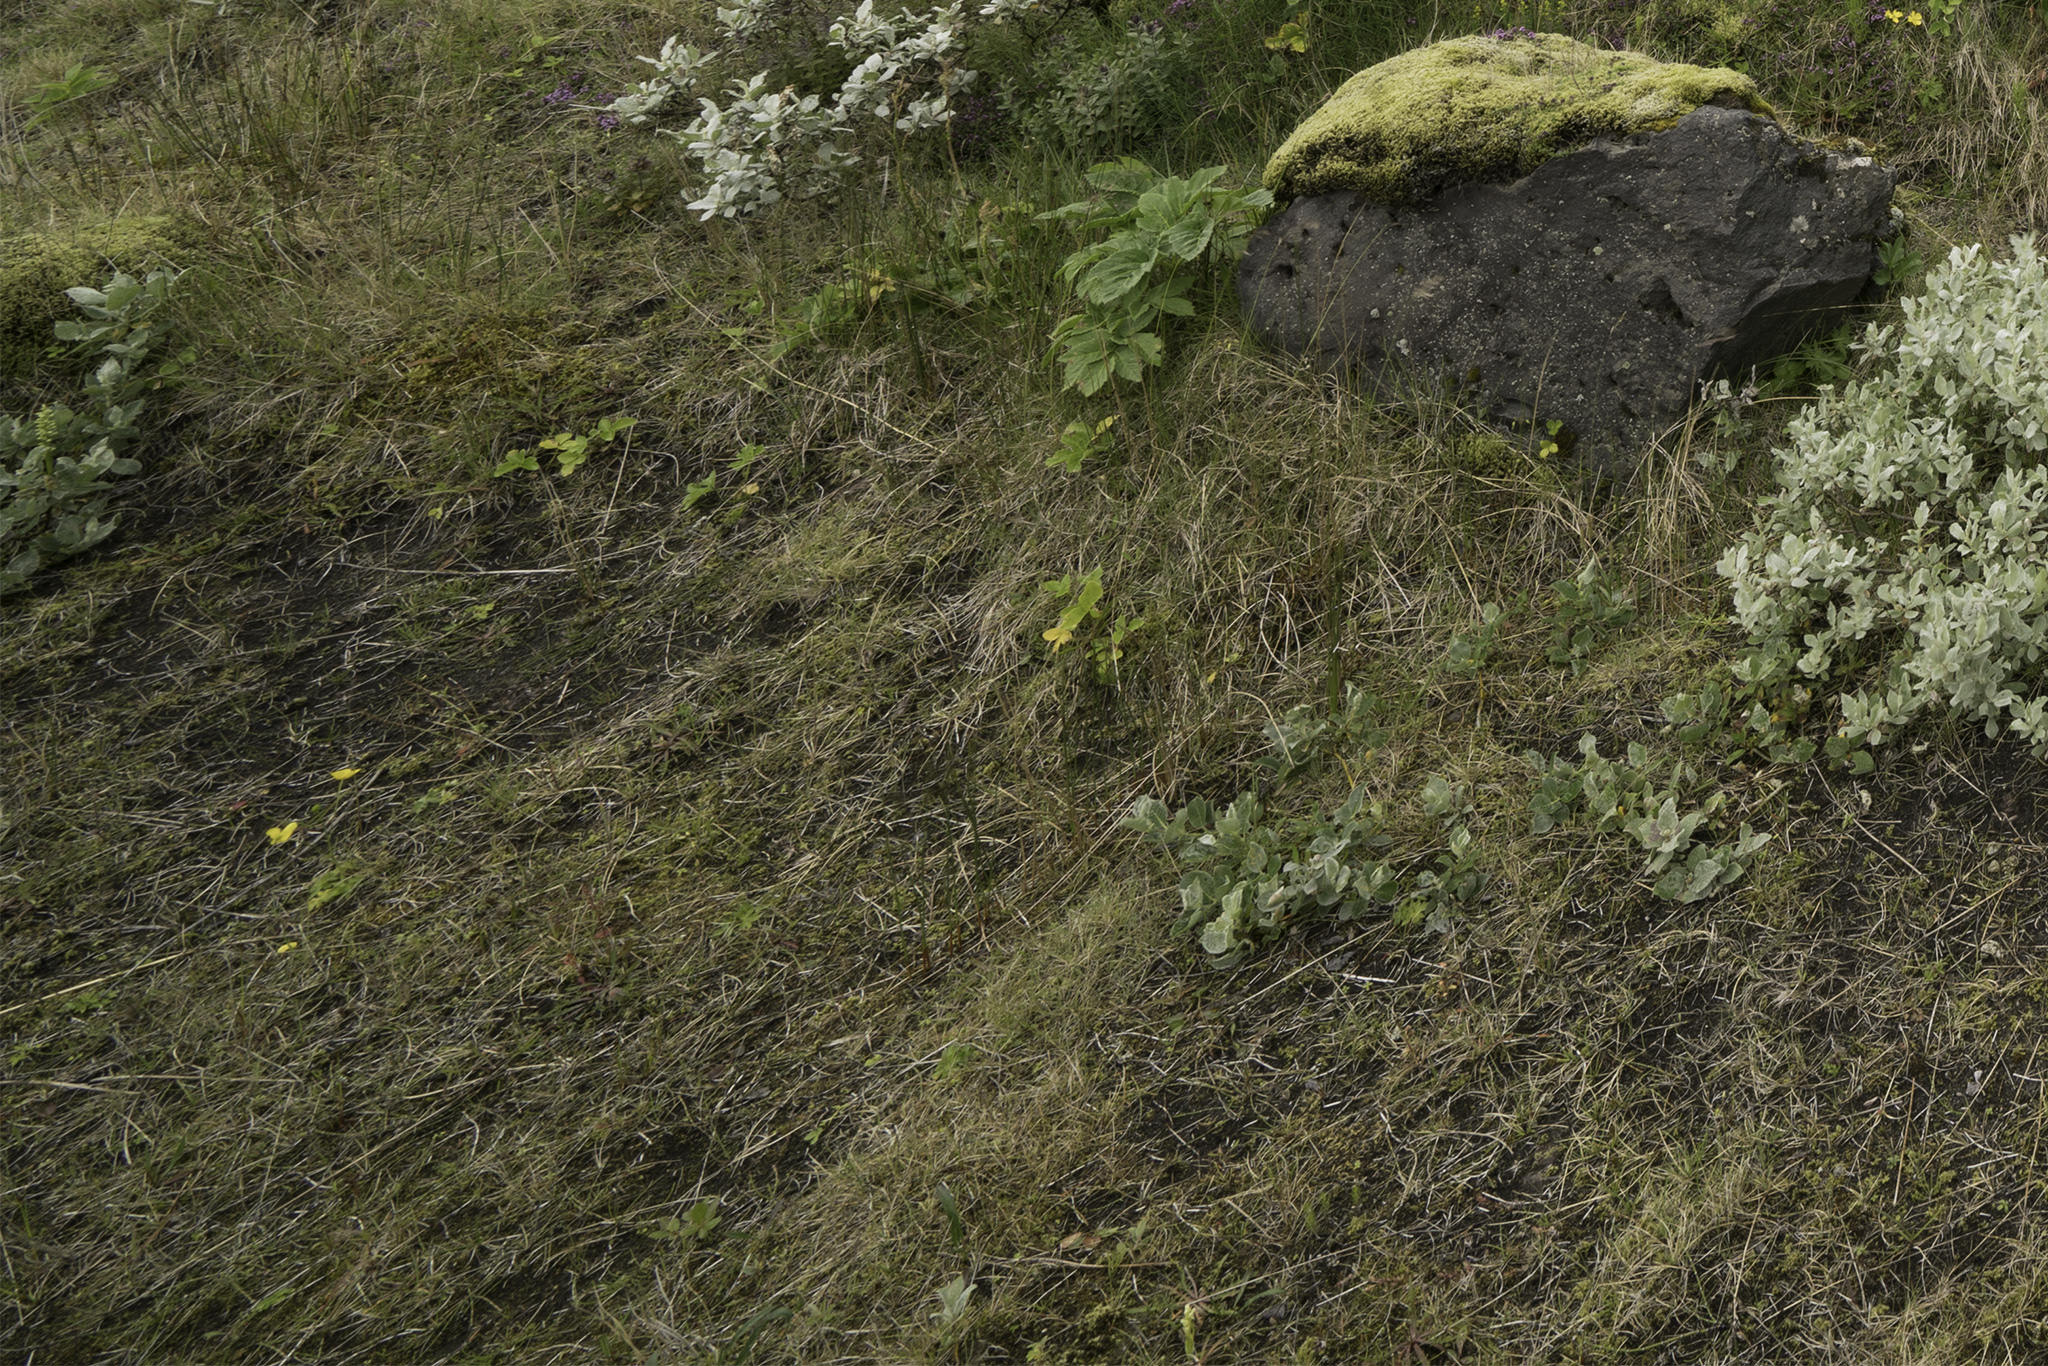
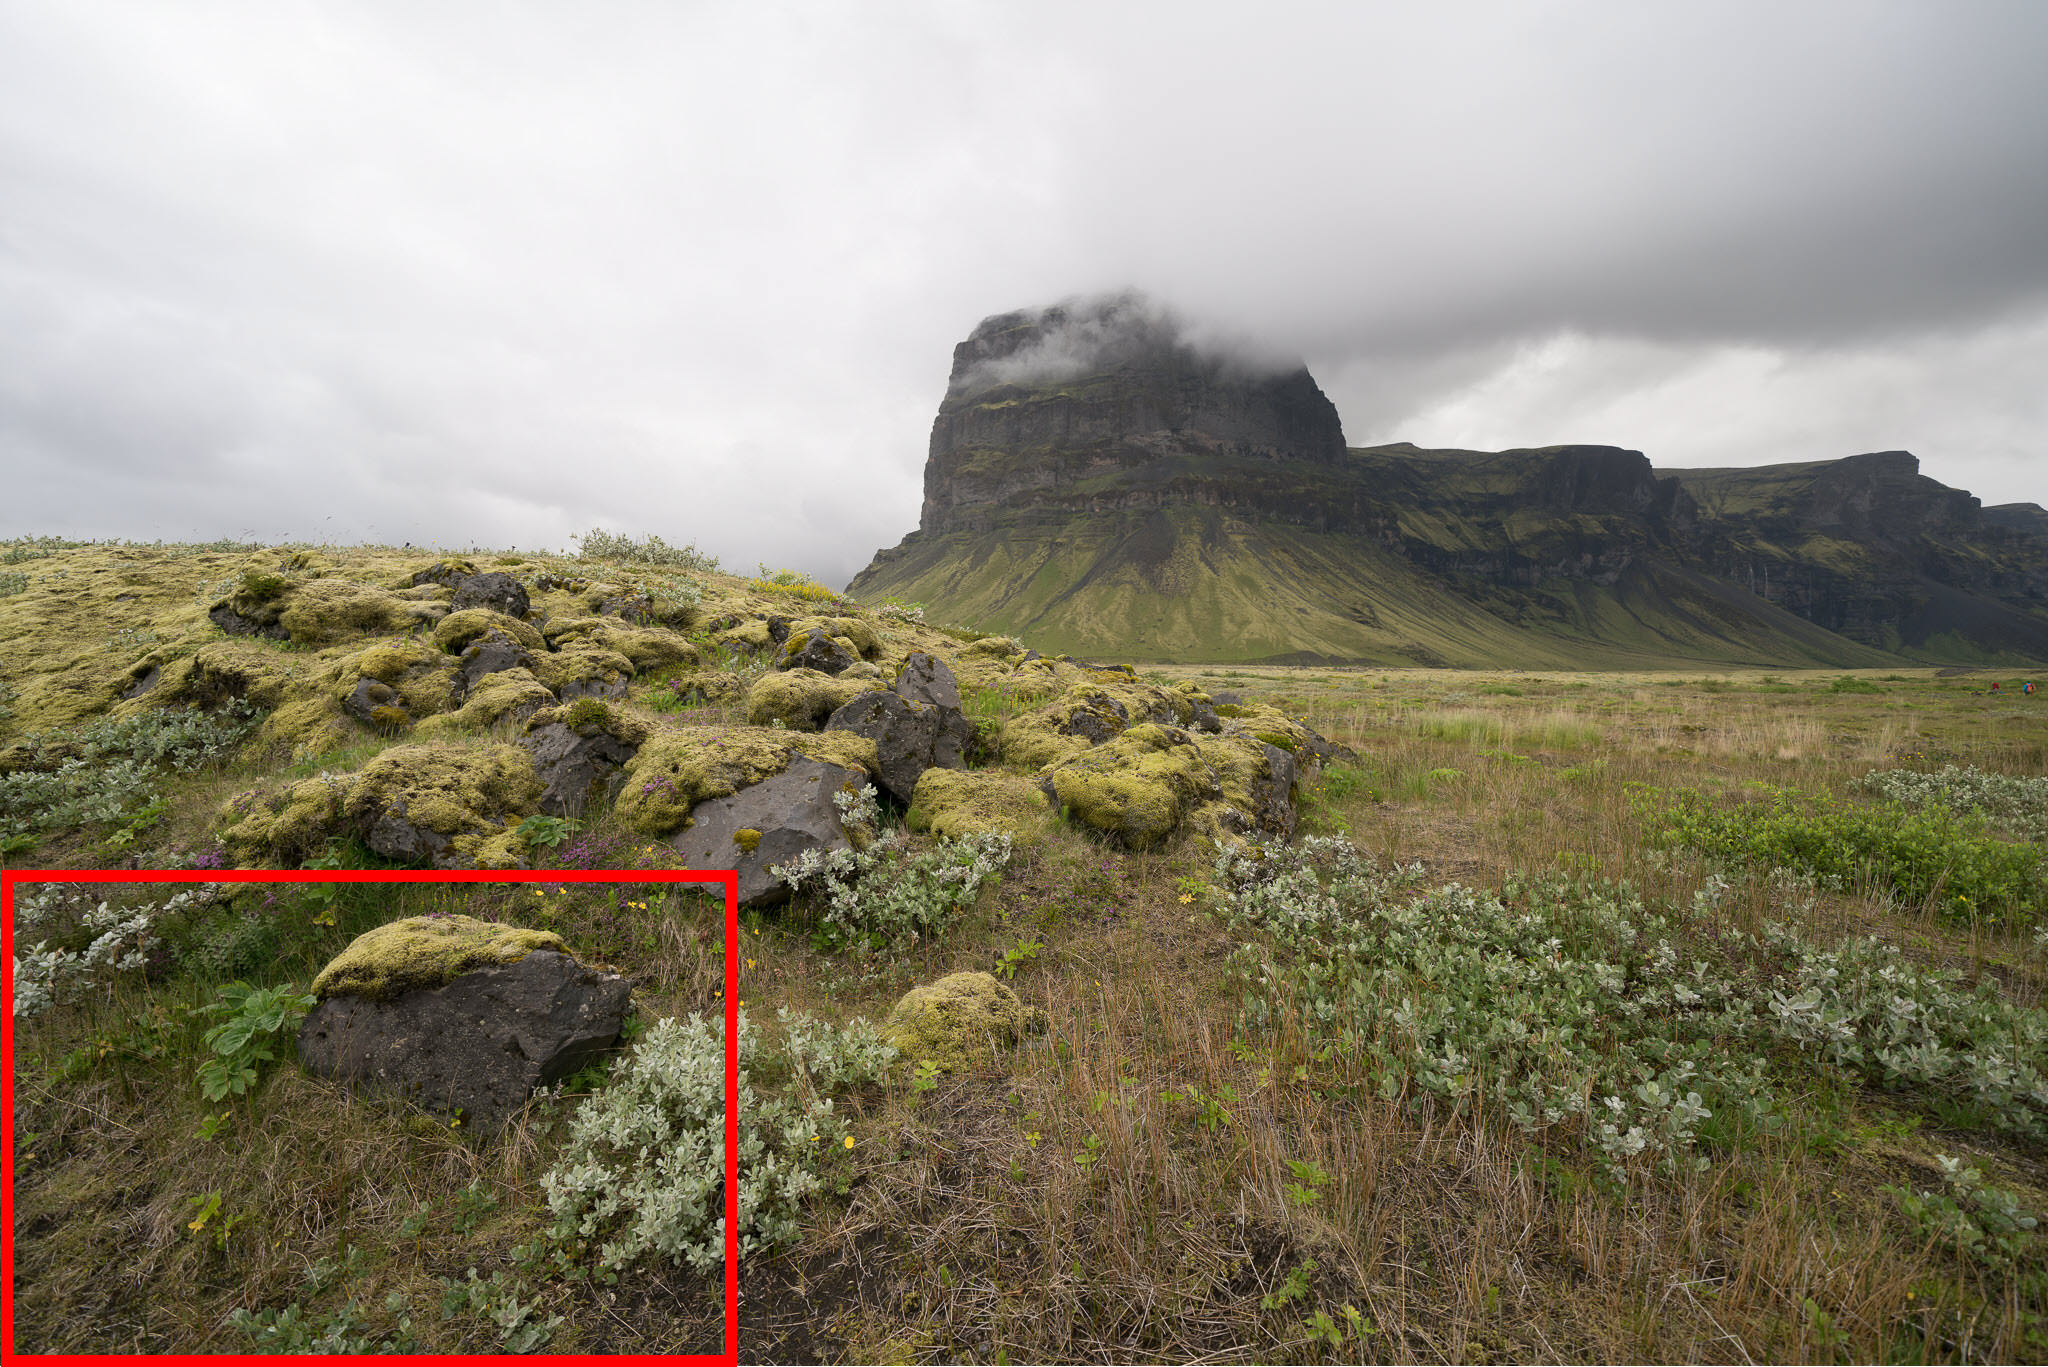
Anytime you use an ultra-wide angle lens, you have to pay special attention to your frame edges, especially when shooting at the extremes of the lens. With the 12-24 I found myself shooting at 12mm about 80% of the time while on this trip. This was not only because I enjoyed the challenge of finding subjects that demanded this extreme angle of view, but also because I was so pleased with how the lens performed around the edges. While there is certainly a touch of edge distortion & stretching, the quality of details found along the edges was impressive. I rarely saw any smearing or loss in texture detail as you can see in the 100% zoom of the image below. As for light falloff, there is certainly a noticeable amount, but nothing that can’t be corrected during post.

Lens Profile for the 12-24 f/4 G
Not to long after the this lens was released, Adobe pushed out an update for both Adobe Lightroom and ACR (Adobe Camera RAW). Both applications included the new lens profiles for this lens. As you can see from the images below, applying this lens profile will help you combat any light dropoff as well as help correct for any minor distortion or warping around the edges. While each image might still require a little fine tuning with this lens profile, the results are pretty good right out of the gate.


Corner Sharpness
When it comes to lenses these days, one of the most important (or at least sought after) aspects of a lens is determining how sharp the corners are. This is even more apparent with ultra-wide angle lenses because the angle of view is so much wider, allowing the lens to pull in so much more of a scene. If a lens has a poor design or uses sub-par glass elements, you might see the corners of your images turn out soft or in many cases, looking like mushed details. While this is more apparent in cheaper lenses, many camera/lens manufacturers have put out expensive lenses that offer subpar results. So how did the Sony 12-24 f/4 G perform? Let’s find out!


When you click and zoom into the above images, you get a clear idea of how sharp the corners are with this lens. While f/4 and f/22 look pretty good for a 12mm lens, I do notice some smearing at the extreme edges. The corners as a whole are also not as sharp as they are at other f/stops. I think the bread and butter for this lens is between f/8 and f/11, which seems to offer excellent corner sharpness. At f/16 you start to see things drop off again if you zoom in past 100%, but not by a significant amount. All in all, considering how wide this lens is, I am very happy with the corners at 12mm, especially if I use the sweet spot of the lens!
What about other mm lengths?
While I didn’t conduct the same extensive test 24mm, I did shoot it at 16mm and looking at the results below, you can see that corner sharpness at all f/stops only gets better the more you zoom in. The sweet spot is still around f/11, but sharpness has improved in the corners at all f/stops.


Sunstars/Flare
Two other important elements of a wide angle lens are how well they can both produce sunstars and handle flare or reflected light. For those that might not know, a sunstar is a star like shape that appears over a bright light source, such as the sun or certain kinds of street lights. To get this effect, you often have to stop down your f/stop to around f/16 in order for the aperture blades of your lens to get close enough to create the star-like shape. It can also help to allow your light source to nearly clip the edge of another object, such as the rocks along the horizon line in the image below. Along with this test, it is good to get an idea of how well a lens can handle flare or reflected light, that can cause unwanted colored shapes to appear in your image when you are pointing the lens directly at a light source, such as the sun in this case.


As you can see, the Sony 12-24 f/4 G actually create a very pleasing sunstar. While it isn’t as tac sharp as the new Sony 16-35 f/2.8 GM (Review), it is one of the better sunstars I have seen from an ultra-wide…and it is much more pleasing to the eye than the Sony 16-35 f/4 FE lens. As for flare, I am pretty happy with the results. In the image above, you can see tiny flare reflections located just below the sunstar itself. While it isn’t perfect, it does do a good job of mitigating flare for an ultra-wide angle lens with a bulbous front glass element.
Good for Astro Photography?
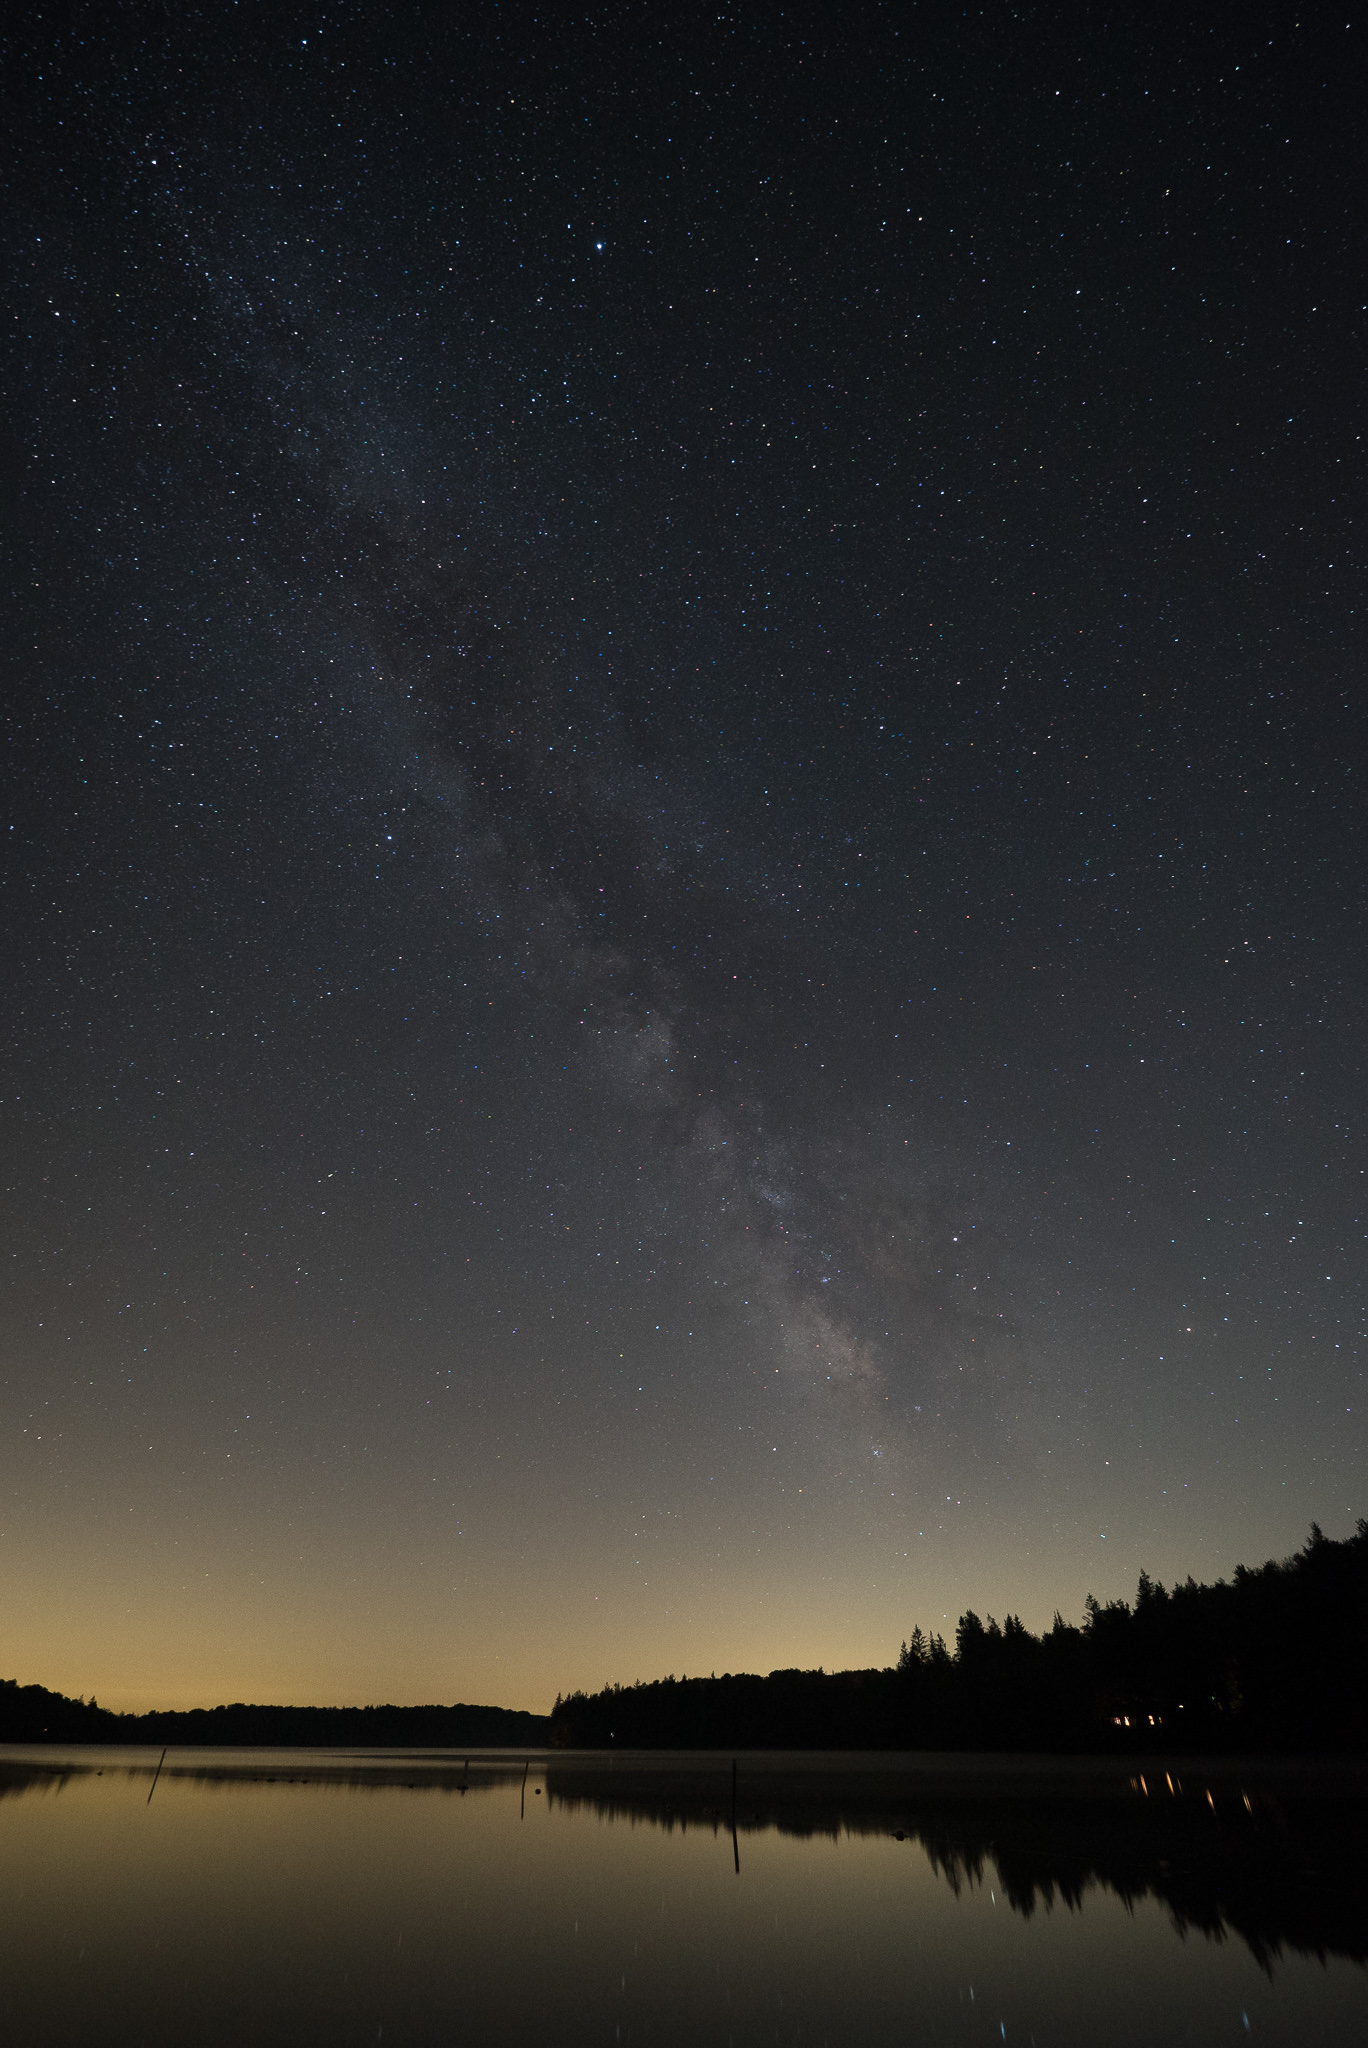
While many photographers will prefer to use faster glass (f/2.8 or faster) for night photography, the ultra-wide angle of view of the 12-24 f/4 G lens helps make it a contender for situations such as photographing the milky way. After all, the wider you go, the more night sky you can bring into your frame. In fact, this was one of the most asked questions I received from photographers when they heard I was reviewing this lens.

So how do you test a lens to see how good it is for astrophotography? For many of us, this comes down to two things…
COMA (Comatic Aberation)
When you hear another photographer talking about COMA, they are refering to Comatic Aberation or multi-colored light that can appear in high contrast aspects of some images, such as bright stars against the dark night sky. Lenses with bad COMA will showcase stars (especially planets) with a multi-colored tail, almost looking like a comet. To see this, you often have to zoom in beyond 200% into your image, but when you do, it should be pretty obvious.
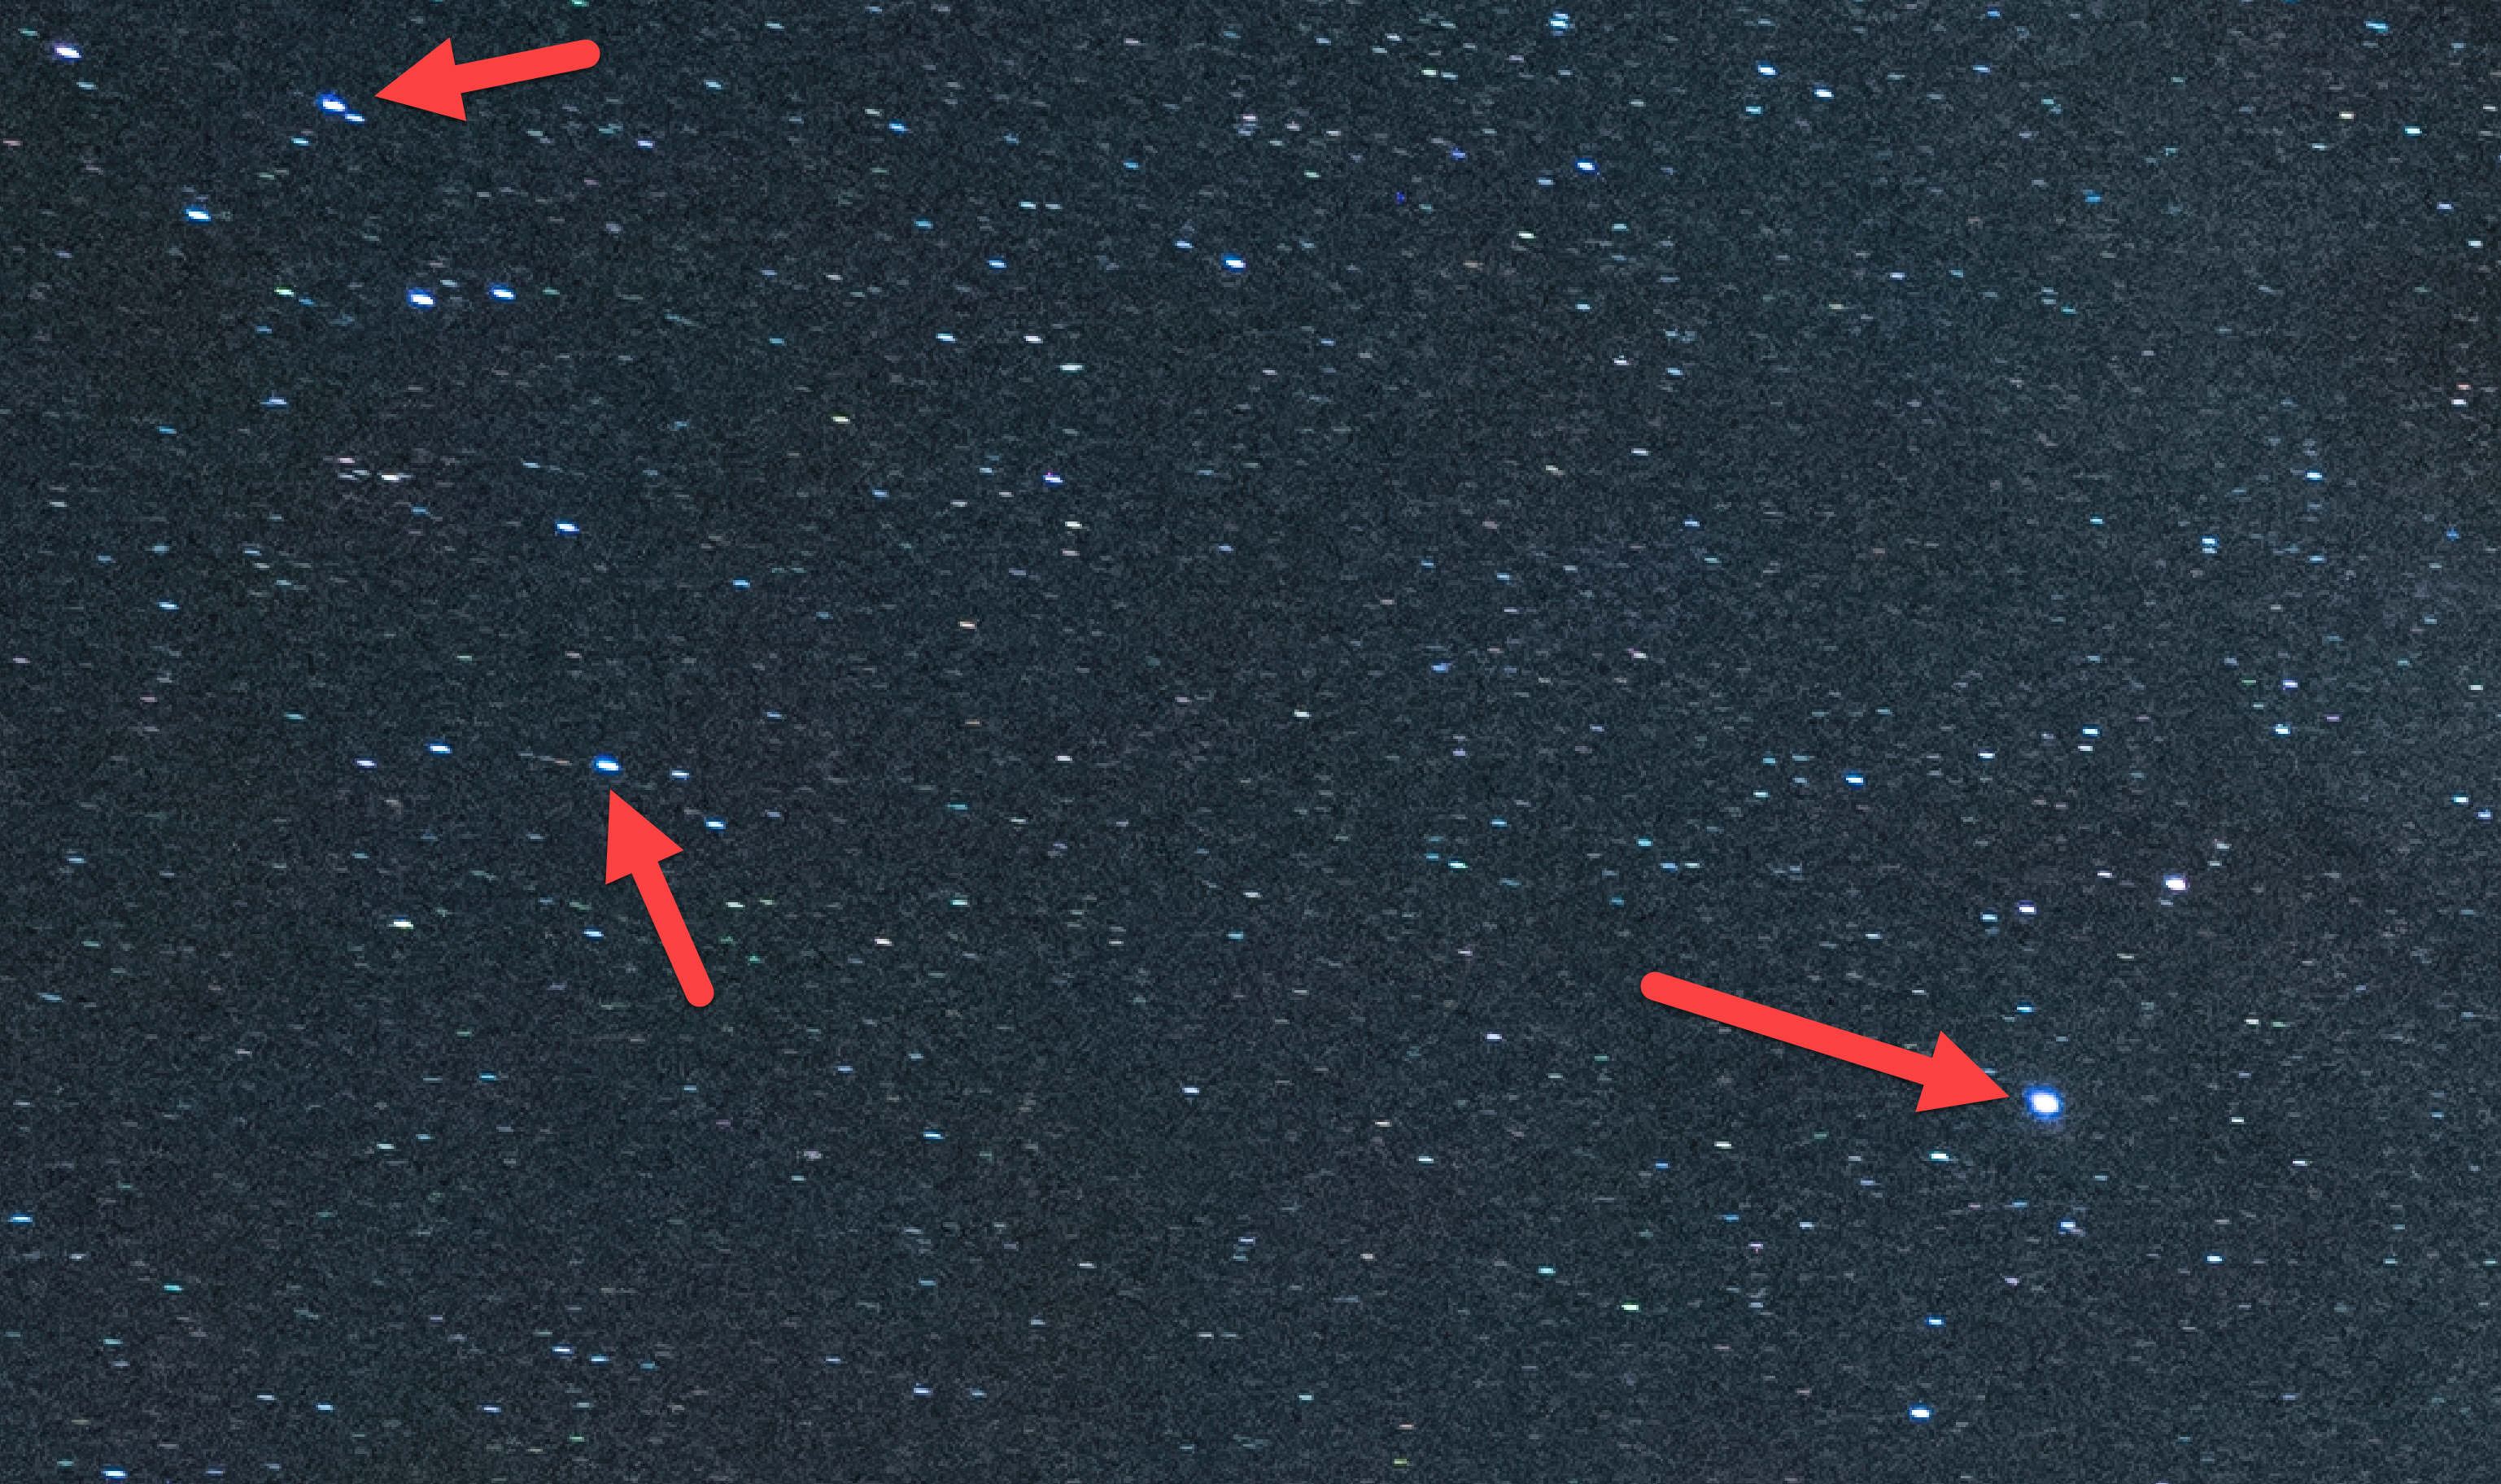
When I zoom into any of the night sky images I have taken with the Sony 12-24, I do not see any COMA at 100%….or 200%, but when I zoom in at 300% (such as this screenshot) you can see a very very faint amount of COMA around a few of the brightest stars. Overall these are impressive results. At 12mm and f/4, which is how I expect most photographers to use this lens in a situation like this, COMA is nearly non-existent.
Astigmatism
Tangential and Sagittal Astigmatism is something that is talked about alot less then COMA, but it still can have an effect on your images of the night sky. According to the Lonely Speck (A great resource for those interested in night photography), a “Stigmatism causes point light sources at the edge of the frame to appear to stretch in a line”. This can look a little like lens distortion or warping in the sense that the stars near the edge of your frame tend to look elongated.
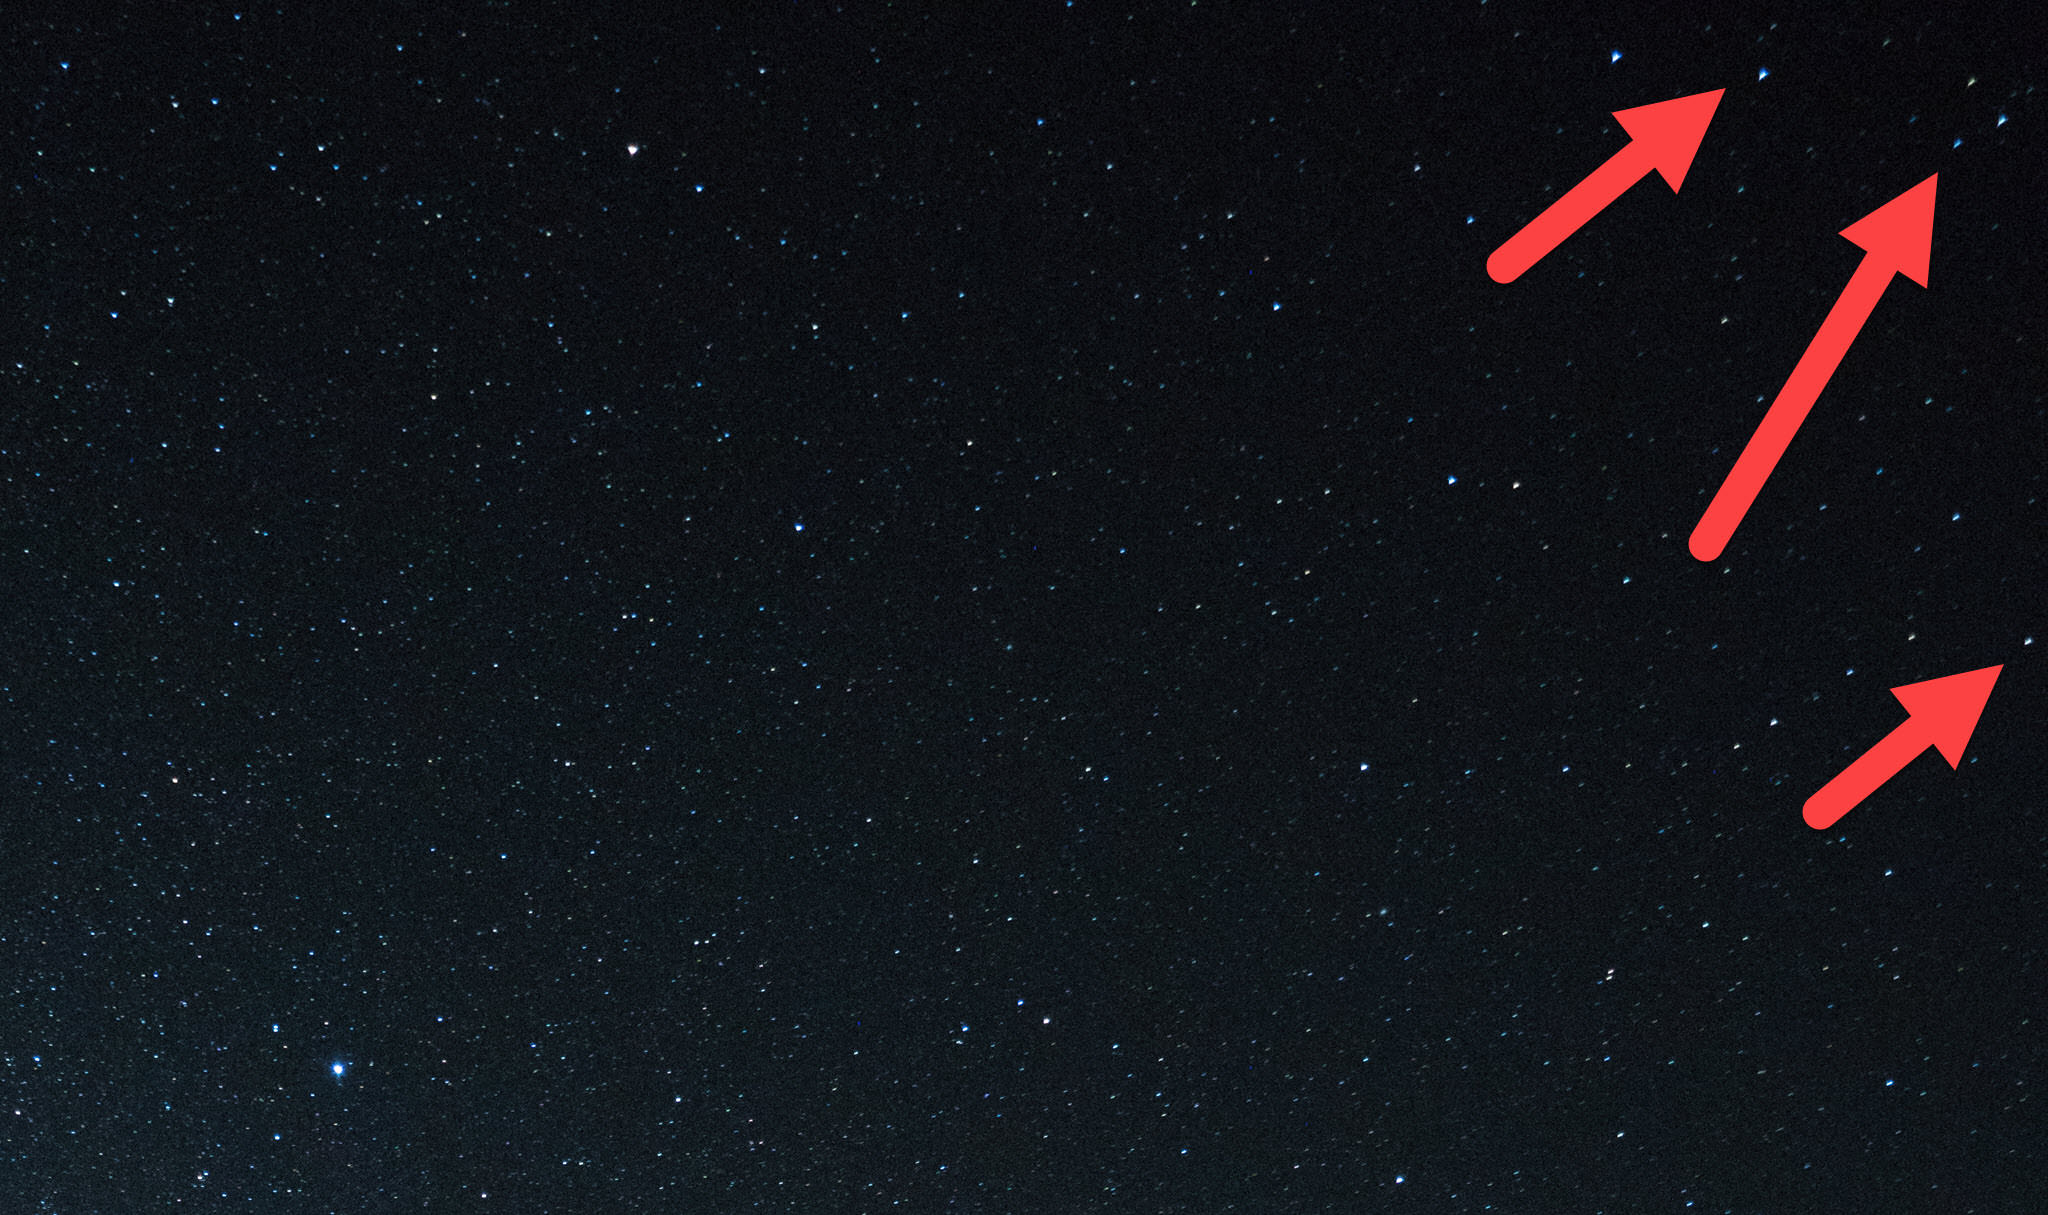
When I look in the extreme corners, I do notice a few stars start to stretch. For a 12-24 f/4, I would actually expect this to start a little closer towards the center of the frame, but as you can see, this isn’t the case. The Tangential Astigmatism is minimal, which I am pretty excited to see.
SOTC
This gallery of images represent images taken straight out of the camera. No edits or alterations were done to these images outside exporting from Adobe Lightroom. All of these images were taken with a Sony a7R II w/ the 12-24 f/4 G lens.
Finalized Images
All of the images in these galleries were processed according to the style, look and feel that I prefer. All of these images were taken with a Sony a7R II w/ the 12-24 f/4 G lens.
RAW Files
The following RAW files are for you to download (links below) to pixel peep and disect to your hearts content.

Sony a7R II w/ Sony 12-24 f/4 G
ISO 50 | f/16 | 2.5 Seconds
Download Link

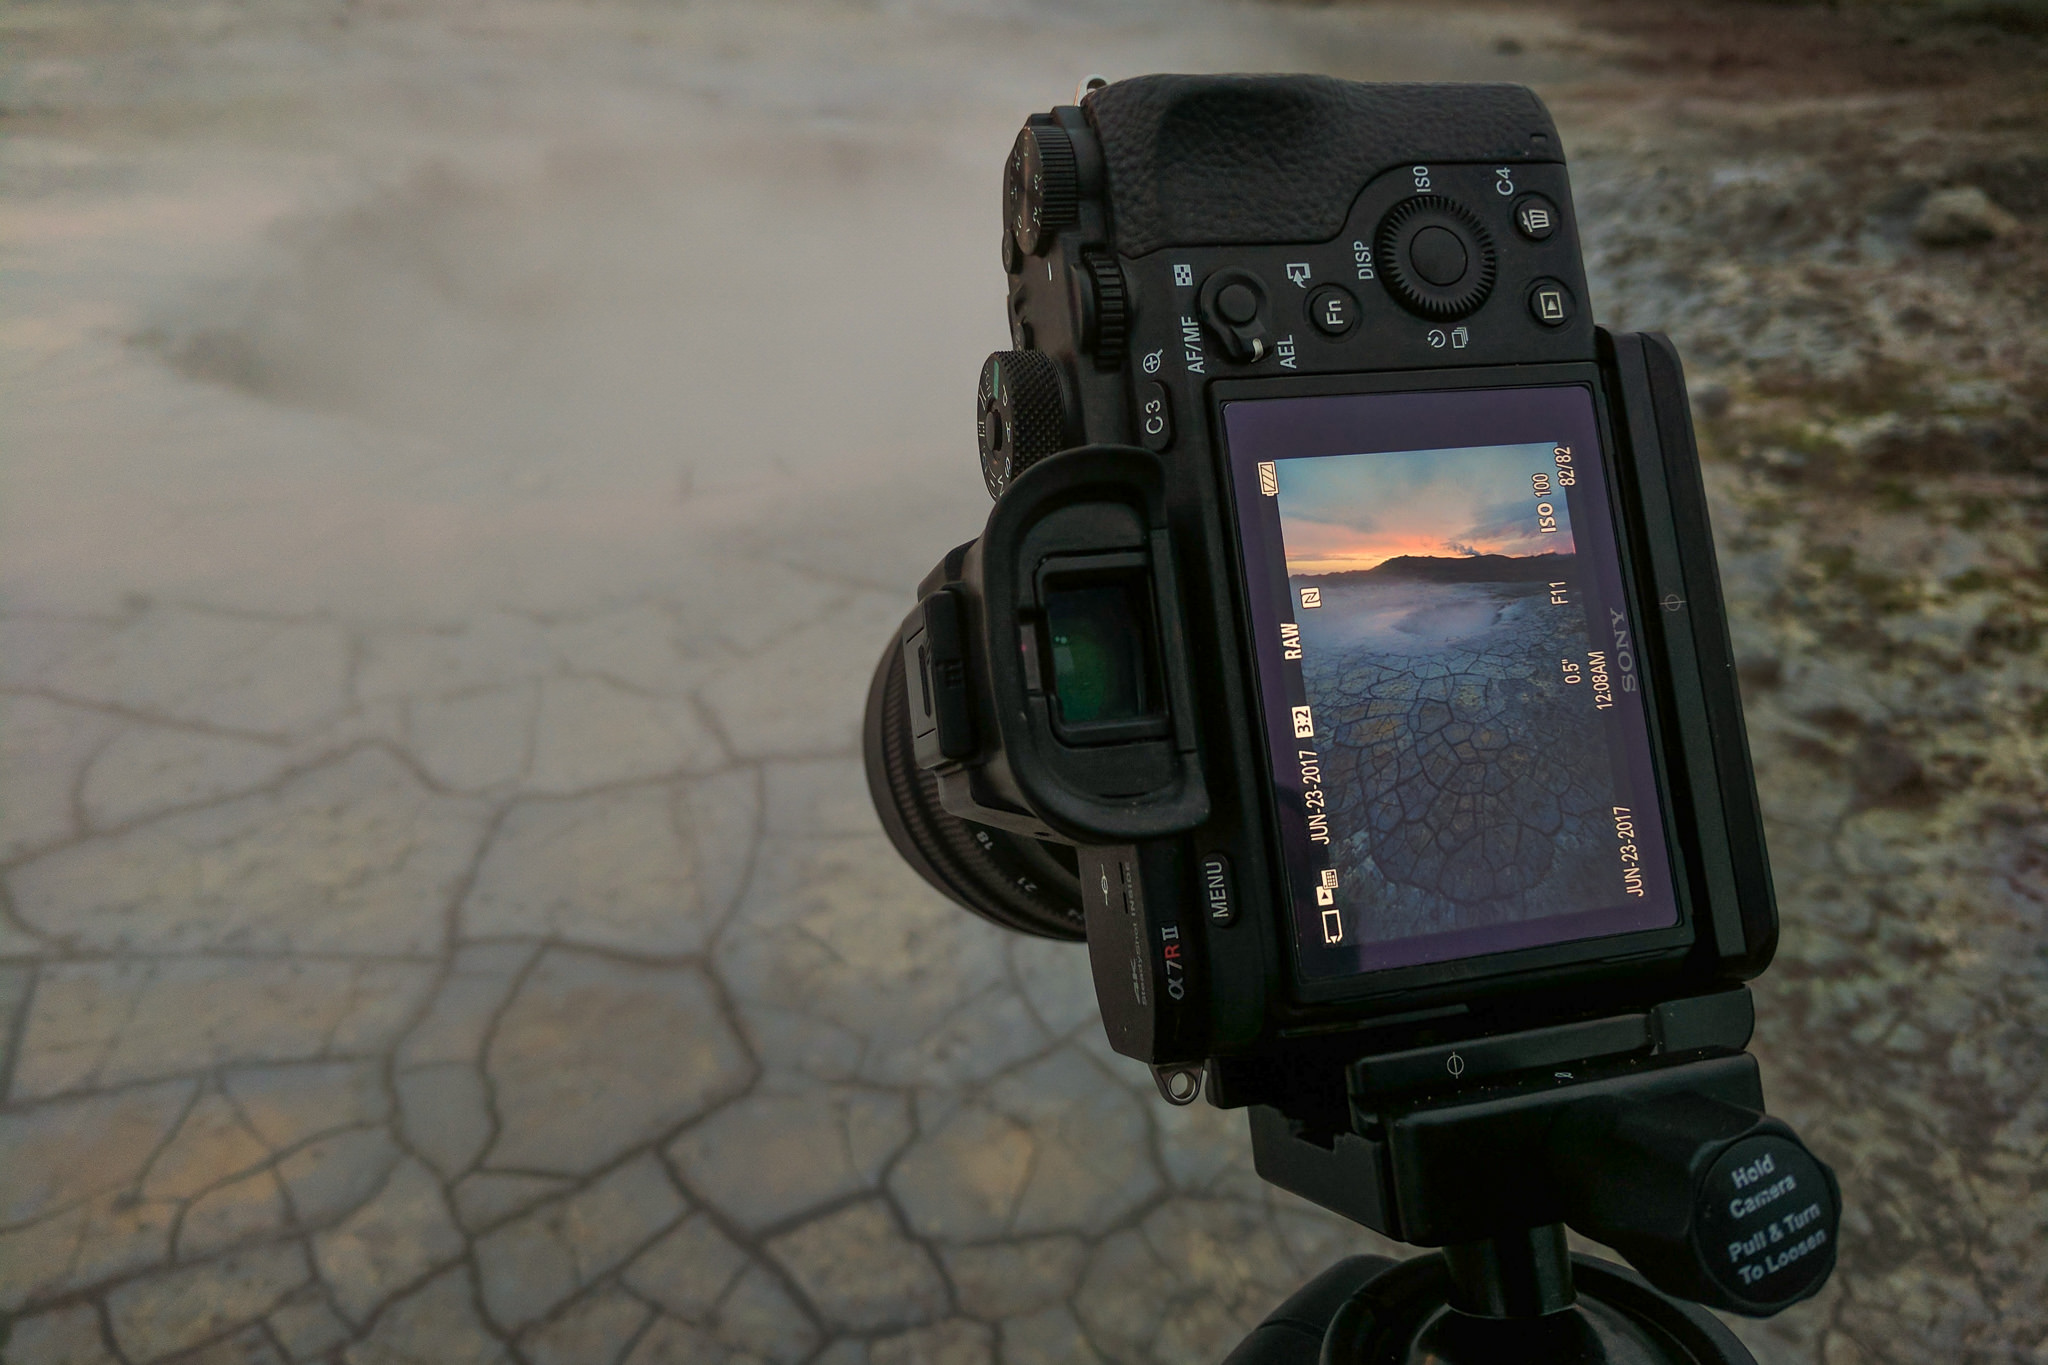
Sony a7R II w/ Sony 12-24 f/4 G
ISO 100 | f/11 | .5 Seconds
Download Link
Sony a7S II w/ Sony 12-24 f/4 G
ISO 5000 | f/4 | 20 Seconds
Download Link
Pros/Cons
So what are the pros and cons of the Sony 12-24 f/4 G Wide Angle Lens?
PROS
– Great Image Quality
– Impressive Corner Sharpness
– Almost no COMA for night photography
– Lightweight and Portable
– Quality Sunstars
– Minimal Distortion for an Ultra-Wide
CONS
– Bulbuous Front Lens Glass Element = No Easy Filter System
– f/4 minimum aperture for night/astro photography
Final Thoughts
While I have always been impressed with Sony’s cameras and sensors, it is Sony glass that I have been most impressed with lately. Each year they continue to fill holes in their lens lineup, such as with the Sony 12-24 f/4 G Ultra Wide Angle Lens.
So how is it? For an ultra-wide angle lens, it offers both great IQ and near corner to corner sharpness. Distortion is very minimal, and the sunstar is a step up above the 16-35 f/4 (that I am now retiring). Lastly, astrophotographers will be happy with both COMA and astigmatism, especially if they pair this lens with the a7S II that can easily handle pumping up the ISO to counter for the fact that this is a f/4 lens.
But to be 100% honest, when this lens was first announced, I found myself much more excited about the Sony 16-35 f/2.8 GM (Review). Afterall, I am used to the 16-35mm range, having used the Sony 16-35 f/4 FE lens with much fan fare for the last 2 1/2 years. Even after landing in Iceland with this lens, I had to force myself to use it, not because it didn’t perform well, but because it is so wide that I need to change my mindset in how and when it should be used. But once I got the hang of it, it quickly became one of my favorite lenses. In fact, in the middle of my Iceland trip I jumped on my phone and placed my own order for the Sony 12-24 f/4 G lens with B&H, knowing that I wanted it to be a part of my gear bag.
In my opinion, the only downside of this lens is the fact that you can’t easily use filters with it. I know the filter company NISI is working on a holder for this lens, but those will require 150mm filters, which are large, combersome and expensive to say the least. If you can get around the fact that you most likely wont use a CPL or ND filter with this lens, I highly recommend that you pick one up. Afterall, I have the Sony 16-35 f/2.8 GM for all my wide angle filters needs anyway!
Full Disclosure
As with all my reviews of Sony’s products or services, it is important to know that I am a Sony Artisan of Imagry. Much like Canon’s Explore’s of Light or Nikon’s Ambassadors, the Artisan program allows me close access to Sony and it’s engineers to help mold future products and services. Having said that, Sony did not ask or pay me to write this review, nor did they give me this lens (I returned the loaner). My thoughts are my own and I hope I have provided enough evidence within this review to back up the opinions I shared.
If you have any questions about this lens, please feel free to leave them in the comments below!