At the Photoshop World Expo in Las Vegas back in September, onOne Software officially announced their new Perfect Photo Suite 7, which is now available to purchase as of today. While it contains many improvements, layout changes and general fixes to the highly popular Perfect Photo Suite 6 (Perfect Effects, Perfect Layers, Perfect Mask…) it also introduced one of the most exciting new photo editing applications that I have been looking forward to, a new black and white conversion program called Perfect B&W.
For months I have been part of the onOne Software beta program, testing out all of these applications, suggesting changes, filling out bug reports and helping to shape the overall feel of the new suite. Now that the final version of the Suite has been released, I am stoked to give you a brief walk-through of Perfect B&W, showcase some of its best features and give you my honest review of the app itself. So lets get started…
The New Look
One of the first things you will notice with Perfect B&W, as with all of the new applications found in Perfect Photo Suite 7, is the new layout and look. If you are familiar with Adobe Lightroom, you should instantly feel at home. Even the color scheme was chosen to match.

Features
New Preset Panel
On the left hand side of the screen, you will now notice the Present panel (formally found at the bottom of the screen in past onOne Software products). The best part about the entire preset section, is that you are provided with true to life preview of your image under each of the presets, so that you have an idea of how the application of that preset will look before you even click on it.

This panel is broken up into 3 sections:
- Effects – Here you will find all of the standard onOne Software presets for B&W conversion of your images. They are easily separated into different sub-sections such as “True Film”, 19th Century Classic Silver” and so on and so forth.
- Favorites – You can easily flag your favorite or most used presets, along you to save time from flipping through each section every time you want to use the application.
- My Presets – One of my favorite new features is the ability to save your own custom presets. Under “My Presets” you will find all of your saved custom presets. To save a preset, simple click on the “Preset” menu item in the top navigation bar and then click on “Save Preset”. You can then share presets with your friends and colleagues with ease.
In the very near future, you will find my own B&W Preset Collection for sale in the onOne Software marketplace which will contain 10 of my favorite B&W presets for a variety of scenarios. Look for that in the coming weeks.
Localized Adjustments
Located to left of your image, you will find the Perfect B&W localized adjustments, which is generally where I spend most of my time. One of the biggest problems I find with most aspiring photographers is that they focus almost entirely on making global adjustments to their image that effect every pixel. However in learning to understand and appreciate the art of post processing, one begins to realize the importance of selectively making adjustments to certain parts of an image. I do not always want to add contrast to an entire image, but instead just to a mountain, or maybe I want to subjectively add sharpness to a woman’s eyes and not her entire face. The localized adjustment options in Perfect B&W allow you to do just that.

In order from top to bottom an including the keyboard shortcut:
Brightness Brush (O) – Allows you to paint in or paint out brightness
Contrast Brush (T) – Allows you to paint in or paint out contrast
Detail Brush (D) – Allows you to paint in or paint out details (sharpness/texture)
Targeted Brightness (I) – Allows you to control how bright a specific set of pixels is. Click on an area and drag the mouse left or right to increase or decrease brightness for all pixels that are similar to the area you originally clicked on.
Selective Color Brush (M) – Allow you to easily paint in selective color back into your black and white images (based on the colors of the original image that was imported into Perfect B&W.
Hand Tool (H) – Allows you to move around an image once zoomed in. If you are already zoomed in and are using one of the other localized adjustment options, you can hold down the space bar to temporarily change your cursor to a hand to move around. Let go of the space bar to return to the adjustment you were using.
Zoom (Z) – Allows you to zoom into your image to observe details. You can also use the zoom options at the top right of your main image (Fit, Fill, 100, 50, 25) to zoom in as well.
Perfect Brush
Singlehandedly my most requested feature for all of onOne Software’s applications has been a brush that has an auto masking feature, similar to Lightroom’s Adjustment Brush with the “Auto Mask” box checked. What this does is allow you to paint in adjustments easily to the specific pixels you want to change while ignoring others that might be near by. An easy example of this is along the edge of a mountain peak where the sky meets the mountains. Without an “auto masking” brush, every time you paint along the rim of the mountain, you would end of effecting the pixels in the sky as well. With Perfect Photo Suite 7, this is no longer an issue.
Creatively titled the “Perfect Brush”, onOne Software has not only finally added this much requested feature, but they have done it better then nearly every other photo editing application out there, including Lightroom. The accuracy of this brush is insane, which has allowed me to save countless seconds, minutes and even hours when it comes to editing images.

To enable this feature on any of the localized adjustments that support it, simply click on the “Perfect Brush” check box found just above your image while in the application itself after selecting the brush you wish to use.
Here is a quick video from onOne Software showcasing the feature..
Editing Panel
Located in the right hand sidebar you will find your main editing panel for your images. This is where you will do all of the global adjustments for the image you are converting to black at white.

At the top of the sidebar you will find a thumbnail of your image, with three options:
- Navigator – Allows you to navigate around your image while zoomed in. Simply drag the highled box to the area of the screen you wish to view
- Loupe – A magnifined version of where you are dragging your cursor on the main image
- Histogram – A look at the brightness of the total number of pixels in your image
Below that you will find the different editing sections that control various aspect of your image
- Tone – Where you can adjust the brightness, contrast, black and white points, shadows, highlights and detail (texture) of your image.
- Color Response – Where you can adjust the black and white sensativity based on the tone of specific colors in the original image
- Tone Curve – Where you can apply a more accurate level of contrast based on your shadows, midtones or highlights. Similar to the “Curves” adjustment in Photoshop
- Glow – Where you can add a touch of glow to your black and white image.
- Film Grain – Where you can add back a touch of film grain to bring back some of the nastalgia that is missing in “digital noise” in today’s cameras
- Toner – Where you can apply specific tones to your black and white images, giving them a silver or sepia color cast for example.
- Vignette – Where you can easily add a vignette to your images (the darkening of pixels around the frame of your image.
- Boarder – Where you can add any number of boarders to your image
- Sharpening – Where you can add specific types and amounts of sharpening to your entire image.
- Blending – Where you can control the layer blending of your black and white processing (exactly the same as adjusting the layer blending mode in Photoshop
Sample Images
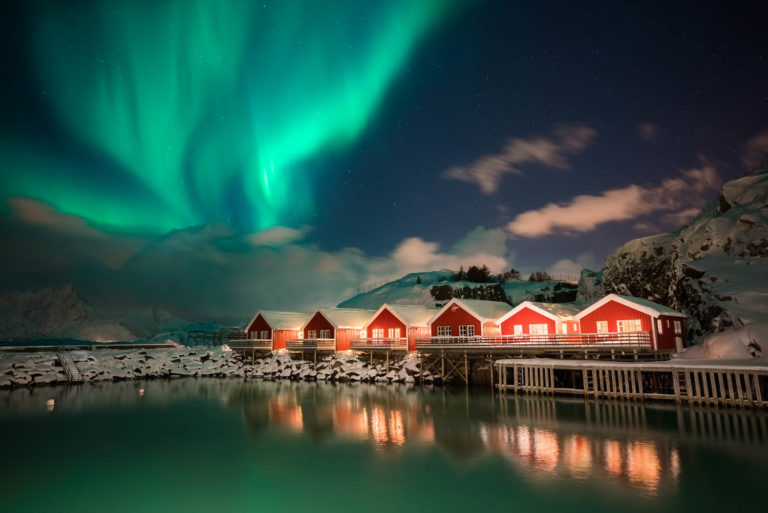
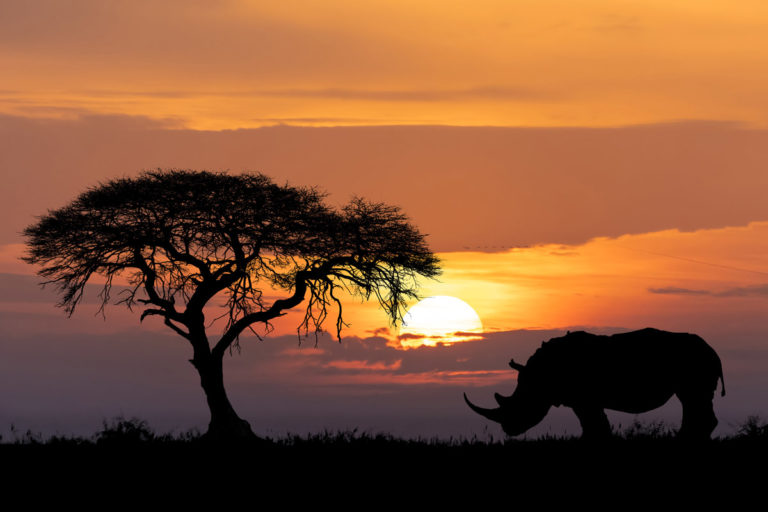
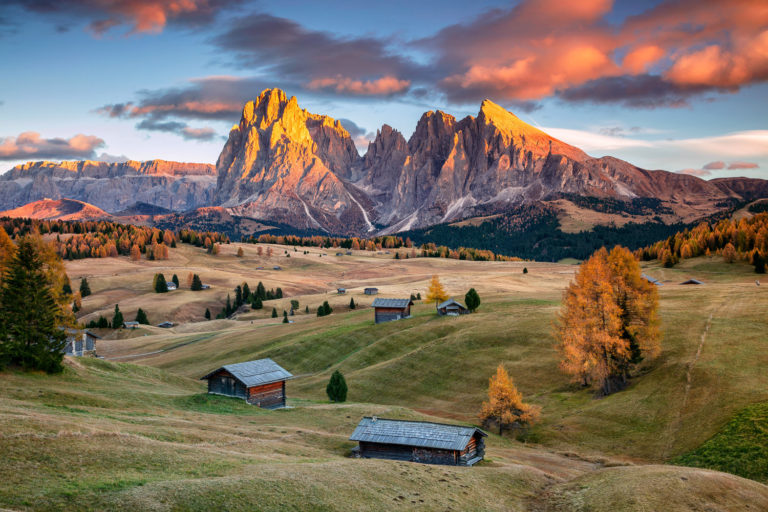
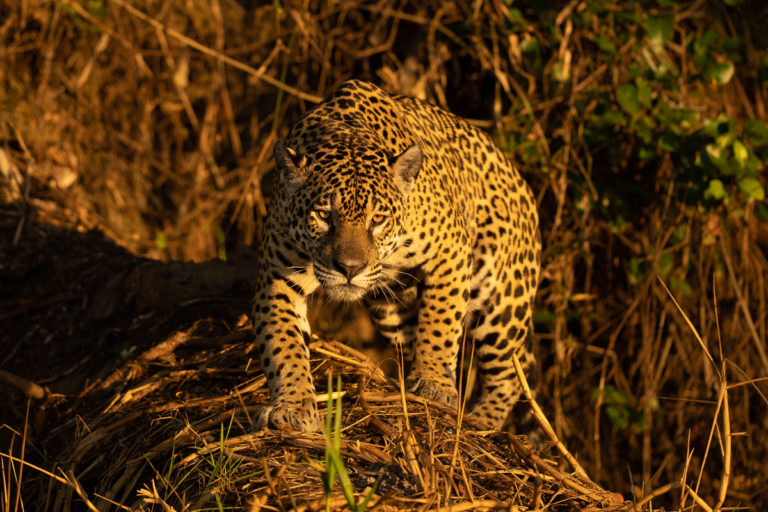
Here is a collection of images that I have edited using onOne Software’s Perfect B&W.


Final Thoughts
Overall I am very impressed and happy with onOne Software’s Perfect B&W. Between the fine tune controls over the black and white processing, the new “perfect brush” with auto masking features and the ability to save and share my black and white presets with the world, there is a lot to love about Perfect B&W. While it is not perfect, such as the error you might get when using the “targeted brightness” feature in an area of an image with low or no saturation, onOne Software’s first foray in the world of black and white images is without a doubt a success.
For years I have sworn by Nik Software’s Silver Efex Pro 2, which many would say has been the best black and white conversion software for photographers, myself included. But to be honest, it didn’t have any competition during that time. Now days I find myself using both Silver Efex Pro 2 and Perfect B&W to edit different types of images. In my software workflow, they are more complimentary then competitive towards each other as each excel in their own ways.
If you have any love for turning your images into black and white pieces of art, onOne Software’s Perfect B&W offers a compelling and well thought out photo editing application that photographers would regret if they didn’t give it a try. With onOne Software’s free 30 day trail, you have nothing to lose!