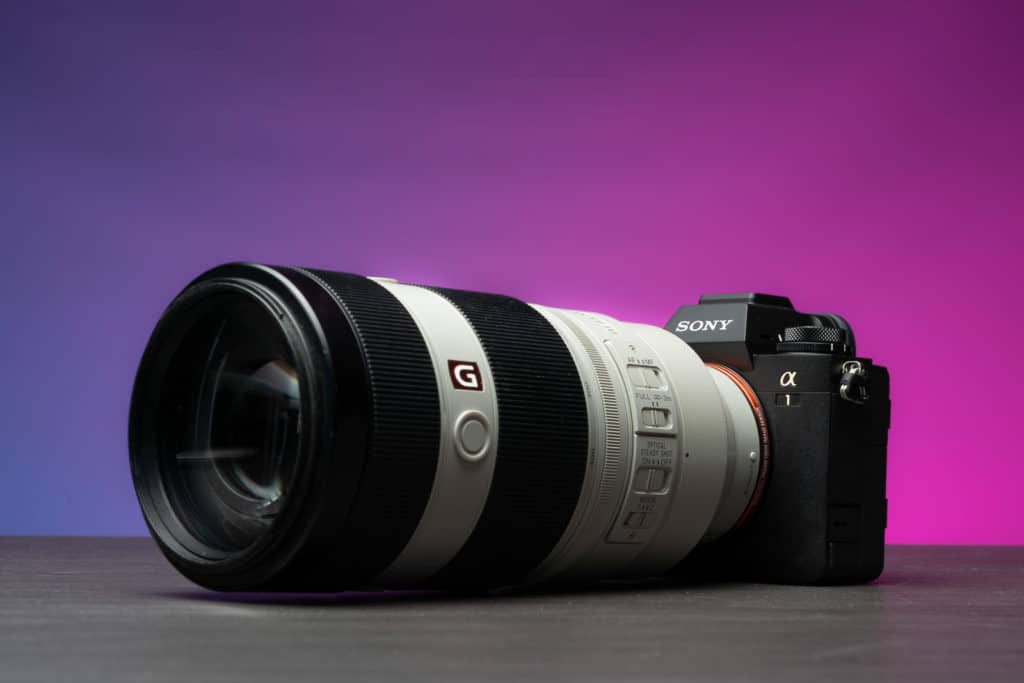
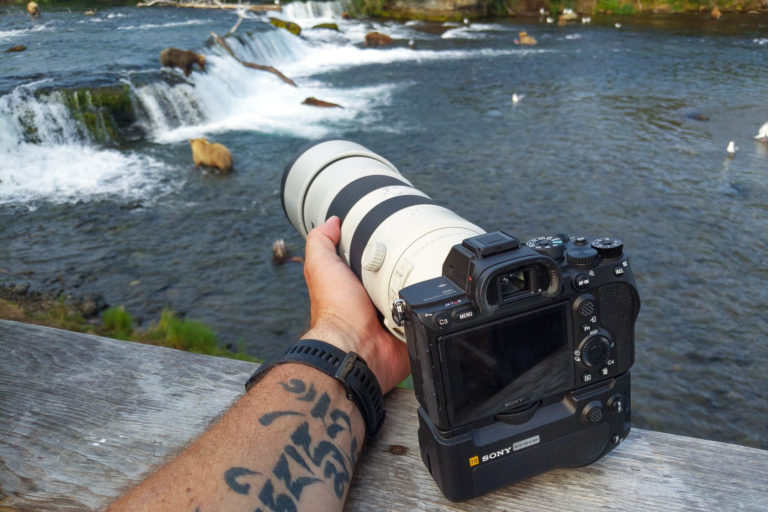
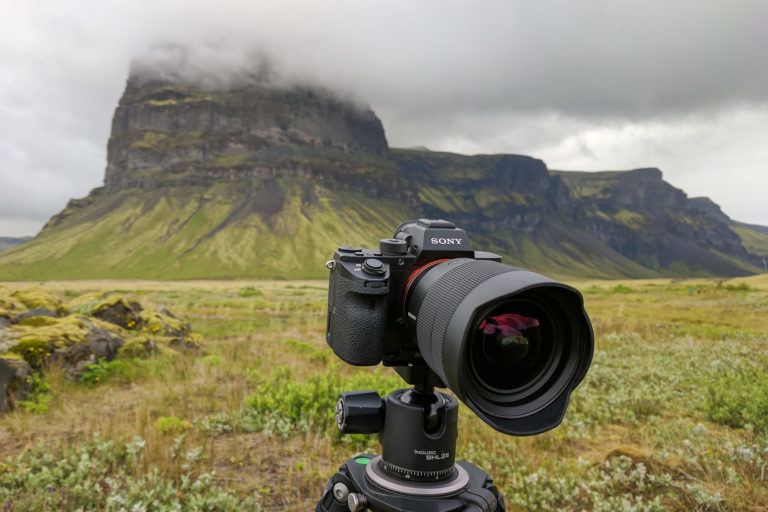
With the launch of the a1, Sony has piqued the interest of ALOT of photographers out there. With an industry-leading AF system partnered with a 50mp stacked CMOS sensor and incredible video capabilities, Sony has appeared to pare the best elements of the Sony a7R series, a9 series, and even the a7S series into a single beast of a camera (with a price tag to match). While all of this is good news, there is no doubt that regardless if you are upgrading from a previous Sony mirrorless camera or moving to Sony because of the a1, setting up a new camera can be a challenge. With a redesigned menu system and a slew of new features and functionality built into the a1, it can take time to get things set up to match your needs. This is where I come in! Having already written several setup guides for Sony cameras (a7R II, a7R III, a7R IV), I have a great foundation to build upon with the a1. As a Sony Artisan for the last 7 years, I have been using my Sony bodies on all seven continents photographing a mixture of landscape, travel, and wildlife photography.
If you have any questions, comments, or even your own recommendations you wish to share with others, please feel free to leave them in the comments section below.
General Settings Worth Changing
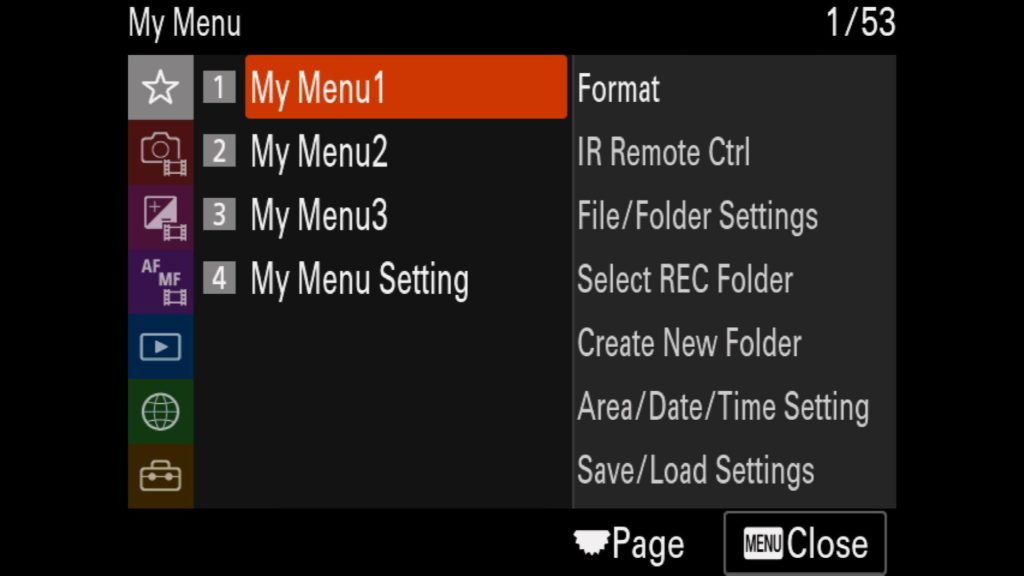
While the Sony a1 does have a lot of new features and settings worth talking about, it is important to start our focus on the basic settings/menu items that you should take a look at with every Sony mirrorless camera. Assuming you have turned on your camera for the first time and adjusted the date/time/area for where you live, these are the settings you want to look at first and make sure you have dialed in as needed.
JPEG/HEIF Switch
One of the first choices you can make is to decide if you want to choose either JPEG or the newer HEIF file format with the a1. HEIF has grown in popularity recently, offering similarly finalized/compressed file format as JPEG but taking up even less space in the process. Time will tell if HEIF really takes off, but JPEG has been around for decades and with companies like Apple and Sony pushing for HEIF, it has a good chance at survival.
Found in the “Shooting” menu under “1: Image Quality” you will find “JPEG/HEIF Switch”. Here you can choose between JPEG, HEIF (4:2:0), or HEIF (4:2:2) with the latter offering the highest degree of color sampling/quality.
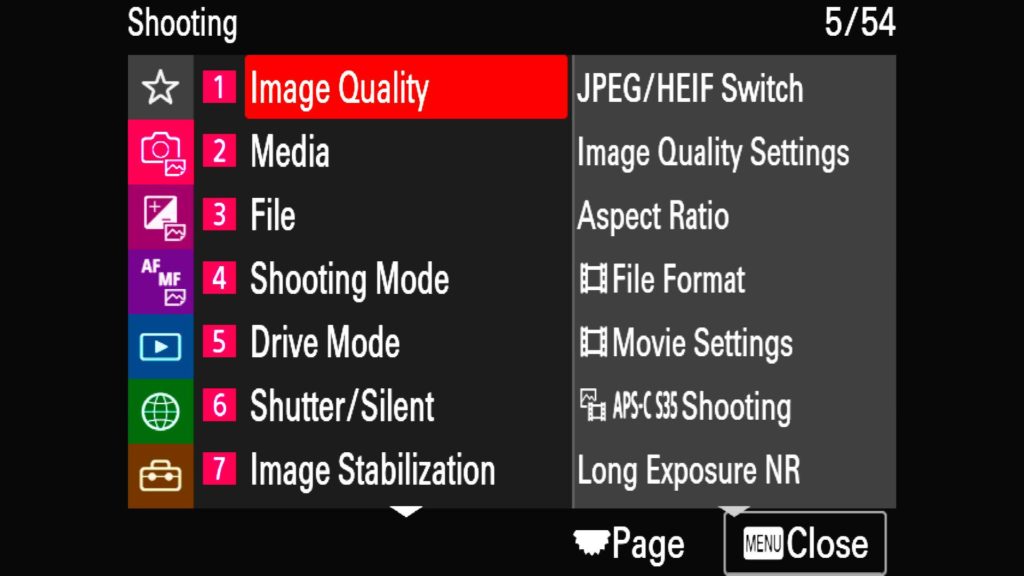
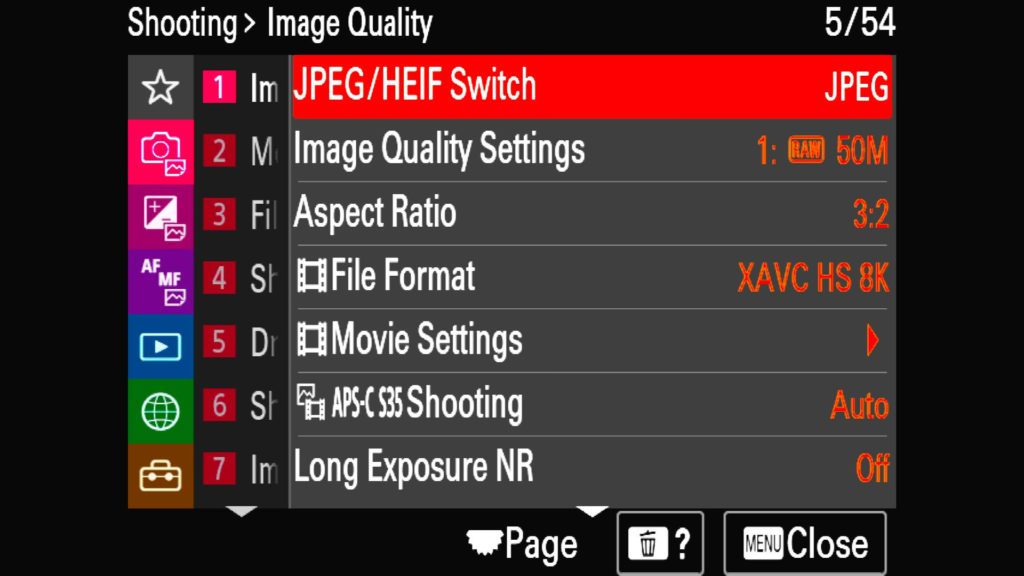
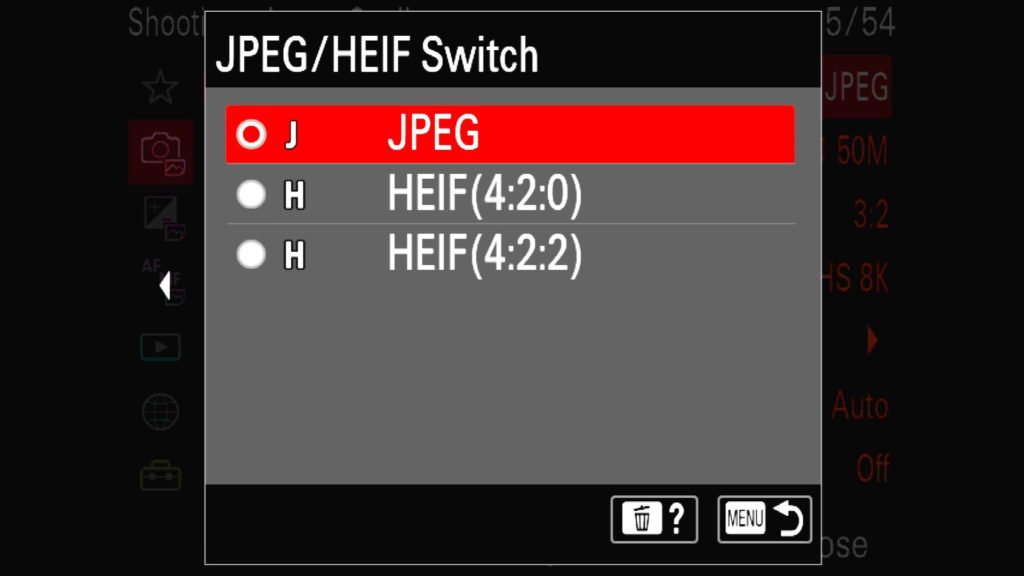
Image Quality Settings
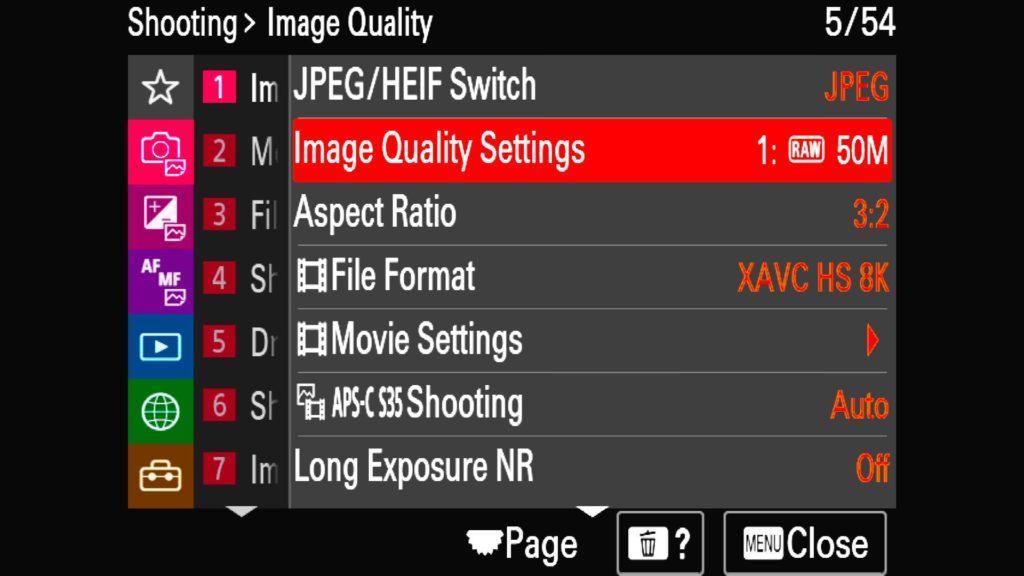
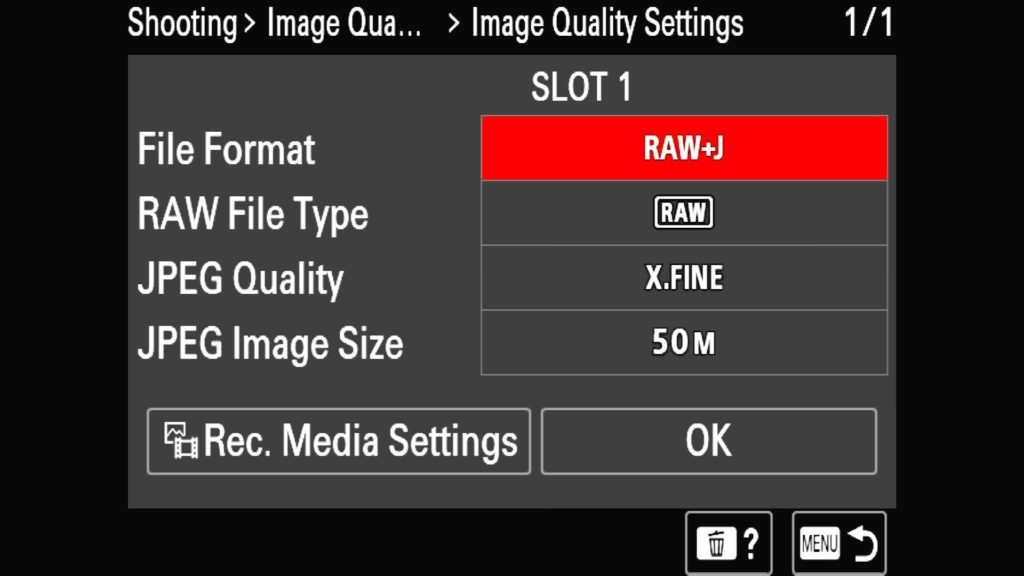
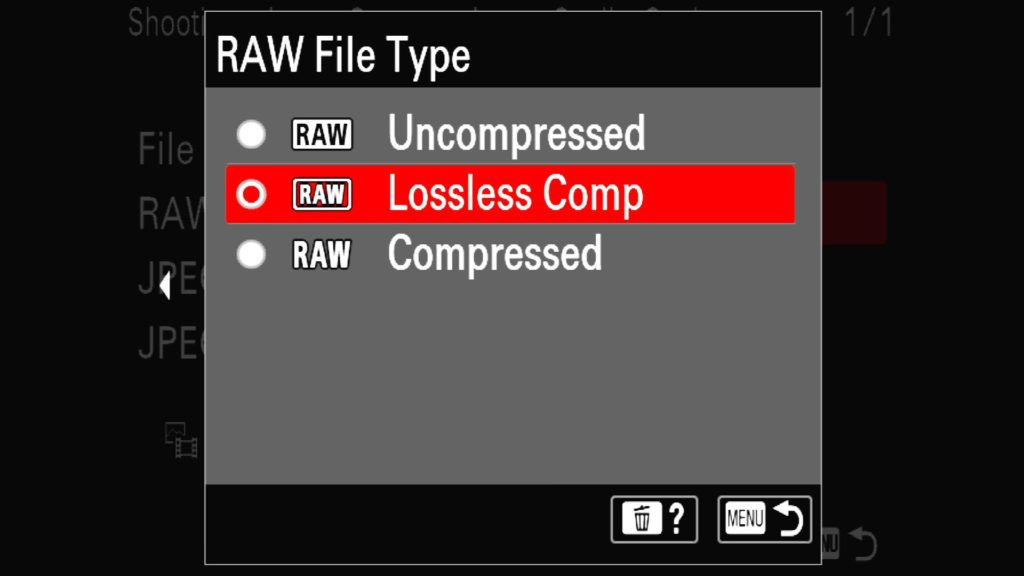
Now it is time to select what kind of images you want to be shooting. Here you can choose to shoot in JPEG or HEIF (depending on what you selected in the option above), RAW, RAW+JPEG, or even RAW+HEIF. Additionally, you can choose the quality level of each of these formats. Under RAW file type you can select Uncompressed (largest file size with no loss in image data), the new Lossless Comp. (smaller file size with no loss in image data) or Compressed (smallest file size with minimal loss in image data). While I do plan on spending most of my time in the new Lossless Comp setting, it is important to note that the only times I have really seen a difference between any of these modes have been in situations with extreme contrast, such as night or astrophotography where you have a dark sky next to extremely bright stars. Lastly, you can choose to adjust the quality and image size of both HEIF or JPEG formats if you have decided to shoot either of those file formats.
Found in the “Shooting” menu under the “1: Image Quality” section you will find “Image Quality Settings”.
Long Exposure Noise Reduction
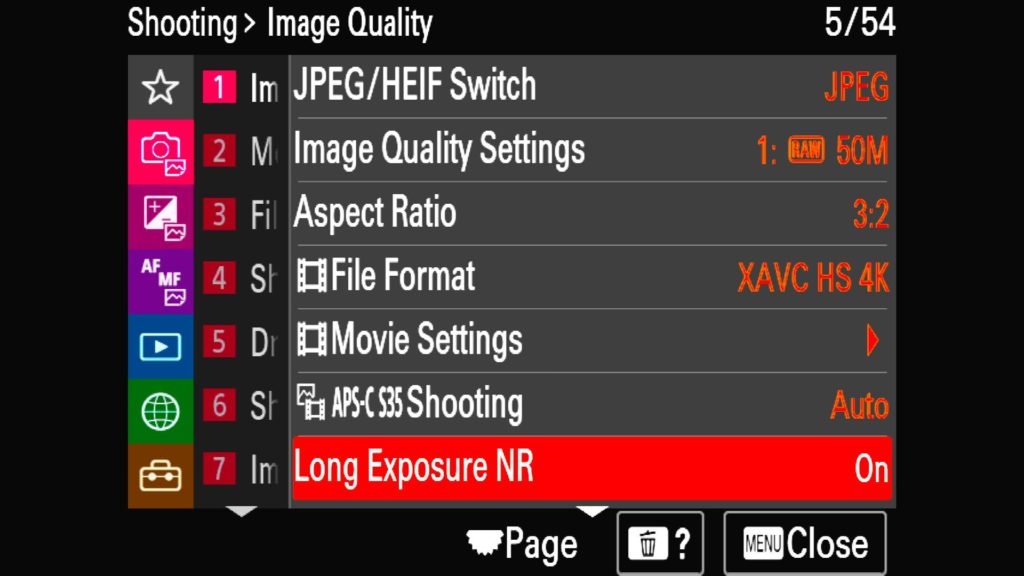
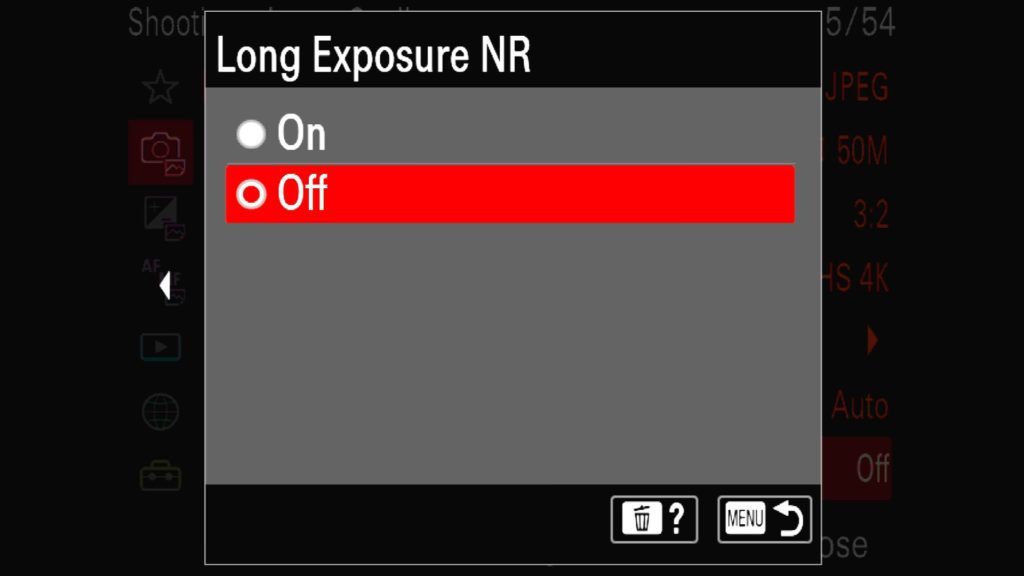
One of the first settings that I like to turn off is “Long Exposure Noise” reduction that is on by default. When shooting long exposures, this setting will force the camera to take a second image with the shutter closed to help the processor look for hot pixels (bright red pixels) that are often generated from the heat of an electronic sensor that is used for an extended period of time. It then takes what it finds and tries to remove those “hot pixels” from your original image. While this process can be beneficial if you don’t fully understand how to deal with noise reduction in the processing phase, it doubles the amount of time required to take a single shot. For example, a 30-second exposure now requires 1 minute of time because of the mandatory second shot. Plus, I would much rather retain full control over how I choose to handle noise reduction regardless.
Found in the “Shooting” menu under the “1: Image Quality” section you will find “Long Exposure NR” at the bottom of the 1st page of this section.
High ISO NR
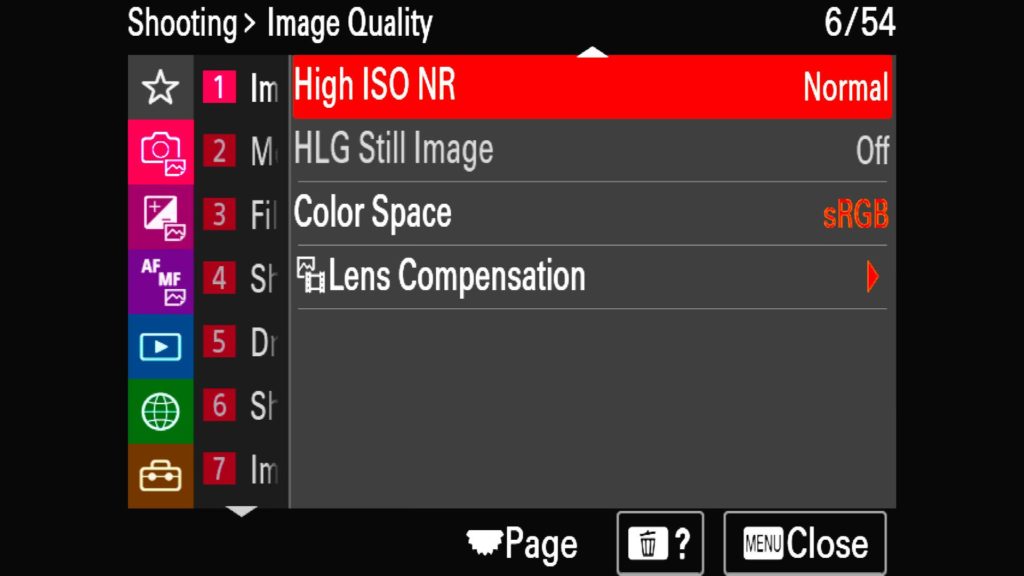
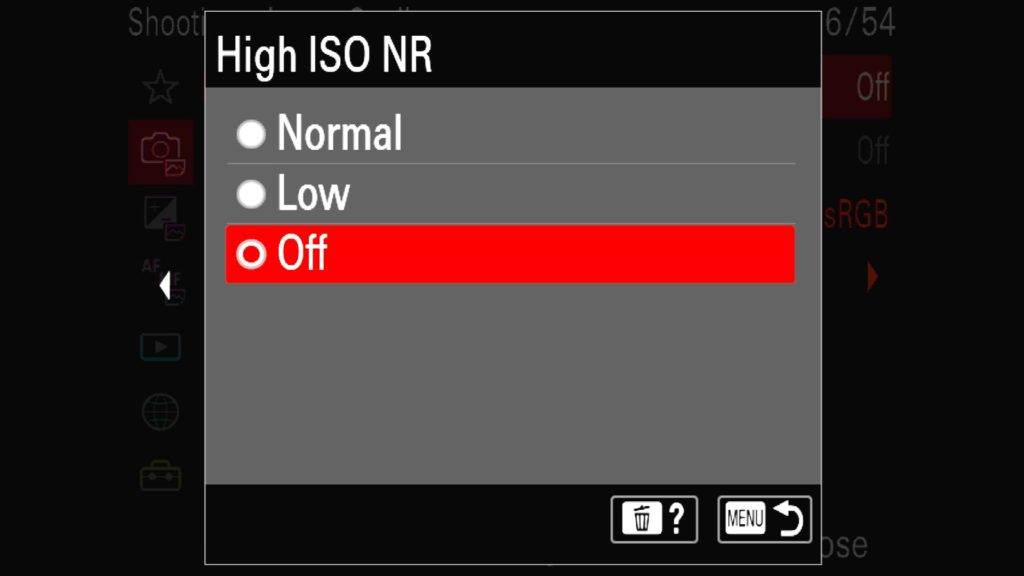
Next, I want to turn off High ISO noise reduction for similar reasons. While using higher ISO’s will absolutely increase the noise found in an image shot on the Sony a1, I would much rather have full control over how I choose to handle that noise when I start processing my images rather than rely on the camera to know what I want. Because of this, I turn this setting off as well.
Found in the “Shooting” menu under the “1: Image Quality” section you will find “High ISO NR” if you continue to hit the down key from “Long Exposure NR” and find yourself on the 2nd menu page of this section.
Rec. Media Settings
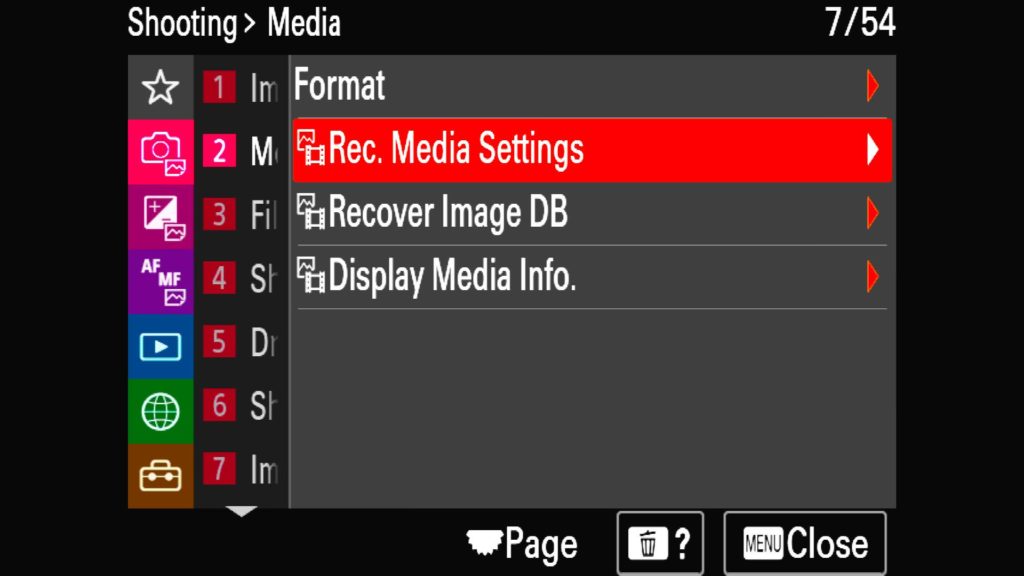
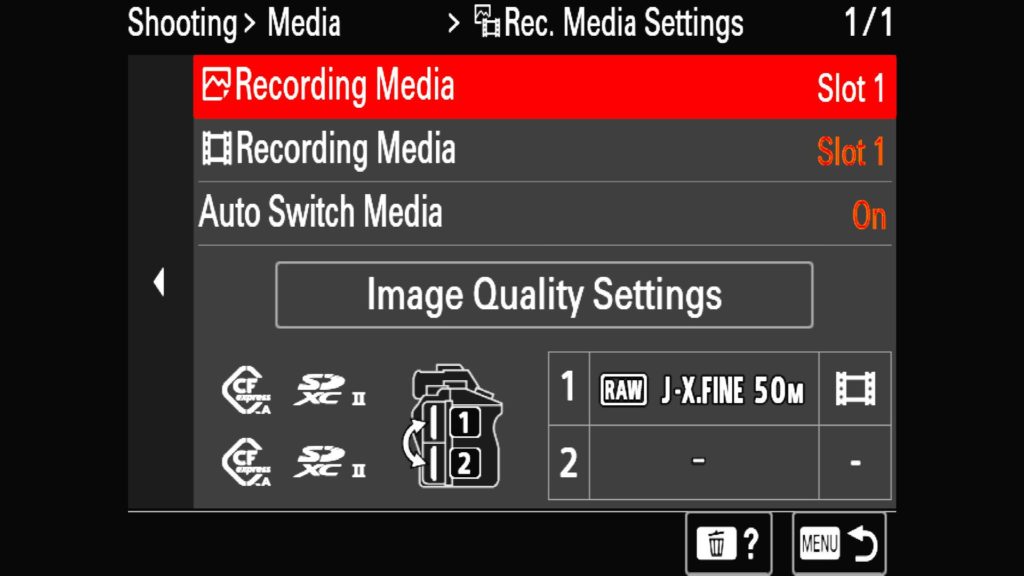
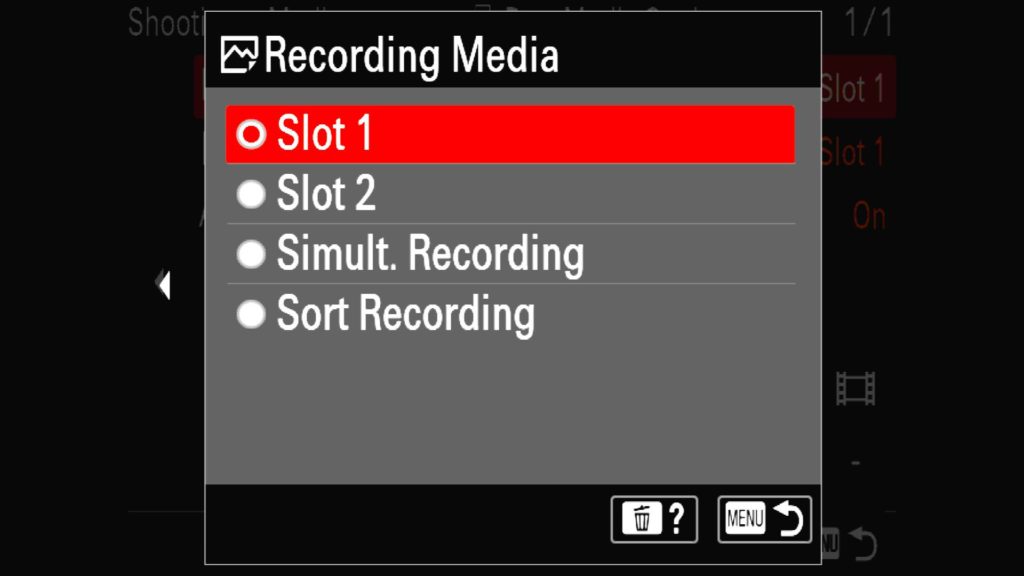
With the Sony a1, you now have the ability to use either SD cards or the newer and faster CF Express Type A cards in either of the two slots available on the camera. Through the “Rec. Media Settings” menu, you can decide how exactly you want your photo and video files written to those cards. If you want you could record photos to one card and videos to the other or duplicate all images to both cards while only shooting video on the other card. The combinations are endless, so be sure to experiment with them to find what works best for you. Additionally in this menu, you will find the “Auto Switch Media” setting, which is very handy for photographers like myself. When I am shooting wildlife photography with bursts of images at 20 or 30fps, I can fill up a card rather quickly. However, if I have two cards in my a1, I can set it to auto-switch to my second card if the first one fills up, minimizing the chance that I missed a shot because I ran out of space in the middle of some action.
Found in the “Shooting” menu under “2: Media” section you will find “Rec. Media Settings”.
Copyright Info
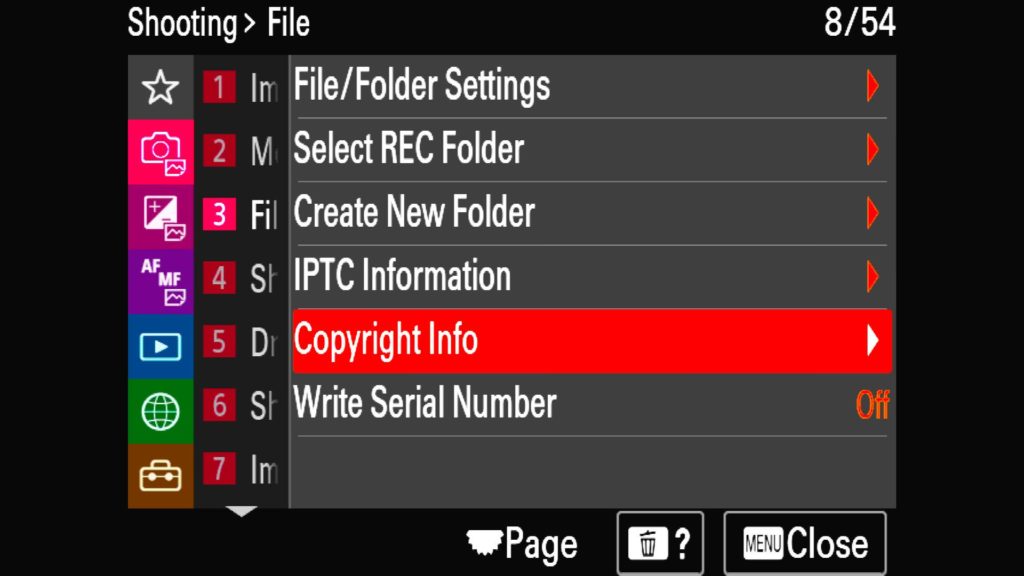
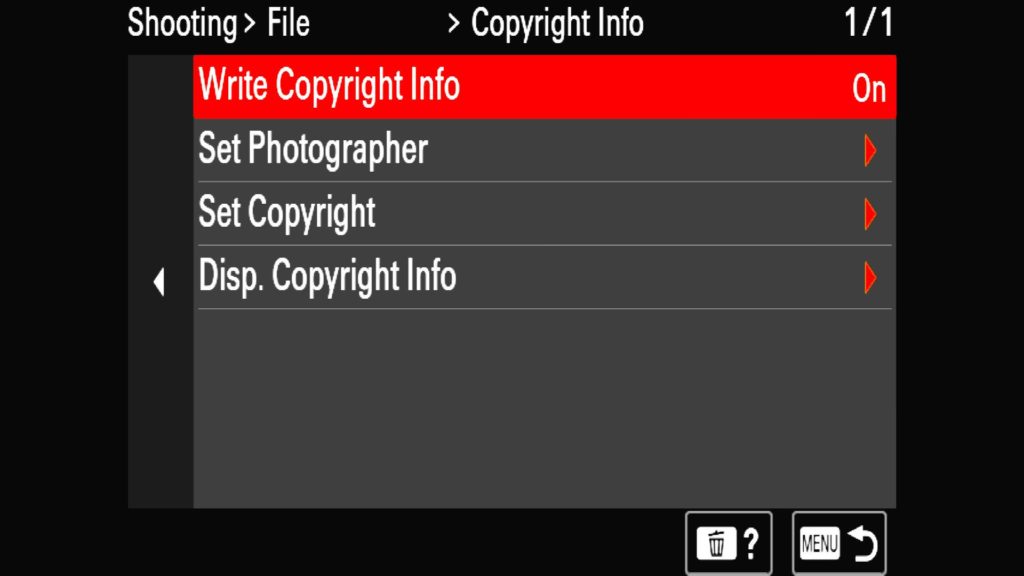
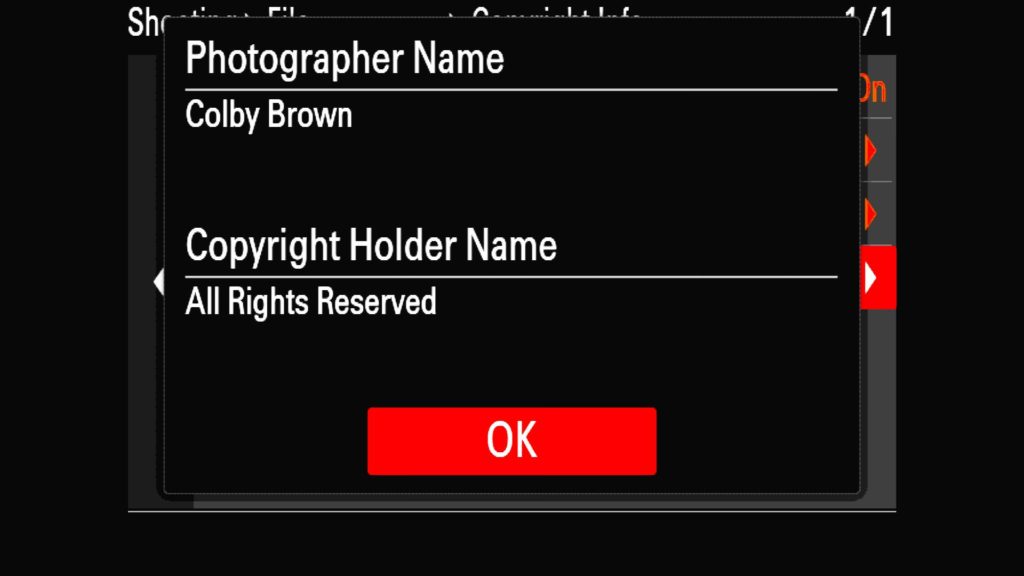
One of the ways that you can protect the copyright of any image that you take is to make sure that your copyright information can be found inside the image itself. While this is normally done in the post-processing side of things, I have lately found myself making sure my info can be found on all of my RAW images as well straight out of the camera. The process is easy, simply head to the Copyright menu and turn on the “Write Copyright Info” setting on and then fill out the sections for “Set Photographer” and “Set Copyright”.
Found in the “Shooting” menu under “3: File” section you will find the “Copyright Info” option.
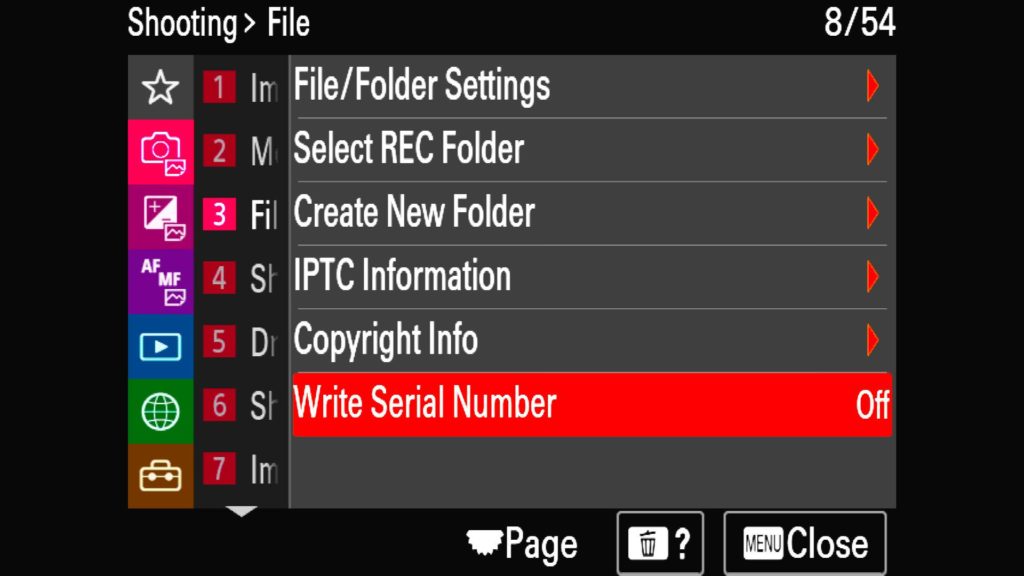
Write Serial Number
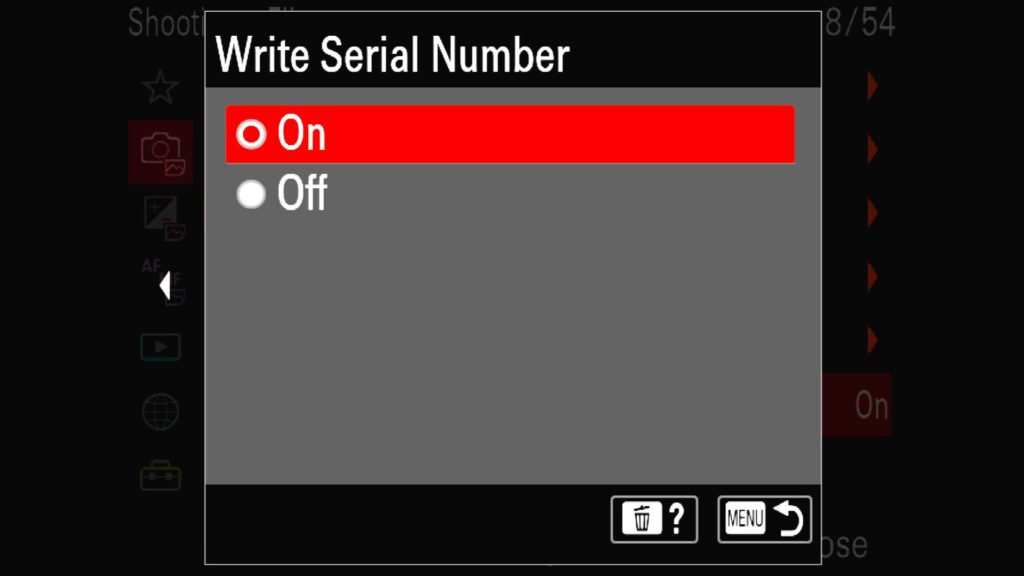
Another handy setting to help you protect your images/copyright is having the ability to write your camera’s serial number to your images. This will embed that information into your JPEG, HEIF or RAW files, giving you yet one more way to prove that you took a specific image if they were ever stolen or used without your permission. If your camera was ever stolen, you could also possibly identify people using the camera if this feature was left on.
Found in the “Shooting” menu under “3: File” section you will find the “Write Serial Number” setting at the bottom of page.
Self-timer Type
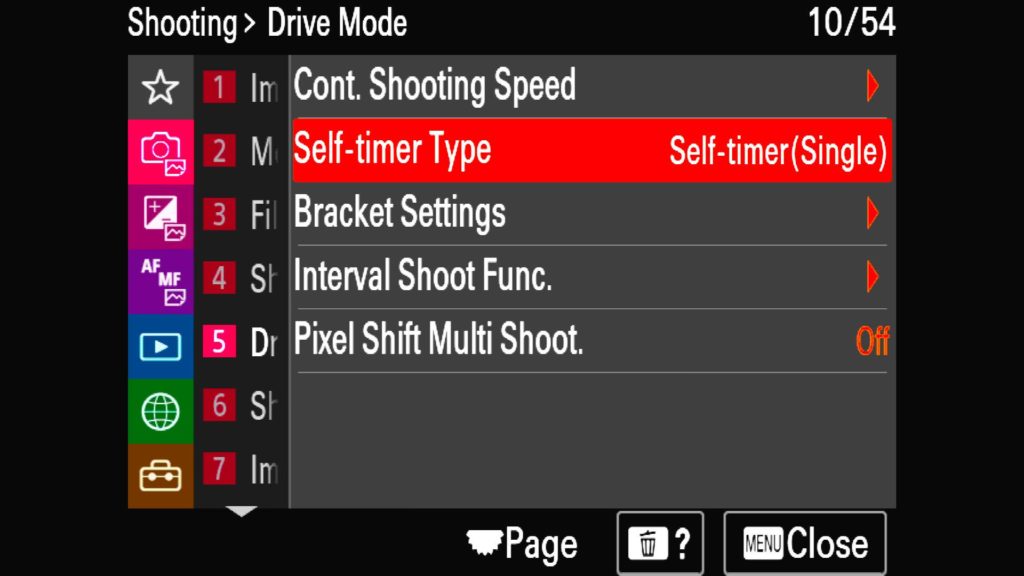
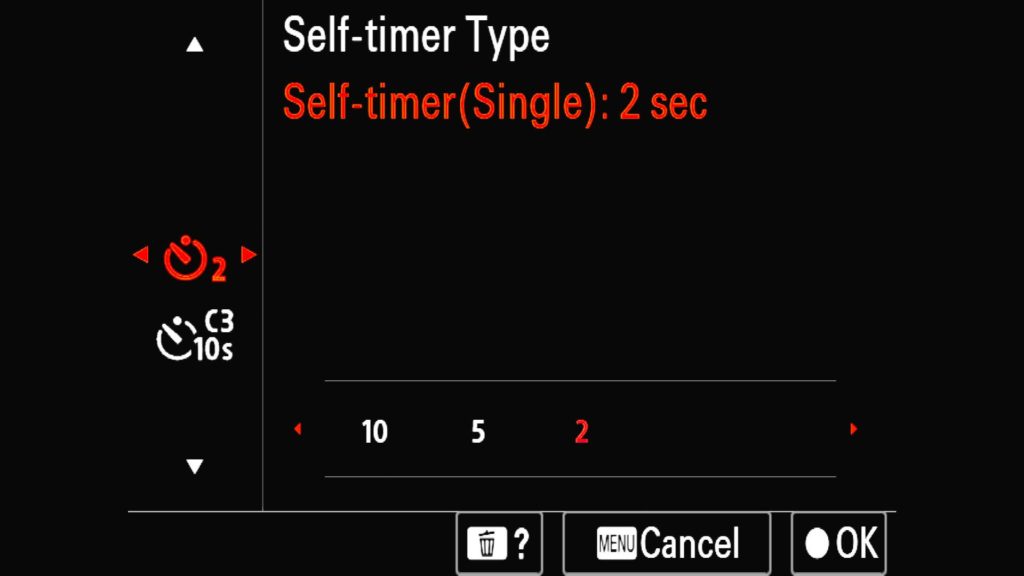
With the Sony a1 adopting the a9 series “drive mode” top dial instead of a pure software solution like the a7R series, be sure to quickly take a look at the “Self-time Type” settings. Here you can adjust the self-timer mode found on that top dial to handle 2, 5 or 10-second delays before taking an image. Additionally, you can experiment with the continuous self-timer mode to take a rapid succession of images after a delay as well.
Found in the “Shooting” menu under “3: Drive Mode” section you will find the “Self-time Type” setting.
Bracket Settings
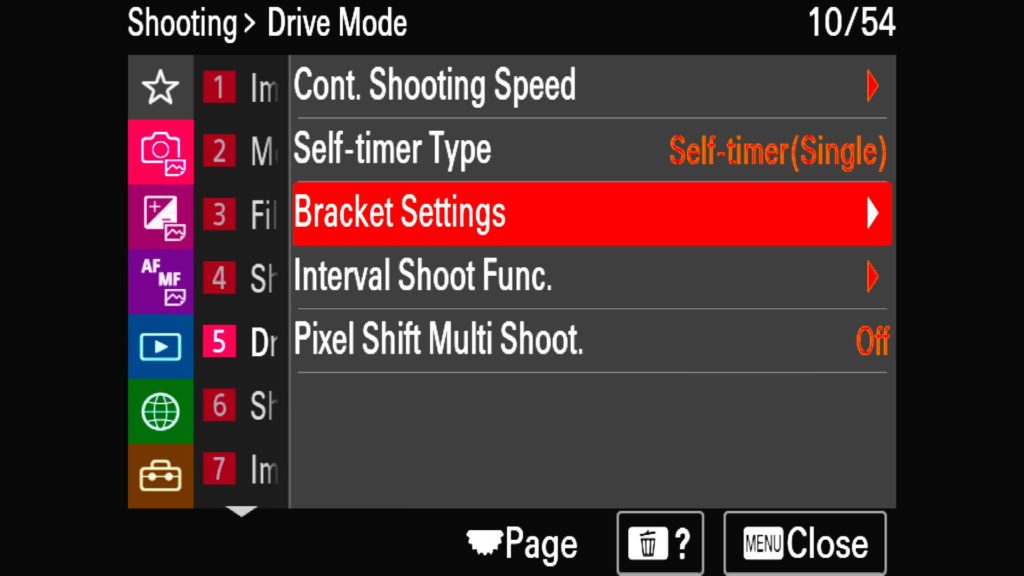
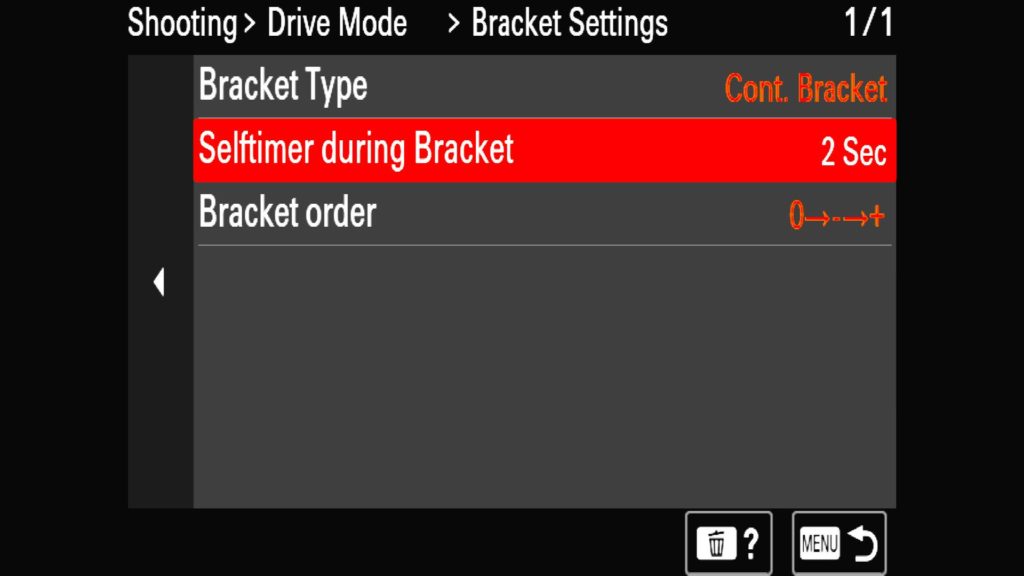
If you are a landscape photographer, you might find yourself wanting to bracket some of the images you while out in the field. The “Bracket Settings” menu will allow you to control the kind of bracket and most importantly, allow you to turn on the “Selftimer during Bracket” setting. With this on, your bracket will automatically take the entire set of bracketed images for you once the initial timer delay has counted down. This will minimize any camera shake that might happen if you had to take each of those bracketed images by pressing the shutter button down on your own.
Found in the “Shooting” menu under the “3: Drive Mode” section you will find the “Bracket Settings” option.
Interval Shoot Func.
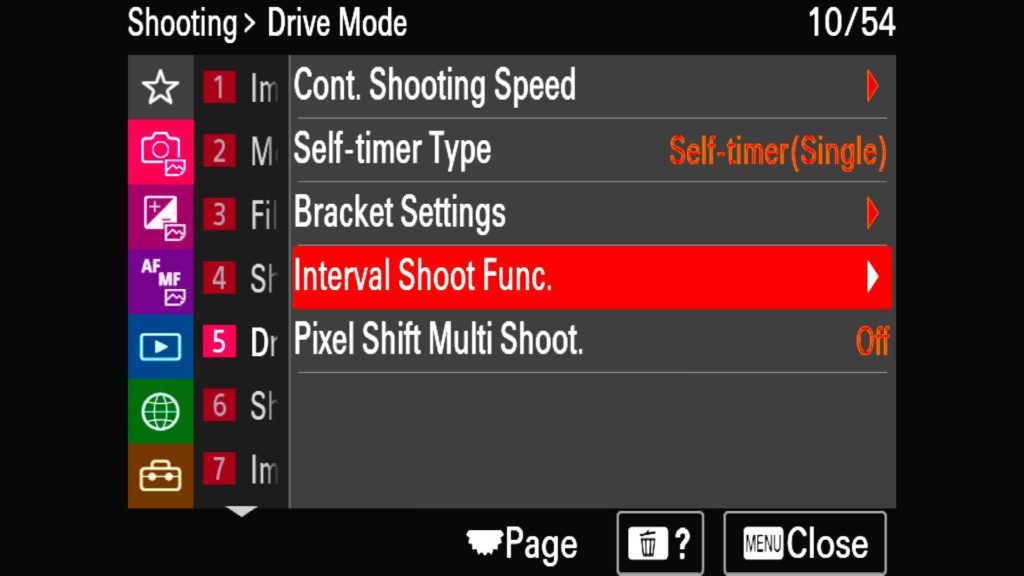
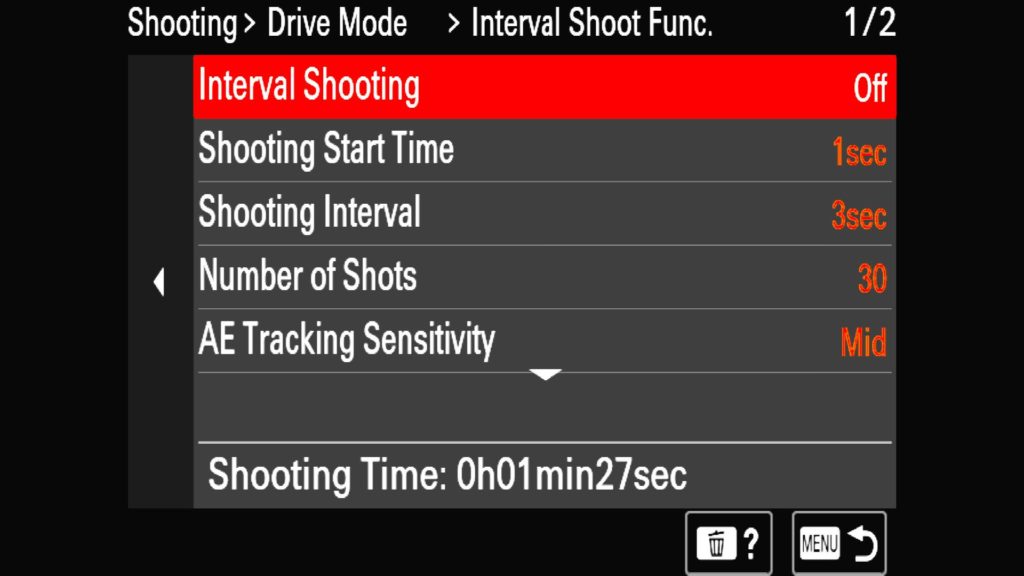
If you want to dabble in shooting time-lapses with the Sony a1, you will spend a lot of time in the “Interval Shoot Func.” menu getting all of your settings set correctly. While I could write an entire blog post on how to correctly shoot time-lapses, I simply don’t have space here. Just know that all of the settings for your time-lapses can be found here.
Found in the “Shooting” menu under the “3: Drive Mode” section you will find the “Interval Shoot Func.” option.
Pixel Shift Multi Shoot.
If you find yourself shooting static (non-moving) subjects such as architecture, you might want to experiment with Sony’s Pixel Shift technology. With this feature, the camera will take a series of images (4 or 16), slightly shifting the sensor for each image. In doing so, it is filling in the tiny pixel-level spaces with real-time image data rather than relying on the sensor to use its processor to fill in the gaps itself. The end result is a larger image with more refined detail found throughout the image. This mode can also eliminate any moire that might appear in your images from contrasting elements being incredibly close to each other, creating that repeating pattern that most of us try to avoid with our images.
Found in the “Shooting” menu under the “3: Drive Mode” section you will find the “Pixel Shift Multi Shoot.” option.
Grid Lines
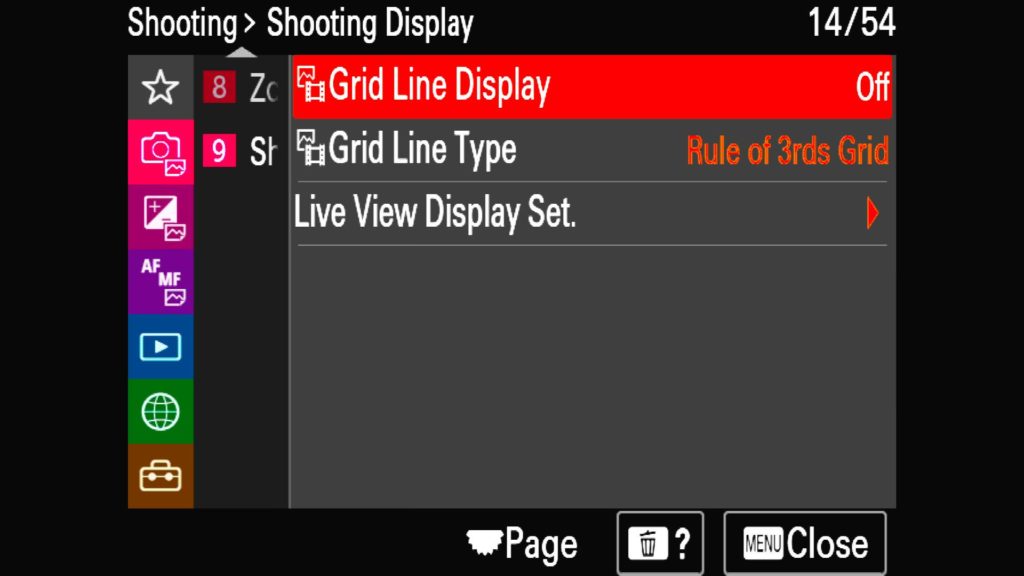
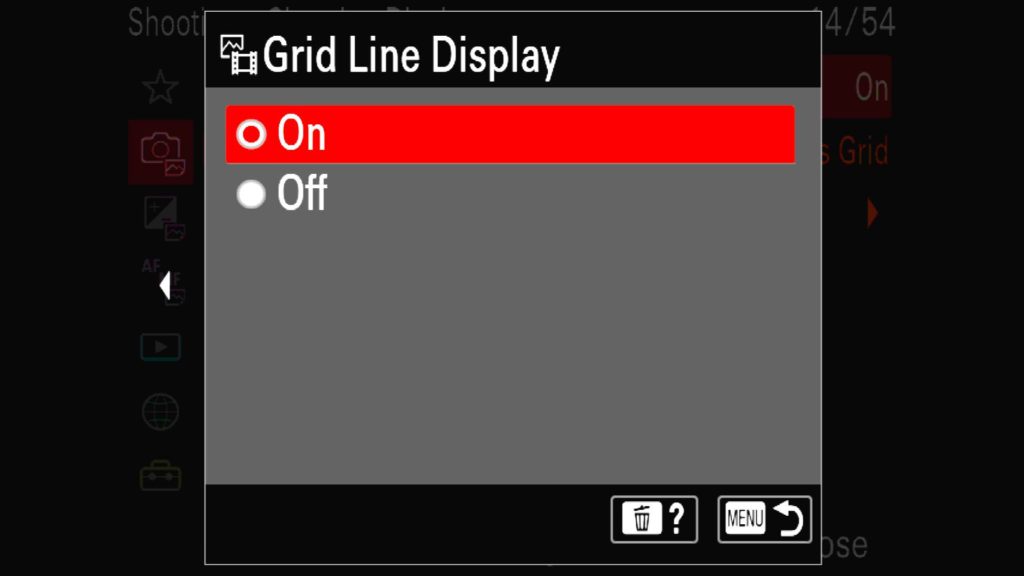
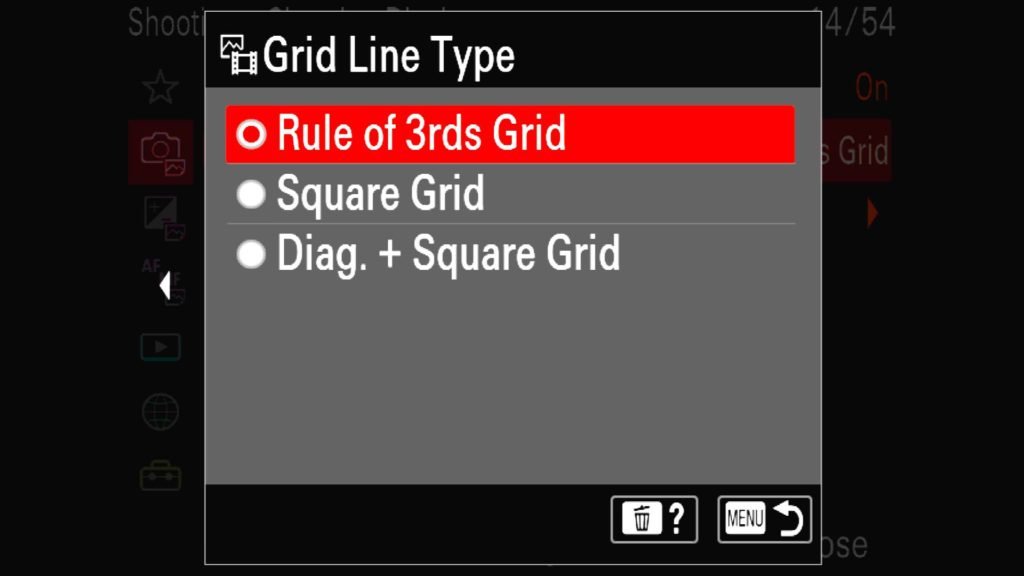
A helpful tool found on the Sony a1 is the ability to apply a digital overlay to your rear LCD as well as the viewfinder to help you create more compelling compositions. I often opt for the “Rule of 3rds Grid” as it can help me quickly level the horizon in an image while also giving me some insight on subject placement throughout my scene.
Found in the “Shooting” menu under the “9: Shooting Display” section you will find both the “Grid Line Display” setting as well as the “Grid Line Type” options.
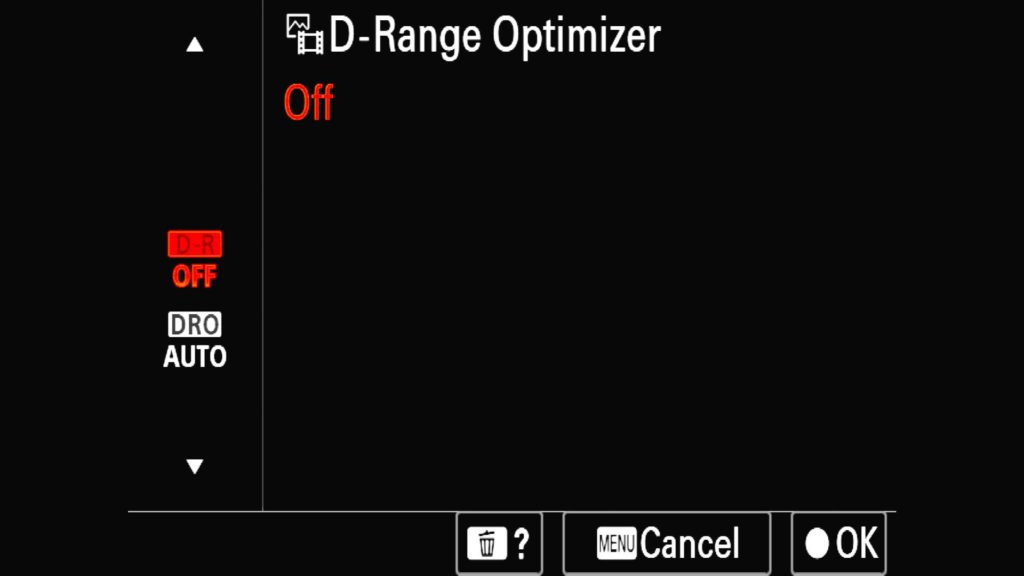
D-Range Optimizer
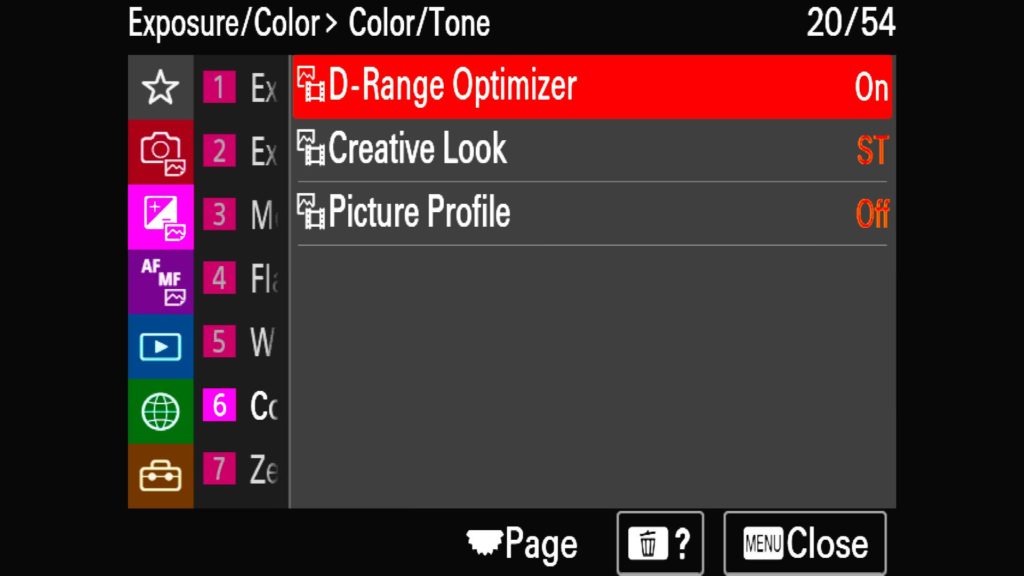
On by default, the “D-Range Optimizer” or DRO, will artificially increase the dynamic range found in any JPEG or HEIF images you capture (but it won’t affect RAW images). Because this is an artificial adjustment that doesn’t do anything to RAW images, I tend to turn this off and rely on my post-processing skills to make any dynamic range adjustments when editing my shots. If you do end up shooting JPEG or HEIF, feel free to experiment with it on and by adjusting its strength.
Found in the “Exposure/Color” menu under the “6: Color/Tone” section you will find the “D-Range Optimizer” option.
Focus Peaking Settings
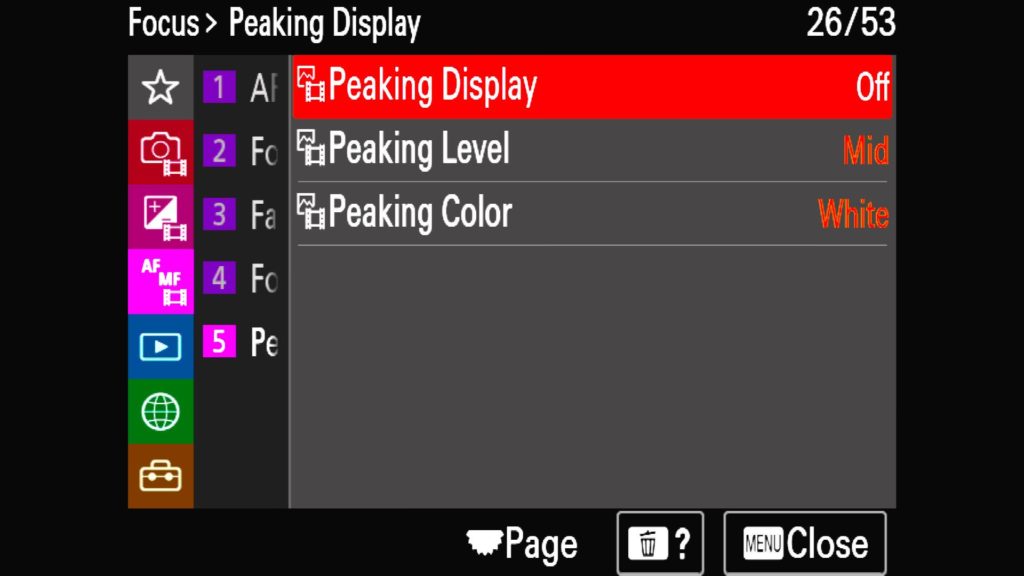
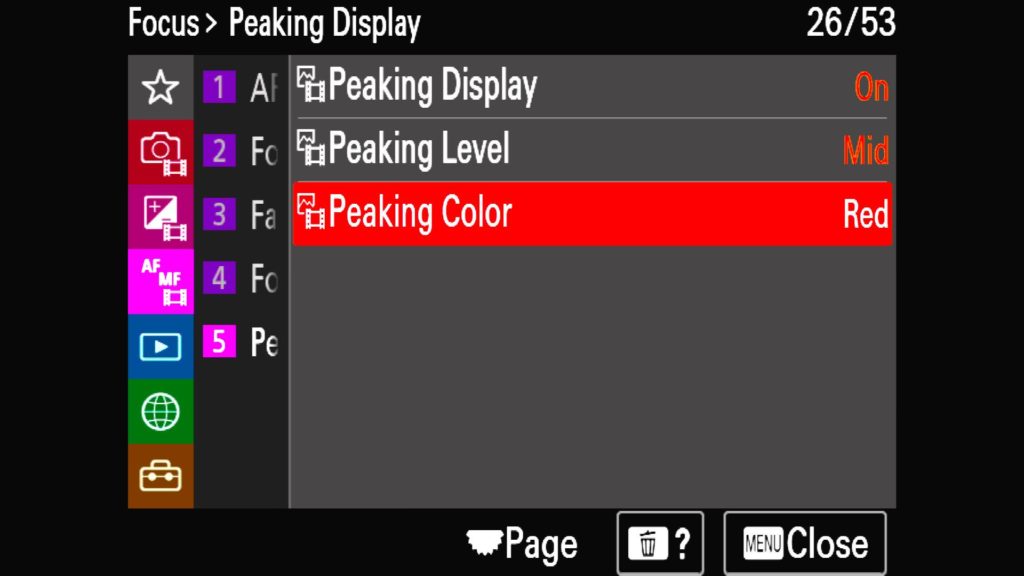
One of my favorite Sony camera settings happens to be Focus Peaking. What this does is a digital overlay onto the rear LCD or viewfinder to help let you know when you are close to getting an object in focus when using manual focus. Just note that it means you are “close” and not meant to indicate “tac sharp” results. Often times once I know I am close, I can zoom in and further dial things in get the sharpness results I am after. I use this most often with night/astrophotography. In my experience, you want to set the Peaking Level to “Med” and the Peaking Color to “Red” for the best results in the vast majority of situations.
Found in the “Focus” menu under the “5: Peaking Display” section you will find the Peaking Display, Peaking Level and Peaking Color menu options.
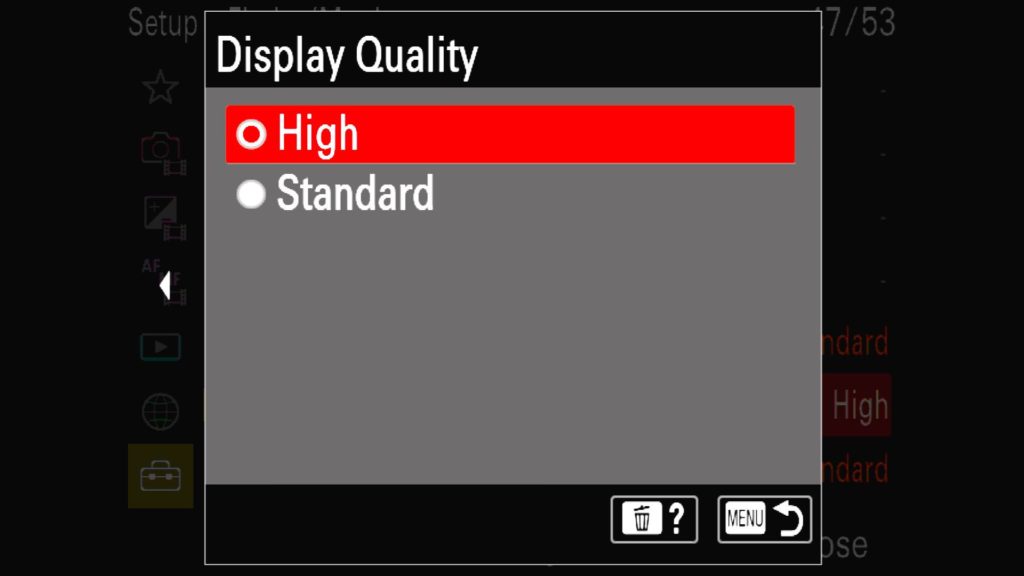
Display Quality
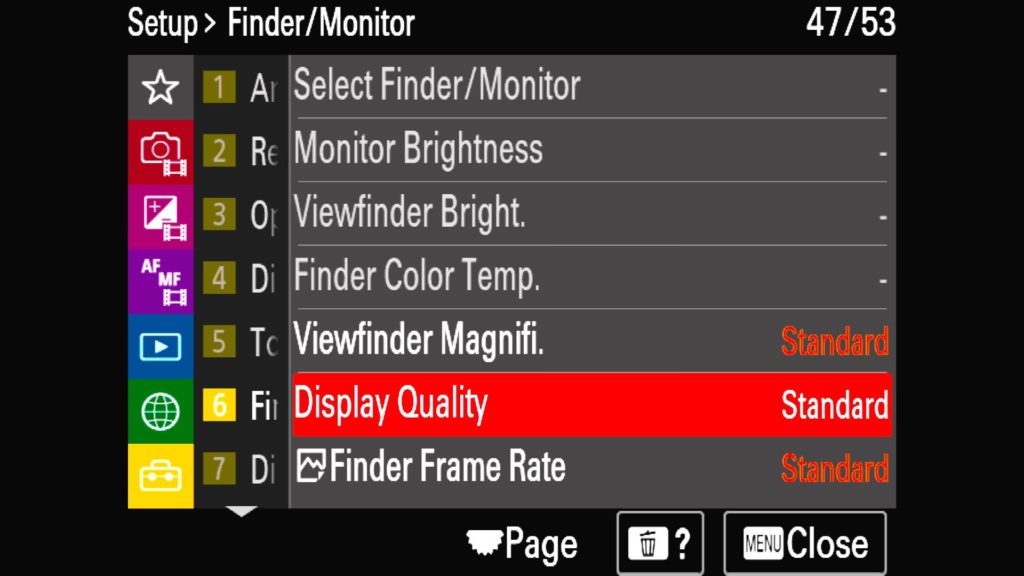
One of the best new additions to the Sony a1 is the incredible Viewfinder with its lifelike resolution of 9,437,184. This thing is a joy to look through straight out of the box, but with a little hidden setting, you can make it look even better. By adjusting the “Display Quality” setting from standard to High, you will max out the resolution of both the rear LCD and the viewfinder, giving you the best viewing experience possible with the camera. That said, Sony does note that this will be at the cost of some battery life, but in my experience, it has been a pretty small trade-off in that department.
Found in the last “Setup” menu under the “6: Finder/Monitor” section you will find the Display Quality option near the bottom of the menu.
Finder Frame Rate
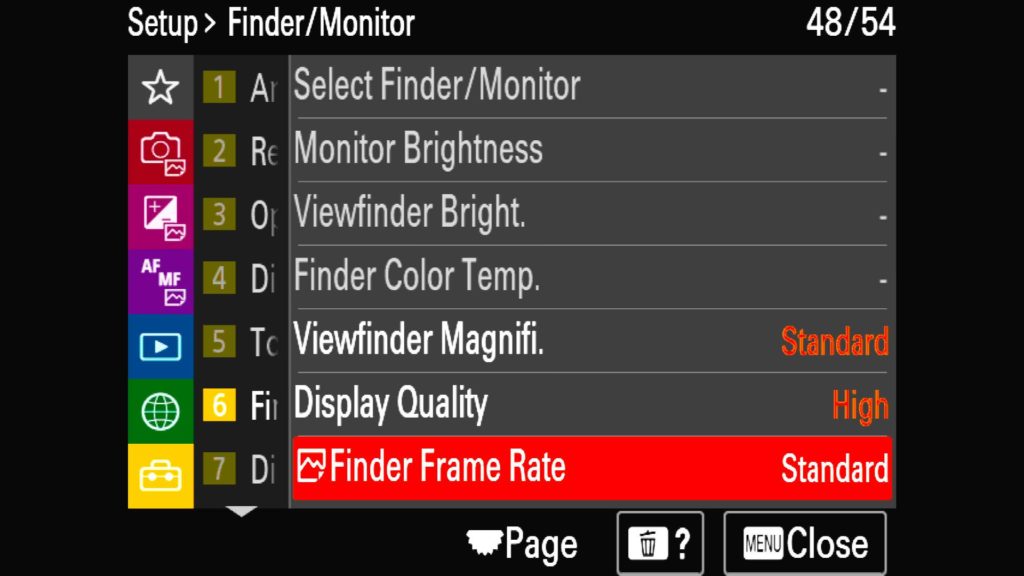
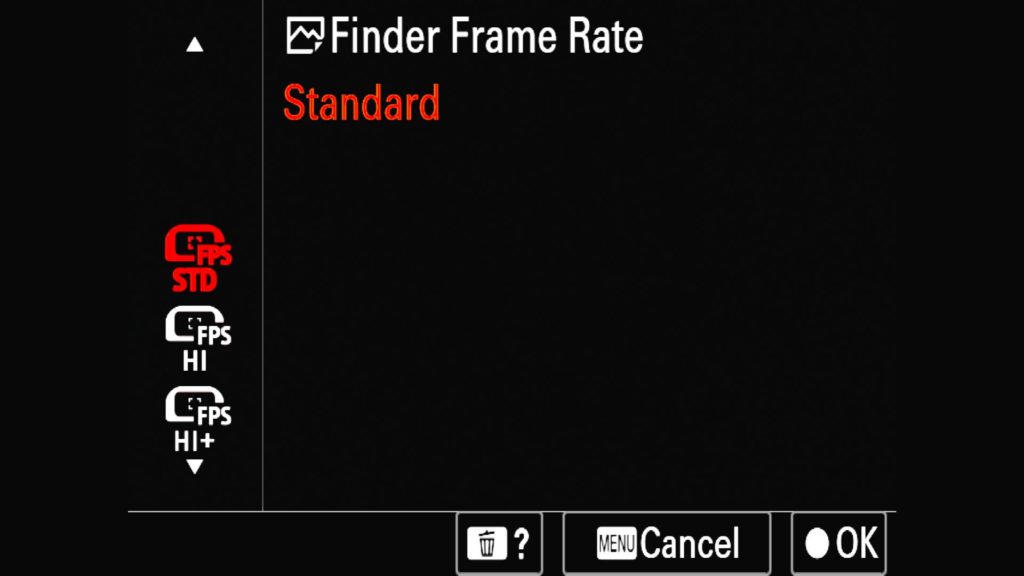
One of the settings that you should be aware of is the “Finder Frame Rate”, where you can manually adjust the FPS found in the viewfinder from Standard to High to Higher. Each setting will increase the FPS of the viewfinder by slightly lowering the resolution at each step. This can be handy when shooting fast-moving subjects as you will be able to view the subject more smoothly at a higher FPS as they move across the frame of the image. Do note however that the frame rate of the viewfinder is limited in the following situations: During playback, During an HDMI connection, when the temperature inside the camera is too high or when the Shutter Type is set to Electronic Shutter or Auto and continuous shooting is performed. Additionally, selecting any option besides “Standard” will automatically lock the “Display Quality” to standard as well. Most of the time I leave this is at “Standard” but you should experiment to see what kind of results you get.
Found in the last “Setup” menu under the “6: Finder/Monitor” section you will find the Finder Frame Rate option at the bottom of the menu tab.
The AF System
One of the most impressive things about the Sony a1 is its AF system. With stacked sensors drastically increasing its readout and processing capabilities, the a1 can perform over 120 AF and AE calculations per second, making it one of the fastest if not the fastest, and most responsive and accurate AF systems in the industry. While I do plan on writing separate blog posts that cover my favorite settings for wildlife, landscape, travel, and portraits in the coming days, let’s start with understanding all of the different AF settings you have at your disposal first.
AF Mode Top Dial
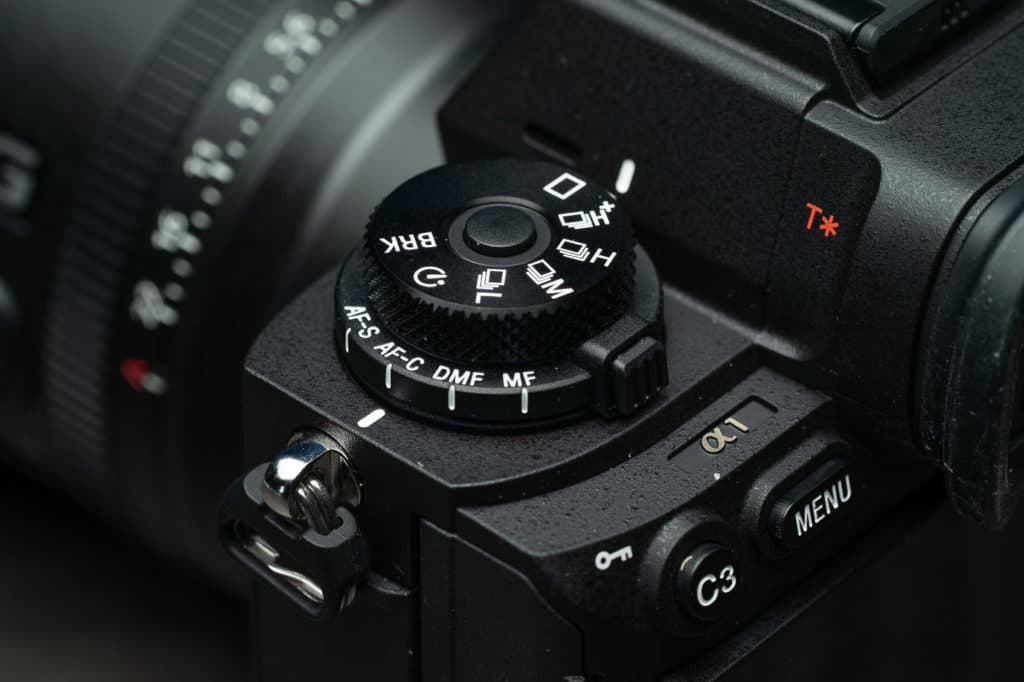
Pulling from the Sony a9 series, the a1 has a dedicated top dial specifically for the AF system on the camera. It is here that you move from Single Focus (AF-S), AF-C (Continuous), Direct Manual Focus (DMF) or Manual Focus (MF). While most of these are pretty self-explanatory, DMF is essentially a mixture of AUTO and MF focus. With it, you can use the camera’s AF system to achieve focus and then use your lens’s focus ring to further dial things in to suit your needs. On the dial, you will find a small button that must be pressed in before you move the dial, preventing you from accidentally rotating the dial by accident.
Drive Mode Dial
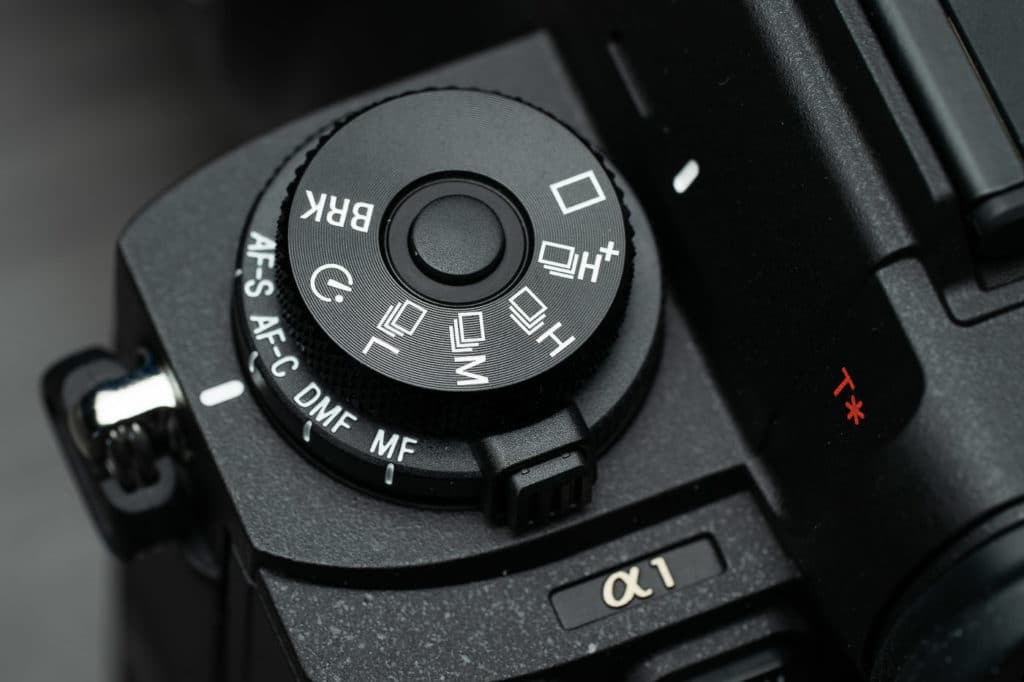
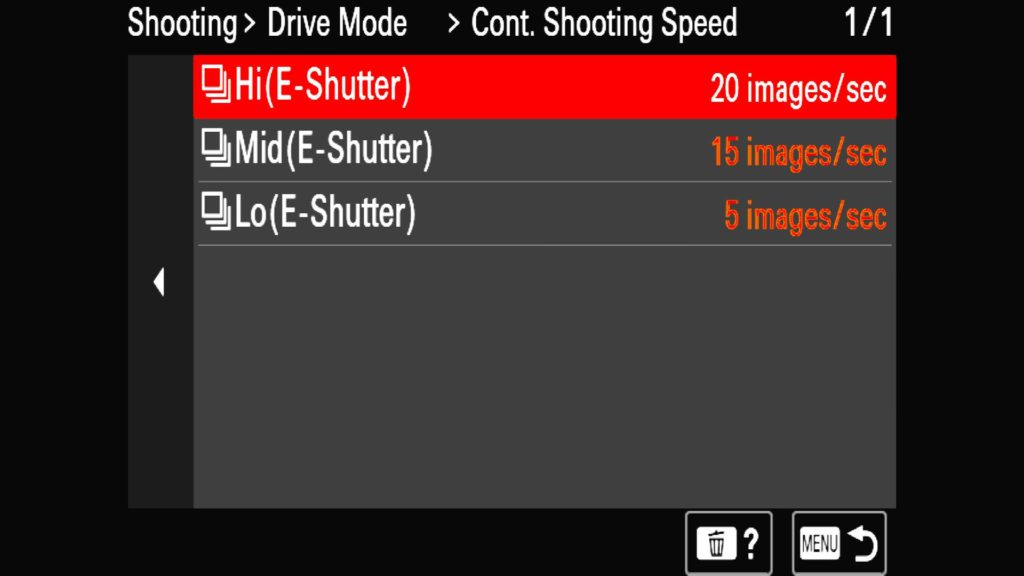
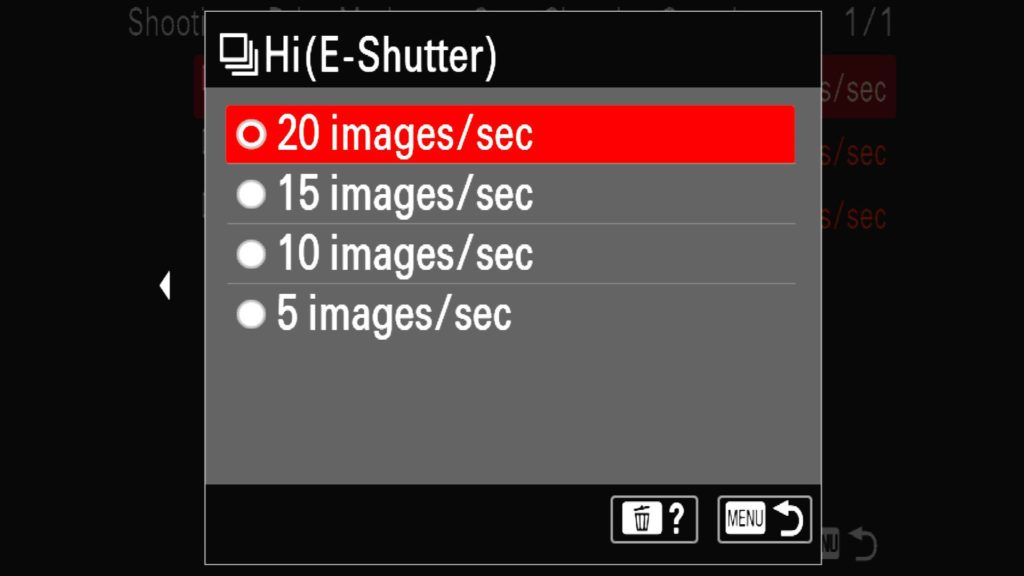
Sitting on top of the AF Mode Dial is the Drive Mode Dial. With the locking button located in the middle of the dial, you can easily move between each of the different drive modes such as Single Shot, Shutter Delay and Bracketing Mode (BRK). When it comes to continuous shooting you have High+ (30fps), High (20fps), Medium (15fps) and Low (5) by default. These can be customized, which I will cover in the next setting.
Cont. Shooting Speed
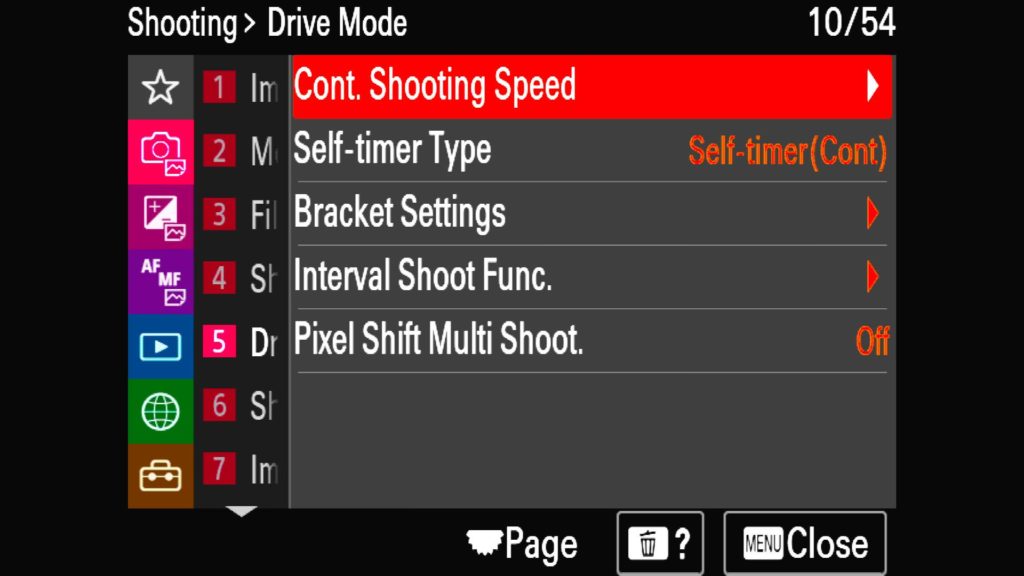
If you want to customize the various FPS speeds for each of the different drive modes, you can in the “Cont. Shooting Speed” setting. Here you can adjust for the High, Medium and Low options. High+ will always be set for 30fps, but it is important to note that not all Sony native lenses will be able to shoot at 30fps with the a1. I have a list of compatible lenses at the end of this section, so be sure to check them out.
This setting can be found in the “Shooting” menu tab under the “5: Drive Mode” section under “Cont. Shooting Speed”.
Priority Set in AF-S & AF-C
You have the ability to control the priority when it comes to the AF-S & AF-C focusing modes. By default, this setting is set to Balance Emphasis which is a mixture between focusing on AF (where the camera will not take a photo until it achieves focus) and Release (where the camera will capture an image even if it isn’t in focus yet). What you set these settings at should be determined by what kinds of subjects you are photographing. Wildlife photographers for example will want to experiment with Release, as it is not only the fastest setting here but the only setting that offers the full 30FPS that the Sony a1 is capable of shooting. Regardless, experiment with these options and see which ones provide you with the best results.
This setting can be found in the “Focus” menu tab under the “1: AF/MF” section under “Priority Set in AF-S” or “Priority Set in AF-C”.
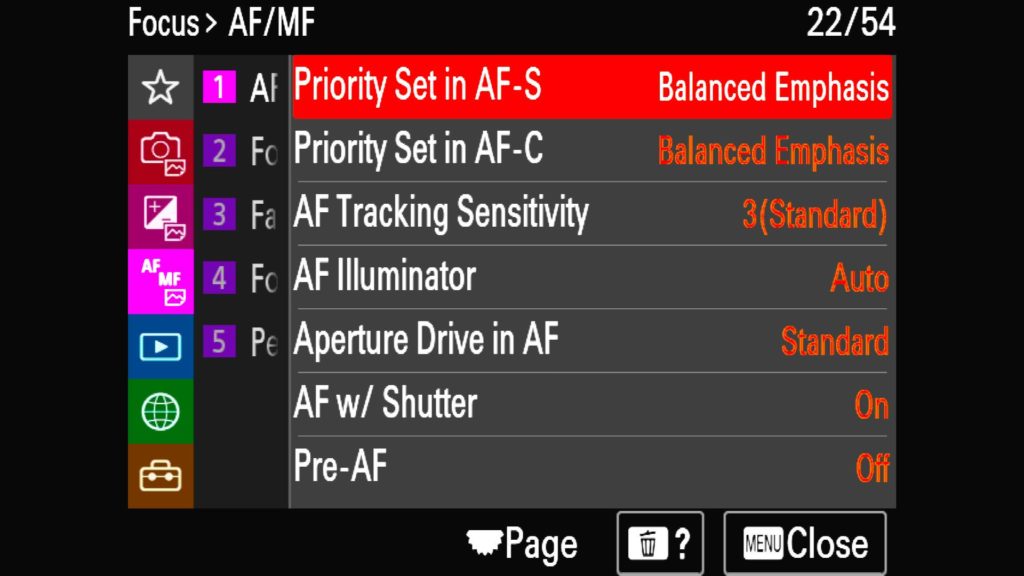
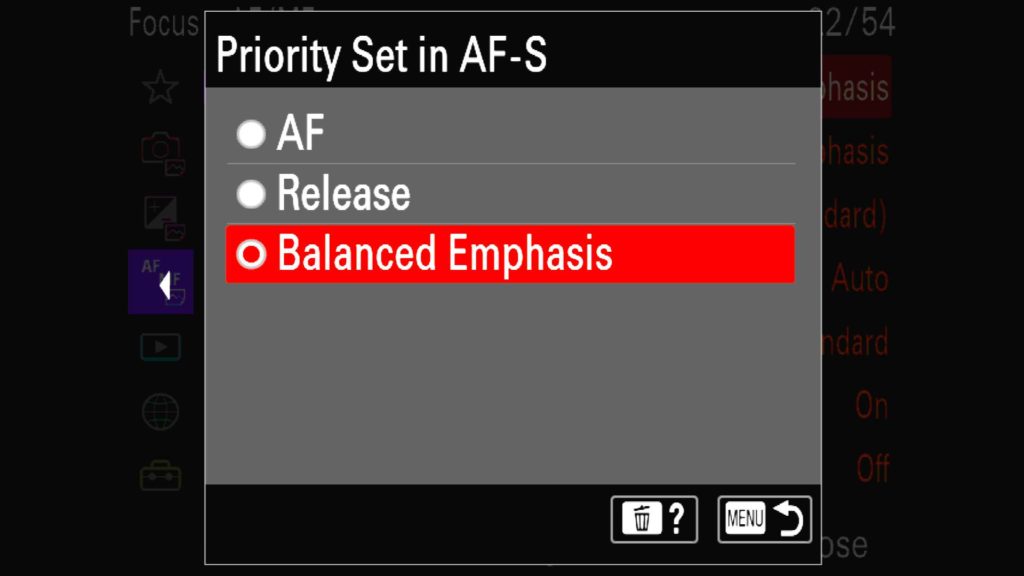
AF Tracking Sensitivity
When it comes to how “sticky” the a1’s AF system is to your subject when it goes out of focus, you will want to pay attention to the “AF Tracking Sensitivity” setting. Here you can adjust the sensitivity between 1 (where the AF tries to stay locked on to the same subject) to 5 (where the system is actively trying to keep something in focus the whole time). What kind of subject you are photographing and how fast they are moving should help dictate this setting. By default, it is set to 3 (Standard).
This setting can be found in the “Focus” menu tab under the “1: AF/MF” section under “AF Tracking Sensitivity”.
Focus Area Modes
The various different AF Area modes found on the a1 shouldn’t be anything new to other Sony users, but if you are coming from a different system, it is important to know more about each different option at your disposal.
Wide – This mode covers the entire range of potential AF points across the sensor. This mode is handy in situations where you trust the a1’s AF system to get your subject in focus where you want it. Over the years I found this setting to get more and more accurate, seemingly as if it automatically knows to focus on the heads or faces of a subject without me selecting it outright with another mode.
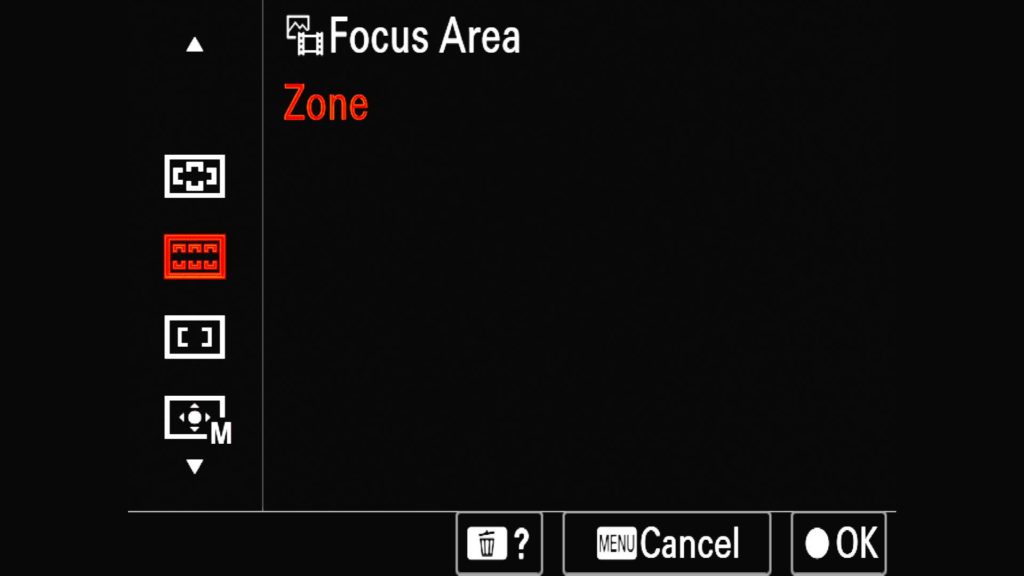
Zone – This mode selects a smaller movable rectangle that you can place around your frame with the rear joystick on the a1. If I know I want to place a subject in a certain spot within my image (such as a bird on the right side of the frame facing towards the left), this is often my go do AF area mode.
Center Fix – This fixes the AF point to solely be in the center of the frame, often requiring a focus and readjust before capturing the shot. I rarely use this mode anymore.
Spot (S, M, L) – When you need to be extremely particular about your focus point, the moveable “Spot” mode is one of the best choices. You can select three different sizes (Small, Medium, and Large) by jumping into the Focus Area setting and hitting the left or right buttons on the rear control wheel with this mode selected.
Expanded Spot – Similar to the “Spot” mode, the “Expanded Spot” mode will use the AF points around your selected AF spot to focus on on the chance that it can’t find focus initially.
Tracking: – With Continuous AF selected, you can engage the “Tracking” AF area to have the a1 track the subject within the AF area you selected within this mode. You can choose any of the above AF area modes within the “Tracking” section (such as Tracking: Wide or Tracking: Zone) to better track subjects moving throughout your frame.
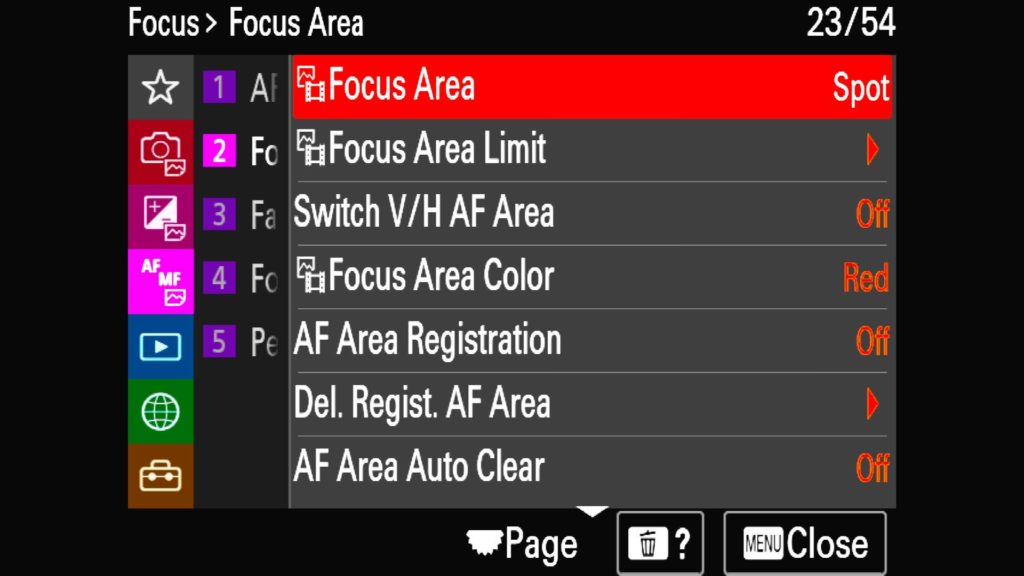
This setting can be found in the “Focus” menu tab under the “2: Focus Area” section under “Focus Area” option.
Touch AF
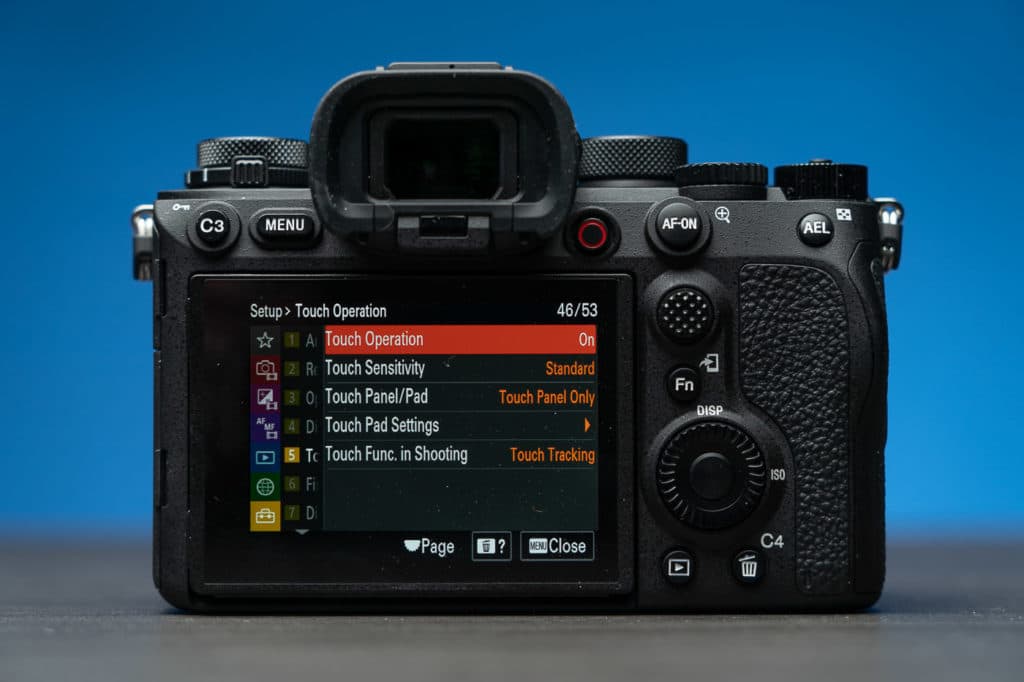
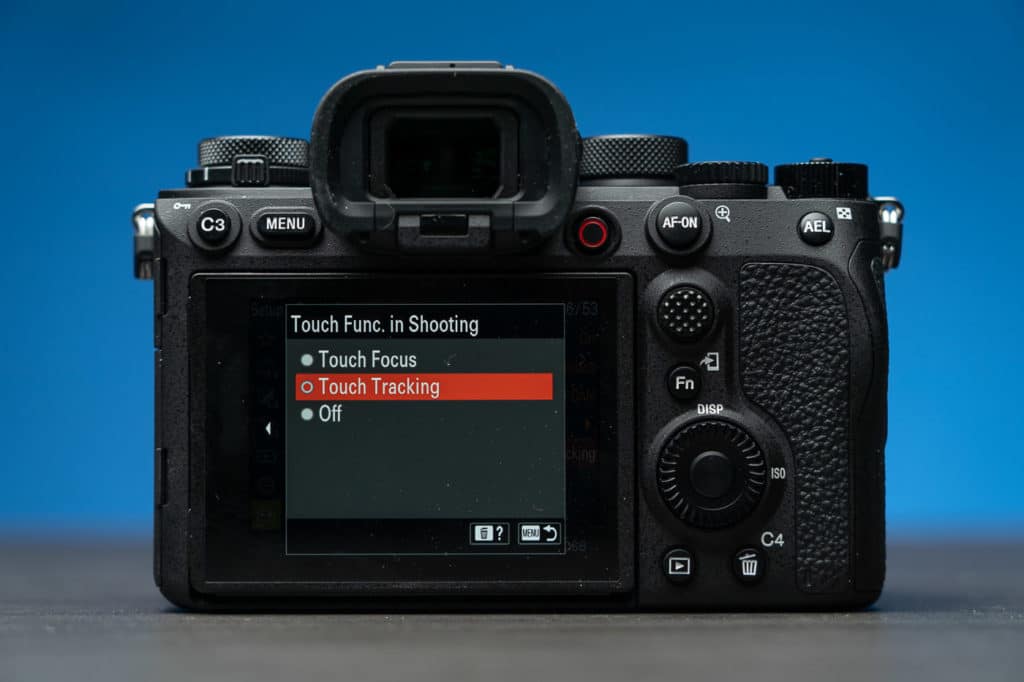
With the a1, you have the ability to use the touch-sensitive rear LCD screen to also select an AF point for you to focus on. This is incredibly handy in many situations where you had a subject move around your frame and resettle in a spot. However, by default, it is set to engage the “Tracking: Spot” mode we mentioned above, making it an ideal option for some sports and wildlife-focused situations. You do have the ability to change it to Touch Focus (single focus), keep it at Touch Tracking, or simply off if you don’t intend to use the feature.
You can find this setting in the “Setup” menu tab under “5: Touch Operation” under “Touch Func. in Shooting”.
Focus Area Color
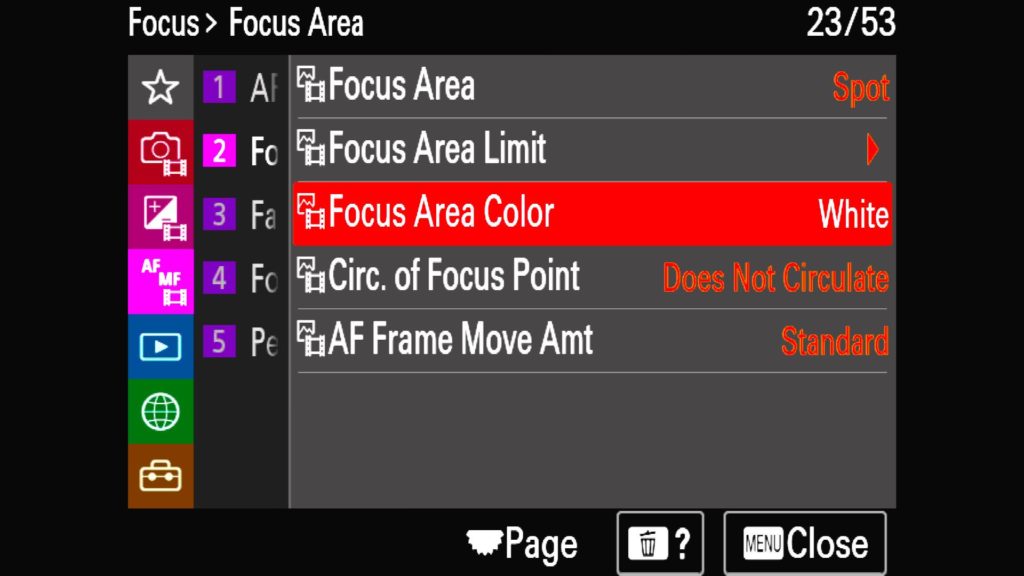
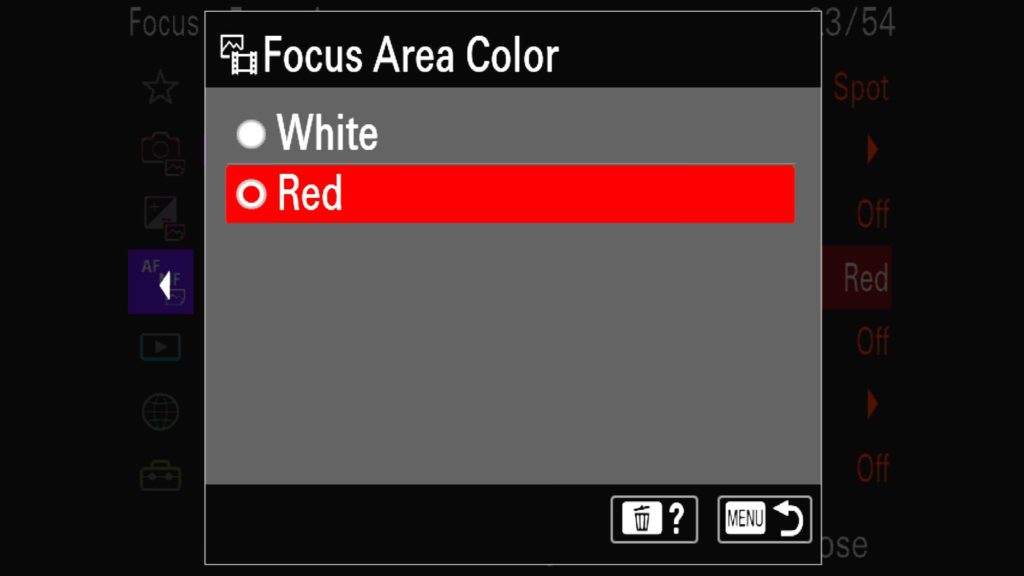
Another setting with adjusting right away would be to change the color of the adjustable focus areas within the Sony a1 mirrorless camera. By default, this is set to “white” which can be pretty difficult to see in some situations. I prefer the “red” option, making it much more visible when you are out in the field.
This setting can be found in the “Focus” menu tab under “2: Focus Area” in the “Focus Area Color” setting.
The Eye AF System
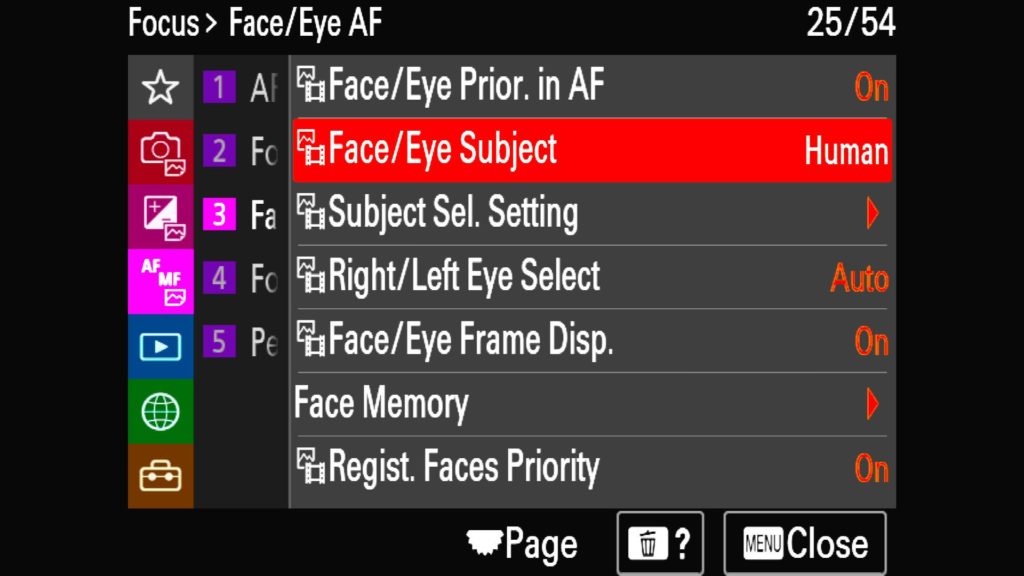
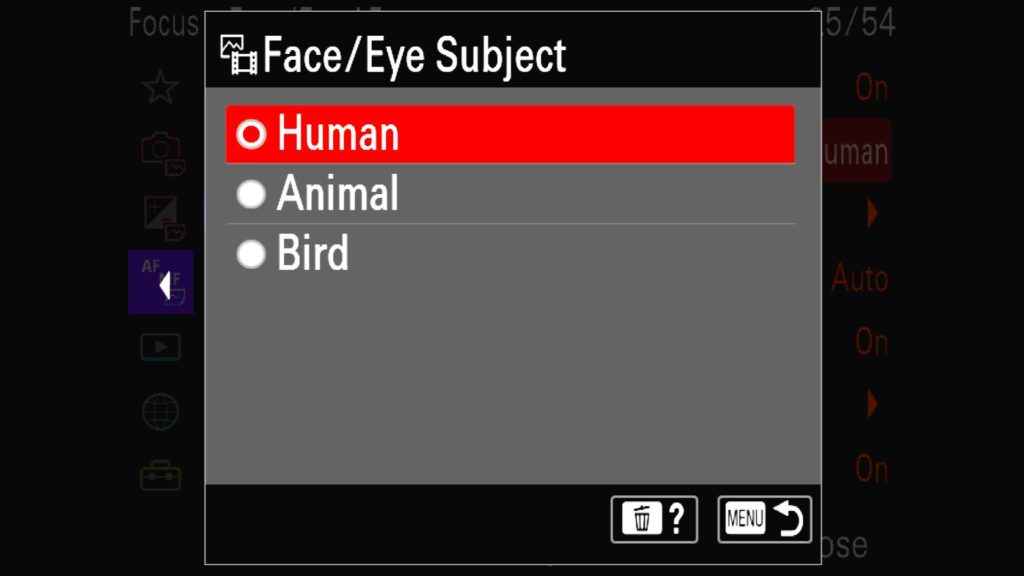
Over the years Sony has lead the industry when it comes to its Eye AF technology that uses AI to help you achieve tac sharp results with a variety of different subjects. This started out focusing on humans but then added in animals with an emphasis on mammals such as cats, dogs, bears, and the like. With the a1, Sony has now added the ability to track the eyes of birds as well. The challenge is that because of the variety of different potential subjects, you have to manually tell the a1 to switch between looking for humans, animals or birds with the Eye AF feature. I have assigned this feature to a custom button on my Sony a1 along with the ability to switch back and forth between which eye I want to focus on within a subject. I will walk you through how to do this yourself a little later on in this blog post. Now, because so much of this is based on AI, this technology will only increase in accuracy and effectiveness as Sony releases firmware updates for this camera, which is great news for everyone.
This setting can be found in the “Focus” menu tab under “3: Face/Eye AF” in the “Face/Eye Subject” setting.
What Is Required to Shoot at 30fps?
I think we can all safely agree that one of the most impressive features announced with the Sony a1 was its ability to shoot at 30fps at 50mp. That is an insane amount of speed with an insane amount of resolution. However, in order to achieve this milestone, there are some required settings that you should be aware of.
- You have to be in compressed RAW or the JPEG file format (uncompress RAW or lossless compressed RAW has a maximum FPS of 20)
- AF-C mode selected and Drive mode set to Hi+
- Selection of an Electronic shutter and shutter speeds selected between 1/250th and 1/32000 of a sec
- Priority Set in AF-C to Release (not balanced emphasis)
- The “Tracking” AF modes will drop a few FPS, so try to stick with the other AF areas such as Zone or Wide.
- Have a compatible lens that can shoot at 30fps (see the next section)
Compatible Lenses for 30 FPS Shooting
While I am sure that we all want all of our Sony & 3rd party glass to shoot at 30fps, it is important to know that not all lenses are created equal. In order to achieve that 30fps milestone, you need to use one of Sony’s officially stated compatible lenses, otherwise you will be limited to 20fps or possibly lower. To help ease the confusion with all of this, I have put together this list of FF lenses that are all known to be fully capable of capturing 30fps with the Sony a1.
Understanding A1 Video Modes & Settings
Whether you are new to video or just to the Sony a1, it is important to understand just how incredible this camera is when it comes to the video you create with it. In this section, we will break down each of the important video-focused settings to hopefully clear up any confusion you might have, but before we begin, you should know that many a1 settings are separately applied depending on if you are in one of the photo modes or in video mode, so before you change any of the settings we list below, make sure you set your a1 into “Video” mode.
Video File Formats
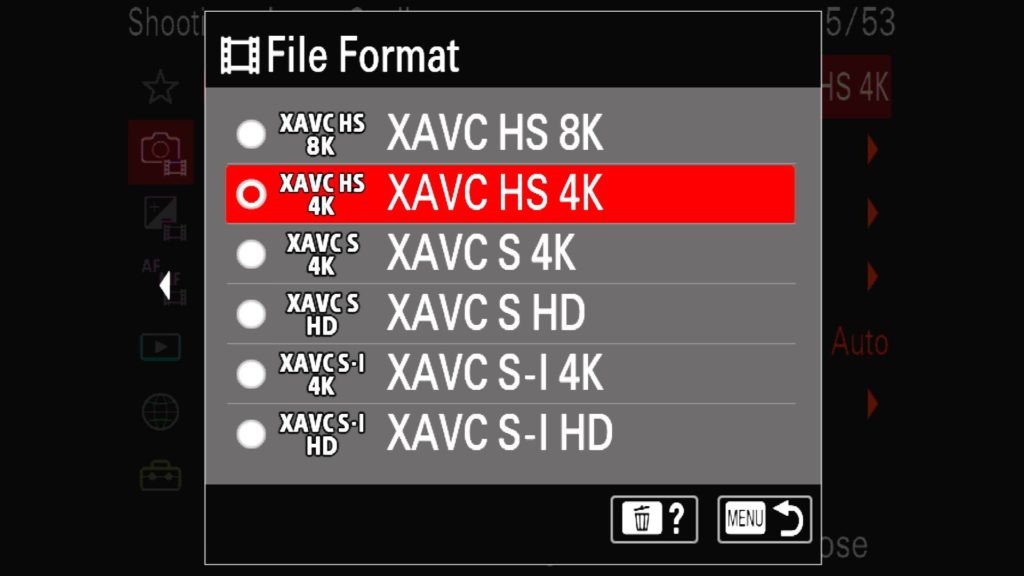
With the Sony a1, you have a bunch of different video file formats to choose from, so lets break down your options so that you know the difference between each of the modes.
XAVC HS 8K – The largest resolution that is possible to capture with this camera
XAVC HS 4K – The highest quality 4k video mode you can shoot in
XAVC S 4k – The standard 4k mode you can film in
XAVC S HD – The standard HD (1920x1080p) that you can capture
XAVC S-I 4k – This mode can make editing this 4k video much quicker/easier, but the files sizes can be massive
XAVC S-I HD – This mode can make editing this 1080p video much quicker/easier, but the files sizes can be massive
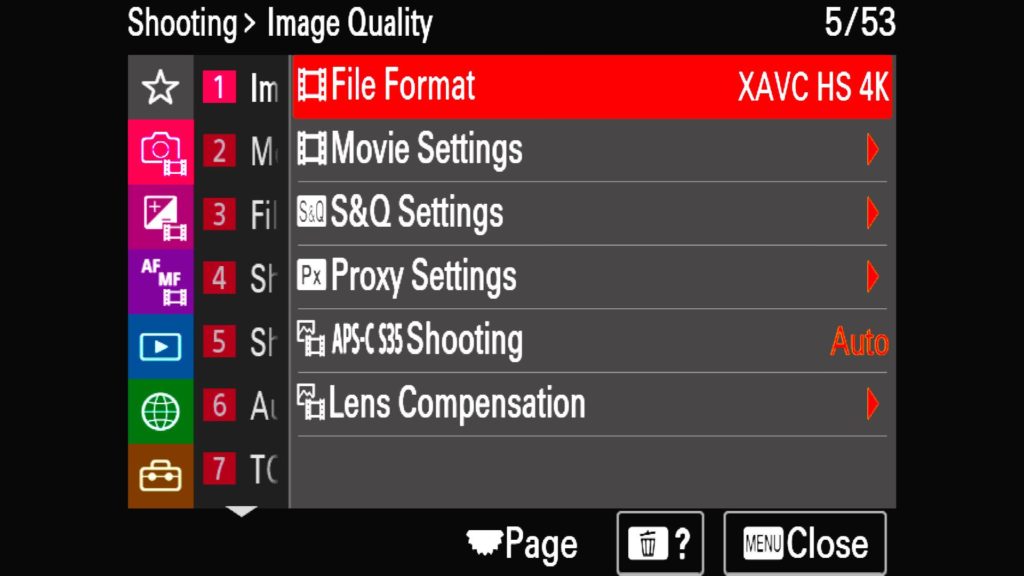
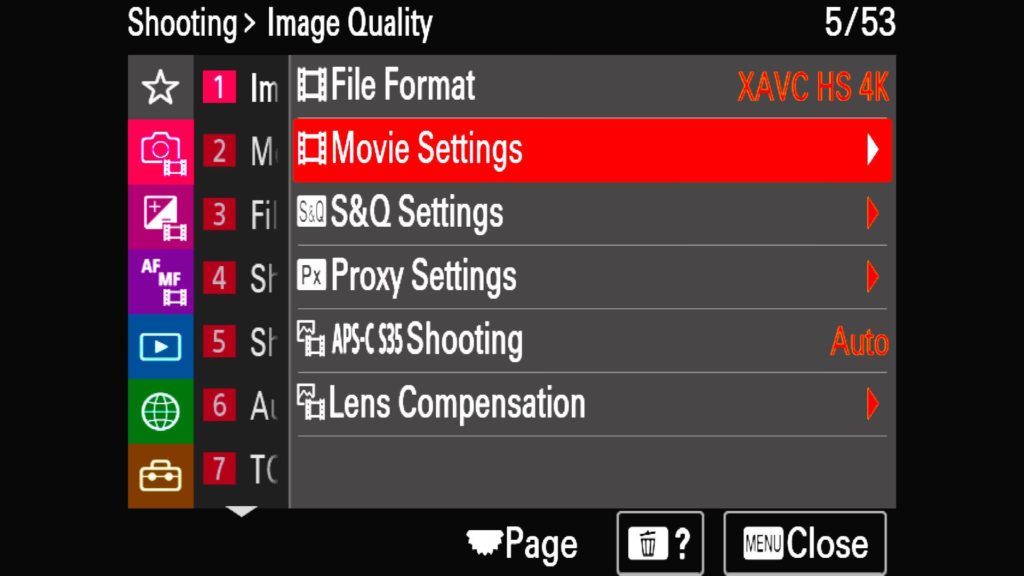
This setting can be found in the “Shooting” menu tab under “1: Image Quality” in the “File Format” setting.
Movie Settings
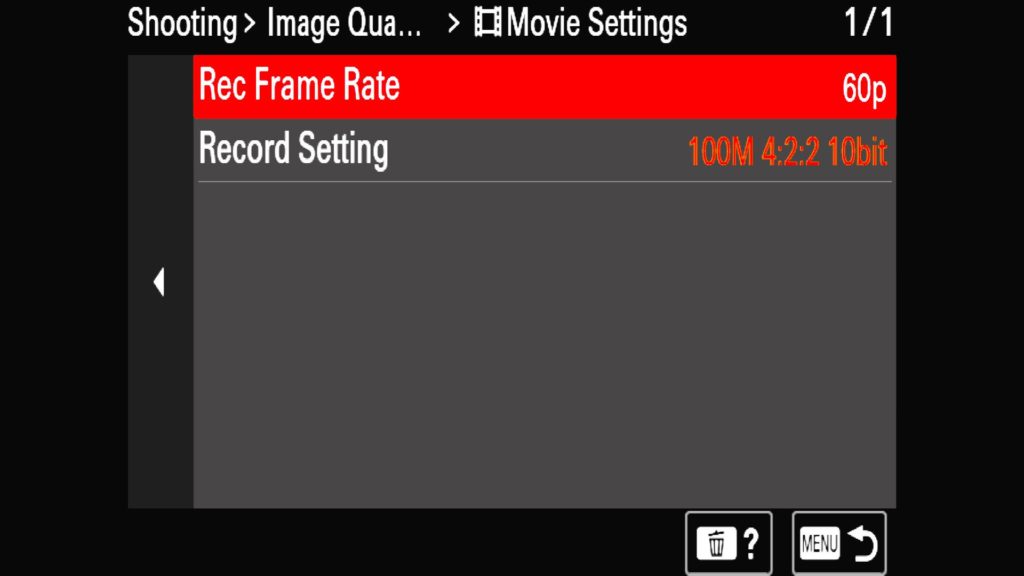
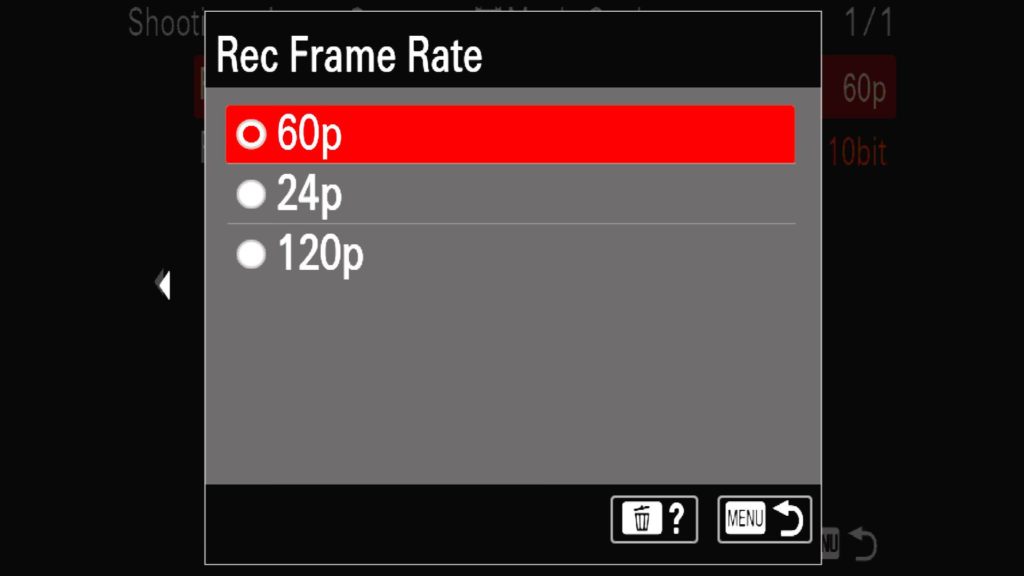
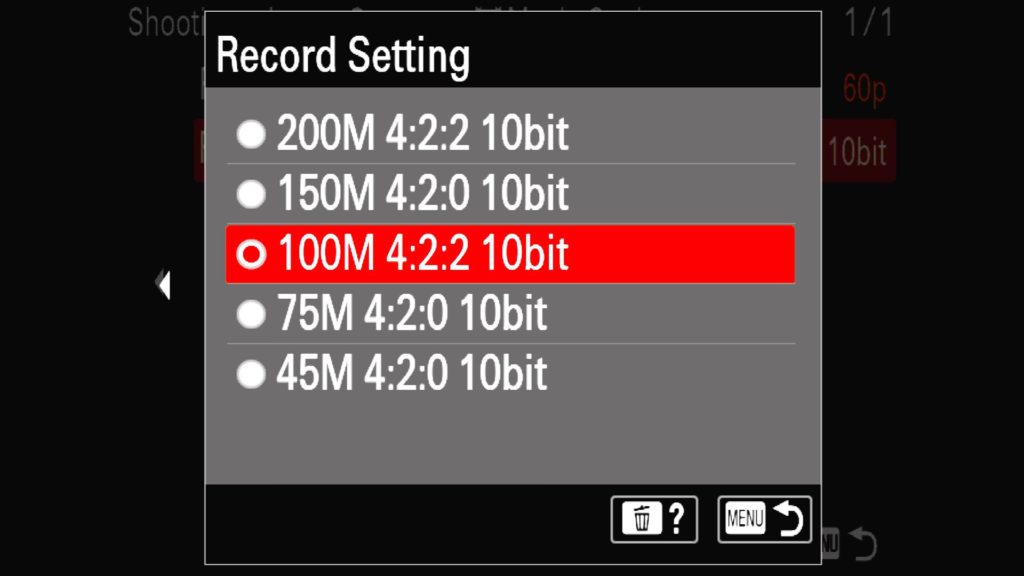
Once you have selected your video resolution, it is time to make adjustments to the video frame rates (Rec Frame Rate) and quality/bit rates (Record Settings). It is important to know that the options available to you via both of these settings will differ depending on what video mode you selected above. So how do these settings affect your video?
Your choice of frame rate determines the general feel and look of the video.
24p – A cinematic or film-like look and feel
30p – A mode more in line with your standard internet video
60p – With fast-moving subjects, you will want a faster FPS, such as 60p. This will also give you the ability to slow down footage shot at 60fps for a partial slow-motion effect
120p – Offering the ability to more dramatically slow down a clip if it is shot at 120fps.
When it comes to the “Record Settings”, this is where you choose the quality, bitrate, and color options found within your video. The larger the bitrate, color pallet, and quality, the larger the video file size. For example, with 8k video selected, you can choose: 400M 4:2:0 10bit
The first part (400m) stands for the bit rate. The higher the rate, the larger the file size and the higher the quality of the video. Next, we focus on chroma subsampling which refers to how much color information is recorded at the pixel level, in this case, 4:2:0. The higher the numbers the more color information is recorded, so 4:2:2 is better than 4:2:0 for example. Lastly, we have bit-depth, in this case, 10bit. With the Sony a1, you only have two options with some of the video modes, 8-bit and 10-bit, which again has to do with color. A 10bit video can display 1.07 billion colors where an 8bit video is limited to 16.7 million. When I am shooting important scenes that I know I want pull every last bit of detail out of a shot, I will choose a high bit rate, try to shoot in 4:2:2 when possible, and select 10bit. These videos will be large, but worth it in my mind.
These settings can be found in the “Shooting” menu tab, under the “1: Image Quality” section in “Movie Settings”.
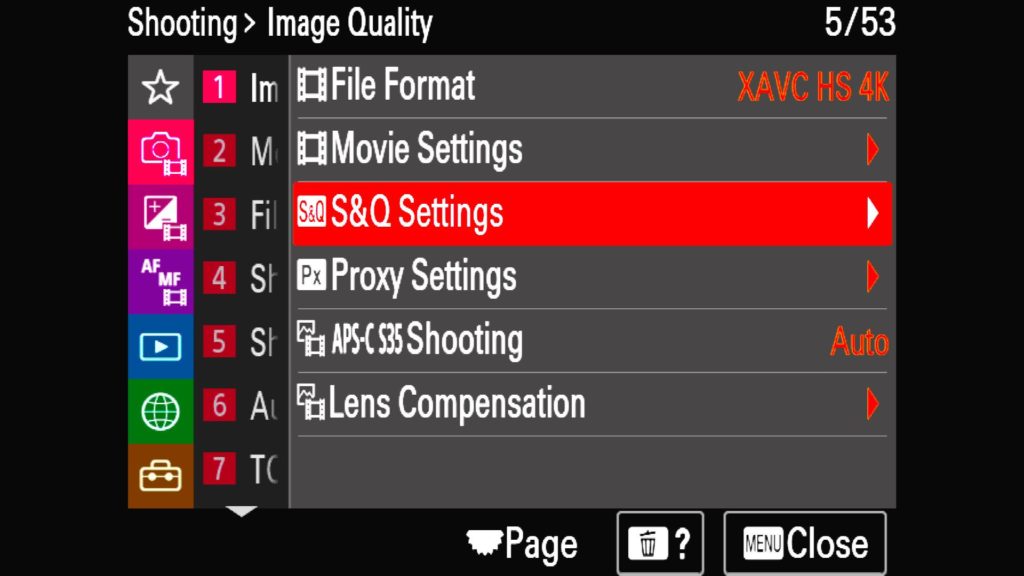
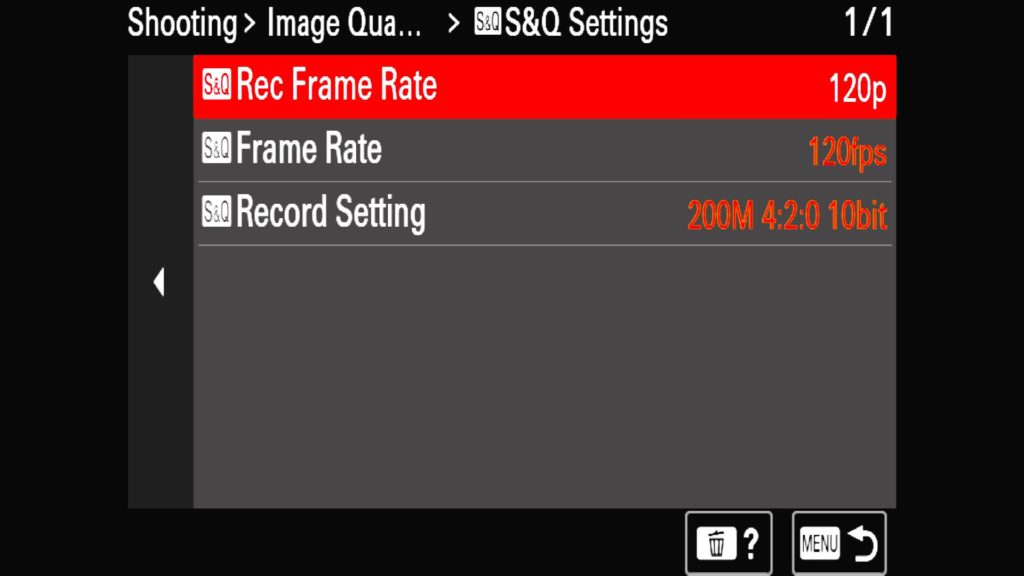
S&Q Settings
Sony’s S&Q feature stands for Slow & Quick motion, providing you an easy way to shoot frame rates from 1 second to 240fps slow-motion video or even quick timelapses with your a1 (depending on your selected video mode). Here you can choose your Rec Frame Rate (24p, 30p, 60p, 120p), Frame Rate (1fps – 240fps), and variable Recording Settings that change depending on what video mode have selected on the camera, such as shooting in 8k, 4k or 1080p.
These settings can be found in the “Shooting” menu tab, under the “1: Image Quality” section in “S&Q Settings”.
Proxy Settings
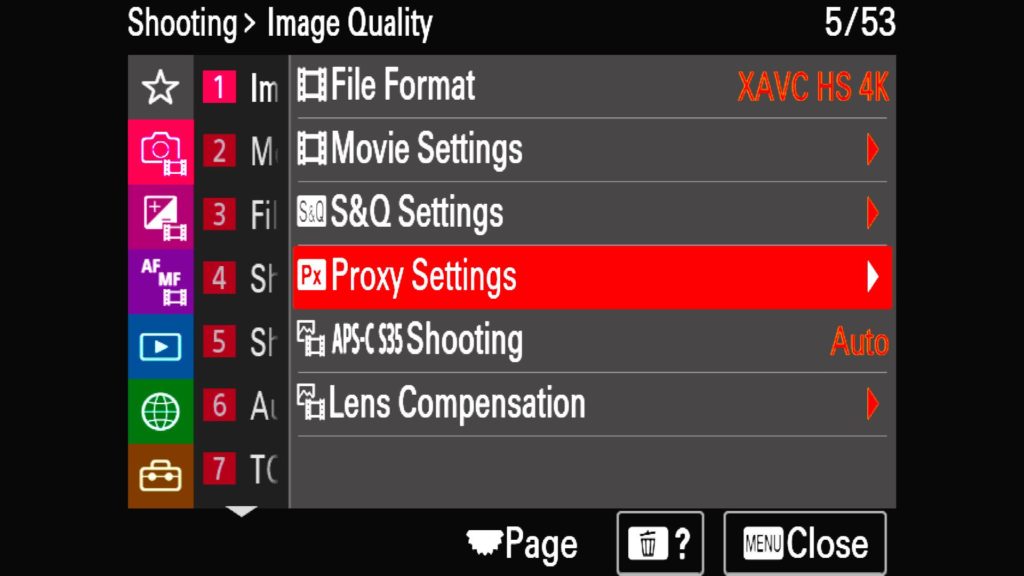
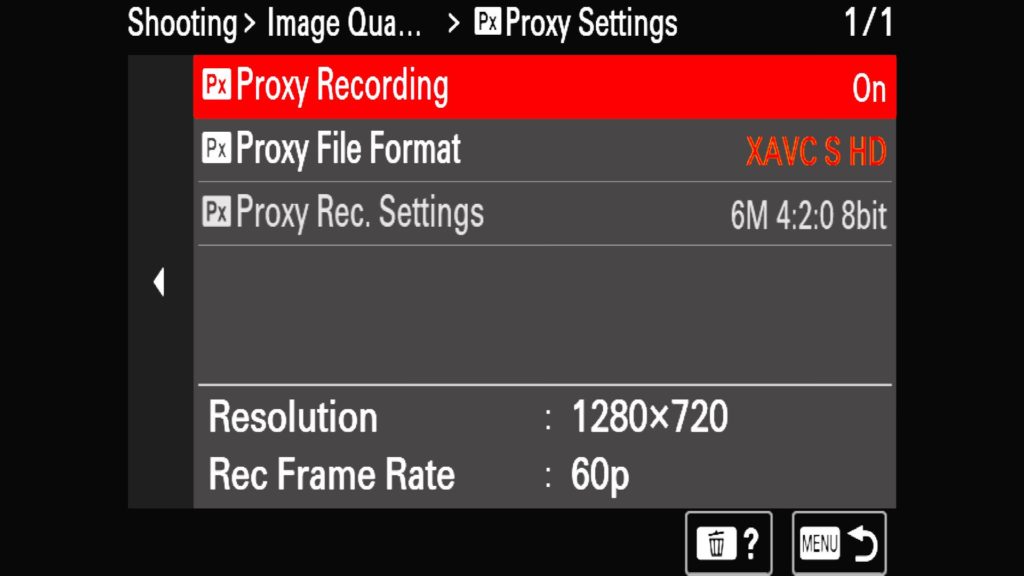
An overlooked video setting is the ability to shoot proxy files along with your videos. Essentially this records an auxiliary (second) copy of the original video file at a lower resolution so that it is easier to process on a computer. This can be handy (or maybe even required) if you feel your desktop or laptop can’t handle processing the beefy 8k video files coming out of the a1. Do note that many video editing apps will also allow you to create proxies when you import your video files into your system, but it can add a long amount of time to the process.
With the internal Sony a1 settings, you have the ability to turn “Proxy Recording” on/off, adjust the “Proxy File Format” and experiment with the “Proxy Rec. Settings” to fine-tune your proxy video files as needed.
These settings can be found in the “Shooting” menu tab, under the “1: Image Quality” section in “Proxy Settings”.
Picture Profiles
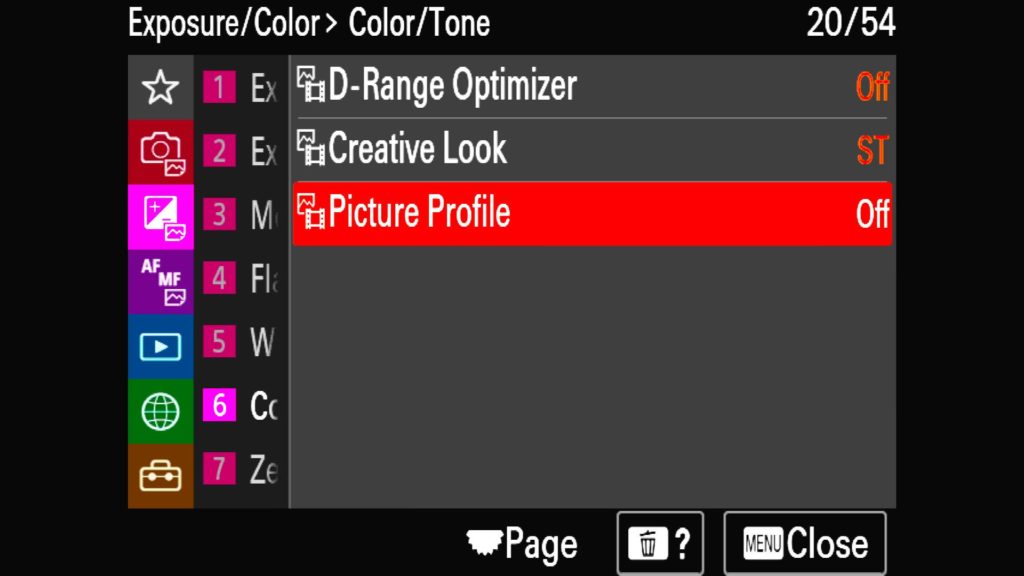
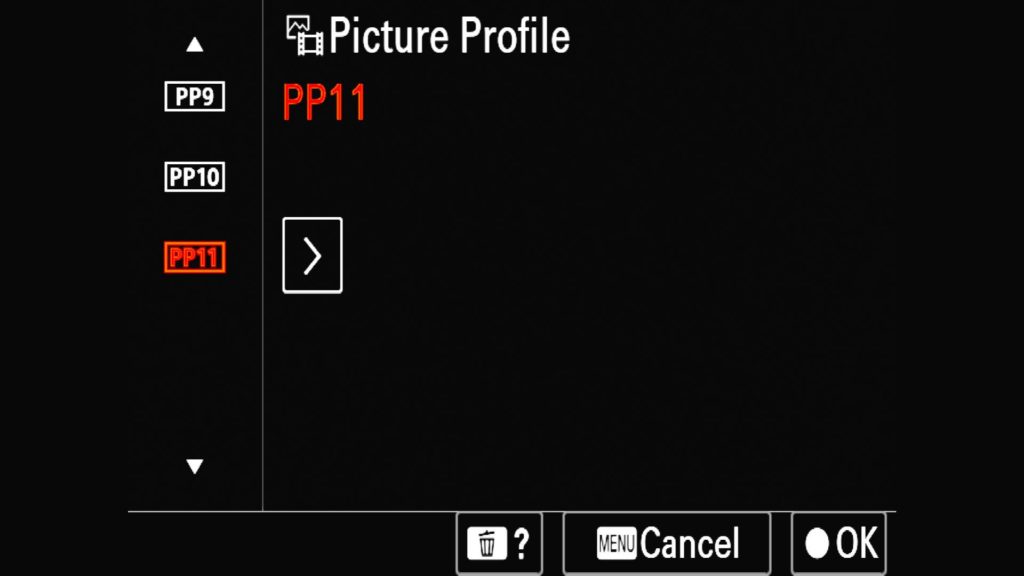
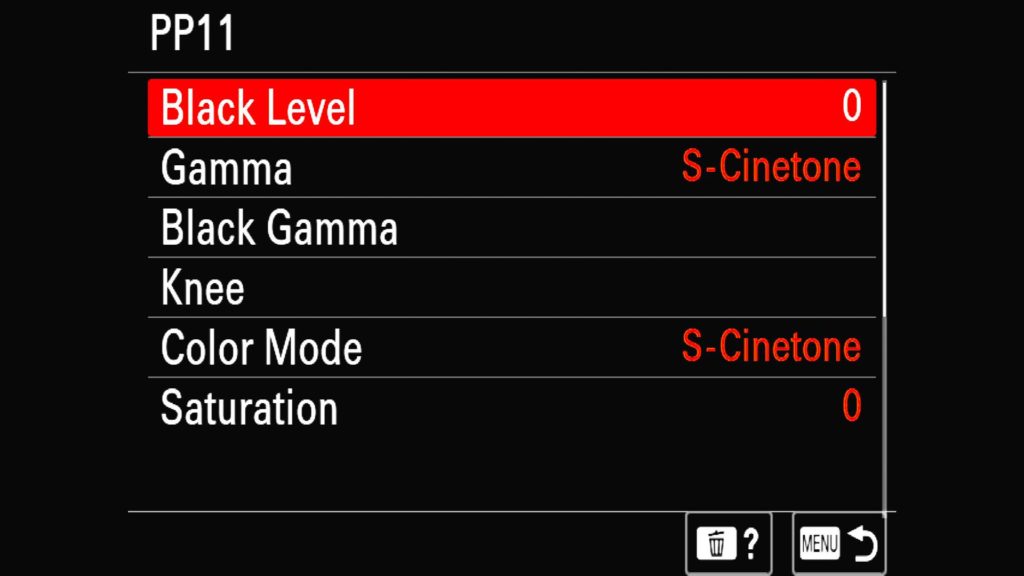
Outside of choosing the right video format, FPS and bitrate, choosing the right Picture Profile to use with a video can be absolutely crucial when it comes to how well you can color grade (process) the video. With the Sony a1 you have 11 different PP that can be used for both still and video, although the vast majority of people tend to focus on video production when it comes to these profiles. While PP1 is the standard or default setting, I am not going to cover every single profile in this section. Instead, let’s focus on the last 5 profiles that are most commonly used.
PP7 – S-Log2 gamma and S-Gamut color mode
PP8 – S-Log3 gamma and S-Gamut3.Cine color mode
PP9 – S-Log3 gamma and S-Gamut3 color mode
PP10 – HLG2 gamma and BT.2020 color mode
PP11 – S-Cinetone gamma & color mode
Each of these modes represents a different look/feel when it comes to how they handle both gamma and color. The resulting video file might end up looking incredibly flat and desaturated at times, but they offer much more leverage when it comes to processing (color grading) the footage.
Zebra Display
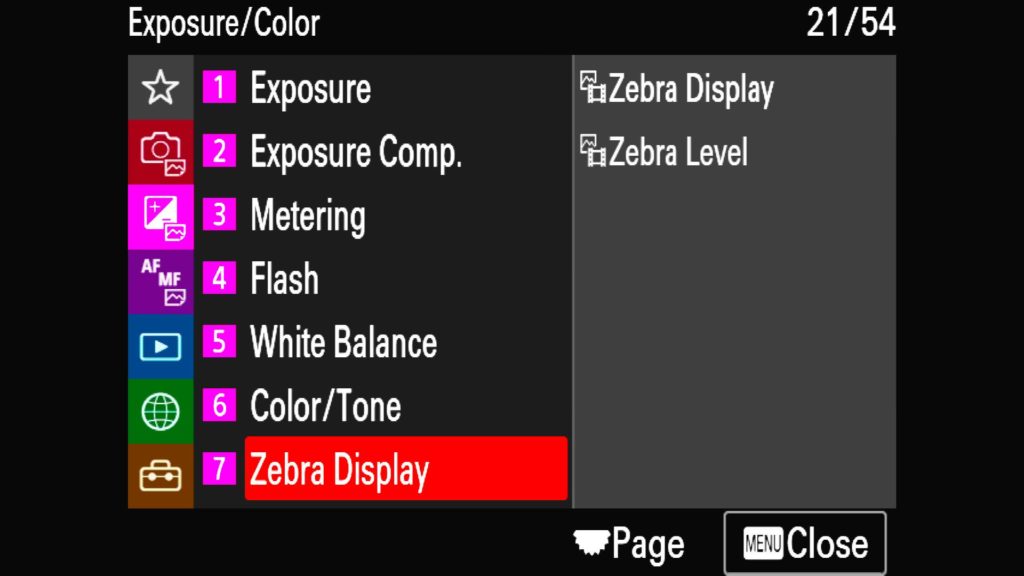
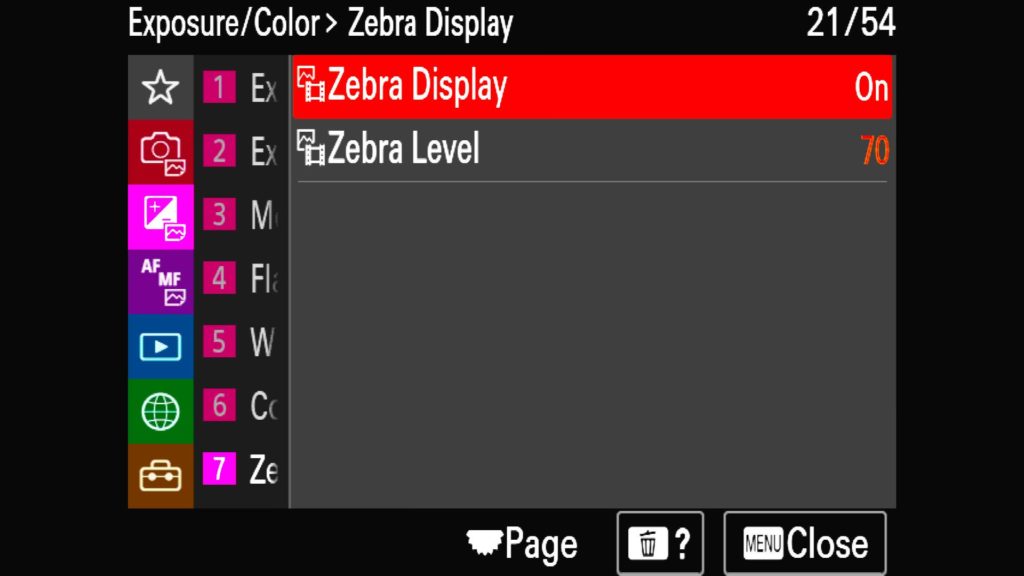
When it comes to shooting video, things can get pretty complicated if you accidentally blow out the highlights within a scene. The “Zebra” setting acts as a warning with rapid blinking lights appearing on any area that represents an exposure over a certain level of brightness, which you can set the threshold for. The default setting is at 70, but depending on the Picture Profile you have selected from the last section, you might want to either leave it alone or bump it up if allowed to based on the PP in question.
Both the “Zebra Display” and “Zebra Level” settings can be found in the “Exposure/Color” menu tab under “6: Zebra Display”.
Video AF Transition Speed
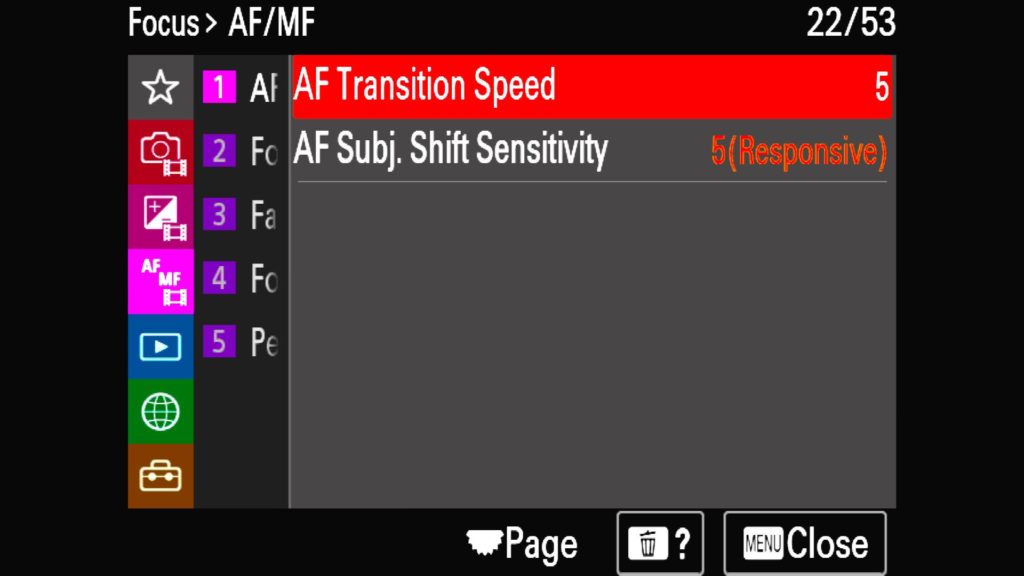
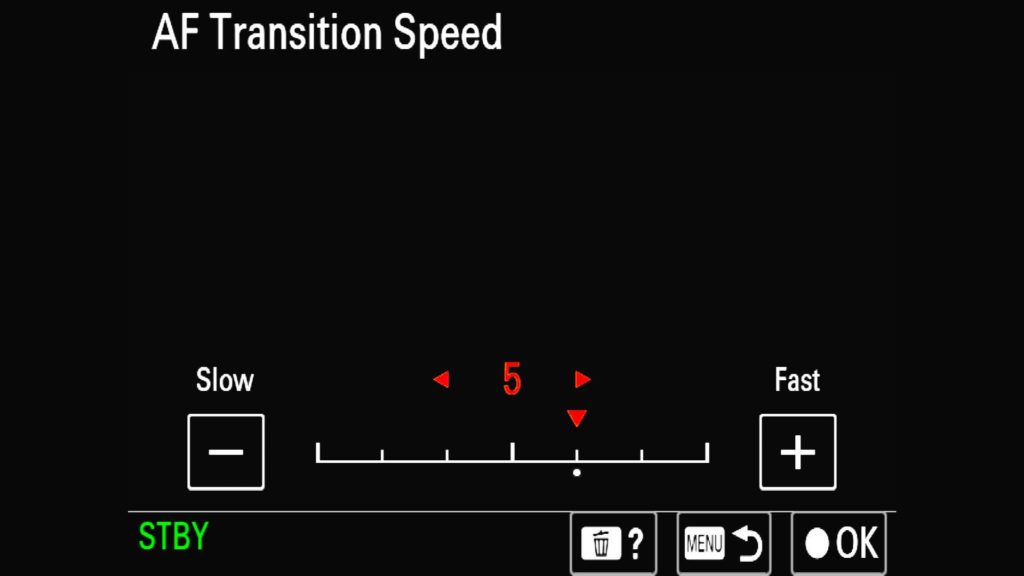
While many professionally videographers tend to stick with MF to rack focus their shots, the AF systems on cameras such as the a1 have continued to offer more and settings to help AF look smooth and natural in video. One of those settings is the “AF Transition Speed” which determines the focus transition speed when focus changes from one spot to another. If the move is too fast or too slow, it can throw off the viewing experience for the audience. The setting ranges from Slow (1) to Fast (5).
This setting can be found in the “Focus” menu tab, under the “1: AF/MF” with “AF Transition Speed”.
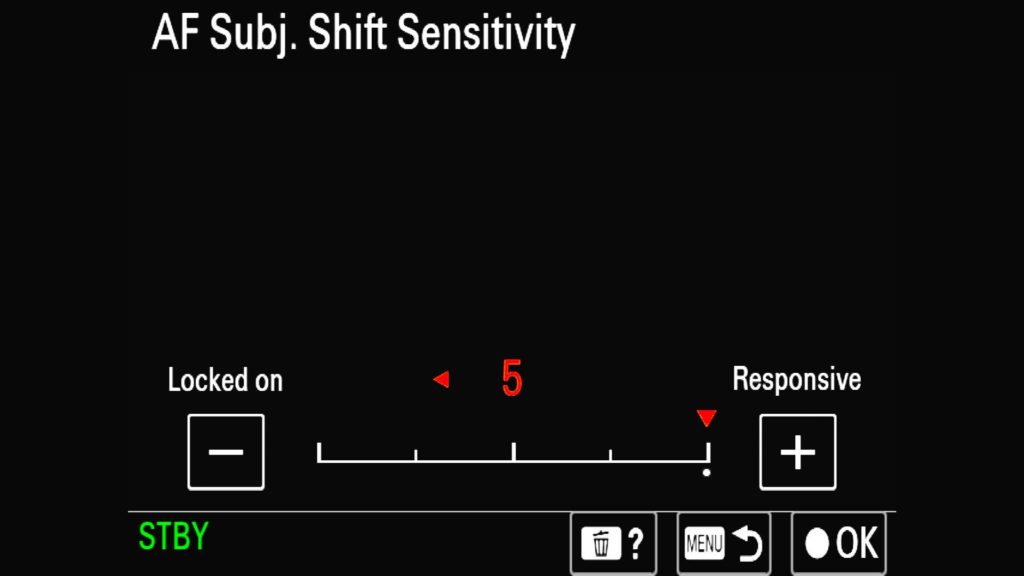
AF Subj. Shift Sensitivity for Video
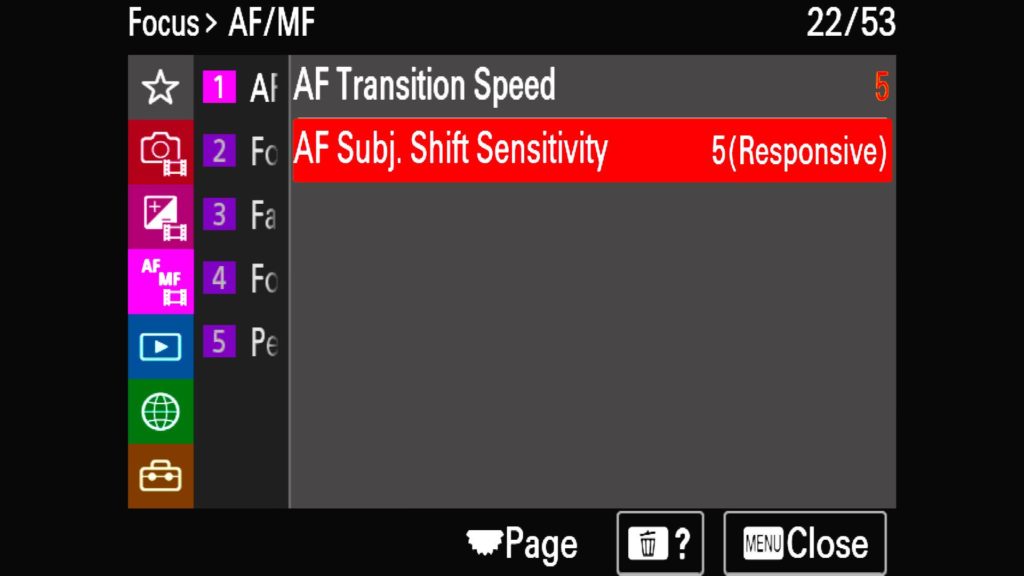
Another important setting when it comes to AF with video is the “AF Subj. Shift Sensitivity”. This setting is primarily focused on the speed at which the AF system should start to look for another focus point when your subject moves out of the focus area. You can set this from Locked On (1) all the way to Response (5) where it quickly looks for something else to focus on.
This setting can be found in the “Focus” menu tab, under the “1: AF/MF” with “AF Subj. Shift Sensitivity”.
Customizing Your Sony a1
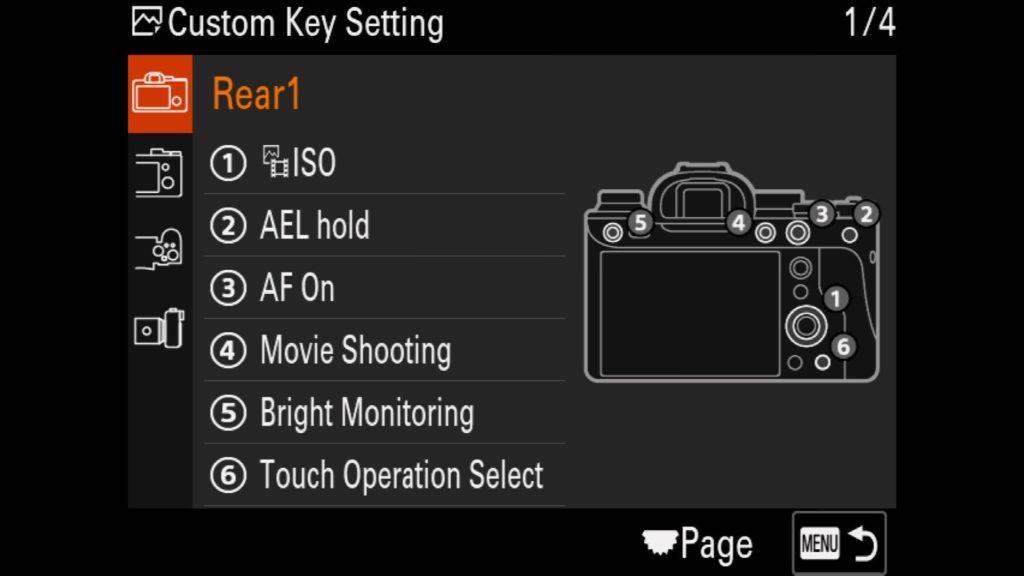
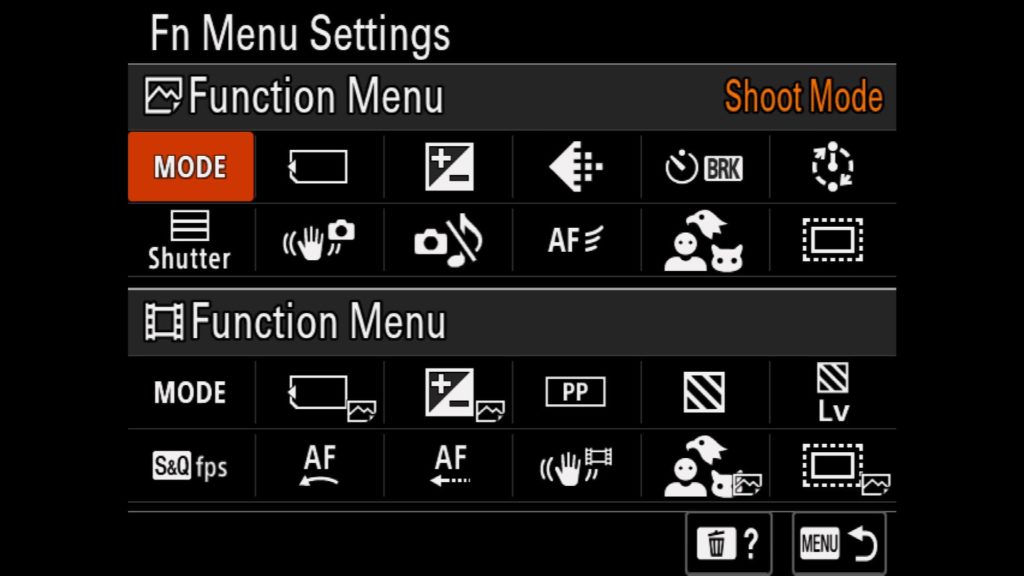
One of the best things you can do with your new Sony a1 mirrorless camera is customize it to fit your needs as a photographer. Don’t like what a button does on the back of the camera, simply reassign it. Want quicker access to make the camera shoot in truly silent mode or want to change Eye AF from Human to Bird? Nearly every button and menu on your a1 can and should be customized.
While it might take you weeks or months to truly get a feel for how you want your a1 to operate, I have decided to write a separate blog post detailed every customization I have done to my own pair of Sony a1 cameras. Separating this section out from this blog post gave me more room to explain each of the different choices I made and why. You can click on THIS link or any of the images above to take you to my Customizing the Sony a1 article. Enjoy!
** New Additions to the Guide **
So after publishing this guide, I have either been asked about or come across a series of additional settings/features worth mentioning. I will constantly update this section as I find more to share with you all!
Understanding The Memory Recall Features
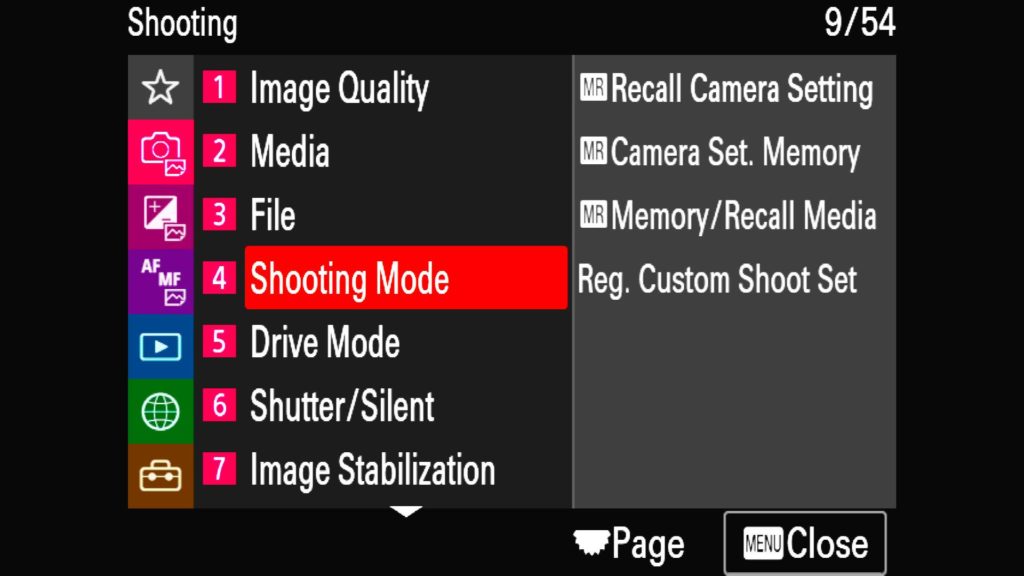
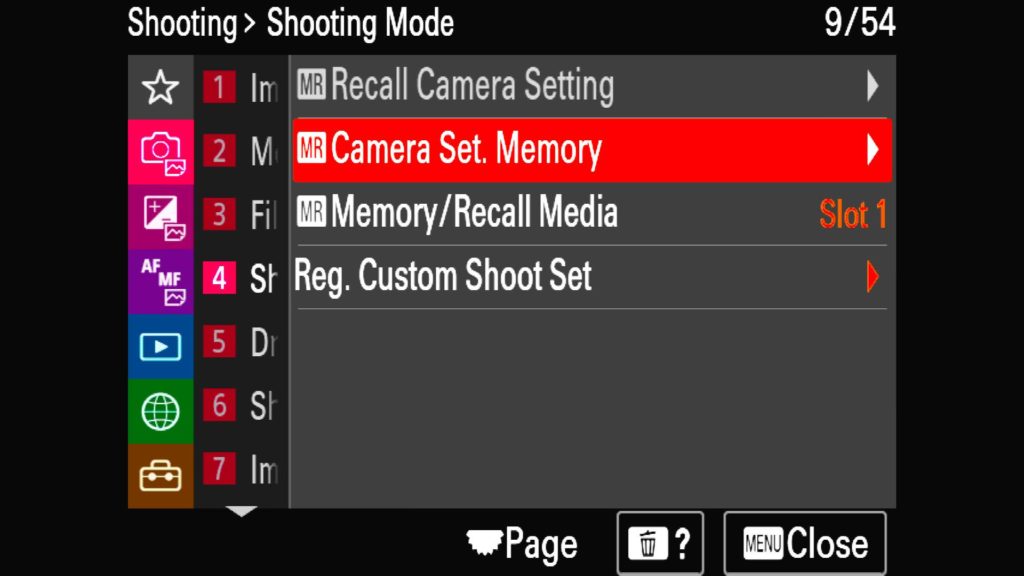
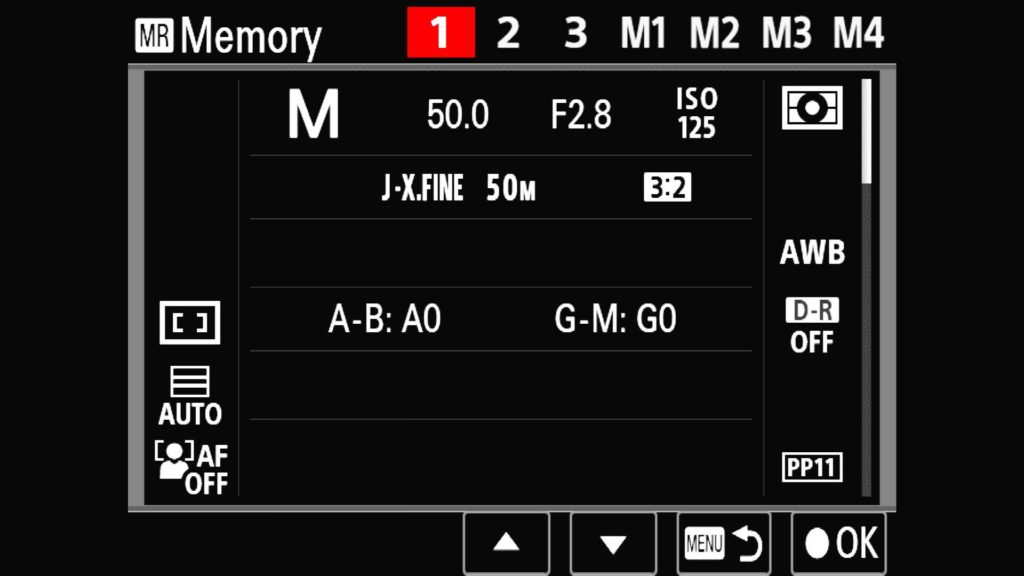
A great question that came up from a fellow photographer had to do with the Sony a1’s Memory Recall settings. When you look at the Camera Mode dial on the top of the a1, you will see all of the normal modes you are used to like “Manual” & “Shutter Priority” but you will also see the numbers “1”, “2” and “3”. These slots are reserved for you to essentially create your own camera modes that can include a variety of saved settings. But why would you ever use this feature? Let’s say you find that you enjoy shooting Landscapes, Wildlife and Portrait work. You can create three custom camera modes with your settings for AF, Aperture, Shutter Speed, ISO (and others) so that you can quickly jump to the best settings required for those different genres of photography.
So how do setup up these modes? It actually isn’t really overly complicated. First, you set your camera up exactly as you want for your custom camera mode, dialing all of the different settings to your heart’s content, such as adjusting AF sensitivity for wildlife or choosing a specific AF Area that is best for portraits. Once you have things dialed in you will head to the “Shooting” menu and then find “4: Shooting Mode”. There you can select “MR Camera Set. Memory”. Once there, you simply select “1”, “2” or “3” and all your current settings will save to that custom camera mode.
*You will also see M1, M2, M3 & M4, which do the same kind of thing, but instead of saving your custom settings to one of those camera modes, it saves them to the currently selected memory card instead.
Focus Frame Display
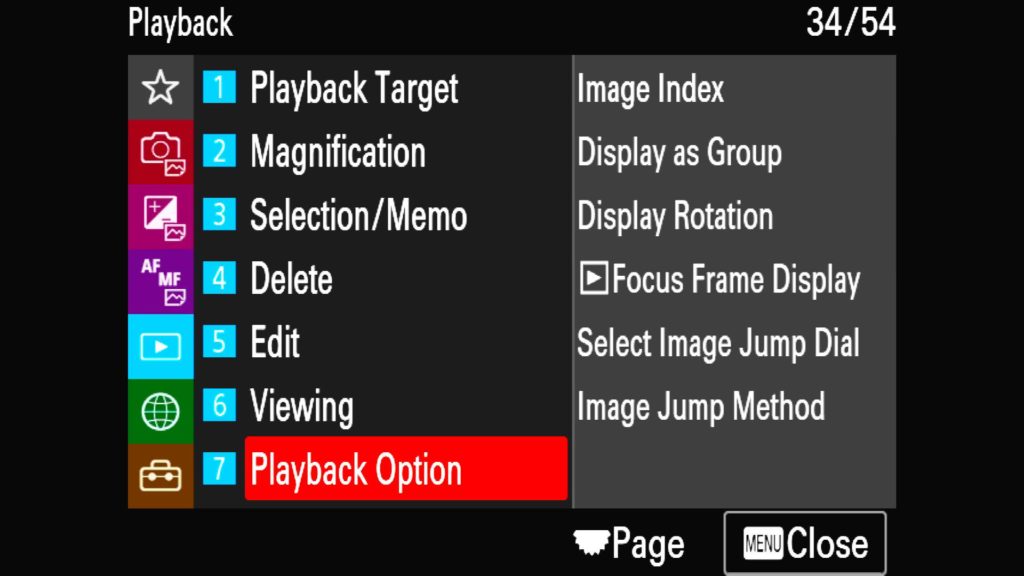
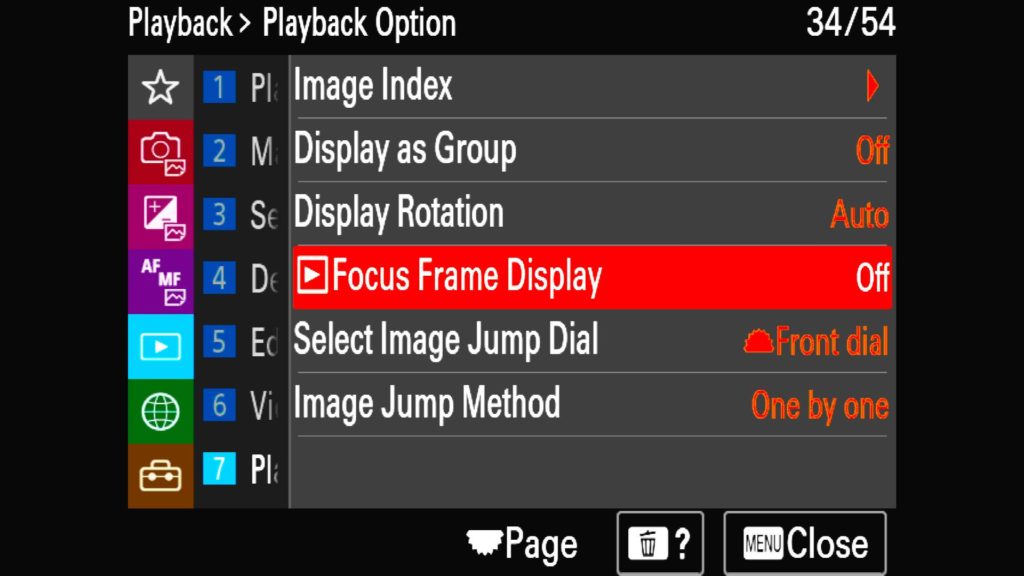
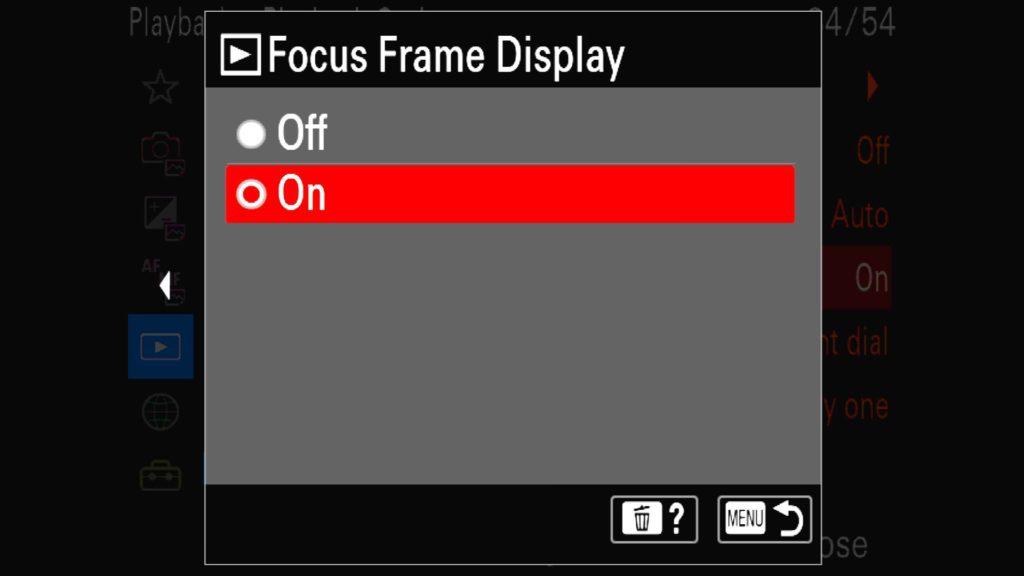
Have you ever taken a photo and wanted to know exactly where the camera ended up focusing for the shot? With the Sony a1 you can now do that via the “Focus Frame Display” setting.
You can find it under the “Playback” menu under “7: Playback Option”. There you will see “Focus Frame Display. Just set it to “On” and you are good to go!
New Clear Image Zoom Feature
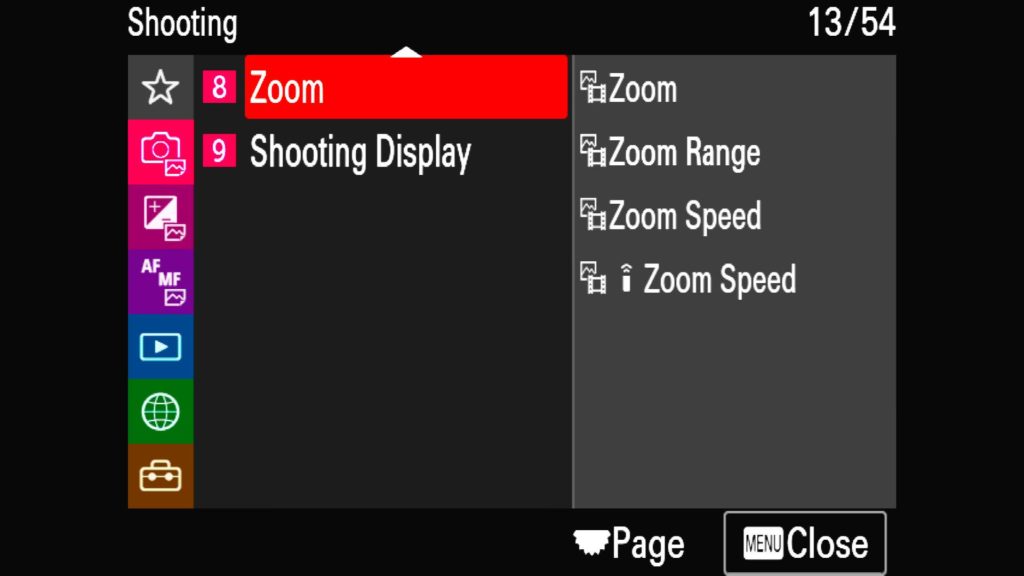
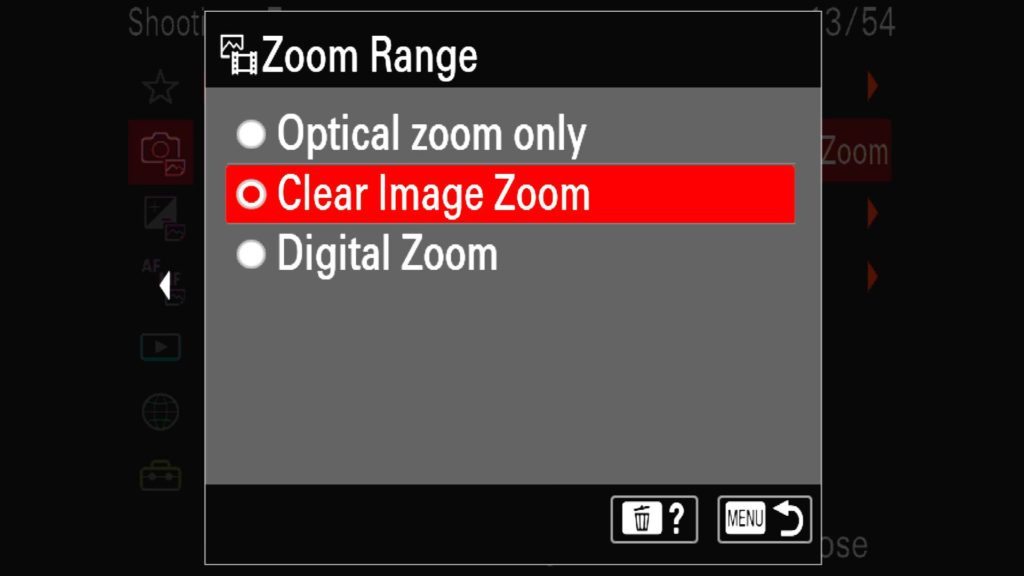
Another under-rated feature of Sony’s camera is known as Clear Image Zoom (or CIZ for short). This is a special mode that only works in JPEG mode, but that allows you to zoom in 2x into your subject with little to no loss in image quality. What is new with the a1 is that previously, Continuous AF (AF-C) was disabled when using this feature, meaning that it worked great for subjects that were at a standstill, but not so great for moving subjects. Now with the a1, AF-C will continue to work when in this mode.
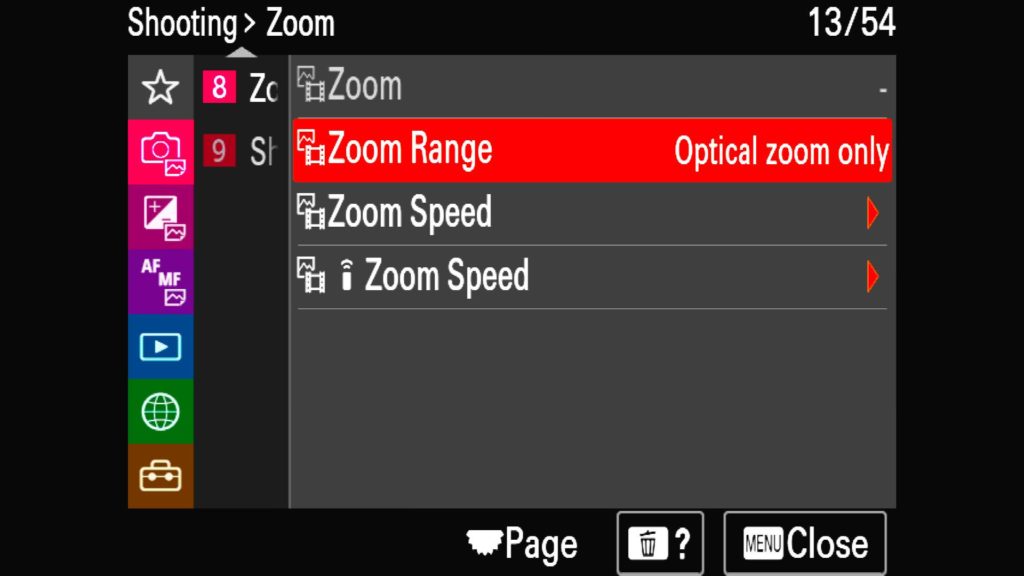
For all of this to work, of course, you need to make sure your camera is in AF-C mode first and that you are shooting JPEGs. Then you want to jump into the menu and under the “Shooting” menu, find “8: Zoom”. Here, under “Zoom Range” you will want to select “Clear Image Zoom”. Once that is done, the easiest way to engage this mode is to make sure that it is configured to one of your Custom buttons, in this case, I set it to “C3” on the back of my camera. With all that done, all you have to do is tap that “C3” button and then use the rear joystick to zoom in and out. Enjoy!
Downloading My Settings
One of the best additions to the Sony mirrorless camera lineup over the last few generations is the ability to not only save all of your settings into a single file on your memory card for backup but also load those same settings onto a 2nd camera as well. This feature becomes incredibly handy if you have two camera bodies as you can fully set up one a1, save the settings file to your SD or CF Express card, and then simply load those settings into your 2nd a1 and instantly have a fully setup camera.
Additionally, this feature makes it easy for me to share all of my settings and customizations with you easily. Everything I have mentioned in this blog post can be loaded onto your a1 in just a few seconds. Of course, you can just use this guide and manually set up your camera, but if you wish to do it quickly, simply sign up for my newsletter below, and they are yours for FREE!!
*Please make sure you have the latest Firmware update for the Sony a1 before trying to load my saved settings (LINK)
Recommended Accessories
CF Express Type A Cards
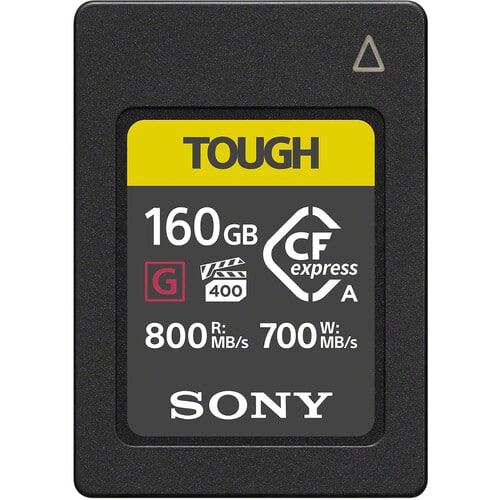
As the famous line goes in Top Gun, “I have the need…the need for SPEED!”. This is what the new CF Express Type A cards are all about. While it is great that Sony allows you to use either SD or Express A in both their card slots, CF Express offers close to 3 times the speed performance when it comes to the top-end SD cards on the market. Why is this important? The Image Buffer! When you are shooting at 30 FPS with RAW files, it is very easy to fill that buffer. With the CF Express Type A cards that buffer will clear exponentially faster than if you were shooting on an SD card. If you want to take full advantage of the a1 and you plan on shooting bursts of images with this 50mp sensor, you will want the new…and absolutely more expensive memory cards. They come in 80GB or 160GB versions.
Extra Sony z100 Batteries
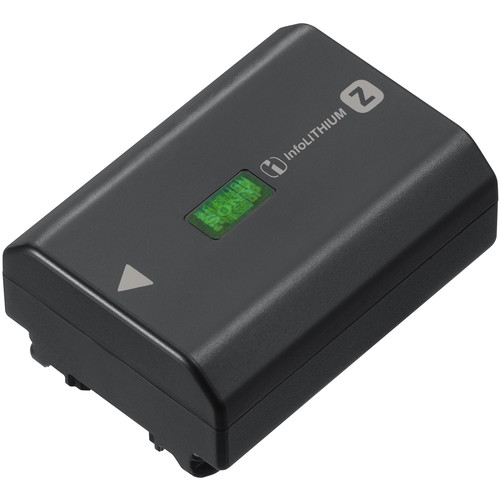
When Sony released the z100 battery a number of years ago, it completely changed the narrative when it came to people complaining about the battery life on mirrorless cameras. These batteries were designed from the ground up to last long, be more effective, and more reliable for all of Sony’s latest mirrorless cameras. All that said, with the a1 being able to shoot 30 FPS, have a jaw-dropping viewfinder, and the ability to shoot 8k footage, you will absolutely want to pick up a few extra batteries just in case. There are some cheaper 3rd party options, but I hate to rely on a product that I am not 100% sure offers the right voltages and watts for my expensive camera. For that reason, I stick with Sony-branded NP-FZ100 batteries.
Vertical Battery Grip
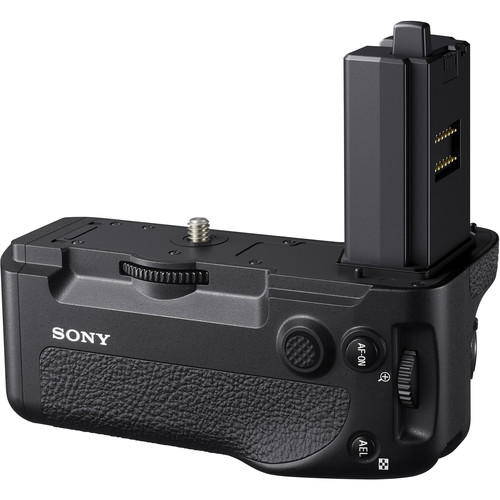
If you have big hands or simply prefer having extended battery life, picking up a vertical battery grip for the a1 is highly recommended. While there are cheaper 3rd party options, I prefer to stick with the Sony brand when it comes to battery and control focused accessories. The Sony VG-C4EM will work on the a1 just as it does with the a7R IV, a9 II and a7S III, matching the new button layout and design of the newer Sony bodies. The grip makes it easy to shoot move from horizontal to vertical orientations while also allowing you to load two z100 batteries into the grip at one time. When you use Sony’s larger telephoto lenses, the battery grip will also help balance out the weight a bit more, making it more comfortable to hold these larger setups for longer periods of time.
L-Bracket
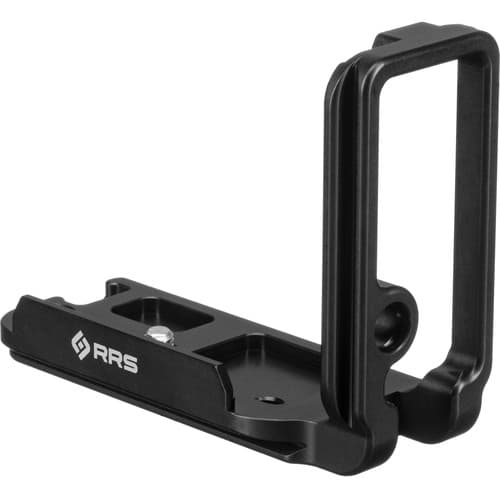
One of the best camera accessories for any photographer that uses a tripod is an L-Bracket. Forming an “L” on the bottom and side of your camera, an L-Bracket allows for the easy transition from horizontal to vertical shooting while maintaining the center of gravity over the center of your tripod rather than forcing it to lean to one side. While an a1 specific L-Bracket hasn’t been released just yet, you can use an L-Bracket built for the a7R IV, a9 II or a7S III so those plates would all fit the battery door correctly. That said, you will have to pull out the L shape on the side of the a1 a touch (away from the camera body) as the side panels are different on the a1 when compared to the other Sony mirrorless cameras. Links (RRS, Kirk, Photo Clam)
Camera Cage
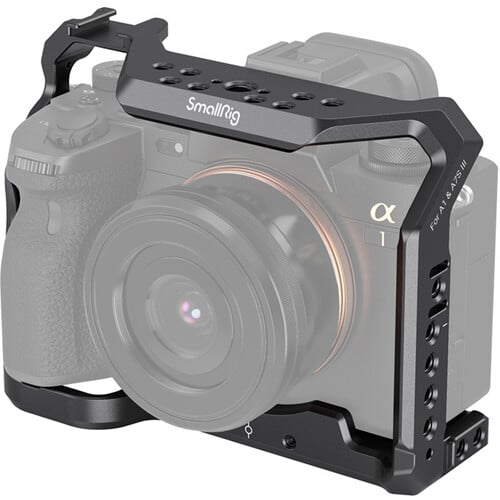
If you find yourself doing a lot of video work, you will probably want to opt for a camera cage rather than just an L-Bracket. Why? Because of the dramatic increase in attachment points for external mics, video recorders and other accessories to help you create some epic video footage. While you do have some options when it comes to the different camera cages, my two favorites tend to be SmallRig or Tilta. Currently, SmallRig is the only one to list a cage compatible with the a1 (LINK), but I am sure Tilta will follow in the coming weeks. I will update this post when I hear from them.
Wireless IR Remote Control
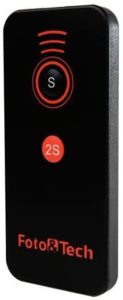
Having a wireless remote control can be very handy for a variety of situations, including when you are shooting from a tripod and truly want to minimize all vibrations. While Sony does offer their own wireless remote control, I find it to be a bit over-priced. A better solution is the cheaper Foto&Tech IR Remote you can pick up from Amazon (LINK) for just $10.29. These aren’t the most robust controllers on the market, so maybe think of picking up a second one as well just in case. Either way, this is what I use and I haven’t been dissapointed.
Eye Cup Extention
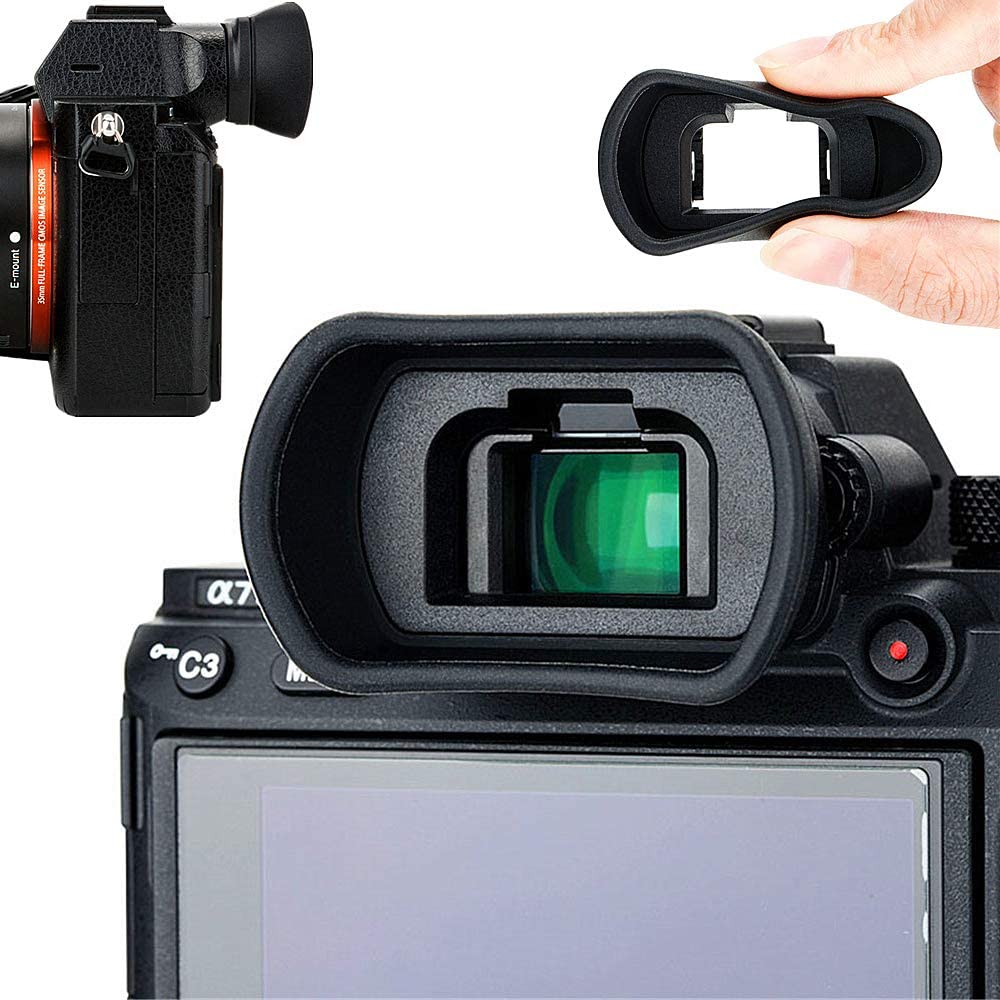
One of my favorite but lesser-known 3rd party purchases for my Sony mirrorless cameras is a replacement eyecup for the viewfinder. While the stock one works just fine, I find an extended eyecup can be extremely helpful on bright sunny days, especially when you are tracking subjects such as birds in flight. My personal favorite can be found on Amazon (LINK) for $13.99, but maybe pick up two just in case you lose one out in the field!

